Table of Contents
Advertisement
Advertisement
Table of Contents

Subscribe to Our Youtube Channel
Related Manuals for Lathem LTR4-512


Summary of Contents for Lathem LTR4-512
- Page 1 LTR4-512 LTR8-512 LTR8-512M Master Clock Installation & User's Guide...
- Page 2 Lathem, the Lathem logo, LTR4-512, LTR8-512, LTR8-512M, Radio Sync, LTR MasterLink, Terminal Manager and PayClock are registered trademarks of Lathem Time Corporation. Other product names mentioned in this manual may be trademarks of their respective companies and are hereby acknowledged.
-
Page 3: Table Of Contents
Table of Contents Welcome......................1 Step 1 - Mounting the Master.................2 ....................2 URFACE OUNT ....................3 LUSH OUNT .......................5 OUNT ..................6 IDDEN OWER UPPLY OUNT Step 2 – Wiring the Master ..................8 – LTR8 .....................8 OWER UPPLY – LTR4 .....................9 OWER UPPLY Step 3 –... -
Page 4: Welcome
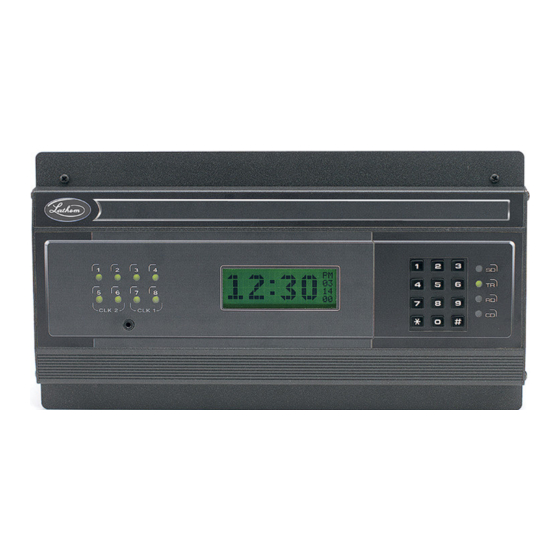
Yes. Requires LTR-GPS or synchronization MasterLink software MasterLink software If your Master has 4 lights on the front panel, then you have the model LTR4-512 CLK 1 cancel ent er If your Master has 8 lights at the left of the front panel, then you have the model LTR8-512. If the TR... -
Page 5: Step 1 - Mounting The Master
LTRx-512 Installation and User’s Guide Step 1 - Mounting the Master The Master comes ready to surface mount on the wall. However, you can also install the Master in a standard 19" rack, recess the power supply into the wall or hide the power supply in the floor or ceiling and hang only the display unit on the wall with optional hardware. -
Page 6: Semi-Flush Mount
LTRx-512 Installation and User’s Guide To surface mount the Master 1. Place the Master on its back with the display unit facing up and the keypad to the right 2. Remove the two screws from just above the display unit 3. - Page 7 LTRx-512 Installation and User’s Guide Lowering the Display Unit during Testing With a Semi-Flush or Surface mount, you can hang the display unit below the back box when testing the Master and its circuits. To lower the display unit, remove the two screws that attach the display unit to the back box.
-
Page 8: Rack Mount
LTRx-512 Installation and User’s Guide Rack Mount The LTR8-512 and LTR8-512M come with two L-shaped brackets (optional on the LTR4-512) so you can install your Master in a standard 19-inch rack Power Supply Box Brackets Display Unit To install the Master in a 19-inch rack 1. -
Page 9: Hidden Power Supply Mount
LTRx-512 Installation and User’s Guide 10. Remove the two screws from the side of the display unit 11. Using these same screws, attach an “L” bracket (or ear) 12. Repeat to attach the other ear 13. Mount the unit in the rack 14. - Page 10 LTRx-512 Installation and User’s Guide Attach the ground wire to one of the lower power supply mounting screws Note: UL regulations require that you do NOT place high voltage (120V) and low voltage communication cables in the same conduit or through the same knockout holes Follow the wiring steps in step 2 •...
-
Page 11: Step 2 - Wiring The Master
Appendix C2 for more details. Until you complete this part of the wiring, do not turn on the AC power to P4, and keep the power/relay unit’s toggle switch turned “OFF” (Note: The LTR4-512 does not contain Terminal Block P3) Power Supply – LTR8 TERMINAL BLOCK ‘P4’... -
Page 12: Power Supply - Ltr4
LTRx-512 Installation and User’s Guide Power Supply – LTR4 TERMINAL BLOCK ‘P4’ TERMINAL BLOCK ‘P4’ WIRING THE LTR8-512 FOR 120VAC WIRING THE LTR8-512 FOR 220/240VAC (nom.) OPERATION (nom.) OPERATION J1 installed between 3 & 4 and J2 J1 installed between 4 & 5 installed between 5 &... - Page 13 LTRx-512 Installation and User’s Guide We recommend using stranded wire inside the Power Supply Box. Stranded wire allows for a firm connection to the Quick Connect terminals. Stranded wires are also less likely to interfere with the relay board components. If you must use solid wire, join the stranded wire to the solid wire in another Note that applying 220/240 VAC power to a system not setup for that voltage level can severely damage its electronic parts Attach the supplied quick-connects to the wires as needed...
-
Page 14: Step 3 - Setting Up The Master
LTRx-512 Installation and User’s Guide Step 3 – Setting Up the Master If you will use the Master to sync clocks, you must first use relays #7 & #8 (terminal block P1) for synching. If you have an LTR8-512 or LTR8-512M and will use a second clock type, you must use relays #5 &... - Page 15 LTRx-512 Installation and User’s Guide To set the date and time, select Function [1] by keying [#][1][#] Enter the numbers for the month, date and year (4-digit year), then press [#], such as [0][4][0][3][2][0][0][3][#] shown below: ENT.DATE: 04-03-2003 ENTER DAY-OF-WEEK: D 1=SUNDAY..7=SATURDAY Enter a number [1] - [7] for the day of the week, Sunday through Saturday: [1]=Sunday...
- Page 16 LTRx-512 Installation and User’s Guide If you enter a time less than 13:00 (1:00 PM), then you will see SELECT [0]PM / [1]AM Press [0] for PM or [1] for AM. If you choose ‘PM’, then the time will display in 24-hour format to confirm your entry ENT.DATE: 04-03-2003 TODAY IS...
- Page 17 Function [2] to choose the clock type for Clock #1 and/or Clock #2, following the instructions below. Clock Control Codes can be found in Appendix C1. NOTE: You do not need to enter any special setup to make the Master synchronize Lathem time sync devices (DDC4R, LTR-0, DWA-S and ATX6) using the Master’s RS-485 SYNC ports...
- Page 18 LTRx-512 Installation and User’s Guide 3E - Test Bell Circuits Manual Bell Control Use Manual Bell Control Function [3] (described on Pg. 20 to test selected bell circuits. Press [#][3][#] to start this function MANUAL BELL CONTROLS 1-2-3-4-5-6-7-8 PRESS AND HOLD [#] TO EXECUTE.
- Page 19 LTRx-512 Installation and User’s Guide 3G – Setup Communication The “factory default” communication settings (LTR8-512 and LTR8-512M only) are: Baud Rate: 9600 Terminal ID#: Use Function [B] (described on Pg. 30) if you if you need to change these settings for MasterLink configurations involving multiple Masters, You can setup your LTR8-512 with LTR MasterLink using RS-232 (serial), RS-485 (networked), Modem (remote), or Ethernet (requires TXTOSER accessory) Communications.
- Page 20 LTRx-512 Installation and User’s Guide Additional Functions: All of the Master’s functions are described in the next section of this guide. Remaining steps, which may be performed “as needed” by the Installer or User, include the following: Function Number Programming Operation Enter Password Set Date / Time Manual Bell Control (Immediate Activation)
-
Page 21: Function Descriptions
LTRx-512 Installation and User’s Guide Function Descriptions Starts the Programming Functions and Confirms Entries Ends Program functions and/or Cancels Entries (except the “Quick Check”) Quick Check Commands Quick Check commands display system information for about 2 seconds. You can press any of the three “corner quick check keys”... -
Page 22: Password
LTRx-512 Installation and User’s Guide [0] = Password You must enter a password for most programming functions. To enter your password, press [#][0][#] Enter your 6-digit password, then press [#] Once you enter your password, you can now program your Master until it detects that you haven’t pressed a key for 5 minutes. - Page 23 LTRx-512 Installation and User’s Guide Once you press [#], enter the time of the next upcoming minute, using either 12-hour or 24-hour format, then press [#]. (If using 24-hour format, enter midnight as 00:00) For example, if the current time is 08:59, enter: 09:00 ENT.DATE: 04-03-2003 TODAY IS...
-
Page 24: Select Clock Control
This function requires the administrator password Use this function to choose the make/model of the clocks that your Master will synchronize (Note: The LTR4-512 can only synchronize one type of secondary system) Enter your administrator password, then start this function by pressing [#][2][#]... -
Page 25: Auto Bell Test
LTRx-512 Installation and User’s Guide Press [0] to turn them all off, or press keys [1] - [8] to turn a circuit off or on When you see the circuits that you want to ring, press and hold the [#] key. The front panel lights will light up to show that you have turned on those relays. - Page 26 LTRx-512 Installation and User’s Guide The following will show on the display: For Firmware version 4.05 and earlier: For Firmware version 4.06 and later: To select the appropriate mode: Press [1] DATA ENTRY to create a new schedule Press [2] DATA SCAN to view a schedule Press [3] DATA EDIT to change a schedule Press [4] CLEAR to clear all records in the selected schedule When you choose [2] DATA SCAN, you can view events.
- Page 27 LTRx-512 Installation and User’s Guide Then select the days when this event occurs [0] selects no days, [1]-[7] selects Sunday-Saturday, [8] selects holidays and [9] selects all days (including holidays). Press these keys to turn days on or off. After you choose the days when the event will occur, press [#] Example: Press 1,3,5,7,8 to turn off all days except Monday, Wednesday and Friday SELECT DAYS: S M T W T F S H...
- Page 28 LTRx-512 Installation and User’s Guide [5]=Schedule Changes (Use the handy programming charts included at the end of this Guide) If you wish to activate schedules at a future date, use Schedule Changes to program a schedule’s start date and time. This function works much like the Bell Schedule Function [4]. Enter your password (#0#), then press [#][5][#] To select the appropriate mode: Press [1] DATA ENTRY to create a new schedule...
-
Page 29: Enable Or Disable Circuits
LTRx-512 Installation and User’s Guide [6]=Enable or Disable Circuits This function requires the administrator password. Use this function to Enable and Disable your Master’s control relays during circuit wiring or maintenance. This function can also ‘hold back’ clocks to manually adjust for daylight savings in the fall if you have chosen not to use Function 7 “Daylight Savings”. -
Page 30: Sync Clocks
LTRx-512 Installation and User’s Guide [9]=Sync Clocks Use this function to quickly sync any secondary clocks that lose time. This can occur if power to your LTRx-512 stayed on while power to the secondary clocks stopped. Note: This function is primarily used during initial installation of the secondary system, if there has been maintenance of the system requiring the power to be turned off, or other special circumstance. -
Page 31: [A]=Program Holidays
LTRx-512 Installation and User’s Guide [A]=Program Holidays You can enter up to 16 dates as holidays in your LTRx-512. During holidays, only the events that you set to occur on holidays will turn on when they reach the scheduled time. Examples: 1) Select SmtwtfSH for an event to occur on Sunday, Saturday, or any day setup as a Holiday, even if the holiday is other than Sunday or Saturday... -
Page 32: [B]=Communications (Ltr8-512 And Ltr8-512M Only)
LTRx-512 Installation and User’s Guide [B]=Communications (LTR8-512 and LTR8-512M Only) This function requires the administrator password Use this function if you use LTR MasterLink or Terminal Manager software with your LTR8-512 You cannot choose function [B] directly. To enter Communications, press [#][9][0][0][#] Use this function to enter the data transmission speed and terminal ID# You must enter these same settings for your LTR8-512 in the LTR MasterLink software You can see your terminal ID# and baud rate by using the “Quick Check”... -
Page 33: Appendix A - Specifications
Semi-Flush, Surface, 19" Rack, Hidden Power Supply (some configurations optional) FUNCTIONAL: Secondary Clocks Supported Any two (2) of twenty-four (24) types plus Lathem DDC4R synchronization built-in; See Appendix B. One (1) of twenty-four (24) types plus Lathem DDC4R synchronization built-in; on the LTR4-512... -
Page 34: Appendix B - Daylight Savings Country Codes
LTRx-512 Installation and User’s Guide Daylight Savings Codes APPENDIX B – DAYLIGHT SAVINGS COUNTRY CODES ALBANIA ENGLAND MALTA ANDORRA ESTONIA MONACO ARMENIA FALKLAND ISLANDS NETHERLANDS AUSTRIA FINLAND NEW ZEALAND AZERBJAN FRANCE NORWAY AZORES GERMANY POLAND BAHAMAS GIBRALTER PORTUGAL BALEARIC ISLANDS GREECE ROMANIA BELARUS... -
Page 35: Appendix C1 - Secondary Clock Type Codes
APPENDIX C1 - SECONDARY CLOCK TYPE CODES Type Description Page Type Description Page STANDARD EL SYNCH SYNCHRONOUS WIRED AMR T&S X55BHGA801 LATHEM TYPE SS STANDARD TM AR-2A CINCINNATI D10 3W MIN IMPULSE/58 IBM 77 SERIES SYNCHRONOUS WIRED SIMPLEX 77 SER CINCINNATI D8 SIMPLEX 93-9... -
Page 36: Appendix C2 - Wiring Secondary Clocks
LTRx-512 Installation and User’s Guide Wiring Diagrams APPENDIX C2 - WIRING SECONDARY CLOCKS TYPE 01 - SYNCHRONOUS WIRED TYPES INCLUDE: Lathem Type SS Wall Clocks Cincinnati D10 (115VAC), D12 (24VAC) 77 Series Simplex 77 Series, 93-9, 91-9, 941-9, 943-9, 6310-9231... - Page 37 LTRx-512 Installation and User’s Guide Wiring Diagrams TYPE 02 - THREE WIRE MINUTE IMPULSE (59 MIN.) TYPES INCLUDE: Lathem Type ISC (3-Wire) Cincinnati D2, D4 Edwards Impulse Faraday Impulse 75 Series Simplex 74 Series, 91-4, 93-4, 941-4, 943-4, 6310-9075, 6310-9231...
- Page 38 LTRx-512 Installation and User’s Guide Wiring Diagrams TYPE 02 - TWO WIRE REVERSE POLARITY MINUTE IMPULSE (59 MIN.) TYPES INCLUDE: Lathem Type ISC (2-Wire) Cincinnati Using PS8-2412 Power Supply: Using PS8-24 Power Supply: * Green and Black Wires in Clock Cable are unused.
- Page 39 LTRx-512 Installation and User’s Guide Wiring Diagrams TYPE 03 - STANDARD ELECTRIC SYNCHRONOUS (*Old Style: Dual Motor) AMERICAN TIME & SIGNAL #X55BHGA801 All circuits should be fused or protected by a circuit breaker (10Amp maximum) Note: For New Style (Motor+Solenoid), see Type 06 (Faraday)
- Page 40 LTRx-512 Installation and User’s Guide Wiring Diagrams TYPE 04 - STANDARD ELECTRIC TIME AR-2A TWO WIRE DUAL VOLTAGE All circuits should be fused or protected by a circuit breaker (10Amp maximum) TYPE 05 - THREE WIRE MINUTE IMPULSE (58 MIN.) All circuits should be fused or protected by a circuit breaker (10Amp maximum)
- Page 41 All circuits should be fused or protected by a circuit breaker (10Amp maximum) TYPE 07 - DUKANE 24F200 DIGITAL CLOCKS NOTE: THIS SELECTION IS NOT SUPPORTED ON THE LATHEM LTR8-512 OR LTR4-512 SERIES. CORRECTION FOR DUKANE 24F200 DIGITAL CLOCKS IS AVAILABLE ON THE DUKANE 24A715 SERIES MASTER CONTROL WITH SOLID-STATE RELAYS.
- Page 42 LTRx-512 Installation and User’s Guide Wiring Diagrams 115VAC TYPE All circuits should be fused or protected by a circuit breaker (10Amp maximum) 24VAC TYPE All circuits should be fused or protected by a circuit breaker (10Amp maximum) TYPE 09 - SIMPLEX 59 MINUTE DUAL MOTOR TYPE 10 -...
- Page 43 LTRx-512 Installation and User’s Guide Wiring Diagrams TYPE 11 - EDWARDS DUAL MOTOR All circuits should be fused or protected by a circuit breaker (10Amp maximum) TYPE 12 - CINCINNATI ‘D6’ CLOCKS All circuits should be fused or protected by a circuit breaker (10Amp maximum)
- Page 44 LTRx-512 Installation and User’s Guide Wiring Diagrams Type 14 - ELECTRONIC CODED CLOCKS Clocks run normally with 120 VAC power. For any bells or clock correction, the generator prestart relay (SK1) first turns on for the signal-generator to reach frequency. SK1 turns on at the 00 second after a programmed time or manual bell time.
- Page 45 LTRx-512 Installation and User’s Guide Wiring Diagrams Clock correction and bell circuit operations are generated by sequentially applying various frequencies onto correction the 120 VAC. Each bell and clock correction circuit has its own frequency. Each bell and clock circuit has a receiver circuit that applies the associated bell or clock frequency (3510 Hz normally used clock signals).
- Page 46 LTRx-512 Installation and User’s Guide Wiring Diagrams TYPE 16 - THREE WIRE MINUTE IMPULSE (59 MIN) WITH 12-HOUR CORRECTION TYPES INCLUDE: Simplex 91 and 941 SAME WIRING AS FOR TYPE 02 (3-WIRE) TYPE 16 - TWO WIRE REVERSE POLARITY MINUTE IMPULSE (59 MIN) WITH 12-HOUR CORRECTION SAME WIRING AS FOR TYPE 02 (2-WIRE) __________________________________________________________________________________...
- Page 47 Lathem Type SS Wall Clocks (modified) NOTE: Lathem type SS wall clocks can run according to the above signal operation if modified to reference the minute and second hands to HH:57:16 (versus HH:59:00) and the hour hand to 12 o'clock versus 6 o'clock.
- Page 48 LTRx-512 Installation and User’s Guide Wiring Diagrams TYPE 20 - THREE WIRE MINUTE IMPULSE (44 MIN.) All circuits should be fused or protected by a circuit breaker (10Amp maximum) TYPE 21 - CINCINNATI ‘D1’ All circuits should be fused or protected by a circuit breaker (10Amp maximum)
- Page 49 LTRx-512 Installation and User’s Guide Wiring Diagrams TYPE 22 - DUKANE SYNCHRONOUS WIRED All circuits should be fused or protected by a circuit breaker (10Amp maximum) TYPE 23 - CONDOR DIGITAL CLOCKS (Model 2412) TYPES INCLUDE: Condor 2412 If the digital clocks lose sync with the LTRx-512, then you can use function [9]=SYNC CLOCKS to re-sync them. All circuits should be fused or protected by a circuit breaker (10Amp maximum)
- Page 50 LTRx-512 Installation and User’s Guide Wiring Diagrams TYPE 23 - RAULAND DIGITAL CLOCKS (Model 2422) TYPES INCLUDE: Rauland 2422 If the digital clocks lose sync with the LTRx-512, then you can use function [9]=SYNC CLOCKS to re-sync them. All circuits should be fused or protected by a circuit breaker (10Amp maximum) All circuits should be fused or protected by a circuit breaker (10Amp maximum)
- Page 51 LTRx-512 Installation and User’s Guide Wiring Diagrams TYPE 23 - CONDOR DIGITAL CLOCKS (BAR-AC-4412) If the digital clocks lose sync with the LTRx-512, then you can use function [9]=SYNC CLOCKS to re-sync them. All circuits should be fused or protected by a circuit breaker (10Amp maximum)
- Page 52 LTRx-512 Installation and User’s Guide Wiring Diagrams TYPE 24 - EDWARDS SYNCHRONOUS WIRED CLOCKS - TYPE E1 All circuits should be fused or protected by a circuit breaker (10Amp maximum)
-
Page 53: Appendix D - Wiring Diagrams: Power, Bells, Etc
LTRx-512 Installation and User’s Guide Wiring Diagrams APPENDIX D - WIRING DIAGRAMS: POWER, BELLS, ETC. Fig. D1 - TERMINAL BLOCK ‘P4’ WIRING THE LTRx-512 FOR 120VAC (nom.) OPERATION All circuits should be fused or protected by a circuit breaker (10Amp maximum) WIRING THE LTRx-512 FOR 220/240VAC (nom.) OPERATION All circuits should be fused or protected by a circuit breaker (10Amp maximum) -
Page 54: Fig. D2 - Typical Signal Device Wiring
LTRx-512 Installation and User’s Guide Wiring Diagrams Fig. D2 - TYPICAL SIGNAL DEVICE WIRING All circuits should be fused or protected by a circuit breaker (10Amp maximum) -
Page 55: Fig. D3 - Computer Cable
LTRx-512 Installation and User’s Guide Wiring Diagrams Fig. D3 - COMPUTER CABLE (For Front Access Port) (LTR8-512 and LTR8-512M Only) Fig. D4 - RS-232 CABLE (for permanent connection to the Communications Terminal Block) (LTR8-512 and LTR8-512M Only) -
Page 56: Fig. D5 - Synching Up To 60 Rs-485 Time Sync Devices
LTRx-512 Installation and User’s Guide Wiring Diagrams Fig. D5 - SYNCHING UP TO 60 RS-485 TIME SYNC DEVICES WITHOUT A BUFFER RS-485 RS-485 RS-485 RS-485 RS-485 RS-485 10 11 12 13 Ports are located on the back of the Display Unit 12V~ SYNC SYNC... -
Page 57: Fig. D7 - Communication Terminal Block
LTRx-512 Installation and User’s Guide Wiring Diagrams Fig. D7 – COMMUNICATION TERMINAL BLOCK Rear of Display Unit NOTES: 1. Twisted-pair (Cat-3/Cat-5) wire connects directly to Terminal Block; up to 2 wires per position 2. Pulse-sync input is same as provided in power supply. One (1) second (min.) dry-contact switch closure across terminals causes Master to reset time to 12:00AM of nearest date 3. - Page 58 Wiring Diagrams RS-485 Sync Time Device Connection Sync In: Terminal block pair used to receive RS-485 synchronization from another Lathem Master product • or radio sync device, or transmit the LTRx-512’s own sync commands to up to 31 RS-485 devices, including...
-
Page 59: Fig. D8 - Power Supply Terminal Blocks
1. Circuits CKT1...CKT4 designate bell controls. Circuit pairs CKT5/CKT6 and CKT7/CKT8 can function as clock synchronization circuits or as bell controls (Note: CKT1…CKT4 do not exist on the LTR4-512. Instead use CKT5…CKT8 which are indicated related to the LEDs on the Display Unit numbered 1-4). -
Page 60: Appendix E - Install The Optional Modem
LTRx-512 Installation and User’s Guide Installing the Modem APPENDIX E – INSTALL THE OPTIONAL MODEM Installation of the optional internal modem should be performed by a trained and competent electronics technician. Follow these steps; Turn off the power to the Master Clock. You can either access the on/off switch inside the Power Supply Box or turn off the power at the source. -
Page 61: Appendix F - Connecting The Ltr-Gps Satellite Receiver / Synchronizer
APPENDIX F – Connecting the LTR-GPS Satellite Receiver / Synchronizer Lathem’s LTR-GPS is a Global Positioning Satellite receiver using 12-channels to access the accurate date and time signal transmitted each second by 24 satellites in geosynchronous orbit around the globe. -
Page 62: Appendix G - Power Supply Schematics
LTRx-512 Installation and User’s Guide Power Supply Schematics APPENDIX G – POWER SUPPLY SCHEMATICS LTR8-512 / LTR8-512M LTR4-512 (C) 2000 LATHEM TIME CORP. (C) 2000 LATHEM TIME CORP. VMM7086 REV. D VMM7086 REV. D... - Page 63 LTRx-512 Installation and User’s Guide Programming Charts BELL SCHEDULE PROGRAMMING CHART SCHEDULE #: 1 2 3 4 5 6 7 8 (Circle One) DATE:____-____-____ DAYS CIRCUITS START DAYS CIRCUITS START SMSTWTFSH 12345678 HH:MM SMSTWTFSH 12345678 HH:MM MTWTF 1234 08:00 MTWTF 1234 08:00 COPY THIS PAGE FOR USE IN CREATING YOUR OWN BELL SCHEDULES...
- Page 64 LTRx-512 Installation and User’s Guide Programming Charts SCHEDULE CHANGE DATES PROGRAMMING CHART DATE:____-____-____ DATE TIME SCHEDULES NO. MM 12345678 COMMENTS 2345 Shortened Schedule COPY THIS PAGE TO USE IN CREATING YOUR SCHEDULE CHANGE TABLE...
- Page 65 LTRx-512 Installation and User’s Guide Programming Charts HOLIDAYS SETUP CHART DATE:____-____-____ RECORD DATE COMMENTS Independence Day COPY THIS PAGE TO USE IN CREATING YOUR HOLIDAY TABLE...
- Page 66 If they do, you will be given advance notice so as to give you an opportunity to maintain uninterrupted service. If you experience trouble with this equipment (Modem), please contact Lathem Time Customer Service at (800) 241-4990 for repair/warranty information.
- Page 67 Lathem warrants the hardware products described in this guide against defects in material and workmanship for a period of one year from date of original purchase from Lathem or from an authorized Lathem reseller. The conditions of this warranty and the extent of the responsibility of Lathem Time Corporation (“Lathem”) under this warranty are listed below.
- Page 68 LTRx-512 Installation and User’s Guide Index Function [C] - Change Password ....29 Administrator password ......11, 19 Auto Bell Test ........15, 22 Hidden codes ........15, 22 Hidden power supply....... 6, 55 Baud rate ..........29 Holiday schedules ......18, 22, 28 Baud Rate ..........
Need help?
Do you have a question about the LTR4-512 and is the answer not in the manual?
Questions and answers