Table of Contents
Advertisement
Advertisement
Table of Contents

Subscribe to Our Youtube Channel
Related Manuals for Lathem 700E


Summary of Contents for Lathem 700E
- Page 2 The information within this document has been carefully checked and is believed to be entirely reliable. However, no responsibility is assumed for inaccuracies. Lathem reserves the right to make changes to any products herein to improve reliability, function, or design.
-
Page 3: Table Of Contents
TABLE OF CONTENTS 1. GETTING STARTED - Packing Contents - Display & Buttons - Features 2. SETUP - SETUP: AC Adapter - SETUP: Remove/Attach the Cover - Installing the Ribbon Cassette - Mounting Unit on Wall 3. DAILY OPERATION 4. DEFAULT SETTINGS 5. -
Page 4: Getting Started
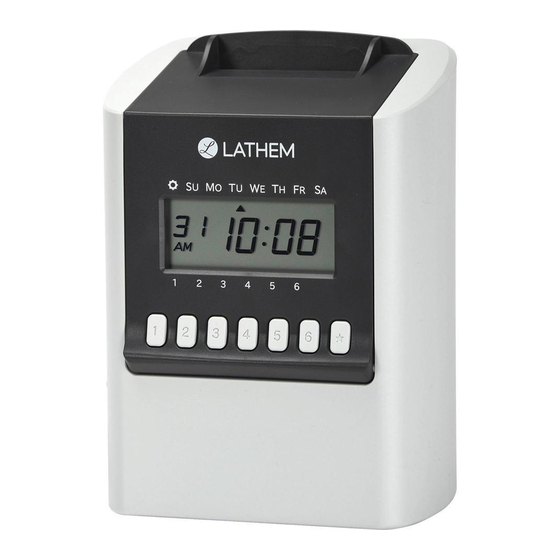
1. GETTING STARTED Register Your Product It is important that you register your product with Lathem shortly after purchase to activate your product’s warranty. To register online visit: www.lathem.com/register Overview Card slot Cover Display Wall-mounting holes Control buttons Packing Contents... -
Page 5: Display & Buttons
Display and Buttons Day of the week indication Daylight saving time indication Current date AM PM AM/PM indication Current time Current column indication SETTING 700E SETTING START/END Button Press Short : Setting Mode Long (3 sec.) : Ribbon Change Error Cancellation AUTO... -
Page 6: Features
Features • Fully automatic time clock for up to 100 employees • DualMode™ feature provides Calculating or Non-Calculating operation • SumTime™ Calculating mode option calculates elapsed hours between punches and total accumulated hours for pay period in exact minute or rounded time format •... -
Page 7: Setup
2. SETUP SETUP: AC adapter Put the bottom face of a time recorder toward you. Connect a plug of AC adapter into the time recorder, and run the cord into the groove on the bottom. Then, plug the AC adapter into AC outlet. -
Page 8: Installing The Ribbon Cassette
Installing the Ribbon Cassette Make sure the power is on before installing. Remove cover, press When you replace an installed ribbon [SETTING] button for three seconds. cassette to a new one, pull up the ribbon Then, display will change as follows cassette just above with the tab. - Page 9 Install the ribbon cassette so that the ribbon is between the print head and the ribbon mask (see the figure on the left). Printing will not come out properly if the ribbon is placed behind the ribbon mask (see the figure on the right). Print head Print head Ribbon mask...
-
Page 10: Mounting Unit On Wall
Mounting Unit on Wall The unit can be mounted on a wall using the supplied mounting fittings. Make sure the power is off before mounting. Install wall mount screws (supplied) into a wall 10 cm (3-15/16") apart. Be sure to keep about 3 mm (1/8") of the screw head out of the wall. -
Page 11: Daily Operation
• If an employee forgets to punch out, the 700E will print the next day’s in punch on a new row without miscalculating time based on the Max Hours In setting (pg.18). -
Page 12: Default Settings
4. DEFAULT SETTINGS Below are a list of Default Settings of the time clock. If you choose to change any of these settings, go to the page noted next to that setting. DATE/TIME Settings Setting Default Value Page Display Hours AM/PM Time Current time (Eastern USA) -
Page 13: Setting: Date And Time
5. SETTING: Date and Time Setting the Display Hours "Display hours" is the format that the hours appear on the clock face. Once you select "AM/PM" for display hours, time in setting mode is also indicated in "AM/PM" format. Below image shows an example that "24hours" is chosen. Selectable numbers and Options Type of Hours DISPLAY... -
Page 14: Setting The Date
Setting the Date Below image shows an example of December 20, 2017. Selectable numbers and Options Year Month Date Year Month Date DATE 2000 January 2099 December Remove the cover, and press [SETTING] button to enter setting mode. Note: When "9999" appears on display, input the password first. Press [DATE/TIME] button, and position "... -
Page 15: Setting: Function
6. SETTING: Functions Setting the Mode-Pay Period Select the desire mode option and pay period settings. Choose between Calculating and Non-Calculating operation modes. Example below shows Calculating Semi-Monthly Pay Period. Option MODE Option Mode Pay Period Calculating Monthly (once per month) Calculating Weekly (ever 7 days) Calculating... -
Page 16: Setting The Pay Period Starting Date/Days
Setting the Pay Period Starting Dates / Days Example below shows Calculating Semi-Monthly Pay Period that begins in the 1st and 16th of every month. Option MODE Starting Date / Day 1st Starting Date (Semi-monthly only) Set the Pay Period start date / day based on the pay period you selected in the Option setting. -
Page 17: Setting The Print Format/Language
Setting the Print Format Below image shows an example that "Date, 24hour", "Regular Minutes" and “English Language” are chosen. PRINT FORMAT Print Format Minute Type Language Type Print Format: Selectable numbers and Options Print Format Example: Date, 24hour 15 : 30 Day of the week, 24hour Mo 15 : 30 Date, 12hour... -
Page 18: Setting The Max In (Calculating Mode)
Setting the Max In (Calculating Mode) Only available in Calculating Mode. This setting operates differently depending on your operating Mode, Calculating or Non-Calculating. MAX IN Max in Value (hour) Max In Override Option Max In Value Set this to the maximum number of an hours an employee may work before punching out. -
Page 19: Setting The Max In (Non-Calculating Mode)
Setting the Max In (Non-Calculating Mode) If Non-Calculating Mode is selected, Max-In changes to the Day Advance Time. The day advance time refers to the time when printing shifts to the next line on a time card for the next day. With this function, you can adjust from what time to what time of the day will be regarded as the same day on a time card. -
Page 20: Setting The Auto Break Deduction
Setting the Auto Break Deduction Only available in Calculating Mode. The 700E will deduct the break amount after totaling the hours and if the total hours are equal to or greater than the "Elapsed Time" setting. Break times can be automatically deducted from totals using the "Auto Break Deduction"... -
Page 21: Setting The Rounding
Setting the Rounding Only available in Calculating Mode. For Rounding, there are two options: Hourly Rounding and Punch Time Rounding. Using Hourly Rounding, the recorder calculates the hours from time IN punch and time OUT punch, and rounds that result with the "Rounding Unit". The fractions that occur after rounding will be omitted by breakpoint. - Page 22 Special Note Regarding "Punch Rounding" When calculating employee hours, it is a common business practice to round to the nearest quarter or tenth of an hour. The 700E supports both punch and totals rounding. However, it is important that you understand how punch rounding works before setting the 700E.
-
Page 23: Setting The Daylight Saving Time
Setting the Daylight Saving Time Daylight saving time function D.S.T. execution time At 2:00 a.m. on the first day of daylight saving time period, the clock automatically gains one hour to show 3:00 a.m. When :00 a.m. comes on the last day of the daylight saving period, it loses one hour and returns to :00 a.m. - Page 24 Below image shows examples that "March 12, 2017" and "November 5, 2017" are set as starting / ending date. Month Month Year Year Date Date DAYLIGHT DAYLIGHT SAVING SAVING " " mark means " " mark means "starting date" setting. "ending date"...
-
Page 25: Others
7. OTHERS Setting / Changing the Passcode Once the passcode is set, you are requested to input the current passcode before changing any setting. If the passcode you entered does not coincide with the current passcode, you cannot change the setting values. Below image shows an example that "1234"... -
Page 26: Reset For Initialization
Reset for Initialization All settings including weekly programs will be deleted when the reset is done. It's strongly recommended to print out setting list before reset. Remove the cover, and push [RESET] switch with a pointed implement. Note: Any setting shall be kept. [RESET] After you press a RESET switch, date BUTTON... -
Page 27: Reset To All Clear
Stored cards are also deleted from memory. It's strongly recommended to print out setting list before reset. Contact lathem for Printing Setting List. If you want to just reset all cards, refer to "All cards reset" on page 29. -
Page 28: Card Reassign
Card Reassign When the card that you are using becomes full (Max 62 punches), it will show “End” on the display and the buzzer will sound. When the “End” appears, you can use the “Card Reassign” mode to transfer the card and have a new card take over from the old one. -
Page 29: Card Reset
All Cards Reset If you want to reset all cards manually, Remove the cover and press the Use the [+] or [-] buttons to move [SETTING] button to enter through the registered card numbers setting mode. and select “ALL”. Press [SET]. NOTE: If “9999”... -
Page 30: Information
8. INFORMATION Error No. Causes and Actions Error causes Action E-00 CPU Error Contact the store from whom you bought the unit. E-01 The remaining life of lithium battery for memory back-up is short. E-05 The card is not pulled in properly. Make sure that another time card is not jamming in the time recorder and the ribbon cassette is E-15... -
Page 31: Other Failures
Other failures • The unit does not operate. Check whether AC adapter is properly in an AC outlet. • The unit does not print. Check whether the ribbon cassette is installed in place. • Print is not located in the right place. Check whether setting of the pay period ending date is set correctly. -
Page 32: Specifications
Specifications Clock accuracy Monthly accuracy ± 15 sec. (at ordinary temperature) Year up to 2099. Automatically adjusted to leap years, 31-day Calendar months and months with thirty or fewer days, and the days of the week. Printing system Dot matrix imprint Power failure Three years of cumulative power failure hours after the date of compensation... -
Page 33: Precautions
9. PRECAUTIONS This user's manual is prepared for safe and proper use of the unit. Please follow all the instructions to avoid possible danger to yourself or others and damage to the unit. Signs Various warnings and cautions are provided throughout this manual along with signs. Remember each sign and its explanation listed below for your safety and proper operation of the unit. - Page 34 If foreign matter should get in the unit (including a piece of metal, water, or liquid), disconnect the plug from the outlet immediately and contact your dealer for servicing. There is a danger that further use may cause a fire or electric shock. Do not plug or unplug the unit with a wet hand.
- Page 35 Lathem. 5. If it becomes necessary to send the product or any defective part to Lathem or any authorized service dealer, the product must be shipped in its original carton or equivalent, fully insured with shipping charges prepaid.
- Page 36 Leave about 1/8" gap between wall and screw head. Holes should be 3 15/16” or 10 cm apart. Level Line Wall Mount Template...
Need help?
Do you have a question about the 700E and is the answer not in the manual?
Questions and answers
How do you set the day
To set the day on the Lathem 700E:
1. Remove the cover.
2. Press the [SETTING] button to enter setting mode.
- If "9999" appears, enter the password.
3. Press the [DATE/TIME] button.
4. Use the [+] or [-] buttons to set the correct year, month, and date (the day is set automatically based on the date).
5. Press the [SET] button to confirm each value and move to the next.
This answer is automatically generated