Table of Contents
Advertisement
Advertisement
Table of Contents

Related Manuals for Lathem 2121


Summary of Contents for Lathem 2121
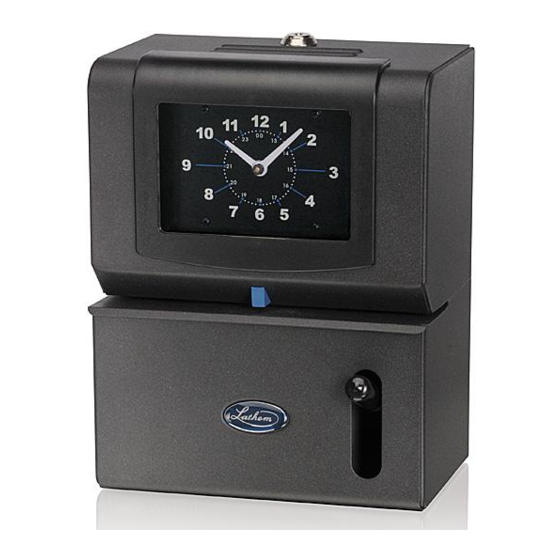
- Page 1 Mechanical Time Recorder Model 2121 User’s Guide...
-
Page 2: Table Of Contents
Contents Thank you for choosing the Lathem 2121 time recorder. Should you ever need assistance, please let us know. This guide contains all the information you need for setting up and operating your new time recorder. Service information is also included for replacing certain parts. -
Page 3: Ordering Accessories
Lathem time recorders fulfill a wide range of timekeeping requirements. For maximum results, only use Lathem accessories specifically designed to fit your time recorder. To purchase the appropriate accessories for your Model 2121 time recorder, contact your local Lathem dealer or visit us at: http://shop.lathem.com Description Part Number... -
Page 4: Start Here
Model 2121 Time Recorder User’s Guide Start Here Complete these steps to setup your new time recorder This guide is available to download at: http://www.lathem.com/support/product-manuals.aspx Mount Clock in Suitable Location Must be within 6 feet of AC power source (unswitched) and conveniently located for your employees. -
Page 5: Lift The Type Section
Model 2121 Time Recorder User’s Guide Place your hands on both sides of the cover and pull it toward you to remove it. A small amount of force may be required. Lift the Type Section Locate the lock lever on either side of the type section behind the clock face. -
Page 6: Set The Printed Day And Time
Model 2121 Time Recorder User’s Guide While pushing the lock lever down, lift the entire type section as shown below until it locks into place horizontally. It will click distinctly when it locks place. Set the Printed Day and Time Locate and press the red overthrow lever until it clicks. - Page 7 Model 2121 Time Recorder User’s Guide Before setting type wheels, observe the center position of wheels, as shown by the arrows below. The characters in the center position of each wheel are the characters that will print. Rotate each wheel with your fingers or a pointed object clockwise until the correct day and time are aligned at the center position.
-
Page 8: Set Hands On Clock Face
Model 2121 Time Recorder User’s Guide When finished, release the red overthrow lever by gently pulling it toward you until it clicks. This prevents the print wheels from being manually turned. Set Hands on Clock Face Locate the setting wheel on the right side below the clock face. -
Page 9: Advance Print Wheels And Hands
Model 2121 Time Recorder User’s Guide Advance Print Wheels and Hands Turn the main setting wheel, as shown below, to advance both the clock face and the print wheels together. Use your fingers or a pointed object to rotate the main setting wheel clockwise until it advances the time on the clock face to the current time. - Page 10 Model 2121 Time Recorder User’s Guide While holding the type section up, release the latch by slightly pushing it in the direction, as shown below. Gently lower the type section. Tip: Turn spools to tighten ribbon before lowering type section to avoid catching the ribbon.
-
Page 11: Test That Clock Is Now Set Correctly
Model 2121 Time Recorder User’s Guide Test that Clock Is Now Set Correctly When the clock advances to the next minute, you hear a distinct click. Insert a card or piece of paper below the print ribbon. Push lever on front of the unit down to make a print. -
Page 12: Change The Ribbon
4. Slide off the old ribbon spools. 5. Slide on the new Lathem ribbon spools. Make sure the ribbon feeds from the bottom of the spools and runs between the reversing fingers. Also make sure that the red side of the ribbon is nearest the outside of the unit. -
Page 13: Change The Type Section
Model 2121 Time Recorder User’s Guide Change the Type Section If the type section needs servicing, you can easily remove and change it without sending the entire unit for service. 1. Remove cover as described in Unlock and Remove the Cover. -
Page 14: Change The Motor
Model 2121 Time Recorder User’s Guide Change the Motor 1. Unplug the unit from the AC electrical outlet. 2. Remove cover as described in Unlock and Remove the Cover. 3. Remove type section as described in Changing the Type Section. -
Page 15: Trouble Shooting
Model 2121 Time Recorder User’s Guide 8. Install the new motor making sure the motor bracket is completely behind the clock frame and the gold motor bearing is resting in the slot of the frame. 9. Attach the type section, reset the time, and replace the cover, as described in this guide. -
Page 16: Warranty
Lathem. If it becomes necessary to send the product or any defective part to Lathem or any authorized service dealer, the product must be shipped in its original carton or equivalent, fully insured with shipping charges prepaid.
Need help?
Do you have a question about the 2121 and is the answer not in the manual?
Questions and answers