Advertisement
Model No. PFCCEX5905.0
Serial No.
Write the serial number in the
space above for reference.
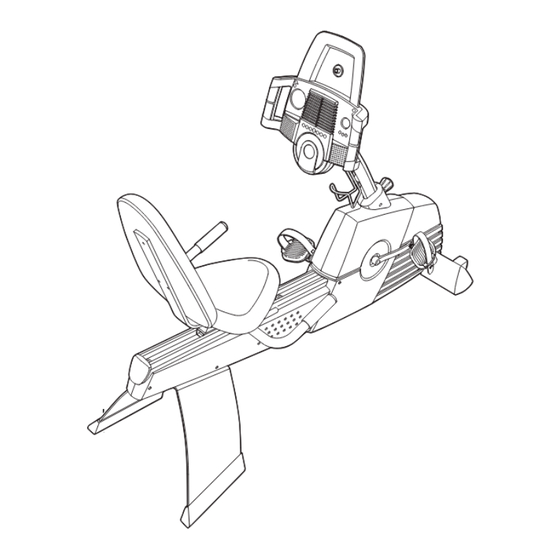
Serial Number Decal
(beneath stabilizer)
QUESTIONS?
As a manufacturer, we are com-
mitted to providing complete
customer satisfaction. If you
have questions, or if there are
missing parts, please call:
1-888-936-4266
Mon.–Fri. 8:00 until 17:00 EST
(excluding holidays).
CAUTION
Read all precautions and instruc-
tions in this manual before using
this equipment. Keep this manual
for future reference.
USER'S MANUAL
Visit our website at
www.proform.com
Advertisement
Table of Contents

Related Manuals for Pro-Form GL125


Summary of Contents for Pro-Form GL125
- Page 1 Model No. PFCCEX5905.0 Serial No. USER’S MANUAL Write the serial number in the space above for reference. Serial Number Decal (beneath stabilizer) QUESTIONS? As a manufacturer, we are com- mitted to providing complete customer satisfaction. If you have questions, or if there are missing parts, please call: 1-888-936-4266 Mon.–Fri.
-
Page 2: Table Of Contents
TABLE OF CONTENTS IMPORTANT PRECAUTIONS ..............3 BEFORE YOU BEGIN . -
Page 3: Important Precautions
IMPORTANT PRECAUTIONS WARNING: To reduce the risk of serious injury, read the following important precau- tions before using the exercise cycle. 1. Read all instructions in this manual and all readings. The pulse sensor is intended only warnings on the exercise cycle before using as an exercise aid in determining heart rate the exercise cycle. -
Page 4: Before You Begin
Congratulations for selecting the new PROFORM ® after reading this manual, please see the front cover GL125 exercise cycle. Cycling is one of the most of this manual. To help us assist you, please note the effective exercises for increasing cardiovascular fit- product model number and serial number before call- ness, building endurance, and toning the entire body. -
Page 5: Assembly
ASSEMBLY Assembly requires two persons. Place all parts of the exercise cycle in a cleared area and remove the packing materials. Do not dispose of the packing materials until assembly is completed. Assembly requires the included tools and your own adjustable wrench and Phillips screwdriver Use the drawings below to identify the small parts used for assembly. - Page 6 2. While another person holds the Upright (2) in the posi- tion shown, connect the Upper Wire Harness (42) to Make sure the the Lower Wire Harness (43). Gently pull the upper wire harnesses end of the Upper Wire Harness to remove any slack do not get from the Wire Harnesses.
-
Page 7: The Seat Carriage (10), Slide The Seat Carriage Into The
5. Attach the Seat (9) to the Seat Bracket (11) with four M6 x 16mm Button Screws (8) and four M6 Washers (66). 6. Attach the Backrest (90) to the Seat Bracket (11) with three M6 x 22mm Button Screws (93). 7. - Page 8 8. With the help of another person, carefully tip the exercise cycle onto its left side so it is resting on the Left Inner Handlebar (not shown). Identify the Left Rear Stabilizer (16), which is marked with an “L” sticker. Attach the Left Rear Stabilizer and the Stabilizer Plate (87) to the Frame (1) with two M8 x 25mm Button Screws (40) as shown;...
- Page 9 11. Identify the Left Pedal (22), which is marked with an “L.” Using an adjustable wrench, firmly tighten the Left Pedal counterclockwise into the Left Crank Arm (24). Tighten the Right Pedal (not shown) clockwise into the Right Crank Arm. Important: Tighten both Pedals as firmly as possible.
-
Page 10: How To Operate The Exercise Cycle
HOW TO OPERATE THE EXERCISE CYCLE HOW TO ADJUST THE SEAT HOW TO ADJUST THE UPRIGHT For effective exercise, the seat should be in the proper The upright can be position. As you pedal, there should be a slight bend in adjusted to the your knees when the pedals are all of the way forward. - Page 11 FEATURES OF THE CONSOLE er, you can play special iFIT.com CD programs. iFIT.com CD programs automatically control the resis- The advanced console offers a selection of features tance of the pedals and prompt you to vary your pace designed to make your workouts more enjoyable and while a personal trainer coaches you through every effective.
- Page 12 To use the manual mode of the console, see the every few seconds. If you use the handgrip pulse instructions below. To use a Smart program, see sensor, the display will also show your heart rate page 14. To use a Heart Rate program, see page 15. (see step 5 on page 13).
- Page 13 To reset the displays, press the On/Reset button. Turn on the fan if desired. Measure your heart rate if desired. To turn on the fan at low speed, If there are press the fan thin sheets of button. To turn plastic on the on the fan at metal contacts...
- Page 14 appears at the tip HOW TO USE A SMART PROGRAM of each arrow Indicator (see the drawing at the right). Note: Each Smart program will automatically change the When the word Arrows resistance of the pedals and prompt you to increase or TARGET does not decrease your pace as it guides you through an effec- appear in the...
- Page 15 to operate properly. Each time you hold the HOW TO USE A HEART RATE PROGRAM handgrips, keep your hands on the metal con- tacts for at least 30 seconds. Heart Rate program 1 is designed to keep your heart Begin pedaling to start the program. rate between 65% and 85% of your maximum heart rate during your workout.
- Page 16 The program will continue in this way until the HOW TO USE IFIT.COM CD PROGRAMS large display shows that no time remains in the program. Note: If you stop pedaling for a few sec- onds, the program will end. To use the program When you use an iFIT.com CD program, a certified again, reselect it and start it at the beginning.
- Page 17 The CD program will function in almost the same Follow your progress with the large display. way as a Smart program (see step 3 on page 14). However, an electronic “chirping” sound will alert See step 4 on page 12. you when the resistance level and/or the target pace is about to change.
- Page 18 HOW TO CONNECT TO YOUR COMPUTER HOW TO CONNECT THE EXERCISE CYCLE TO YOUR VCR OR COMPUTER Note: If your computer has a 1/8” LINE OUT jack, see instruction A. If your computer has only a PHONES jack, see instruction B. HOW TO CONNECT TO YOUR VCR A.
- Page 19 page 14). However, an electronic “chirping” sound HOW TO USE IFIT.COM VIDEO PROGRAMS will alert you when the resistance level and/or the target pace is about to change. To use iFIT.com video programs, the exercise cycle Note: If the resistance level and/or the target must be connected to your VCR.
- Page 20 Follow the desired links on our Web site to HOW TO USE PROGRAMS DIRECTLY FROM select a program. OUR WEB SITE Follow the on-line instructions to start the program. Our Web site at www.iFIT.com allows you to play iFIT.com programs directly from the internet. To use When you start the program, an on-screen count- programs from our Web site, the exercise cycle must down will begin.
-
Page 21: Maintenance And Troubleshooting
MAINTENANCE AND TROUBLESHOOTING Inspect and tighten all parts of the exercise cycle reg- HOW TO LEVEL THE EXERCISE CYCLE ularly. Replace any worn parts immediately. After the exercise To clean the exercise cycle, use a damp cloth and a cycle has been small amount of mild soap. -
Page 22: Conditioning Guidelines
CONDITIONING GUIDELINES The following guidelines will help you to plan your During the first few minutes of exercise, your body exercise program. Remember that proper nutrition uses easily accessible carbohydrate calories for ener- and adequate rest are essential for successful results. gy. - Page 23 SUGGESTED STRETCHES The correct form for several basic stretches is shown at the right. Move slowly as you stretch—never bounce. 1. Toe Touch Stretch Stand with your knees bent slightly and slowly bend forward from your hips. Allow your back and shoulders to relax as you reach down toward your toes as far as possible.
- Page 24 NOTES...
-
Page 25: Part List
PART LIST—Model No. PFCCEX5905.0 R0106A Key No. Qty. Description Key No. Qty. Description Frame M8 x 52mm Button Screw Upright Left Belt Cover Handlebar M4 x 50mm Screw Console M4 x 16mm Screw Right Handlebar Cover Small Pulley Left Handlebar Cover CD Holder M8 Split Washer M4 x 8mm Screw... -
Page 26: Exploded Drawing
EXPLODED DRAWING A—Model No. PFCCEX5905.0 R0106A 51 58... - Page 27 EXPLODED DRAWING B—Model No. PFCCEX5905.0 R0106A...
-
Page 28: How To Order Replacement Parts
• the MODEL NUMBER of the product (PFCCEX5905.0) • the NAME of the product (PROFORM GL125 exercise cycle) • the SERIAL NUMBER of the product (see the front cover of this manual) • the KEY NUMBER and DESCRIPTION of the part(s) (see the PART LIST on page 25) LIMITED WARRANTY ICON OF CANADA, INC., (ICON), warrants this product to be free from defects in workmanship and...
Need help?
Do you have a question about the GL125 and is the answer not in the manual?
Questions and answers