
Related Manuals for Honda HARMONY FG100


Summary of Contents for Honda HARMONY FG100
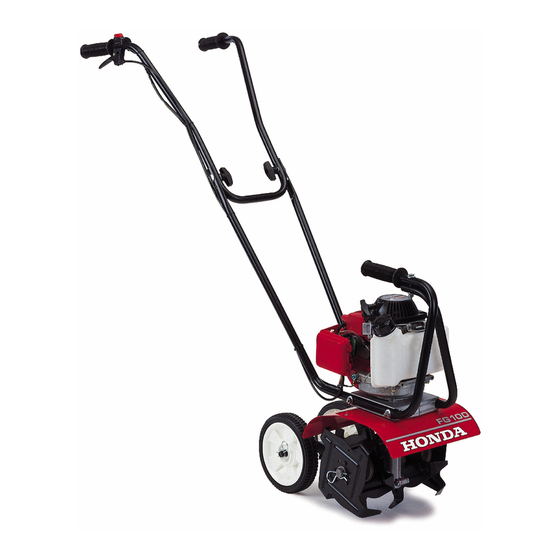
- Page 1 OWNER'S MANUAL Mini-Tiller FG100 See page 28 for instructions on assembling your FG100 Mini-Tiller. ¿Necesita un manual en Español? Vea a la página 44. ©1997 American Honda Motor Co., Inc. All Rights Reserved...
- Page 2 State of California to cause cancer, birth defects, or other reproductive harm. Keep this owner’s manual handy so you can refer to it at any time. This should remain with the tiller if resold. The information and specifications included in this publication were in effect at the time of approval for printing.
- Page 3 FG100 TILLER INTRODUCTION Congratulations on your selection of a Honda Harmony FG100 Tiller. We are certain you will be pleased with your purchase of one of the finest tillers on the market. We want to help you get the best results from your new tiller and to operate it safely. This manual contains the information on how to do that;...
- Page 4 FG100 TILLER A FEW WORDS ABOUT SAFETY Your safety and the safety of others are very important. And using this tiller is an important responsibility. To help you make informed decisions about safety, we have provided operating procedures and other information on labels in this manual.
-
Page 5: Table Of Contents
....9 BEFORE OPERATION ...10 GENERAL...10 CHECK TILLING AREA ...11 CHECK TILLER ...11 OPERATION...12 SAFETY PRECAUTIONS ...12 MOVING THE TILLER ...12 HANDLEBAR ADJUSTMENT ...12 STARTING/STOPPING THE ENGINE ...13 TILLER OPERATION...14 MAINTENANCE & ADJUSTMENTS ...17 THE IMPORTANCE OF MAINTENANCE...17 MAINTENANCE SAFETY ...17 MAINTENANCE SCHEDULE ...18... -
Page 6: Safety
Loose clothing should not be permitted because of the danger of getting into moving parts. Tie up or restrain long hair. Turn Engine Off When Not Tilling If you need to leave the tiller for any reason, even just to inspect the area ahead, always stop the engine . FG100 TILLER... -
Page 7: Attachments And Modifications
Be honest! Anyone who takes unnecessary risks and doesn’t obey rules should not operate this tiller. If you decide that your son or daughter can handle the tiller safely, carefully read the owner’s manual with your youngster. Make sure you both understand all instructions and safety information. Also, be sure your youngster wears sturdy shoes and other protective clothing when operating or handling the tiller. -
Page 8: Safety Label Locations
The labels shown here contain important safety information. Please read them carefully. These labels are considered permanent parts of your Honda tiller. If a label comes off or becomes hard to read, immediately contact a Honda tiller servicing dealer for a replacement label. -
Page 9: Controls
ENGINE SWITCH HANDLE HEIGHT ADJUSTER THROTTLE LEVER ENGINE OIL FILLER CAP/ ENGINE OIL DRAIN CHOKE LEVER AIR CLEANER PRIMING BULB TRANSPORT WHEEL OR DRAG BAR FG100 TILLER SPARK PLUG FUEL CAP TILLING TINES CONTROLS RECOIL STARTER CARRYING HANDLE TINE SHIELD... -
Page 10: Description Of Controls
Releasing the throttle lever reduces engine speed and stops the tiller tines from turning. The tiller will have the greatest tilling force at maximum engine speed. At idle, the tilling tines should stop rotating. -
Page 11: Transport Wheels
Pulling the starter grip operates the recoil starter to crank the engine for starting. Drag Bar The drag bar is used to control the forward action of the turning tiller tines. The drag bar can be adjusted to control the tilling depth of the tines. FG100 TILLER CARRYING... -
Page 12: Before Operation
Knowledge Read and understand this manual. Know what the controls do and how to operate them. Familiarize yourself with the tiller and its operation before you begin to use it. Know what to do in case of emergencies. Physical and Mental Readiness You must be alert and in good physical condition to operate the tiller. -
Page 13: Is Your Working Area Ready
For your safety, and to maximize the service life of your equipment, it is very important to take a few moments before you operate the tiller to check its condition. Be sure to take care of any problem you find, or have your servicing dealer correct it, before you operate the tiller. -
Page 14: Operation
Before operating the tiller for the first time, please review the IMPORTANT SAFETY INFORMATION (see page 4) and the chapter titled BEFORE OPERATION (see page 10). Even if you have operated other tillers, take time to become familiar with the operation of this tiller’s controls and handling. -
Page 15: Starting/Stopping The Engine
4. Place your left hand on the carrying handle rubber grip and hold it firmly. Make sure your feet are away from the tiller tines. With your right hand, pull the starter grip lightly until you feel resistance, then pull briskly. Return the starter grip gently. -
Page 16: Tiller Operation
6. Lower the front of the tiller until the tines begin to dig into the ground. 7. Lower the handle slightly so the front of the tiller is raised about 6 - 8°. To get the maximum advantage from the tiller, hold the tiller at this angle while you are tilling the ground. - Page 17 Tilling In Rocky Soil If you are tilling in stony or rocky soil, and experience continual rock jams between tines, set the tiller tines in the rocky soil pattern to help alleviate the problem. 1. Stop the engine (see page 13).
-
Page 18: Narrow Cultivating
Slide the outside tine set off the tine shaft and place a tine spacer, included with your tiller, over the tine shaft. Repeat this procedure for the other side. Secure the spacer with the lock pin in the outer hole. -
Page 19: Servicing Your Honda Tiller
Always follow the inspection and maintenance recommendations and schedules in this owner’s manual. To help you properly care for your tiller, the following pages include a maintenance schedule, routine inspection procedures, and simple maintenance procedures using basic hand tools. -
Page 20: Maintenance Schedule
3 months 6 months Each 10 Hrs 10 Hrs 25 Hrs 50 Hrs O (1) O (2) Every Every Refer to year 2 years page number 100 Hrs 200 Hrs O (2) O (2) O (2) FG100 TILLER... -
Page 21: Engine Oil Level Check
Check the engine oil level before each use, or every 10 hours if operated continuously. Tip the tiller on its carrying handle, on a level surface, with the engine stopped and in an upright position. 1. Tip the tiller on its carrying handle as shown. -
Page 22: Air Filter
– 2 0 –10 AMBIENT TEMPERATURE 1 0W- 30 AIR CLEANER LATCH TAB RETAINING AIR CLEANER BASE TABS LOCATING PEGS (5) CLEANER AIR FILTER COVER 100 F 40 C CHOKE LEVER CLEANER COVER AIR FILTER LOCATING HOLES (5) LATCH TAB FG100 TILLER... -
Page 23: Air Filter Cleaning
Be careful to prevent dirt from entering the carburetor. 5. Reinstall the air filter and air filter cover (see page 20). FG100 TILLER MAINTENANCE & ADJUSTMENTS 1. Clean in hot, soapy water. 2. Rinse thoroughly, and dry completely. -
Page 24: Spark Plug
Overtightening the spark plug can damage the threads in the cylinder head. 7. Attach the spark plug cap. SPARK PLUG SPARK PLUG CAP SPARK PLUG WRENCH SIDE ELECTRODE 0.024 - 0.028 in (0.60 - 0.70 mm) FG100 TILLER... -
Page 25: Spark Arrester
8. Install the spark arrester, muffler cover, top cover, and recoil starter in the reverse order of disassembly. SPARK ARRESTER SPECIAL SCREW FG100 TILLER MAINTENANCE & ADJUSTMENTS 5 x 18 mm BOLT (4) IGNITION SWITCH WIRE 5 x 22 mm BOLT (2) -
Page 26: Cooling Fin Inspection
2. Start the engine outdoors, and allow it to warm up to normal operating temperature. 3. Turn the throttle stop screw to obtain a stable idle, below the speed at which the tiller tines begin to turn. Standard idle speed: 3,100 ± 200 rpm. -
Page 27: Fuel Recommendations
If the engine has been running, allow it to cool first. To refuel, set the tiller on level ground. Remove the fuel tank cap, and fill the tank with gasoline to the bottom of the filler neck. Refuel carefully to avoid spilling fuel. -
Page 28: Fuel Tube Inspection
Honda servicing dealer. Fuel Filter and Fuel Tank Cleaning 1. Remove the fuel tank cap. 2. Tip the tiller as shown and empty the fuel tank into an approved gasoline container. Use a funnel to avoid spilling gasoline. 3. Pull the fuel filter out through the fuel filler neck... -
Page 29: Transmission
Loosen the set screw using a 3/32 inch allen wrench. The dust cap should then slide off of the tine shaft. 4. Lay the tiller on its left side so that the tine shaft is vertical. 5. Remove the air vent screw and fill hole screw from the transmission. -
Page 30: Important Safety Precautions
To reduce the possibility of a fire or explosion, be careful when working around gasoline or batteries. Use only a nonflammable solvent, not gasoline, to clean parts. Keep all cigarettes, sparks, and flames away from all fuel-related parts. B WARNING B WARNING FG100 TILLER... -
Page 31: Unpacking
UNPACKING 1. Carefully remove the tiller and loose parts from the carton. 2. Remove the loose parts bag. Compare the loose parts with the inventory list below. Tools Required: Phillips screwdriver, 7/16 inch wrench (2), and 3/8 inch wrench. LOOSE PARTS Check all loose parts against the following list. -
Page 32: Tiller Assembly
After the assembly is completed, select one of the four holes that provides the most comfort when transporting the tiller (see page 12). 5. Install the left and and right lower handles to the transmission engine mount with the two 1/4-20 x 4 1/2 inch bolts, four curved washers and two 1/4 inch locking nuts. - Page 33 THROTTLE LEVER SLOTTED HOLE THROTTLE CABLE CYLINDER THROTTLE CABLE FG100 TILLER 6. Install the grip on the right lower handle. Apply RIGHT a small mount of dish soap to the right handle LOWER pipe to ease the installation of the grip.
- Page 34 THROTTLE LEVER CABLE SOCKET AIR CLEANER BLACK WIRE COVER FEMALE CONNECTOR BLACK WIRE MALE CONNECTOR THROTTLE CABLE HOUSING THROTTLE CABLE HOUSING Release the throttle cable housing into the throttle lever cable socket. SMALL SCREW GREEN WIRE EYELET TERMINAL FG100 TILLER...
- Page 35 18. Secure the throttle cable and engine switch wire harness to the upper handle and right lower handle using the two tie straps as shown. 19. Tip the tiller on its carrying handle on a level surface as shown. 20. Remove the oil filler cap/dipstick.
-
Page 36: Transporting/Storage
Stop the engine and allow it to cool. After the tiller is clean and dry, touch up any damaged paint, and coat other areas that may rust with a light film of oil. Lubricate the throttle cable core with a silicone spray lubricant. - Page 37 Old gasoline will cause hard starting, and it leaves gum deposits that restrict the fuel system. If the gasoline in your tiller deteriorates during storage, you may need to have the carburetor and other fuel system components, serviced or replaced.
-
Page 38: Storage Precautions
TRANSPORTING/STORAGE STORAGE PRECAUTIONS If your tiller will be stored with gasoline in the fuel tank and carburetor, it is important to reduce the hazard of gasoline vapor ignition. Select a well-ventilated storage area away from any appliance that operates with a flame, such as a furnace, water heater, or clothes dryer. -
Page 39: Taking Care Of Unexpected Problems
Possible Cause Engine switch OFF. Choke lever not in CHOKE ( position (cold engine). Out of fuel. Bad fuel, tiller stored without treating or draining gasoline, refueled with bad gasoline. Spark plug faulty, fouled, or has incorrect gap. Fuel filter restricted, carburetor malfunction, ignition malfunction, valves stuck, etc. -
Page 40: Specifications
FZCV 41.5 x 14 x 39 in (1054 x 355 x 990 mm) 25 lb (11.3 kg) Centrifugal mechanical 3,800 ± 200 rpm 10 in (254 mm) 8 in (203 mm) Worm gear 4 (4 teeth per tine) FG100 TILLER... -
Page 41: Technical & Consumer Information
These publications will give you additional information for maintaining and repairing your tiller. You may order them from your Honda tiller dealer. Shop Manual This manual covers complete tiller maintenance and overhaul procedures. It is intended to be used by a skilled technician. Parts Listing This parts listing provides a complete illustrated service parts list. -
Page 42: Warranty
To Obtain Warranty Service: You must take the Honda FG100 Tiller and proof of original retail purchase date, at your expense, to any Honda Power Equipment dealer in the United States, Puerto Rico, or the U.S. Virgin Islands who is authorized to service that product, during the dealer’s normal business hours. - Page 43 You must take the Honda Power Equipment accessory, replacement part, apparel or the power equipment on which the accessory or replacement part is installed, and proof of purchase, at your expense, to any Honda Power Equipment dealer in the United States, Puerto Rico, or the U.S. Virgin Islands who is authorized to service that product, during the dealer’s normal business hours.
-
Page 44: Emission Control System Warranty
You are responsible for presenting your power equipment engine to a Honda Power Equipment dealer as soon as a problem exists. The warranty repairs should be completed in a reasonable amount of time, not to exceed 30 days. -
Page 45: Parts Description
To Obtain Warranty Service: You must take your Honda Power Equipment engine or the product on which it is installed, along with your warranty registration card or other proof of original purchase date, at your expense, to any Honda Power Equipment dealer who is authorized by American Honda Motor Co., Inc. -
Page 46: Warranty Service Information
WARRANTY SERVICE INFORMATION Honda Power Equipment dealership personnel are trained professionals. They should be able to answer any question you may have. If you encounter a problem that your dealer does not solve to your satisfaction, please discuss it with the dealership’s management. - Page 47 When you write or call, please provide the following information: • Model and serial numbers • Name of the dealer who sold the Honda power equipment to you • Name and address of the dealer who services your equipment •...
-
Page 48: Oxygenated Fuels
A very rich mixture will also foul the spark plug and cause hard starting. High altitude performance can be improved by specific modifications to the carburetor. If you always operate your tiller at altitudes above 5,000 feet (1,500 meters), have your servicing dealer perform this carburetor modification. - Page 49 Follow the maintenance schedule on page 18. Remember that this schedule is based on the assumption that your machine will be used for its designed purpose. Sustained high-load or high-temperature operation, or use in unusually wet or dusty conditions, will require more frequent service. FG100 TILLER...
-
Page 50: Replacement Parts
Descriptive Term Moderate Intermediate Extended The Air Index Information hang tag/label must remain on the mini-tiller until it is sold. Remove the hang tag/label before operating the tiller. REPLACEMENT PARTS Replacement parts may be purchased from authorized servicing Honda tiller dealer. - Page 51 Throttle Cable...24 Transmission ...27 Moving the Tiller...12 Oil, Engine: Change...19 Level Check...19 Recommendations ...20 Operating the Tiller ...14 Options ...39 Oxygenated Fuels...45 Parts, Replacement ...47 Publications...39 Priming Bulb... 8 & 13 Recoil Starter ... 9 & 13 Replacement Parts ...47 Safety:...4...
-
Page 52: Quick Reference
QUICK REFERENCE Maintenance Fuel Engine Oil Transmission Lubricant (SD) Spark Plug (Resistor plugs reduce the interference with radio and television reception.) Maximum Engine Speed Throttle Cable Tuneup Spark Plug Gap Idle Speed Valve Clearance (cold) Other Specifications Unleaded gasoline with a pump octane rating Type of 86 or higher Capacity 0.75 US qt (.7l) - Page 53 POM52753C POM52753 31V06600 31V06610 ECP 80009712 Printed on 00X31-V06-6000 Recycled Paper Printed in U.S.A. 00X31-V06-6100...
Need help?
Do you have a question about the HARMONY FG100 and is the answer not in the manual?
Questions and answers