
Related Manuals for Honda Harmony FG100


Summary of Contents for Honda Harmony FG100
- Page 1 [] "..Tiller ® See page 28 for instructions assembling your FG 100 Mini-Tiller. manuat IgNecesita en Espahol? p_gina 44. l © 1997, 2003 American Honda Motor Co,, tnc, -- ALl Rights Reserved...
- Page 2 The information and specifications included in this publication were in effect at the time of approval printing. American Honda Motor Co., Inc. reserves the right, however, to discontinue or change specifications or design at any time without notice and without...
- Page 3 Honda servicing dealer is specially trained in servicing Honda tillers. Your Honda servicing dealer is dedicated to your satisfaction and will be pleased to answer your questions and concerns. Left and right sides of this unit are determined...
- Page 4 FGI00 TILLER A FEW WORDS ABOUT SAFETY Your safety, and the safety of others, is very important. And using this tifler is an important responsibilky. To help you make informed decisions about safety, we have provided operating procedures and other information on Rabels in this manual.
- Page 5 ..........ARE YOU READY TO OPERATE SERIAL NUMBER LOCATIONS ....TILLER? ............CONSUMER INFORMATION ....... tS YOUR WORKING AREA READY? ... 11 HONDA PUBLICATIONS ......tS YOUR TILLER READY TO GO? ....11 AVAILABLE OPTIONS ......... WARRANTY ..........OPERATION ............
- Page 6 Honda Tiller Usage Honda tillers are designed to give safe and dependable service if operated according to instructions intended use. Honda tillers are intended...
- Page 7 MESSAGE TO PARENTS Your child's safety is very important to Honda. Read this message if you decide to permit your youngster operate this tiJler. Tillers are tools, not toys. As with any equipment,...
- Page 8 Please read them carefuUUy. These RabeUsare considered permanent parts of your Honda tiIRer, if a RabeU comes off or becomes hard to read, immediateUy contact an authorized Honda tiller servicing deaBer for a repUacement RabeL TO AVOmD SERmOUS mNJURY READ THE OWNER'S MANUAL CAREFULLY BEFORE OPERATION.
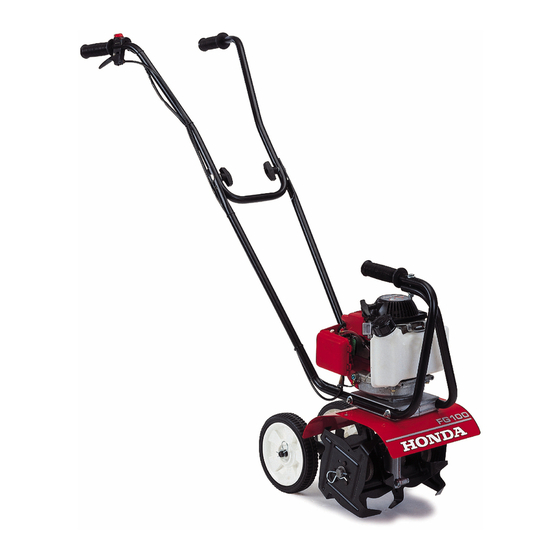
- Page 9 COMPONENT iDENTiFiCATiON ENGINE SWITCH HANDLEBAR KNOBS SPARK PLUG THROTTLE LEVER RECOIL STARTER GRIP CARRYING HANDLE FUELCAP CHOKE LEVER TmNE SHIELD ENGINE OIL FmLLER CAP/ ENGINE OraLDRAIN TmLUNG TmNES FG100 TmLLER...
- Page 10 DESCRiPTiON OF CONTROLS ENGINE SWITCH Throttme Lever The throttle lever controls engine speed and tiller fine rotation. Pulling the throttle lever towards the grip increases the engine speed which causes the tines to turn. Releasing the throttle lever reduces engine speed and stops the tiller tines from turning.
- Page 11 Transport Wheems CARRYING HANDLE The transport wheels are used to move the tiller around. Before tilling, the transport wheels must be removed and the drag bar installed in their place. RECOIL STARTER Carrying Handle GRIP Hold the rubber grip on the carrying handle when TRANSPORT starting...
- Page 12 BEFORE OPERATION ARE YOU READY TO OPERATE THE TILLER? Your safety is your responsibility. A little time spent in preparation will significantly reduce your risk of injury. Know_edge Read and understand this manual. Know what the controls do and how to operate them.
- Page 13 BEFORE OPERATION JS YOUR WORKING AREA READY? Objects thrown by the tiller can cause serious injury. Be especiaUly carefuU when crossing graveU drives, walks or roads. Before operating the tiIRer, carefuUUy inspect the area, and remove aUlobjects that couUd be thrown by, or entangled in, the tilling attachment, such as rocks, broken glass, nails, wire, or string.
- Page 14 SAFETY PRECAUTIONS Before operating the filler for the first time, please review the IMPORTANT SAFETY INFORMATION (see page 4) and the chapter titled BEFORE OPERATION (see page 10). Even if you have operated other fillers, take time to become familiar wkh the operation of tMs filler's controls...
- Page 15 Starting The Engine ENGINE SWITCH 1. Move the engine switch to the ON position. To start a cold engine, move the choke lever to the CLOSED (N) position. CARRYING HANDLE STARTER RUBBER GRIP To restart a warm engine, leave the choke GRIP lever in the OPEN position.
- Page 16 TILLER OPERATION 1. Install the drag bar (see page 12). Honda recommends using the drag bar when filling. The filler can be difficult to control without the drag bar installed. 2. Adjust the handlebar to a comfortable position around waist height for normal tilling (see page 12).
- Page 17 LOCK PmN THHng mnRocky Soi_ tf you till in rocky soil and experience continual fine area rock jams, install the tines in the rocky soil tine configuration to help alleviate the problem. RAISED AREA [ NOTICE i Experiencing continual rock jams with the tines instafled in the regular tine configuration, cause transmission...
- Page 18 Narrow Cuffivating The two outer tines can be removed to give you a narrower cukivating width. This width is approximateUy 6 inches. This wiUl give you the ability to get between very closeUy spaced pUants. tn order to do this, puUU the Uock pin out of the hoUe in the end of the fine shaft.
- Page 19 To ensure the best quality and reliability, use only new, genuine Honda parts or their equivalents To reduce the possibility of fire or explosion, repair and replacement. careful when working around gasoline.
- Page 20 (2) These items shouUd be serviced by your authorized Honda servicing dealer, unless you have the proper tooUs and are mechanicaIRy proficient. Refer to the Honda shop manual for service procedures. (3) Log hours of operation to determine proper maintenance intervals.
-
Page 21: Engine Oil
MAINTENANCE & ADJUSTMENTS ENGINE MAINTENANCE Engine OH Levem Check Check the engine oil ReveU before each use, or every 10 hours if operated continuously. AUso, check the oiUon a ReveU surface, with the engine stopped and in an upright position. Tip the tiller on its carry handUebar as shown. -
Page 22: Air Filter
40°C within the recommended ranges. AMBIENT TEMPERATURE The SAE oil viscosity and service classification in the APJ label on the oil container. Honda recommends that you use APJ SERVICE category SH or SJ oil with the "starburst" certification mark displayed on the container. - Page 23 MAINTENANCE & ADJUSTMENTS Air FHter Cmeaning A dirty air filter restricts air flow to the carburetor, reducing engine performance. If you operate engine in very dusty areas, clean the air filter after each refueling. an in hot, soapy water. 1. Remove the air filter (see page 20).
-
Page 24: Spark Plug
MAINTENANCE & ADJUSTMENTS Spark Pmug Service SPARK PLUG CAP Recommended spark plugs: SPARK PLUG NGK - CSHSB or CRSHSB DENSO- U16FS°UB or U16FSR-UB I NOTmCE ] Incorrect spark plugs can cause engine damage. 1. Disconnect the spark pUug cap, and remove any dirt from around the spark pUug area. -
Page 25: Spark Arrester
MAINTENANCE & ADJUSTMENTS RECOIL STARTER Spark Attester Service The spark arrester must be serviced every 100 hours to keep it functioning as designed. tf the engine has been running, the muffler will be very hot. Allow the muffler to cool before servicing the spark arrester. -
Page 26: Cooling Fins
Carburetor Adjustment A tachometer is required to adjust the idle speed. you do not have one, take your tiller to an authorized Honda servicing dealer to perform idle speed adjustment. ADJUSTER LOCK Verify that the throttle lever free play is NUTS 7/8 - 1 inch (22 - 25 mm). -
Page 27: Refueling
If spark knock or pinging persists, see an barbecues, electric appliances, power tools, etc. authorized Honda servicing dealer. Spilled fuel is not only a fire hazard, it causes environmental damage. Wipe up spills immediately. I NOTICE Running... -
Page 28: Fuel Tube Inspection
Fuem Tube Rnspection Check the fuel supply and return tubes, and replace any tube that is damaged, cracked, leaking. FUEL RETURN Refer to the Honda shop manual for tube TUBE replacement instructions, or take the filler to an (clear) authorized Honda servicing dealer. -
Page 29: Transmission Lubrication
MAINTENANCE & ADJUSTMENTS LOCK PmN TRANSMmSSRON LUBRRCATRON The transmission is prequbricated at the factory. At the beginning of each tilling season, or after every 25 hours of use during the season, transmission shouUd be filled with grease. RepUacement grease shouUd be a high quaUky petroUeum based NLGI #2 general purpose grease... -
Page 30: Safety Precautions
THE iMPORTANCE OF PROPER ASSEMBLY Proper assembly is essential to operator safety and the reliability of the machine. Any error or oversight made by the person assembling and servicing a unit can result in faulty operation, damage to the machine, or injury to the operator. -
Page 31: Table Of Contents
LOOSE PARTS Check aJ[ loose parts against the following list. Contact your authorized Honda servicing dealer if any of the loose parts shown beJow are not incJuded with your filler. Ref. No Description Qty. -
Page 32: Right Lower Handlebar
TILLER ASSEMBLY 1. AssemMe the wheel assembly and install the wheel assembly on the tiller with the arrow up as shown. Torque: 14 ftqb (20 N°m) LOCK ruNNER COLLAR (2) COLLAR (2) CLEVIS WHEEL 2. Attach the Reftand right Rower handlebars to the transmission mount with the one 1/4o20 x 64nch bout, and one 1/44nch Rock nut. -
Page 33: Lock Nut
3. install the right and left carry handlebars: a. Insert the carry handlebars into the left and c. Install the pipe plug. right lower handlebars as shown. d. install the 1/4-20 x 1-1/2-inch bolt and lock nut. b. install a 1/4-20 x 6-inch bolt and lock nut. Do not tighten the mounting bolt at this time. - Page 34 Lift the throttle lever towards the handlebar expose the slotted hole. Insert the cylinder end of the throttle cable into THROTTLE LEVER the slotted hole. CYMNDER (pull up} SLOTTED HOLE THROTTLE CABLE THROTTLE CABLE Release the throttle lever. Swing the cable up HOUSING as shown.
- Page 35 12. Secure the throttle came and engine switch wire harness to the upper handUebar and right lower handlebar using the two tie straps shown. Tree STRAP(2) 13. Working on a BeveU surface, tip the filler on its carrying handUebar as shown. 14.
- Page 36 TFIANS PO FITING/STOFIAG Before Loading Always turn the engine switch to the OFF position. T H ROTT L E Make sure the fuel cap is securely tightened. CABLE & ENGINE SWmTCH WmRE Install the wheels to provide added stability when transporting (see page 12).
- Page 37 TRANSPORTING/STORAGE Fuem Gasoline will oxidize and deteriorate in storage. Draining the Fuel Tank and Carburetor Old gasoline will cause hard starting, and it leaves Drain the fuel from the fuel tank to a suitable container gum deposits that restrict the fuel system. If the gasoline in your filler deteriorates...
- Page 38 TRANSPORTING/STORAGE STORAGE PRECAUTIONS REMOVAL FROM STORAGE if your tiller will be stored with gasoline in the fuel Check your tiller as described in the BEFORE tank and carburetor, it is important to reduce the OPERA T/ON chapter of this manual (see page 10).
-
Page 39: Problems
Clean, gap, or replace the spark plug. Check spark plug= incorrect gap. Fuel filter restricted, carburetor Replace or repair faulty components as Contact an authorized Honda servicing malfunction, ignition malfunction, needed. dealer, or refer to shop manual. vaIves stuck, etc. -
Page 40: Drag Bar
SPECIFiCATiONS Model GX31 Type Description code GCAG Displacement 1,89 cu in (31 cc) Bore x stroke 1,5 x 1,0 in (39 x 26 mm) Maximum horsepower 1,5 hp (1,1 kW) at 7,000 rpm Maximum torque 1,23 ft°lbs (1,64 Nom) at 4,500 rpm ignition system Transistorized magneto Nonresistor... -
Page 41: Locations
_ conl/dea, Honda PubJications These pubJicafions will give you additionaJ information for maintaining and repairing your tiller. You may order them from your Honda tiller deaJer. Shop Manual This manuaJ covers complete tiller maintenance and overhauJ procedures. Jt is intended to be used by a skilled technician. - Page 42 Honda will Repair or Replace Under Warranty: Amerban Honda will repair or replace, at its option, any part that is proven to be defective in material or workmanship under normal use during the applicable warranty time period, Warranty repairs and replacements wiii be made without...
- Page 43 Accessories and replacement parts, installed by a dealer who is authorized by American Honda to sell them, will be repaired or replaced under warranty without charge for parts or labor, If installed by anyone else, accessories and...
- Page 44 Warranty repairs wiii be made without charge for diagnosis, parts or labor. Aii defective parts replaced under this warranty become the property of American Honda Motor Co., Inc. A list of warranted parts is on the reverse side of this warranty statement. Normal maintenance items, such as spark plugs and filters, that are on the warranted parts list are warranted up to their required replacement interval only.
- Page 45 To Obtain Warranty Service: You must take your Honda Power Equipment engine or the product on whbh it is instalbd, along with your warranty registration card or other proof of original purchase date, at your expense, to any Honda Power Equipment dealer who...
-
Page 46: Information
Honda Power Equipment Customer Relations Office. You can write to: American Honda Motor Co., inc. Power Equipment Division Customer Relations Office 4900 Marconi Drive Alpharetta, 30005°8847 Or telephone: (770) 497°6400... -
Page 47: Fuels
TECHNICAL & CONSUMER iNFORMATiON OXYGENATED FUELS Some conventional gasolines are being blended with alcohol or an ether compound. These gasolines collectively referred to as oxygenated fuels. To meet clean air standards, some areas of the USA and Canada use oxygenated fuels to help reduce emissions. - Page 48 Black exhaust smoke or high fuel consumption, Repmacement Parts The emission control systems on your new Honda engine were designed, built, and certified to conform with EPA and California emission regulations, We recommend the use of genuine Honda parts whenever you have maintenance done, These original-design...
-
Page 49: Parts
Remove the hang tag!label before operating the tiller. REPLACEMENT PARTS Replacement parts may be purchased from authorized servicing Honda tiller dealer. Description Pa_t Number Notes Air filter 17211 -ZM3-800 98056-55777 Spark plug DENSO 98056-55757 Engine oil 08209-10W30 Tine "A"... - Page 50 Maintenance: Assembly ............... Air Filter ................Air Filter ..............Gleaning ..............Cooling Fins .............. inspection ..............Engine Oil ..............Fuel System ............. Idle Speed ..............Before Operation ............importance ..............Schedule ..............¢ Spark Arrester ............Carburetor Adjustment ........... Spark Plug ..............Throttle Cable ............
- Page 51 QUICK REFERENCE Maintenance Fuel Type Unleaded gasoline with a pump octane rating of 86 or higher See page 25. Capacity 0.75 US qt (.7{') Type SAE 10W-30, APISH or SJ See page 20. Capacity 3.4 fi oz (100 cc) See page 19. Transmission lubricant Type Grease (NLGi #2)
- Page 52 The power POM52753G Printed 45000.2003.10 31V06622 Recycled Paper PRINTED iN U.S.A.
Need help?
Do you have a question about the Harmony FG100 and is the answer not in the manual?
Questions and answers