Table of Contents
Advertisement
INTRODUCTION
Congratulations on your selection of a Honda FG110 mini-tiller!
We are certain you will be pleased with your purchase of one of the
finest tillers on the market.
We want to help you get the best results from your new tiller and to
operate it safely. This manual contains the information on how to do
that; please read it carefully.
We suggest you read the DISTRIBUTOR'S LIMITED WARRANTY
(page 21) and EMISSION CONTROL SYSTEM WARRANTY
(page 22) to fully understand coverage and your responsibilities of
ownership.
When your tiller needs scheduled maintenance, keep in mind that an
authorized Honda servicing dealer is specially trained in servicing
Honda tillers and is supported by the parts and service divisions of
American Honda. Your Honda dealer is dedicated to your satisfaction
and will be pleased to answer your questions and concerns.
Keep this owner's manual handy, so you can refer to it at any time.
This owner's manual is considered a permanent part of the tiller and
should remain with the tiller if resold.
The information and specifications included in this publication were in
effect at the time of approval for printing. American Honda Motor Co.,
Inc. reserves the right, however, to discontinue or change
specifications or design at any time without notice and without
incurring any obligation whatever. No part of this publication may be
reproduced without written permission.
SAFETY MESSAGES
Your safety and the safety of others are very important. We have
provided important safety messages in this manual and on the tiller.
This information alerts you to potential hazards that could hurt you or
others. Please read these messages carefully.
Of course, it is not practical or possible to warn you about all the
hazards associated with operating or maintaining a mini-tiller. You
must use your own good judgment.
You will find important safety information in a variety of forms:
• Safety Labels - on the tiller.
• Instructions - how to use this tiller correctly and safely.
• Safety Messages - preceded by a safety alert A symbol and one
of three signal words: DANGER, WARNING, or CAUTION. These
signal words mean:
B DANGER
B WARNING
B CAUTION
Each message tells you what the hazard is, what can happen, and
what you can do to avoid or reduce injury.
• Damage Prevention Messages - You will also see other
important messages that are preceded by the word NOTICE. This
word means:
Your tiller or other property can be damaged if
NOTICE
you don't follow instructions.
© 2004-2008 American Honda Motor Co., Inc.-All Rights Reserved
31V25033
K1
00X31-V25-0330
You WILL be KILLED or SERIOUSLY
HURT if you don't follow instructions.
You CAN be KILLED or SERIOUSLY
HURT if you don't follow instructions.
You CAN be HURT if you don't follow
instructions.
POM31V25033
EM5
IPC.XXX.2008.11
PRINTED IN U.S.A.
OWNER'S MANUAL
WARNING:
B
The engine exhaust from this product contains
chemicals known to the State of California to cause
cancer, birth defects, or other reproductive harm.
CONTENTS
INTRODUCTION ...............................1
SAFETY MESSAGES........................1
TILLER SAFETY................................2
INFORMATION.............................2
MODIFICATIONS .........................2
SAFETY LABEL LOCATION ........3
CONTROL LOCATIONS ...................4
BEFORE OPERATION......................4
THE TILLER? ...............................4
READY? .......................................4
OPERATION......................................5
SAFE OPERATING PRECAUTIONS........5
STARTING THE ENGINE.............6
STOPPING THE ENGINE ............7
TILLER OPERATION ...................7
SERVICING YOUR TILLER ..............8
MAINTENANCE SAFETY.............8
MAINTENANCE SCHEDULE .......8
ENGINE OIL .................................9
AIR FILTER ................................10
SPARK PLUG .............................11
EQUIPMENT) .............................11
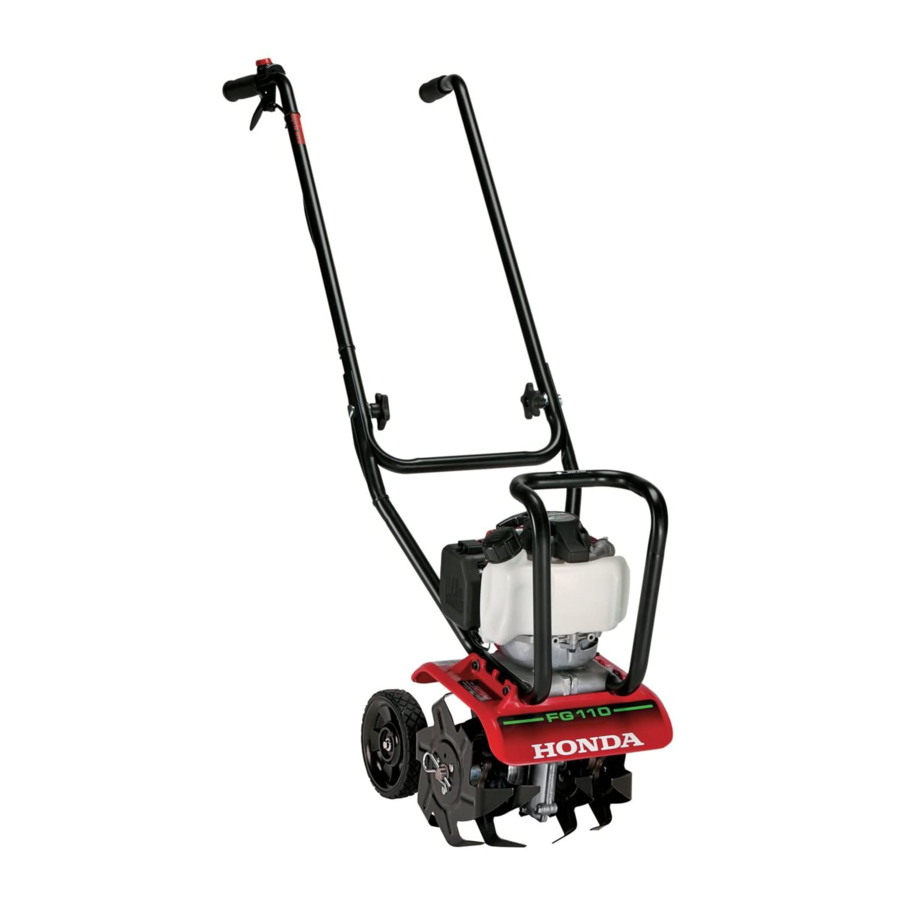
FG110
B
REFUELING ............................... 12
TRANSMISSION LUBRICATION............14
TRANSPORTING ............................ 15
STORAGE ....................................... 15
PROBLEMS..................................... 17
TECHNICAL INFORMATION .......... 17
ALTITUDE OPERATION ............ 17
AIR INDEX.................................. 18
SPECIFICATIONS...................... 19
CONSUMER INFORMATION ......... 20
SERVICE ITEMS ........................ 20
INFORMATION........................... 20
INFORMATION........................... 20
WARRANTY ............................... 21
APPAREL WARRANTY.............. 21
WARRANTY ............................... 22
1
Advertisement
Table of Contents

Related Manuals for Honda FG110


Summary of Contents for Honda FG110
-
Page 1: Table Of Contents
When your tiller needs scheduled maintenance, keep in mind that an authorized Honda servicing dealer is specially trained in servicing Honda tillers and is supported by the parts and service divisions of American Honda. Your Honda dealer is dedicated to your satisfaction and will be pleased to answer your questions and concerns. -
Page 2: Tiller Safety
If you decide the person is, make sure the employee reads and understands all instructions and warnings in this manual, and on the Honda tillers are designed to give safe and dependable service if labels before operating the tiller. operated according to instructions and intended use. -
Page 3: Safety Label Location
The label shown here contains important safety information. Please read it carefully. This label is considered a permanent part of your All Honda engines are run at the factory prior to packaging. Most of tiller. If the label comes off or becomes hard to read, contact your the oil is removed prior to shipment;... -
Page 4: Control Locations
CONTROL LOCATIONS BEFORE OPERATION ARE YOU READY TO OPERATE THE TILLER? CHOKE LEVER (P. 6) Your safety is your responsibility. A little time spent in preparation will STARTER GRIP significantly reduce your risk of injury. PRIMING BULB (P. 6) Read and understand this manual. Know what the controls do and how to operate them. -
Page 5: Operation
Safety Inspection Tine Installation Make sure the tines are installed properly with the blades angled • Look around the engine for signs of oil or gasoline leaks. Wipe up inward and the tine spacers facing each other. The leading edge of any spills before starting the engine. -
Page 6: Starting The Engine
STARTING THE ENGINE Moving the Tiller The tiller has wheels to allow easy maneuvering to and from the work 1. Move the engine switch area. to the ON position. ENG. SW. Do not transport the tiller with the engine running. 2. -
Page 7: Stopping The Engine
STOPPING THE ENGINE Tilling With the Drag Bar Installed 1. Install the drag bar and set the tilling depth by moving the drag bar 1. Release the throttle lever. up or down into one of 4 height positions (page 5). ENG. -
Page 8: Servicing Your Tiller
Every 2 years or Replace the spark plug (page 11) after each 300 To ensure the best quality and reliability, use only new, Honda Adjust the valve clearance Genuine parts or their equivalents for repair and replacement. hours... -
Page 9: Engine Oil
The SAE oil viscosity and service category are in the API label on the NOTICE oil container. Honda recommends that you use API SERVICE Running the engine with a low oil level can cause engine damage. category SJ or later oil with the API “starburst” certification mark This type of damage is not covered by the DISTRIBUTOR’S... -
Page 10: Air Filter
AIR FILTER Cleaning A dirty air filter will restrict air flow to the carburetor, reducing engine Inspection performance. If you operate the tiller in very dusty areas, clean the air 1. Move the choke filter more often than specified in the MAINTENANCE SCHEDULE AIR CLEANER BASE UPPER TABS lever to the... -
Page 11: Spark Plug
Check local laws and regulations. An optional USDA approved spark NOTICE arrester is available from an authorized Honda servicing dealer. See An incorrect spark plug can cause engine damage. page 20 for part numbers. -
Page 12: Carburetor Adjustment
California Air Resources Board throttle lever does not operate smoothly or release properly, take your (page 20). tiller to your authorized Honda servicing dealer. This engine is certified to operate on unleaded gasoline with a pump Check the freeplay at the end of octane rating of 86 or higher. - Page 13 FUEL or leaking. an approved RETURN TUBE Refer to the Honda gasoline (clear) shop manual for container. Use a tube replacement funnel to avoid instructions, or take spilling gasoline.
-
Page 14: Transmission Lubrication
TRANSMISSION LUBRICATION The transmission is pre-lubricated at the factory. At the beginning of each tilling season, or after every 25 hours of use during the season, the transmission should be filled with grease. Replacement grease should be a high quality petroleum based NLGI #2 general purpose grease usually available in disposable tubes at most hardware or automotive parts stores. -
Page 15: Transporting
TRANSPORTING STORAGE BEFORE LOADING STORAGE PREPARATION If the engine has been running, allow it to cool for at least 15 minutes Proper storage preparation is essential for keeping your tiller before loading the tiller on the transport vehicle. A hot engine and trouble-free and looking good. -
Page 16: Storage Precautions
STORAGE PRECAUTIONS Adding Fuel Stabilizer To Extend Fuel Storage Life When adding a fuel stabilizer, fill the fuel tank with fresh gasoline. If If your tiller will be stored with gasoline in the fuel tank and carburetor, only partially filled, air in the tank will promote fuel deterioration during it is important to reduce the hazard of gasoline vapor ignition. -
Page 17: Taking Care Of Unexpected Problems
Idle speed is too high. Adjust the idle speed (page 12) the air-fuel mixture will be too lean for low altitude use. Operation at or have an authorized Honda altitudes below 5,000 feet (1,500 meters) with a modified carburetor servicing dealer adjust idle may cause the engine to overheat and result in serious engine speed. -
Page 18: Emission Control System
Intermediate 125 hours (0–80 cc inclusive) 250 hours (greater than 80 cc) The following instructions and procedures must be followed in order to keep the emissions from your Honda engine within the emission Extended 300 hours (0–80 cc inclusive) standards. -
Page 19: Specifications
See your Carburetor Diaphragm type (cold) 0.08 ± 0.02 mm authorized Air cleaner Semi-dry type Exhaust: Honda servicing Lubrication system Oil mist 0.11 ± 0.02 mm dealer Oil capacity 2.7 US oz (80 cc) Other No other adjustments needed specifications Recommended operating 41°F ~ 104°F... -
Page 20: Consumer Information
CONSUMER INFORMATION DEALER LOCATOR INFORMATION To find an Authorized Honda Servicing Dealer anywhere in the United REPLACEMENT PARTS, States: OPTIONAL EQUIPMENT, AND SERVICE ITEMS Visit our website: www.hondapowerequipment.com and click on Dealer Locator. Contact an authorized Honda servicing dealer to purchase any of these (or other) Honda Genuine items for your tiller. -
Page 21: Distributor's Limited Warranty
Warranty: Warranty: American Honda will repair or replace, at its option, any part that is proven to American Honda will repair or replace, at its option, any power equipment be defective in material or workmanship under normal use during the accessories, replacement parts, or apparel that are proven to be defective in applicable warranty time period. -
Page 22: Emission Control System Warranty
Your Warranty Rights And Obligations: Honda dealer determines it is defective or causes a failure of a warranted part, your claim for repair of your engine may be denied. If the part in question is not California related to the reason your engine requires repair, your claim will not be denied. - Page 23 NOTES...
- Page 24 Printed on Recycled Paper...
Need help?
Do you have a question about the FG110 and is the answer not in the manual?
Questions and answers