Table of Contents
Advertisement
Quick Links
Advertisement
Table of Contents

Related Manuals for Yamaha CRW-F1DX


Summary of Contents for Yamaha CRW-F1DX
- Page 2 This product, when installed as indicated in the instructions contained in this manual, meets FCC requirements. Modifications not expressly approved by Yamaha may void your authority, granted by the FCC, to use the product. 2. IMPORTANT: When connecting this product to accessories and/or another product use only high quality shielded cables.
- Page 3 Laser Product Class: Class 1 CAUTION Laser Diode Properties Use of controls or adjustments or performance of Wavelength: 779 789 nm procedures other than those specified herein may result – Pulse Durations and Max. Output in hazardous radiation exposure. at the Objective Lens of the Laser Pickup Unit DC Erase Mode: Max.
- Page 5 OWNER’S MANUAL...
- Page 6 Contact the store of purchase or your nearest Yamaha dealer (listed at the back of this manual). Be sure that the devices are electrically grounded to avoid the risk of electrical shock.
- Page 7 Prior to cleaning the drive, always unplug the computer or do not handle the plug with wet hands to avoid the risk of electrical shock. Use the included AC adapter to avoid the risk of fire or malfunction. Clean the AC power plug regularly to avoid the risk of fire due to insulation failure such as humidity.
- Page 8 Have the device serviced regularly to avoid internal dust buildup that can cause malfunction, damage or fire. For service information and service charges, contact the store of purchase or your nearest Yamaha dealer (listed at the back of this manual).
- Page 9 WARRANTY YAMAHA AND ITS SUPPLIERS ACCEPT NO LIABILITY FOR ANY PROBLEMS THAT OCCUR AS A RESULT OF ANY OPERATIONS CARRIED OUT OTHER THAN THOSE STATED IN THE MANUAL FOR THIS PRODUCT, OR THE LOSS OR THE DAMAGE OF ANY DATA CAUSED AS A RESULT OF USING THIS PRODUCT.
-
Page 10: Table Of Contents
Connect with USB for Macintosh............22 Connect with IEEE1394 for Windows ..........29 Connect with USB for Windows ............35 Connecting/Disconnecting the CRW-F1DX Drive to/from the Computer ... 42 Loading/Ejecting a Disc ............43 Troubleshooting ..............45 Firmware ................53 CRW-F1DX Drive Specifications .......... -
Page 11: Features Of The Crw-F1Dx Drive
High speed writing/reading The CRW-F1DX drive supports up to 44X-speed writing for CD-R discs, up to 24X- speed writing/rewriting for CD-RW discs, and up to 44X-speed data reading or digital audio data extraction. The Full CAV method enables 44X-speed writing and high fidelity stable writing at once for CD-R discs. - Page 12 The CRW-F1DX drive uses IEEE1394 and USB (supporting USB 2.0) for the interface. The interface adjusted to your computer environment can be easily switched by the selector. The CRW-F1DX drive supports the hot plug function that enables you to connect/ disconnect the drive while a computer is turned on.
-
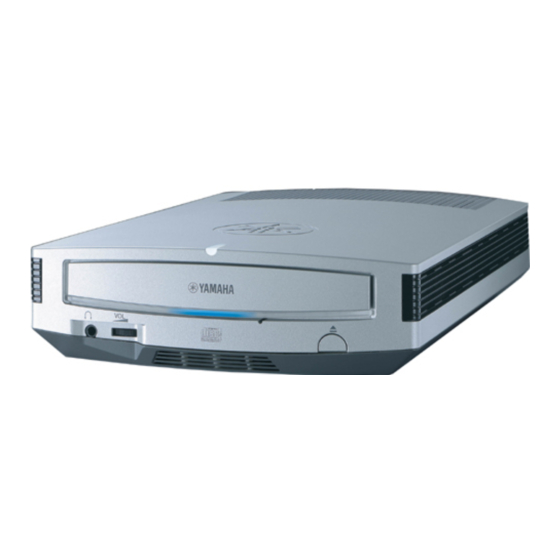
Page 13: Names And Functions Of Parts
Status LED Holds the disc. It is opened or closed by Indicates the operational status of the pressing the eject button. (P. 43) CRW-F1DX drive by its colors and blinking patterns. Power LED Lights or blinks blue Lights when the drive is turned on. -
Page 14: Rear Panel
Names and Functions of Parts Rear Panel LINE OUT jacks (L/R) IEEE1394 ports Connect a device such as external speakers Connect the included IEEE1394 cable. or a sound card. (P. 16 for Macintosh, P. 30 for Windows) Power switch (STANDBY/ON) 1394/USB selector Turns the power on/off. -
Page 15: Precautions On Use
RW drive, take due care not to infringe the copyright. Disclaimer of Indemnity • Yamaha assumes no liability for the loss of any profits incurred as a result of the loss or corruption of data written on a CD-R or CD-RW, for any loss or damage... -
Page 16: Compatible Discs
Do not use any irregular shaped discs such as heart-shaped or star-shaped discs to avoid the risk of malfunction. Recordable disc type The CRW-F1DX drive is compatible with the following discs. CD-R discs • Orange Book Part2 Vol.1 Version3.1-compliant discs •... - Page 17 A CD-R/RW drive without the logo may not recognize a High Speed CD-RW disc, resulting in computer malfunction. Refer to the Yamaha website to check the disc compatibility prior to using a YAMAHA CD-R/RW drive without the logo for a High Speed CD-RW disc.
-
Page 18: System Requirements
A CD-R/RW drive without the logo may not recognize a High/Ultra Speed CD-RW disc, resulting in computer malfunction. Refer to the Yamaha website to check the disc compatibility prior to using a YAMAHA CD-R/RW drive without the logo for a High/Ultra Speed CD-RW disc. - Page 19 6X. The data reading speed is up to 6X. • CD-ROM drive Note The CRW-F1DX drive cannot be used to boot the computer or to set up an operating system. • Hard drive space Writing data on a CD-R/RW disc requires 50MB to 100MB of free space as a working area on the hard drive.
- Page 20 • CD-ROM drive Note • A CD-ROM drive other than the CRW-F1DX drive is required to install the device drivers (for USB connection). • The CRW-F1DX drive cannot be used to boot the computer or to set up an operating system.
- Page 21 (a total of up to 1.1GB). However, hard drive space for image files is not required when directly writing onto a CD-R/RW disc from a hard drive or CD-ROM using the CRW-F1DX drive (on-the-fly writing).
- Page 22 • USB port (USB 2.0 compatible) A USB port is required to connect the CRW-F1DX drive to the computer. The CRW-F1DX drive needs to be connected to the USB port on the computer. The drive connected to the computer via a USB hub may not operate properly.
- Page 23 Connecting the drive to a USB port with USB 1.1 specifications When the CRW-F1DX drive is connected to a USB 1.1-compliant port on the computer, the drive operates with USB 1.1 specifications. For secure data writing, activate Buffer Underrun Protection and set the writing speed to 8X for a CD-R disc or 10X for a CD-RW disc with the writing software.
-
Page 24: Preparing The Crw-F1Dx Drive
Preparing the CRW-F1DX Drive Serial Number The serial number, printed on the label on the bottom of your CRW-F1DX drive, is required when you have a question about the drive or need user support services. Please write the serial number down in the space below. It may be difficult to check the serial number after setting up the drive or for any other reason. -
Page 25: Connect With Firewire (Ieee1394) For Macintosh
(STANDBY). Set the 1394/USB selector of the CRW-F1DX drive to IEEE1394. Note Be sure to set the 1394/USB selector while the power switch of the CRW-F1DX is turned off (STANDBY). Interface cannot be switched if the power switch is on. - Page 26 Connect the included IEEE1394 cable to the CRW-F1DX drive. IEEE1394 port IEEE1394 cable (included) IEEE1394 connector Note The IEEE1394 cable can be connected to either IEEE1394 port of the CRW-F1DX drive. Connect the included AC adapter to the DC-IN connector of the CRW-F1DX drive. DC-IN connector...
- Page 27 • The AC adapter consumes 1 W of power while connected to the wall socket even if the power switch of the CRW-F1DX drive is turned off. Remove the power cable from the wall socket when not using the CRW-F1DX drive for a...
- Page 28 Preparing the CRW-F1DX Drive (Macintosh – FireWire) Turn on the power switch of the CRW-F1DX drive. Lights Note When turning on the CRW-F1DX drive, be sure that the power LED lights. (P. 3) Connect the included IEEE1394 cable to the computer. FireWire (IEEE1394) ports...
- Page 29 To connect multiple FireWire (IEEE1394) devices, refer to “Connecting Multiple IEEE1394 Devices.” (P. 61) Check recognition of the CRW-F1DX drive. After connecting the CRW-F1DX drive to the computer, follow the steps below to check that the drive is recognized by the computer properly. For Mac OS 9.1 and 9.2 Select the Apple menu in the menu bar, then Apple System Profiler and Device and Volume tab.
- Page 30 Mac OS. In such a case, contact the store of purchase or your nearest Yamaha dealer (listed at the back of this manual). • The FireWire version in Mac OS that supports the CRW-F1DX drive is 2.0 or later.
-
Page 31: Install The Cd Writing Software
Mac OS X. Contact the manufacturer of the computer. • If “CRW-F1DX” is not shown even with the “FireWire” item shown, the CRW- F1DX drive is not recognized by Mac OS. In such a case contact the store of purchase or your nearest Yamaha dealer (listed at the back of this manual). -
Page 32: Connect With Usb For Macintosh
(STANDBY). Set the 1394/USB selector of the CRW-F1DX drive to USB. Note Be sure to set the 1394/USB selector while the power switch of the CRW-F1DX is turned off (STANDBY). Interface cannot be switched if the power switch is on. - Page 33 Connect the included USB cable to the CRW-F1DX drive. The included USB cable has two types of plugs: Series A plug and Series B plug. Series A plug Series B plug Insert the Series B plug (with a quadratic section) of the included USB cable to the USB port of the CRW-F1DX drive.
- Page 34 • The AC adapter consumes 1 W of power while connected to the wall socket even if the power switch of the CRW-F1DX drive is turned off. Remove the power cable from the wall socket when not using the CRW-F1DX drive for a...
- Page 35 Turn on the power switch of the CRW-F1DX drive. Lights Note When turning on the CRW-F1DX drive, be sure that the power LED lights. (P. 3) Connect the included USB cable to the computer. Connect the Series A plug (with a rectangular section) of the included USB cable to the Macintosh standard USB port.
- Page 36 Yamaha dealer (listed at the back of this manual). • The USB version in Mac OS that supports the CRW-F1DX drive is 1.2 or later. • The extension files that support the CRW-F1DX drive are required to mount and read the disc even if the drive is recognized by Apple System Profiler.
- Page 37 • If “YAMAHA CRW-F1E” is not shown even with the “USB” item shown, the CRW-F1DX drive is not recognized by Mac OS. In such a case contact the store of purchase or your nearest Yamaha dealer (listed at the back of this manual).
- Page 38 CD writing software when the drive is recognized by the CD writing software properly. For details about how to check recognition of the CRW-F1DX drive with the CD writing software, refer to the instruction for the CD writing software.
-
Page 39: Connect With Ieee1394 For Windows
(STANDBY). Set the 1394/USB selector of the CRW-F1DX drive to IEEE1394. Note Be sure to set the 1394/USB selector while the power switch of the CRW-F1DX is turned off (STANDBY). Interface cannot be switched if the power switch is on. - Page 40 Preparing the CRW-F1DX Drive (Windows – IEEE1394) Connect the included IEEE1394 cable to the CRW-F1DX drive. IEEE1394 port IEEE1394 cable (included) IEEE1394 connector Note • The included IEEE1394 cable has a 6-pin IEEE1394 connector at each end. Depending on your computer environment such as a laptop computer with a 4- pin type IEEE1394 port, an IEEE1394 cable with a 4-pin IEEE1394 connector at one end may be required.
- Page 41 • The AC adapter consumes 1 W of power while connected to the wall socket even if the power switch of the CRW-F1DX drive is turned off. Remove the power cable from the wall socket when not using the CRW-F1DX drive for a...
- Page 42 Preparing the CRW-F1DX Drive (Windows – IEEE1394) Turn on the power switch of the CRW-F1DX drive. Lights Note When turning on the CRW-F1DX drive, be sure that the power LED lights. (P. 3) Connect the included IEEE1394 cable to the computer. IEEE1394 port IEEE1394 cable (included) Note To connect multiple IEEE1394 devices, refer to “Connecting Multiple IEEE1394...
- Page 43 Check recognition of the CRW-F1DX drive. After connecting the CRW-F1DX drive to the computer, follow the steps below to check that the drive is recognized properly by the computer. For Windows XP Select Start on the task bar, then Control Panel, System, Hardware tab, and Device Manager.
-
Page 44: Install Cd Writing Software
Hardware tab, and Device Manager. The Device Manager dialog box appears. Check that the following icons are shown. “YAMAHA CRW-F1DX IEEE 1394 SBP2 Device” in the “DVD/CD- ROM drives” item “IEEE 1394 Bus host controllers” For Windows 98 Second Edition/Me Select Start on the task bar, then Settings, Control Panel, System, and Device Manager tab. -
Page 45: Connect With Usb For Windows
(STANDBY). Set the 1394/USB selector of the CRW-F1DX drive to USB. Note Be sure to set the 1394/USB selector while the power switch of the CRW-F1DX is turned off (STANDBY). Interface cannot be switched if the power switch is on. - Page 46 Preparing the CRW-F1DX Drive (Windows – USB) Connect the included USB cable to the CRW-F1DX drive. The included USB cable has two types of plugs: Series A plug and Series B plug. Series A plug Series B plug Insert the Series B plug (with a quadratic section) of the included USB cable to the USB port of the CRW-F1DX drive.
- Page 47 • The AC adapter consumes 1 W of power while connected to the wall socket even if the power switch of the CRW-F1DX drive is turned off. Remove the power cable from the wall socket when not using the CRW-F1DX drive for a...
- Page 48 Turn on the power switch of the CRW-F1DX drive. Lights Note When turning on the CRW-F1DX drive, be sure that the power LED lights. (P. 3) Connect the included USB cable to the computer. Connect the Series A plug (with a rectangular section) of the included USB cable to the USB port of the USB interface card.
-
Page 49: Install The Device Drivers
Note • The CRW-F1DX drive is required to be connected to the USB port on the computer. The drive connected to the computer via a USB hub may not operate properly. • When the CRW-F1DX drive is connected to a USB 1.1-compliant port on the computer, the drive operates with USB 1.1 specifications. - Page 50 Windows XP.) The drive name is not shown or there is mark. The CRW-F1DX drive has not been recognized properly. Check the cable connections and settings. In some computer environments, a green mark may appear on the left side of checking icons. This is not a malfunction.
- Page 51 Control Panel options on the left side of the window. Check that the following icons are shown. “YAMAHA CRW-F1E” in the “CDROM” item. “USB CD-ROM” in the “Storage device” item. “USB Mass Storage Device” in the “Universal Serial Bus controllers”...
-
Page 52: Connecting/Disconnecting The Crw-F1Dx Drive To/From The Computer
The CRW-F1DX drive can be connected/disconnected whether the computer and the drive are turned on or off (hot plug). However, follow the steps below to disconnect the CRW-F1DX drive from the computer turned on or to turn off the drive connected to the computer. -
Page 53: Loading/Ejecting A Disc
Loading/Ejecting a Disc Prior to the operation, check that the CRW-F1DX drive is turned on. Open the disc tray by pressing the eject button. Press the eject button Place the disc onto the disc tray properly with its label facing upward. - Page 54 Turn off the CRW-F1DX drive. Insert the thin pin-like object straight into the manual eject hole, and push it in. When the disc tray opens, remove the disc. Manual eject hole Turn on the CRW-F1DX drive, and close the disc tray.
-
Page 55: Troubleshooting
If not, connect them properly, and then turn on the CRW-F1DX drive. If the CRW-F1DX is not turned on (the power LED does not light) even if they are connected properly, contact the store of purchase or your nearest Yamaha dealer (listed at the back of this manual). - Page 56 Is the CRW-F1DX drive connected properly to the computer with the USB cable? Check that the USB cable is fully connected to the CRW-F1DX drive and the computer. (P. 23 and 25 for Macintosh, P. 36 and 38 for Windows)
- Page 57 The disc tray does not open when you press the eject button. Is the CRW-F1DX drive turned on? (Does the power LED light?) Refer to “The CRW-F1DX drive is not turned on when the power switch is ON. (The power LED does not light.).” (Troubleshooting, Item 1) Is any CD writing software being used? Some CD writing software prohibits ejecting while accessing.
- Page 58 Drag the disc icon into the Trash and drop it there to unmount the disc to open the disc tray. Is the disc tray opened when all cables is removed from the CRW-F1DX drive? Remove all cables from the drive while the AC adapter is connected. Turn on the drive and press the eject button.
- Page 59 The extension files come with the CD writing software. Does the status LED of the CRW-F1DX drive light correctly when a disc is inserted? When a disc is inserted, the status LED will blink blue for a moment and then light blue.
- Page 60 Troubleshooting Uncheck “Enable digital CD audio for this CD-ROM device” in the “Digital CD Playback” item. Uncheck (This screen is an example on Windows XP.) Start “Windows Media Player.” In the menu bar, select Tools, Options, Devices tab, CD-RW Drive, and Properties. Select “Analog”...
- Page 61 CRW-F1DX drive, the data transfer between those two will be slowed, which may cause failure in writing a disc. • When the CRW-F1DX drive is connected to a USB 1.1-compliant port on the computer, the drive operates with USB 1.1 specifications. For secure data writing, activate Buffer Underrun Protection and set the writing speed to 8X for a CD-R disc or 10X for a CD-RW disc with the writing software.
- Page 62 In the CD-RW Drive Properties dialog box, select the Recording tab, and uncheck “Enable CD recording on this drive.” Uncheck CD writing software must support the CRW-F1DX drive in order to recognize the drive. Contact the manufacturer of your CD writing software to see whether the software...
-
Page 63: Firmware
Check the firmware version with the CD writing software. For Windows 98 Second Edition/Me In the Device Manager dialog box (P. 34, 41), select YAMAHA CRW-F1E to display the YAMAHA CRW-F1E Properties dialog box, and then select the Settings tab. -
Page 64: Crw-F1Dx Drive Specifications
CRW-F1DX Drive Specifications Supported Formats Write Read Play back CD-DA CD TEXT CD-ROM Mixed Mode CD-ROM (CD-ROM+CD-DA) CD-ROM XA *2 *3 Photo CD Video CD CD-i — CD EXTRA CD-MRW includes multisession proper disc required proper application software required proper application software may be required depending on the format... - Page 65 Data Transfer Rate (Mode 1) 150KB/s (1X) to 6,600KB/s (44X) Interface IEEE1394-a: Two 6-pin connectors (power not supplied to port) USB 2.0/1.1 Burst Transfer Rate IEEE1394-a compliant: 400 Mbps (max.) USB 2.0 (HIGH SPEED MODE): 480 Mbps (max.) USB 1.1 (FULL SPEED MODE): 12 Mbps (max.) Data Buffer Size 8MB (3,176 sectors) Average Access Time...
- Page 66 CRW-F1DX Drive Specifications AC adapter (LSE0107A1236) Rated Input Voltage AC 100 to 240 V Rated Input Current 1.0 A or less Rated Output Voltage DC 5 V, 12 V Rated Output Current 3.0 A Terminal Output Polarity DC 12 V Operating Environment Temperature: 5 to 35 ºC...
- Page 67 AS/NZ 3548 Class B Information New Zealand Technology Equipment Japan Safety Electricity Electrical Appliance and Material Safety Emission VCCI Class B Information Technology Equipment Note that the specifications of the CRW-F1DX drive are subject to change without notice due to improvements.
-
Page 68: Technical Notes
When buffer underrun almost happens, Buffer Underrun Protection temporarily suspends the writing process. Writing resumes when enough data has accumulated in the buffer memory. Buffer Underrun Protection in the CRW-F1DX drive is extremely accurate, resulting in seamless recording before and after suspension. - Page 69 Session-at-Once (SAO) This method is used to write data on a disc on a session-by-session basis. Unlike Track-at-Once described above, Session-at-Once enables you to record multiple tracks onto a disc at a time. CD EXTRA, for example, uses this method to write multiple pieces of audio data (or multiple tracks) in the first session and information required for computers in the second session.
-
Page 70: Ieee1394
Technical Notes CD-MRW (CD Mount Rainier ReWriting) This method is a new standard of packet writing for a CD-RW disc and supports defect control by the drive, background formatting, and disc ejecting during formatting. It enables you to use a CD-RW disc like a floppy disk. Note Formatting a CD-RW disc using CD-MRW reduces its storage capacity by about 150MB since CD-MRW requires exclusive disc space. -
Page 71: Connecting Multiple Ieee1394 Devices
Connecting Multiple IEEE1394 Devices The following describes how to connect multiple IEEE1394 devices including the CRW-F1DX drive to the computer. Connecting in a daisy-chain This method is used to connect in series multiple IEEE1394 devices to one IEEE1394 port. Up to 17 IEEE1394 devices (including the host adapter) can be connected through one channel. - Page 72 CRW-F1DX drive, the data transfer between those two will be slowed, which may cause failure in writing a disc. • The IEEE1394 ports on the CRW-F1DX drive have 6-pin connectors, but do not supply power (IEEE1394 bus power).
- Page 73 Distributors and Head Offices / Vertriebs- und Hauptgeschäftsstelle Distributeurs et sièges sociaux / Distribuidores y Casas matrices If you have any questions, please contact the store of purchase or your nearest Yamaha dealer listed below. Contact Yamaha Corporation Japan from outside of the listed countries.
Need help?
Do you have a question about the CRW-F1DX and is the answer not in the manual?
Questions and answers