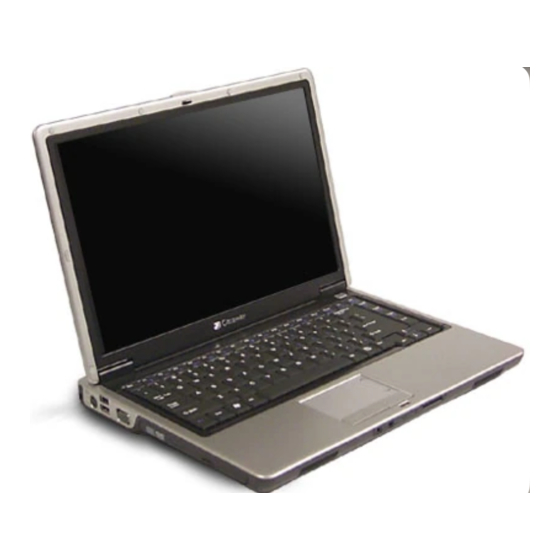
Gateway Notebook Hardware Reference Manual
Notebook
Hide thumbs
Also See for Notebook:
- Reference manual (170 pages) ,
- User manual (160 pages) ,
- User manual & code book (128 pages)
Table of Contents
Advertisement
Quick Links
Advertisement
Table of Contents

Related Manuals for Gateway Notebook


Summary of Contents for Gateway Notebook
- Page 1 HARDWARE REFERENCE Gateway Notebook...
-
Page 3: Table Of Contents
Turning off your notebook ..........14 Restarting (rebooting) your notebook ........15 Using the status indicators . - Page 4 Connecting a video camera to your notebook ......31 Using an optional port replicator ........31 Changing batteries .
-
Page 5: Chapter 1: About This Reference
CHAPTER 1 About this reference • About this guide • Accessing the online User Guide • Gateway contact information • Microsoft Certificate of Authenticity • For more information... -
Page 6: About This Guide
About this guide This guide includes information and maintenance instructions that are specific to your model of Gateway notebook. For all other notebook information, see your online User Guide. Accessing the online User Guide In addition to this guide, the online User Guide has been included on your hard drive. -
Page 7: Microsoft Certificate Of Authenticity
The Microsoft Certificate of Authenticity label found on the bottom of your notebook includes the product key code for your operating system. For more information For more information about your notebook, visit Gateway’s Support page at www.gateway.com or the Web address shown on your notebook’s label. The Support page also has links to additional Gateway documentation and detailed specifications. - Page 8 CHAPTER 1: About this reference www.gateway.com...
-
Page 9: Chapter 2: Checking Out Your Gateway Notebook
CHAPTER 2 Checking Out Your Gateway Notebook • Identifying features • Connecting the AC adapter • Connecting the dial-up modem • Connecting to a cable or DSL modem or to an Ethernet network • Starting your notebook • Turning off your notebook •... -
Page 10: Identifying Features
LED solid red - battery is malfunctioning. ■ Power indicator LED on - notebook is on. ■ LED blinking - notebook is in Standby mode. ■ LED off - notebook is off. ■ Memory card reader Insert a memory card from a digital camera, MP3 player, PDA, or cellular telephone into the memory card reader. -
Page 11: Left
S-Video out jack Component Icon Description Kensington™ Secure your notebook to an object by connecting a Kensington cable lock to this lock slot slot. S-Video out jack Plug an S-Video device, such as a television, into this jack. For more information, “Viewing the display on a television”... -
Page 12: Back
Helps cool internal components. Warning: Do not work for long periods with the notebook resting on your lap. If the air vents are blocked, the notebook may become hot enough to harm your skin. Caution: Do not block or insert objects into these slots. If these slots are blocked, your notebook may overheat resulting in unexpected shutdown or permanent damage to the notebook. -
Page 13: Bottom
UL 1950 for use only with port replicators designed for your Gateway notebook. Battery Provides power when the notebook is not plugged into AC power. Battery lock Slide to unlock the battery. For more information, see “Changing batteries”... -
Page 14: Keyboard Area
CHAPTER 2: Checking Out Your Gateway Notebook www.gateway.com Keyboard area Power button Keyboard Status indicators Touchpad Component Icon Description Power button Press to turn the power on or off. You can also configure the power button for Standby/Resume mode. For more information on configuring the power button mode, see “Changing Power-Saving Settings”... -
Page 15: Connecting The Ac Adapter
Connecting the AC adapter Connecting the AC adapter You can run your notebook using an AC adapter or your notebook’s battery. The Warning Do not attempt to disassemble the AC battery was shipped to you partially charged. You should use the AC adapter adapter. -
Page 16: Protecting From Power Source Problems
Connecting the dial-up modem Your notebook has a built-in 56K modem that you can use to connect to a Warning To reduce the risk of fire, use only No. 26 standard telephone line. -
Page 17: Connecting To A Cable Or Dsl Modem Or To An Ethernet Network
Connecting to a cable or DSL modem or to an Ethernet network Your notebook has a network jack that you can use to connect to a cable or DSL modem or to an Ethernet network. To connect to a cable or DSL modem or to an Ethernet network:... -
Page 18: Starting Your Notebook
If you are starting your notebook for the first time, follow the on-screen instructions to set up your notebook. Waking up your notebook When you have not used your notebook for several minutes or if you close the Tips & Tricks For more information about Standby LCD panel without turning off your notebook, it may enter a power-saving mode, see “Changing power modes”... -
Page 19: Restarting (Rebooting) Your Notebook
Click End Task. Click X in the top-right corner of the Windows Task Manager dialog box. If your notebook does not respond, turn it off, wait ten seconds, then turn it on again. As a part of the regular startup process, a program to check the disk status... -
Page 20: Using The Status Indicators
CHAPTER 2: Checking Out Your Gateway Notebook www.gateway.com Using the status indicators Status indicators inform you when a drive is being used or when a button has Important If none of the indicators are on, you may been pressed that affects how the keyboard is used. The status indicators are... -
Page 21: Using The Keyboard
Using the keyboard Using the keyboard Your notebook features a full-size keyboard that functions the same as a desktop Tips & Tricks You can attach an external keyboard to computer keyboard. Many of the keys have been assigned alternate functions, the notebook using a USB port. -
Page 22: System Key Combinations
CHAPTER 2: Checking Out Your Gateway Notebook www.gateway.com System key combinations When you press the F key and a system key at the same time, your notebook performs the action identified by the text or icon on the key. Press and hold F , then To... - Page 23 Using the keyboard Press and hold F , then To... press this system key... Skip back one CD track or DVD chapter. Skip ahead one CD track or DVD chapter. Increase the brightness of the display. Decrease the brightness of the display.
-
Page 24: Using The Ez Pad Touchpad
CHAPTER 2: Checking Out Your Gateway Notebook www.gateway.com Using the EZ Pad touchpad The EZ Pad™ consists of a touchpad, two buttons, and a scroll zone. Tips & Tricks For instructions on how to adjust the double-click speed, pointer speed,... - Page 25 Using the EZ Pad touchpad To... Do this... Move the pointer on the Move your finger around on screen. the touchpad. If you run out of space and need to move the pointer farther, lift your finger, move it to the...
-
Page 26: Adjusting The Volume
CHAPTER 2: Checking Out Your Gateway Notebook www.gateway.com Adjusting the volume You can use the volume control to adjust the overall volume of your notebook. Tips & Tricks For instructions on how to adjust the volume in Windows, see “Adjusting the To adjust the overall volume level using hardware controls: Volume”... -
Page 27: Changing Modules
Changing modules Changing modules Your notebook’s modular bay supports different bay modules, such as a CD drive, combination DVD/CD-RW drive, DVD±RW/CD-RW drive, a second hard drive, a diskette drive, or a secondary battery. Modular bay Online Support: Tech Support Phone:... - Page 28 Reinstall the optional security screw if your notebook has one. Turn your notebook over. Reconnect the optional port replicator. Open the LCD panel. If your notebook is on, click OK to continue working on your notebook. - OR - If your notebook is off, turn it on.
-
Page 29: Using The Cd Or Dvd Drive
Using the CD or DVD drive Using the CD or DVD drive You can use your notebook to enjoy a wide variety of multimedia features. Identifying drive types Your Gateway notebook may contain one of the following drive types. Look on the front of the drive for one or more of the following logos: If your drive has this logo... -
Page 30: Inserting A Cd Or Dvd
You can use memory cards to transfer pictures from a digital camera to your notebook. You can also use the memory card reader to transfer data between your notebook and a device that uses memory cards, such as a PDA, MP3 player, or cellular telephone. -
Page 31: Using A Memory Card
Adding and removing a PC Card Your notebook has a PC Card slot (also known as a PCMCIA card slot). This slot accepts one Type II card. You do not need to restart your notebook when changing most cards because your notebook supports hot-swapping. -
Page 32: Installing A Printer, Scanner, Digital Camera, Or Other Peripheral Device
Release the eject button by pressing the PC Card eject button once. Eject the PC Card by pressing the eject button again. Installing a printer, scanner, digital camera, or other peripheral device Your notebook or optional port replicator has one or more of the following Important ® ®... -
Page 33: Viewing The Display On A Projector Or Monitor
LCD panel and viewing simultaneous LCD and external display. Simultaneous display lets you control the display on the projector or monitor. the presentation from your notebook and at the same time face your audience. Important To use a projector or external monitor:... -
Page 34: Viewing The Display On A Television
CHAPTER 2: Checking Out Your Gateway Notebook www.gateway.com Viewing the display on a television The S-Video out jack on your notebook or port replicator lets you view your Important The TV out feature is available only on notebook display on a television screen using a standard S-Video cable. -
Page 35: Connecting A Video Camera To Your Notebook
-OR- mishandled. Do not disassemble, heat above 212°F (100°C), or incinerate. If your notebook is on, is not plugged into an AC outlet, and does not have Dispose of used battery promptly. Keep away from children. a charged secondary battery installed, save your work and turn off the notebook. - Page 36 Slide the battery lock to the unlocked position. Slide the battery release latch. Slide the battery out of the notebook. Slide a recharged battery into the notebook until it snaps into place. Slide the battery lock to the locked position. Turn your notebook over.
-
Page 37: Installing A Secondary Battery
Recalibrating the battery If your notebook unexpectedly goes into Standby mode while you are using it Important Do not interrupt the battery recalibration but the battery charge is not low, you may need to recalibrate your battery. You process. -
Page 38: Ordering Accessories
To order accessories, visit the Accessory Store at www.gateway.com. Batteries If you run your notebook on battery power for extended periods, you may want to buy an additional main battery or a secondary battery so you can swap batteries when necessary. See “Changing batteries”... -
Page 39: Chapter 3: Maintaining And Upgrading Your Notebook
CHAPTER 3 Maintaining and Upgrading Your Notebook • Preventing static electricity discharge • Adding or replacing memory modules • Replacing the hard drive kit • Replacing the keyboard... -
Page 40: Preventing Static Electricity Discharge
CHAPTER 3: Maintaining and Upgrading Your Notebook www.gateway.com Preventing static electricity discharge The components inside your notebook are extremely sensitive to static Warning To avoid exposure to dangerous electrical electricity, also known as electrostatic discharge (ESD). voltages and moving parts, turn off your... - Page 41 Disconnect all peripheral devices connected to the notebook and remove any PC cards. Turn your notebook over so the bottom is facing up, then remove the main battery and optional secondary battery. For more information, see “Changing batteries” on page Remove the keyboard screw.
- Page 42 CHAPTER 3: Maintaining and Upgrading Your Notebook www.gateway.com Use the thumb notch to lift the memory bay cover, then remove it. Be careful not to break off the tabs located on the end of the cover opposite of the thumb notch.
- Page 43 Adding or replacing memory modules If you are removing a module, gently press outward on the clip at each end of the memory module until the module tilts upward. Clip Clip...
- Page 44 If the module does not fit, make sure that the notch in the module lines up with the tab in the memory bay. Replace the memory bay cover, then tighten the cover screws. Insert the battery(ies), then turn your notebook over. Connect the optional port replicator. -OR-...
-
Page 45: Replacing The Hard Drive Kit
Disconnect all peripheral devices connected to the notebook and remove any PC cards. Turn your notebook over so the bottom is facing up, then remove the main battery and optional secondary battery. For more information, see “Changing batteries” on page... - Page 46 CHAPTER 3: Maintaining and Upgrading Your Notebook www.gateway.com Remove the keyboard screw. Screw Loosen the five hard drive bay cover screws (these screws cannot be removed). Screw Screw Screw Screw Screw...
- Page 47 Use the thumb notch to lift the hard drive bay cover, then remove it. Be careful not to break off the tabs located on the end of the cover opposite of the thumb notch. Thumb notch Remove the two screws connecting the hard drive to the notebook. Screw Screw...
- Page 48 CHAPTER 3: Maintaining and Upgrading Your Notebook www.gateway.com Using the plastic tab, slide the old hard drive, then remove it. If your new hard drive already includes the hard drive bracket, go to Step -OR- If you need to move the hard drive bracket from your old hard drive to...
- Page 49 Place the new drive, label side up, onto the bracket so the screw holes line Replace the screws that secure the bracket to the drive. Slide the new hard drive kit into your notebook, then replace the screws that secure the hard drive kit to the notebook.
-
Page 50: Replacing The Keyboard
Disconnect all peripheral devices connected to the notebook and remove any PC cards. Turn your notebook over so the bottom is facing up, then remove the main battery and optional secondary battery. For more information, see “Changing batteries” on page Remove the three keyboard screws. - Page 51 Pull the old cover off the notebook. You will hear small snapping sounds as the cover comes away from the notebook. Gently lift the back edge of the keyboard.
- Page 52 Rotate the keyboard toward you so it lies keys-down on top of your notebook. Lift the black connector clip, then remove the cable. Be careful not to touch or damage any other components. Connector Lift the old keyboard away from the notebook.
-
Page 53: Installing The Keyboard
Gently press the keyboard down until it is flat all the way across. The keyboard should easily fall into place. Be careful not to damage the LCD panel. Place the cover on the notebook, then press down on the cover in several Caution If the cover is not correctly replaced, your places until it clicks in place. - Page 54 CHAPTER 3: Maintaining and Upgrading Your Notebook www.gateway.com...
-
Page 55: Appendix A: Safety, Regulatory, And Legal Information
APPENDIX A Safety, Regulatory, and Legal Information • Important safety information • Regulatory compliance statements • Environmental information • Notices... -
Page 56: Important Safety Information
Warning Do not use this notebook near water or a heat source such as a radiator. ■ To reduce the risk of fire, use only No. 26 Set up the notebook on a stable work surface. - Page 57 Unplug the notebook from the wall outlet and refer servicing to qualified ■ personnel if: The power cord or plug is damaged. ■ Liquid has been spilled into the notebook. ■ The notebook does not operate properly when the operating ■...
-
Page 58: Regulatory Compliance Statements
When in your notebook is well below the RF exposure limits as known at this time. environments where you are uncertain of Because the wireless devices (which may be embedded into your notebook) -
Page 59: United States Of America
2.4 GHz band or 5.15 – 5.35 GHz the authorization to use it. Contact band, may be present (embedded) in your notebook system. This section is only Gateway for service. applicable if these devices are present. Refer to the system label to verify the presence of wireless devices. - Page 60 Changes or modifications not expressly Gateway Companies, Inc. approved by Gateway could void the FCC compliance and negate your authority to 610 Gateway Drive, North Sioux City, SD 57049 operate the notebook. (605) 232-2000 Fax: (605) 232-2023 Caution Product: CA6...
- Page 61 2.4 GHz band and/or 5.15 – 5.35 GHz service or co-channel Mobile Satellite band, may be present (embedded) in your notebook system. This section is only systems, this device is intended to be applicable if these devices are present. Refer to the system label to verify the operated indoors and away from windows to provide maximum shielding.
- Page 62 APPENDIX A: Safety, Regulatory, and Legal Information www.gateway.com Telecommunications per Industry Canada CS-03 (for products fitted with an IC-compliant modem) The Industry Canada label identifies certified equipment. This certification means that the equipment meets certain telecommunications network protective, operation, and safety requirements. The Department does not guarantee the equipment will operate to the users’...
-
Page 63: Laser Safety Statement
Laser safety statement All Gateway systems equipped with CD and DVD drives comply with the Warning Use of controls or adjustments or appropriate safety standards, including IEC 825. The laser devices in these performance of procedures other than components are classified as “Class 1 Laser Products” under a US Department those specified in this manual may result of Health and Human Services (DHHS) Radiation Performance Standard. - Page 64 Gateway is not responsible for inaccurate information which may appear in this manual. For the latest product updates, consult the Gateway Web site at www.gateway.com. In no event will Gateway be liable for direct, indirect, special, exemplary, incidental, or consequential damages resulting from any defect or omission in this manual, even if advised of the possibility of such damages.
- Page 65 Macrovision statement If your notebook has a DVD drive and an analog TV Out port, the following paragraph applies: This product incorporates copyright protection technology that is protected by U.S. patents and other intellectual property rights. Use of this copyright...
- Page 66 APPENDIX A: Safety, Regulatory, and Legal Information www.gateway.com...
-
Page 67: Index
Index external audio external diskette drive AC adapter cable lock external speakers connecting cable modem Firewire connector camera flash drive accessories See digital camera headphone purchasing See digital video camera i.Link safety precautions Caps Lock indicator IEEE 1394 application key keyboard cards arrow keys... - Page 68 Index www.gateway.com DVD/CD-RW indicator numeric keypad DVD±RW installing power status hard drive replacing Standby identifying drive types second hard drive Status installing and replacing system headphone jack multi-format DVD±RW system key combinations hot-swapping recordable DVD toggle display replacing hard drive...
- Page 69 DVD drive accessing indicator muting sound shortcuts source problems opening menu Standby mode status box shutting down notebook navigation keys status indicator smartcard reader network jack turning off notebook locating turning on notebook networking SO-DIMM turning off wireless network...
- Page 70 TV out (S-Video out) jack upgrading USB port VGA port video monitor port projector port S-Video out jack VGA port video camera connecting volume adjusting controls muting system keys waking up notebook Windows...
- Page 72 MAN GAMBIT HW REF GDE R0 3/06...
Need help?
Do you have a question about the Notebook and is the answer not in the manual?
Questions and answers