Table of Contents
Advertisement
Advertisement
Table of Contents

Related Manuals for Extech Instruments S2500THS


Summary of Contents for Extech Instruments S2500THS
- Page 1 S2500THS USER GUIDE VERSION: 2.0 DATE: March 2004...
-
Page 2: Table Of Contents
Table of Contents Getting Started: Declaration of Conformity General Precautions Unpacking the printer Installing and Charging the Battery Reading the LED Status Attaching Belt Loop System Loading Supplies: Adding Paper/Labels Tearing Paper Supply Using the Printer: Initial power up and self-test Connecting the Printer Communications: Serial RS232C Communications: IrDA... -
Page 3: Declaration Of Conformity
285 Bear Hill Road, Waltham, MA 02451, USA Telephone: +1 781 890 7440 Declares that the Product Product Name: Portable Receipt Printer Model Number: S2500THS; S1500T Optionally Containing: Bluetooth™ radio short range OEM module from connectBlue ab, cB-0701-01; FCC ID PVH 070101. -
Page 4: General Precautions
General Precautions Before using this product be sure to read through this manual. After reading please • keep the manual in a safe place for future reference. The information contained herein is subject to change without notice of any type. •... -
Page 5: Unpacking The Printer
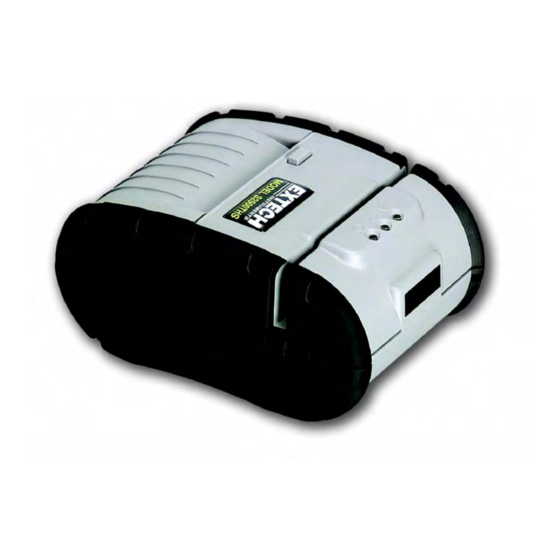
1. Getting Started 1.1 Unpacking the Printer: The S2500THS and S1500T portable printers are full featured portable receipt printers designed for varied job environments including field service, field sales, hospitality and restaurants, ticketing and many others where point of service receipts are required. - Page 6 Korea. Do not use a charger not approved by Extech for use with the S2500THS. Use of an unapproved charger could damage the battery pack or the printer and will void the warranty. The battery terminals are well recessed inside the printer. Do not allow them to contact conductive material since this may create a short circuit which could cause injury or start a fire.
-
Page 7: Reading The Led Status
1.3 Reading the LED Status: This table explains the LED indicator status. Refer to Figure 4 for the locations described for ON/OFF and FEED pushbutton switches and AC adaptor socket LED Indicator State Status Multi Function: Green --- Printer is on and ready to receive data. -
Page 8: Loading Supplies
2. Loading Supplies 2.1 Adding Paper/Labels: The printer can print text, bar codes and graphics on thermal receipt paper. See “Supply Specifications” for the width, thickness requirements and approved vendors. Follow these steps to load printer paper. Press down on the button on the top cover (next to the Extech label) as shown in Figure The paper door will pop open a short way. -
Page 9: Using The Printer
Using the tear bar is the only way to tear the paper. Pulling up and pulling sideways without using the tear bar can cause a paper jam due to paper misalignment in the printhead mechanism. 3. Using the Printer 3.1 Initial power up and self-test Once the Battery is charged and the paper is loaded an initial power up self-test can be performed. -
Page 10: Connecting The Printer
The first few lines of self-test show the printer firmware version, the current printer settings (for example IrDA or Serial mode) and a list of any optional or special features installed. 3.2 Connecting the Printer The 2500THS printers support Serial RS232 and IrDA compatible infrared communication interfaces. - Page 11 Note: Be careful when changing dip switch settings. Carefully use a pointer on the dip switch you are going to change. DO NOT use a screw driver or apply excessive force. Developer’s refer to Programming Manual for more information In order for changes to the dip switch configuration to take effect, the printer power must be reset.
-
Page 12: Communications: Serial Rs232C
3.3 Communications: Serial The RS232C Interface signals for the 2500THS Series printers are terminated on a 6 PIN RJ type data connector located on the side of the printer. Six connections are provided from the Serial Interface to the host computer. TABLE 3 below lists the Serial Interface signals and pin outs on the RJ connector and the connector pin locations are shown in... -
Page 13: Communications: Bluetooth
3.5 Bluetooth Communications (Option): All Dip Switches must be in the <OFF> position Note: Adjust settings to match those of the Bluetooth module in your computing device The printer can be powered up by pressing the power <On/Off> switch When powered up in Bluetooth mode, the printer will not enter a “sleep” mode and will remain active waiting for the wireless print command Pressing the power <On/Off>... -
Page 14: Programming Information
3.7 Programming Information: This section lists the printer control commands strings. Note: System Developers: Please refer to S2500T programmer’s manual for further details. Other features may be available and are described in the programmer’s manual 3.7.1 ASCII CONTROL CHARACTERS: Character Hex/Dec CONTROL ACTION 04/04... -
Page 15: Printer Font Commands
3.7.2 Printer Font Commands – Courier Character Set: Font Name Character size (W x H) Command String 24 CPI normal 8x23 ESC+'k'+'5' 21 CPI normal 9x23 ESC+'k'+'4' 19 CPI normal 10x23 ESC+'k'+'3' 16 CPI normal 12x23 ESC+'k'+'2' 12 CPI normal 16x23 ESC+'k'+'1' 13 CPI rotated... -
Page 16: Printer Maintenance
3.7.7 Printer Supervisory and Control Commands: Command String Printer Action Buffer, power timer & battery status Buffer status ESC - ‘P’ –‘^’ Print Battery Voltage ESC – ‘P’ – alpha Time and date print and control ESC – ‘M’ - ‘000’ - Cr disable the power down timer ESC - ‘M’... -
Page 17: Charging The Printer Battery
Moisten another cotton swab and rub the swab across the tear bar to remove any build-up Note: You may experience dust build-up depending on the environment and the quality of the paper supply you use. If this occurs, use a can of compressed air to blow dust and paper debris out of the printer. -
Page 18: Battery And Safety Information
The AC power portion of the circuit appears ok Disconnect the AC Adapter once the battery has charged for 5 minutes or so. Press and hold the <FEED> switch, then press and release the <ON/OFF> switch and then release the <FEED> switch. The printer will print a “self test” receipt If the self test receipt is printed, the DC power is ok Press <ON/OFF>... -
Page 19: Trouble Shooting
4.6 Trouble Shooting: Problem Action Does not feed paper or has Remove any jammed supply a paper jam. Reload paper supply. Does not print Check or replace the printer’s battery Make sure the paper supply is loaded correctly, not backwards. Verify communication between the host device and the printer by disconnecting the communication cable and performing... -
Page 20: Printer Supplies
4.7 Printer Supplies: Part Number Description 78328I1 S2500THS PKG 120v (US Plug) 78328I1R S2500THS MCR PKG 120v (US Plug) 757060 2500THS Thermal paper pack (2.25”/57 mm, 5 rolls per pack) 7A1000011 2500THS Li-Ion Battery Cartridge: 7.4VDC– 1800mA 157120 Battery charger adapter 2500THS Input 120VAC/Output 10VDC @ 1.4A (US Plug) -
Page 21: Specifications
5 Specifications 5.1 Printer Specifications: Height: 2.56 inches (64mm) Width: 3.93inches (98mm) Length: 5.3 inches (135mm) Weight: w/battery & supply 1.2 lbs. (0.55 g) Shipping weight: 2.8 lbs. (1.31 kg) Power: 7.4 V Li-Ion battery Operating Temp. Limits: 41F to 104F (5 to 40C) Storage Temp. - Page 22 FIGURE 4 – 2500THS Features 1. Power (Green)/Low Power (Yellow) dual LED indicator 2. Charge(Yellow) LED indicator 3. MCR(Green)/Fault(Red) dual LED indicator 4. Paper Door Release Button 5. ON/OFF Button 6. Paper Feed Button 7. MCR Swipe 8. AC Adapter Plug 9.
-
Page 23: Regulatory Notes
5.3 Regulatory Notes: This equipment has been tested and found to comply with the limits for a Class B digital device, pursuant to Part 15 of the FCC rules. These limits are designed to provide reasonable protection against harmful interference in a residential installation. This equipment generates, uses and can radiate radio frequency energy and, if not installed and used in accordance with the instructions, may cause harmful interference to radio communications.
Need help?
Do you have a question about the S2500THS and is the answer not in the manual?
Questions and answers