Table of Contents
Advertisement
Quick Links
Advertisement
Table of Contents

Summary of Contents for DBLTek ROIP302 Series
-
Page 1: User Manual
ROIP302 Series User menu Cross-Network Gateway (Radio, VOIP, GSM, Public Announce) User Manual ROIP302 Series Version:1.0 2010-7-13 For environmental protection, please view this manual electronically and only print the pages you need. www.dbltek.com... -
Page 2: Table Of Contents
ROIP302 Series User menu Content 1、 Important Notices 2、 Gift Box Check List 3、 Overview 4、 Installation 5、 Default Factory Settings 6、 Web Configurations 7、 Call Settings 8、 Operating Instructions 9、 Application Examples 10、 Hardware Specifications 11、 Software Specifications 12、 Miscellaneous 13、... -
Page 3: Important Notices
ROIP302 Series User menu Important Notices 1、 This product is used to link up the civilian radio network, internet, and cellular phone network. Its operation and performance rely on the broadband network connections via private and/or public networks and the cellular phone networks. - Page 4 ROIP302 Series User menu 1 x Main Unit 1 x AC/DC Adapter Input: 110/220VAC Output: 12VDC, 2A 3 x PTT Adapter Cables 1 x Ethernet Cable www.dbltek.com...
- Page 5 VoIP world and the cellular world easily. It truly makes voice communications across multiple networks possible. RoIP302 series is developed based on VoIP technology to realize RoIP functions in order to create a new type of gateway to bridge voice communications across multiple networks (Radio, Cellular, VoIP).
-
Page 6: Theory Of Operation
ROIP302 Series User menu Theory of Operation The diagram below shows the concept of how RoIP bridge the voice communication two radio terminals at two different locations. The PTT Interface Cable provided is used to connect between the RoIP and the radio terminal. - Page 7 ROIP302 Series User menu master and the other will register to the master. Please make sure that both RoIP302s do not have the same Group SIP Number. The diagram below demonstrates each RoIP302 are connected to 3 Radio Terminals. Each terminal is assigned to a different group.
-
Page 8: Application Examples
ROIP302 Series User menu Please note that when more channels are used, the higher bandwidth is required and the poor the performance of the system is. It is recommended that the user needs to insure sufficient bandwidth is available and the network connection is stable before implementing a large network. - Page 9 ROIP302 Series User menu Application example 2: Link up radio network at multiple locations - As shown in the application diagram above, four locations can be linked up via one RoIP302GM and three RoIP302G. The RoIP302GM has a built-in SIP server and the group transmit capability to up to 12 SIP clients.
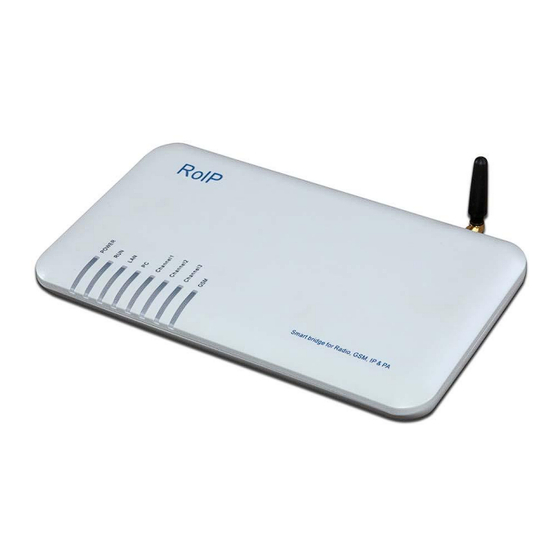
- Page 10 ROIP302 Series User menu Model Nomenclature Installation a)Back Panel Label Name Description Switch Remote control: Relay switch with 220VAC input and 500 mA load current. Channel 3 6-pin RJ11port for PTT Adapter Cable Channel 2 6-pin RJ11port for PTT Adapter Cable...
- Page 11 ROIP302 Series User menu b) LED Indicators LED Name Function Description Power Power Lights up when the power is connected. RoIP Status Flashes every 250ms indicates the device is not ready. Flashes every 500ms indicates the device is ready. LAN port status Lights up when the LAN port is connected.
- Page 12 ROIP302 Series User menu e)Switch Port The built-in relay switch is connected to the middle two pins of the RJ-11 socket. It acts as an ON/OFF switch for the external system connected. f) SIM Card Slot The cell Phone SIM slot is located at the bottom of the device.
-
Page 13: Factory Default Settings
ROIP302 Series User menu iii. Connect the WAN Port to a router, network switch, ADSL/Cable Modem for access an external network or the public network. iv. Connect the LAN Port to a local PC or a local Ethernet network (LAN). - Page 14 ROIP302 Series User menu Device Configuration Via Built-in Web Server The built-in web server provides a comprehensive way to fully program the device manually. Web Server Login There are two methods to access the built-in web server. Method 1 is to access the built-in web server via the LAN port.
- Page 15 ROIP302 Series User menu Enter this IP in the address field of a web browser to get a login window as described in Method Status This is the default page when you first login to the device web server. It consists of three columns and it is important to understand the information shown in this page in order to debug or report a device problem.
- Page 16 ROIP302 Series User menu Configuration The page contain all configuration settings for the RoIP. It is subdivided into various sections/pages for the ease of configuration. The sub-pages include Preference, Network, Call Settings, PTT Settings, GSM Settings, Recorder Settings, Broadcasting Settings, Group Codec Settings, and Group Settings.
- Page 17 ROIP302 Series User menu be set to other DDNS server; this setting only works with our own DDNS server. Once this service is used, the domain name for the RoIP is then <serial number>.com. The serial number is shown on the bottom label.
- Page 18 ROIP302 Series User menu as provided by your ISP to complete this LAN port configuration. The PC Port allows other network devices to be attached to the GoIP4 Gateway. It offers both Bridge and Static IP modes to meet your requirements.
-
Page 19: Call Settings
ROIP302 Series User menu Specify the Starting Address, Ending Address, and Static DNS accordingly. Call Settings The RoIP302 supports up to 3 groups with a unique Group SIP Number. Each RoIP302 must define at least one group. The Group SIP Number is the only reference between a group and the PTT ports. - Page 20 ROIP302 Series User menu For peer-to-peer mode, only two RoIP302s are used for interconnection. One RoIP302 is defined as a Host which supports a proxy mode for other RoIP302 (referenced as terminal) to register. table below describes how to program the key parameters.
-
Page 21: Gsm Settings
ROIP302 Series User menu GSM Settings The GSM settings in this section mainly define the password for incoming and outgoing GSM calls. If it is left blank, then no password is required. The voice activation detection settings are listed below. -
Page 22: Save Changes
ROIP302 Series User menu 6.10 Group Codec Setting Voice codec is commonly used in voice over IP communications. It enables voice to be compressed in order to save the transmission bandwidth. The higher the compression rate is, the low the transmission bandwidth is required. -
Page 23: Online Upgrade
The Online Upgrade selection is the first item in the Tools menu. Please check regularly with your supplier or our website (www.dbltek.com) for the latest firmware release. Initiating a Cellular Call The model RoIPx02G and RoIPx02GM have built-in GSM module to enable voice communication with the radio channels that belong to the same group. - Page 24 ROIP302 Series User menu where the password is the GSM OUT Password as described in Section 7.7. Please make sure that the PTT button is pressed while dialing the sequence. Once the RoIP accepts the dialed sequence, it will then play the voice prompt of “Dialing in Progress”.
- Page 25 ROIP302 Series User menu 6. Next go to the PTT Setting page and set both PTT Input and Output to active low as shown below. 7. Assign the RoIP302 at Location A to be the master and a Group SIP Number as 101.
- Page 26 ROIP302 Series User menu the RoIP302 at location B should have the same Group Settings as the one at location A. This means that the PTT1 port is assigned to Group 1 for both RoIP302s. The last thing to configure is the Codec Settings. Choose a-law or μ-law for best voice performance.
- Page 27 ROIP302 Series User menu adapter cable. Example 2: This example demonstrates how to use a RoIP302M in order to achieve voice communications among multiple locations simultaneously. Conditions: 1. One RoIP302M with a public IP for internet access. It acts as a host for other RoIP302s.
- Page 28 ROIP302 Series User menu 6. Since the QSL output of the ICOMIC-2720 is active high, then the PTT Settings should be configured as shown below. 7. Since the RoIP302M needs to be connected with multiple RoIP302s, the voice codec G.729 should be selected in order to lower the network bandwidth requirement.
- Page 29 ROIP302 Series User menu 3. The DDNS feature should be disabled. 4. In the router configuration, DMZ mode should be configured to IP address of the RoIP302. 5. The Call Settings should be configured according to the example shown below.
-
Page 30: Hardware Specifications
ROIP302 Series User menu Hardware Specifications 1 Physical and Operating Conditions - Dimension: 25 x 14 x 3 cm - Main Unit Net Wegith: 380 g - Storage Temperature: -40°C - 80°C - Operating Temperature: 0°C - 40°C 2 Core Design... - Page 31 ROIP302 Series User menu PTTOUT Circuit: 4 GSM Module - Operating Frequencies: EGSM900MHZ/DCS1800MHz and GSM850MHz/PCS1900MHz - Suported SIM Card: 3V SIM - Transmit Power: Class 4 (2W) at EGSM900. Class (1W) at DCS1800 and PCS1900 5 Network Port - Ethernet Port: 10/100 Base-T - Standard Supported;...
Need help?
Do you have a question about the ROIP302 Series and is the answer not in the manual?
Questions and answers