Table of Contents
Advertisement
KEEP THESE INSTRUCTIONS FOR FUTURE REFERENCE
ELECTRIC CONVECTION WALL OVEN
TABLE OF CONTENTS
Welcome ................................................................. 1
Safety Instructions ............................................... 2-3
Controls at a Glance ............................................ 4-6
Function Pads ................................................ 4-5
Setting the Clock .............................................. 5
Setting the Timers ............................................ 5
Oven Light ....................................................... 5
Oven Control Lockout ..................................... 6
Oven Operation ................................................. 7-11
Oven Vent and Oven Fans ................................ 7
Oven Racks and Positions ................................ 8
Broiling ............................................................ 9
Clock Controlled Oven Operations ........... 10-11
Care and Cleaning ........................................... 12-15
Self-Clean Oven ........................................ 12-13
Cleaning Chart .......................................... 14-15
Maintenance ......................................................... 15
Before You Call for Service ............................. 16-17
If You Need Service .............................................. 18
Warranty ............................................................... 19
®
Advertisement
Table of Contents

Related Manuals for Maytag MEW6627


Summary of Contents for Maytag MEW6627
-
Page 1: Table Of Contents
ELECTRIC CONVECTION WALL OVEN TABLE OF CONTENTS Welcome ..............1 Safety Instructions ..........2-3 Controls at a Glance ..........4-6 Function Pads ..........4-5 Setting the Clock ..........5 Setting the Timers ..........5 Oven Light ............5 Oven Control Lockout ........6 Oven Operation .......... -
Page 2: Welcome
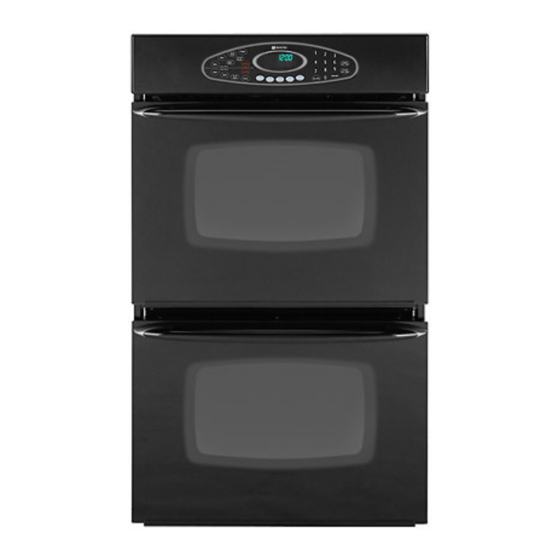
Models: MEW6627 • MEW6630 Welcome IMPORTANT: Keep this guide and the sales receipt in Congratulations on your choice of a Maytag double electric a safe place for future reference. Proof of original wall oven. Your complete satisfaction is very important to us. -
Page 3: Safety Instructions
IMPORTANT SAFETY INSTRUCTIONS • The following instructions are based on safety considerations Children must be taught that the appliance and utensils and must be strictly followed to eliminate the potential risks in it can be hot. Let hot utensils cool in a safe place, out of fire, electric shock, or personal injury. -
Page 4: Safety Instructions
IMPORTANT SAFETY INSTRUCTIONS (continued) Cooking Safety Cleaning Safety • • Turn off all controls and wait for appliance parts to cool NEVER heat an unopened food container in the oven. Pres- before touching or cleaning. Clean with caution. Use sure build-up may cause container to burst resulting in se- care to avoid steam burns if a wet sponge or cloth is rious personal injury or damage to the appliance. -
Page 5: Controls At A Glance
Controls at a Glance The control panel is designed for ease in programming. The display window shows time of day, timer and oven functions. Indicator words flash to prompt your programming steps. “U” indicates upper oven is ON and “L” indicates lower oven is UPPER OVEN CANCEL BAKE... -
Page 6: Setting The Clock
Controls at a Glance (continued) COOK TIME/STOP TIME Pads Example: To set Timer Two for 1 hour and 30 minutes, press the TIMER TWO pad and the numbers 1,3,0 Use to program the oven to start and stop automatically. pads. After five seconds the display will show: 1. -
Page 7: Oven Control Lockout
Control Options Oven Control Lockout To adjust the thermostat: 1. Press the BAKE pad. The oven operation controls - Bake, Convect, Broil, and Clean - can be locked in the “OFF” position. The Timer and Clock 2. Enter 500 by pressing the number pads “5, 0, 0”. controls can always be used regardless of the lockout. -
Page 8: Oven Operation
Oven Operation Baking, Roasting and Convection Cooking • When the oven is preheated, the oven will chime and Every oven has its own characteristics. You may find that the the ON and PREHEAT indicator words will go off. cooking times and temperatures vary slightly from your old Allow 7-11 minutes for the oven to preheat. -
Page 9: Oven Racks And Positions
Oven Racks Double Oven - two flat racks and one offset rack plus an Rack Position #2: additional offset and flat rack for the lower oven are packaged Roasting small cuts of meat, cakes in tube or bundt in your oven. pans, casseroles. -
Page 10: Broiling
Oven Operation (continued) Broiling For best results, use a pan designed for broiling. For addi- Broiling Chart tional broiling tips, see “Cooking Made Simple” booklet. Chart time based on a preheated broil element using the “HI” setting Rack Minutes/Side (Approx.) Setting the Controls for Broiling Foods Position*... -
Page 11: Clock Controlled Oven Operations
Clock Controlled Oven Operations The clock controlled oven cooking feature is used to turn the After five seconds, the time of day returns to the oven off at a preset time of day or delay the start and then turn display. - Page 12 Oven Operation (continued) If you want the stop time to be 1:00, press the number pads Notes . . . “1,0,0”. Five seconds later, the display will briefly show the start time of 10:30 along with the indicator words DELAY, START TIME. •...
-
Page 13: Care And Cleaning
Care and Cleaning Self-Clean Oven Setting the Controls for Self-Clean The self-clean cycle uses above normal cooking temperatures to automatically clean the entire oven interior. While this 1. Close oven door. occurs, a device in the oven vent helps consume normal 2. - Page 14 Care & Cleaning (continued) To Cancel Self-Clean To Delay the Start of a Clean Cycle 1. Press the CANCEL pad. The door will be locked while 1-3. Follow steps 1-3 on page 12. the LOCK indicator word remains in the display. 4.
-
Page 15: Cleaning Chart
Cleaning CAUTIONS: • • Be sure appliance is off and all parts are cool before To prevent staining or discoloration, clean appliance handling or cleaning. This is to avoid damage and after each use. • possible burns. If a part is removed, be sure it is correctly replaced. Cleaning Chart Parts Cleaning Procedure... -
Page 16: Maintenance
Cleaning Chart (continued) Parts Cleaning Procedure Plastic Finishes • Wash with soap and water or mild liquid sprays and a soft cloth. Do not use abrasive cleaners - Door Handle Area or oven cleaners on plastic finishes. • To prevent staining or discoloration, wipe up fat, grease or acid (tomato, lemon, vinegar, milk, fruit juice, marinade) immediately with a dry paper towel or cloth. -
Page 17: Before You Call For Service
Before You Call For Service Check these points if . . . The oven fails •check for a blown fuse or a tripped circuit breaker. to operate. •check if oven is properly connected to electric outlet. Clock, indicator words, •the controls may have been set incorrectly. and/or lights operate •clock controls may be set for a delayed bake function. - Page 18 Before You Call for Service (continued) •the pans being used may not be of the size or material recommended for best results. (See “Cooking Made Simple” booklet). Oven baking results •there may not be sufficient room around sides of the pans for proper air circulation are less than expected.
-
Page 19: If You Need Service
• Be sure to retain proof of purchase to verify warranty status. Refer to WARRANTY (last page) for further information on owner’s responsibilities for warranty service. • If the dealer or service company cannot resolve the problem, write to Maytag Appliances Sales Company, Attn: ®... -
Page 20: Warranty
Maytag Wall Oven Warranty Full One Year Warranty - Parts and Labor For one (1) year from the original retail purchase date, any part which fails in normal home use will be repaired or replaced free of charge. Limited Warranties - Parts Only Second Year - After the first year from the original purchase date, parts which fail in normal home use will be repaired or replaced free of charge for the part itself, with the owner paying all other costs, including labor, mileage and transportation.
Need help?
Do you have a question about the MEW6627 and is the answer not in the manual?
Questions and answers