Table of Contents
Advertisement
Quick Links
Advertisement
Table of Contents

Related Manuals for AEG Voxtel D220BT


Summary of Contents for AEG Voxtel D220BT
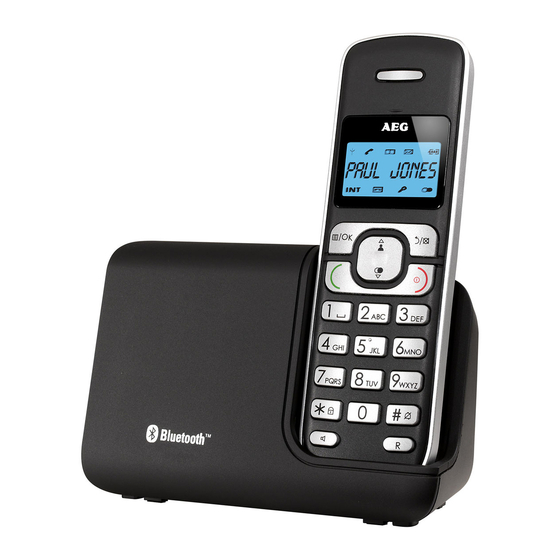
- Page 1 USER GUIDE CORDLESS TELEPHONE Voxtel D220BT...
- Page 2 PQRS WXYZ MOBILE...
-
Page 3: Important Safety Instructions
BECAUSE WE CARE Thank you for purchasing this product. This product has been designed and assembled with utmost care for you and the environment. This is why we supply this product with a quick installation guide to reduce the number of paper (pages) and therefor save trees to be cut for making this paper. -
Page 4: Intended Use
7. NEVER use your phone outdoors during a thunderstorm-unplug the base from the telephone line and the mains socket when there are storms in your area. Damage caused by lightning is not covered by the guarantee. 8. Do not use the telephone to report a gas leak in the vicinity of the leak. -
Page 5: Getting To Know Your Phone
GETTING TO KNOW YOUR PHONE Handset overview (see P1) Meaning Right soft key (clear/back/mute/intercom) In main menu mode: Press to go back to idle screen In sub-menu mode: Press to go back to previous level In sub-menu mode: Press and hold to go back to idle screen In editing / predialling mode: Press to clear a character / digit... - Page 6 During a call: Press to end a call and go back to idle screen In menu / editing mode: Press to go back to previous menu In idle mode: Press and hold to power off the handset In idle mode (when the handset is powered off): Press and hold to power on the handset.
- Page 7 Left soft key In idle mode: Press to access the main menu In sub-menu mode: Press to confirm the selection During a call: Press to access Intercom/Phonebook/ Redial List/ Call List Cordless handset display (see P2) The LCD display gives you information on the current status of the telephone.
- Page 8 Indicates when the battery needs charging. Flashes when low battery power level is detected. Indicates when a mobile call is in progress. Flashes when a mobile call is on hold. Indicates there is (are) Bluetooth device(s) paired. Flashes when Bluetooth devise is being paired. Indicates when Bluetooth device #1 or #2 is connected with the telephone base.
- Page 9 Menu Structure In idle mode, press to go to “CALL LIST“, the first option in the menu list. Press / to go to other options in the menu list. Press to enter a sub-menu or function. Press to go back to the previous level. Refer to the following for the menu structure.
-
Page 10: Installing Your Phone
5.5.1 English Character Set Alphanumeric Editing Number (For phonebook name editing and renaming handset) Editing (For phone number editing, date/ time editing) Key Press 1st 2nd 3rd 9th 10th space , or P (if press and hold) ° ‘ & Some other characters are available with some of the alternative handset language options. -
Page 11: Using Your Phone
Note: The base unit needs mains power for normal operation, not just for charging the handset batteries. Installing and charging the batteries (see P3) Place the 2 supplied batteries into the battery compartment with the polarity markings as shown. Use only the NiMH rechargeable battery type provided. - Page 12 Using your Bluetooth enabled mobile phone, turn on the Bluetooth feature and search for a new device. Once your Bluetooth enabled mobile phone has found the AEG-BT telephone, select it. Using your Bluetooth enabled mobile phone, enter the PIN code of the telephone (the default PIN code is 0000) to continue the pairing process.
- Page 13 Pairing will be confirmed when you hear a tone and the Bluetooth icon appears on the handset. Refer to the user’s manual of your Bluetooth enabled mobile phone to learn how to search for or add new Bluetooth devices. Notes: Paired device(s) will be connected automatically and stored into the Paired Devices list.
- Page 14 Display will show the mobile name of paired device(s). Note: Display will show “EMPTY” if there is no device paired. Press and then / to select the desired mobile device. For the connected mobile device: Press to remove the mobile device. Press to confirm.
- Page 15 7.3.2 Direct dialling Using the home line Press or to take the home line and enter the phone number. Using the mobile line Press , then enter the phone number. MOBILE Press to dial with mobile line. If there are two mobile devices MOBILE connected, you have to select one device from the list.
- Page 16 Using the mobile line Press to dial the selected redial list entry with mobile line. MOBILE 7.3.6 Call timer Your handset automatically times the duration of every call. The call timer will display a few seconds after the call ends. It is shown in hours, minutes and seconds format (HH:MM:SS).
- Page 17 >When you end the call, the setting will remain at the last selected level. Mute a call You can talk to someone nearby without letting the caller hear you during a call. During a call: Press to mute the microphone and “MUTED” will display on the LCD.
- Page 18 Note: If the redial list entry shows a name, press # to view the number of this entry. Press / to browse the redial list. Press to dial to the selected redial number. Note: If there are no numbers in the redial list, the display shows “EMPTY”. 7.11.2 Store a redial number into the phonebook Follow Steps 1 and 2 in Section 7.11.1.
- Page 19 7.12 Find the handset You can locate the handset by pressing the Find button in the middle of the front of the base station. All the handsets registered to the base will produce the paging tone and show “PAGING“ on the display for 60 seconds.
- Page 20 Note: If there is an external call while you are on an intercom call, you‘ll hear warning beeps, and you have to end the intercom call, before you can answer the external call. 7.13.2 Call all handsets In idle mode, press and the registered handset numbers will display.
-
Page 21: Private Phonebook
PRIVATE PHONEBOOK Each handset can store up to 50 private phonebook entries with names and numbers. Each phonebook entry can have a maximum of 20 digits for the phone number and 12 characters for the name. You can also select different ringtones for your phonebook entries. (Note: the different ringtones only play when you receive a call if you subscribe to Caller Display and the incoming number matches the stored number.) Phonebook entries are stored alphabetically by name. - Page 22 Note: If the number is more than 12 digits, press to view the remaining digits. Edit a Phonebook Entry In idle: Press to select “PHONEBOOK“ and then press to access the phonebook. Press / to select the desired phonebook entry. Press and / to select “EDIT“.
-
Page 23: Caller Display (Network Dependent)
Press to display how much of the phonebook is being used, for example “14/50“ means 14 entries are stored out of the total 50 available spaces. CALLER DISPLAY (NETWORK DEPENDENT) This feature is available if you have subscribed to the Calling Line Identification service with your network service provider. -
Page 24: Phone Settings
Store a call list number into the phonebook Follow Steps 1 and 2 in Section 9.1. Press and / to show “ADD TO PB“. Press and then enter the name. Press and the selected call list number is displayed. Edit the number if necessary. Press and / to select the ringtone. - Page 25 Press and / to select your desired date format (“DD-MM- YY“ or “MM-DD-YY“ ). Press to confirm. 10.1.2 Change the Time Format Press and / to select “HS SETTINGS“. Press and / to select “DATE & TIME“. Press and / to select “TIME FORMAT“. Press to select your desired time format (“12 HR“...
- Page 26 display, and the alarm tone rings for 45 seconds. You can press any key to disable the alarm. If the snooze function is activated, the alarm will sound again at the end of the snooze period of seven minutes. You can also press and hold while the alarm is sounding, to stop the alarm and turn off the snooze function.
- Page 27 10.3 Handset settings 10.3.1 Set the ringer melody for internal calls Press and / to select “HS SETTINGS“. Press and / to select “RING SETUP.“ Press and / to select “INT RING“. Press to select the melody you want to hear for internal calls.
- Page 28 10.3.4 Set Alert Tones Three different alert tones are set on by default, but can be turned off, if desired. Key Tone - a single beep is emitted when you press a key. Low Battery Tone - emitted while you are talking on the phone to alert you that you need to charge the handset batteries.
- Page 29 10.5 Set the Auto Answer If you turn on the Auto Answer, you can answer a call automatically by just lifting the handset off the base or charger, without having to press any key. Press and / to select “HS SETTINGS”. Press and / to select “AUTO ANSWER”.
- Page 30 Note: You cannot de-register the handset that you are currently using. Press and / to select “BS SETTINGS“. Press and / to select “DELETE HS“. Press and the display shows “PIN?----“. Enter the 4-digit system PIN. Press and the first handset number is displayed. Press / to step through the list of registered handsets, and select the number of the handset you want to de-register.
- Page 31 Press to confirm. 10.7 Registration Important: When you purchase your phone system, all handsets are already registered to your base, so you do not need to register them. Handset registration is only necessary when you buy extra handsets or if a handset has become faulty. You can register additional handsets to have up to five handsets per base unit, with each handset’s number (1 to 5) shown on its display.
-
Page 32: Troubleshooting
TROUBLESHOOTING Problem Causes Solutions No dialling tone The connection cord Check the connections. when pressing key of the base station Unplug and plug back is not plugged in. in the mains. Check The adapter cord is not that the telephone cord plugged in correctly has been plugged into in the base station. -
Page 33: Technical Details
12.1 While the unit is under Guarantee Disconnect the base unit from the telephone line and the mains electricity supply. Pack up all parts of your phone system, using the original package. Return the unit to the shop where you bought it, making sure you take your sales receipt. -
Page 34: Disposal Of The Device
Electrical power Base: Ten Pao - S004LB0600030 / S004LV0600030 input 100-240VAC 50/60Hz 150mA, output 6VDC 300mA Charger unit: Ten Pao - S004LB0600030 / S004LV0600030 input 100-240VAC 50/60Hz 150mA, output 6VDC 300mA CE DECLARATION This product is in compliance with the essential requirements and other relevant provisions of the R&TTE directive 1999/5/EC. -
Page 35: Cleaning And Care
CLEANING AND CARE Do not clean any part of your phone with benzene, thinners or other solvent chemicals as this may cause permanent damage which is not covered by the Guarantee. When necessary, clean it with a damp cloth. Keep your phone system away from hot, humid conditions or strong sunlight, and don‘t let it get wet. - Page 36 © 2012 Binatone Electronics International Limited All rights reserved Subject to avaibility. Rights of modification reserved. AEG is a registered trademark used under license from AB Electrolux (publ) www.aegtelephones.eu...
Need help?
Do you have a question about the Voxtel D220BT and is the answer not in the manual?
Questions and answers