
Related Manuals for Axis AX-9102


Summary of Contents for Axis AX-9102
-
Page 1: User Manual
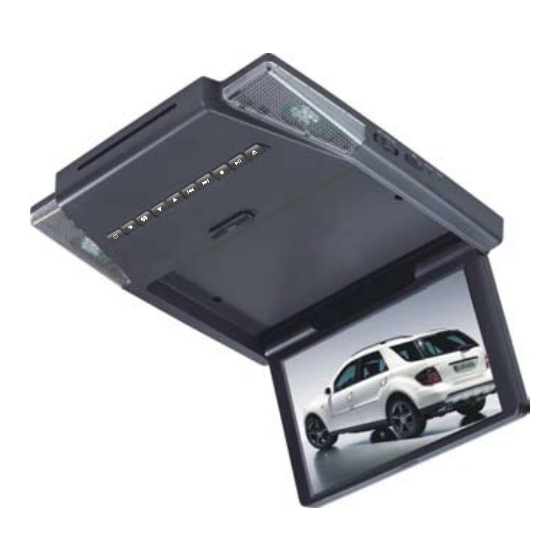
10.2” TFT LCD Monitor with DVD Player USB Port, FM Modulator, 2 Pairs IR Headphones AX-9102 User manual Please read carefully before operating this player... -
Page 2: Table Of Contents
Welcome Thank you for selecting this Roof Mount LCD Monitor with DVD player. Please read this manual carefully to get the most out of all the features and functions. Please keep this manual in a safe place, as it is a valuable tool in helping you to operate your audio system. Contents Safety information..................1 DVD player features ..................3... - Page 3 Avoid installing the unit in direct sunlight or near hot air vents. Please note that the normal working temperature of the unit is between -5 to +50 . If the internal temperature of the vehicle is extremely high, a short cooling down period is necessary before operating the unit.
-
Page 4: Dvd Player Features
DVD player features This player is a Roof Mount 10.2" TFT-LCD Color Display with DVD player that can be used as a stand-alone display, or can be integrated into a mobile multimedia system. This player has the following features: 10.2” TFT-LCD color monitor(16:9) Roof Mounting Application Pixel (dots): 800RGB(W) x 480(H) NTSC and PAL Compatible... -
Page 5: Control
DVD VIDEO FEATURES DVD drive that supports the following formats Playback of CDs with two recorded sessions (one audio and one data) Multi-sound: DVD audio that supports up to eight languages per film Subtitles: support up to 32 languages The playback of MP3 music files stored on a CD-R/CD-RW disc Region number assigned based on the sales area;... - Page 6 Looking up at the player with the LCD panel close Quick reference to controls with monitor closed Power button Press to turn on or turn off the player. Menu button Open the Display menu. Press again to sequentially select each menu item.
-
Page 7: Monitor Open
Monitor Open Looking at the player with the LCD panel open Quick reference to controls with monitor open LCD off switch Turn off the LCD screen. Reset button When unit doesn't work during playback ,press with a pencil or other narrow-tipped tool to restart the unit. -
Page 8: Remote Control
REMOTE CONTROL Quick reference to remote control Power Turn the player on or off Setup Accesses the setup menu used to modify player options. Mute Disables and enables sound. Eject Ejects the current disc in the slot. Numbers Used to directly enter track numbers and to configure some options. Previous Jumps to previous chapter on a DVD or previous track on a CD. - Page 9 ENTER Accepts settings selected using the arrow keys. Fast reverses Fast reverses playback at 2x, 4x, 8x and 16x speeds. Random Plays back chapters or tracks in random order. Repeats playback from previously identified points A to B. Source Selects the video input source: DVD-IN, AV IN1, AV IN2,USB . Return Return to DVD main menu.
-
Page 10: Operations
Operations The monitor and DVD player provide the video; headphones provide the audio. The unit receives power from the power circuit of the car’s dome light, which the unit replaces. Opening the monitor 1. Press the release button to open the overhead monitor screen. 2. -
Page 11: Handling Discs
Handing discs To keep a disc clean, do not touch the play side(non-label side). Do not attach sticky notes to or put tape on a disc. Keep discs away from direct sunlight and heat. Before playback, wipe the disc outwards from the center with a clean cloth. -
Page 12: Playing A Disc(Dvd Or Cd)
Playing a disc (DVD or CD) 1. Put the headphones on your head and turn the headphone power on. 2. Assuming the power is on, insert a disc into the player. The player display “Loading”. 3. Aim the remote control directly at the IR receiver on the player and press the play/pause button or press ENTER (on the remote). - Page 13 Changing languages Note: All audible languages must be pre-recorded on the DVD. Some DVDs only allow language access through the DVD menu. To change the audible language, press the AUDIO button on the remote. The player displays the current language number and name, and the total number of languages available.
-
Page 14: Adjusting Picture Quality
1. Play back the DVD. 2. To identify the beginning of your favorite section (point A), press the A-B button when the section starts playing back. 3. To identify the end of your favorite section (point B), press the A-B button again when play back reaches the end of the section. - Page 15 Tint Adjusts the intensity of the color when in NTSC mode (to play back DVDs recorded in the United States) Wide Selects the aspect ratio of the image wide and normal FMT Freq You can select the frequency for FM transmitter: 88.1 ,88.3, 88.5,88.7,88.9,89.1,89.3,89.5,89.7 and 89.9 MHz to match the frequency of your radio receiver or FM headphone RESET...
- Page 16 3. To choose a folder from the list, press the up and down arrow keys on the remote. 4. Press the ENTER button on the remote. The player displays the contents of the selected folder. Folder contents 5. To select the MP3 file, press the up and down arrow button on the remote. 6.
-
Page 17: Care And Maintenance
Note: .The USB terminal of the main unit supports USB 2.0. 3. The USB player does not support all USB devices. Using FM transmitter To use the FM transmitter for audio: 1. Press the MENU on the remote control . The Operation MENU opens. - Page 18 Do not dispose of used batteries throwing them into fire. If you do so, they may explode. Keep the battery and its holder away from young children. Procedure Note: The battery type must be CR2025. Do not replace with any other battery type. 1.
-
Page 19: Installation And Wiring
Installation and wiring Do not attempt to install or service the player yourself. Installation and servicing require experience in electronic equipment and automotive accessories. If you do not have the knowledge or experience this installation may be dangerous and could expose you to the risk of electric shock or other hazards. -
Page 20: Mounting And Wiring Precautions
Mounting and wiring precautions This unit is exclusively for vehicles with a negative ground, 12V power supply. This unit may be installed with additional mobile audio components, such as a digital camera. Always use great care when attaching anything to a vehicle. Check clearances on both sides of the planned installation before drilling any holes or installing any screws. - Page 21 Install the ceiling bracket and cables 1. Installing the trim ring on the player using the six screws (TB 3 x 8). 2. Screw the metal mounting plate to the beam or plywood using the four ST.4.2x16 screws. 3. Take out the screws fixing the LED cover from unit. 4.
-
Page 22: Setting Preferences
Wiring diagram Note: Do not use both of the 2 AV OUT simultaneously, to prevent the picture being spoilt by interference. Setting preferences Accessing the on screen display menus 1. Press SETUP on the remote to access the OSD menus. 2. - Page 23 Video This item controls the video impact. Video Aspect Ratio Select the display mode: 4:3 or 16:9 TV System Select the TV system. Changing this option also changes the RCA AV output. NTSC Multi Video Out Select the video out mode: Component, P-Scan. Rating To restrict movie viewing to appropriate ages.
-
Page 24: Troubleshooting
Misc Use Default Reset all the set to original value Screen Saver Use the screen saver program or not Troubleshooting If operations freeze, the screen goes blank, or the player otherwise does not function property. Try turning it off and back on again. If it still does not respond, press the reset switch on the front panel. - Page 25 damp cloth. The picture occasionally skips The disc is dirty or scratched. Clean or replace the disc. The picture is blurred You may be passing near a high voltage wire, transformer, aircraft or other source of electrical interference. The picture will improve when you move away from the source interference.
Need help?
Do you have a question about the AX-9102 and is the answer not in the manual?
Questions and answers