Table of Contents
Advertisement
Quick Links
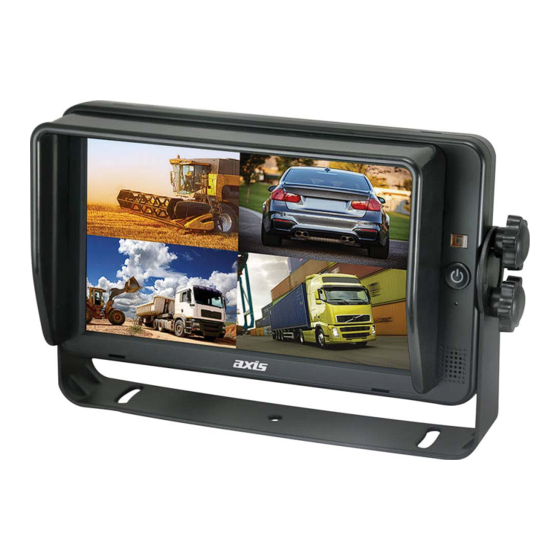
HD264/HD1014
QUAD HD TOUCHSCREEN COLOUR MONITOR
SPECIFICATIONS
- TFT Panel:
- Touchscreen:
- LCD Size:
- Display Format:
- Resolution:
- Brightness:
- Views:
- Viewing Angles:
- Video System:
- Video Connections:
- Camera Display:
- Reverse Trigger:
- Monitor View:
- Guidelines:
- Audio:
- OSD Languages:
- Main Menu:
- Temp Resistance:
- Power Input:
- Dimensions:
HD264
HD1014 267W x 159H x 30D mm (excluding bracket)
INCLUDED
(Optional: Glass Mount Bracket - BKT101)
INSTRUCTION MANUAL
New Grade A LCD, LED Backlight
Yes, Capacitive Touch
7" (HD264), 10.1" (HD1014) Diagonal
16:9
1024 x 600
2
< 450 CD/M
(HD264), < 500 CD/M
1/2/3/4 Selectable
75 Deg. Left/Right/Up/Down
PAL/NTSC Select
4 x 4-Pin (Male) / HDMI / VGA
Input Select and Reverse Trigger Override
5 Triggers
Normal/Mirror Image Select
Selectable & Adjustable
On Board Speaker
9
Brightness/Contrast/Colour/Volume/Reset/Autoscan/Language/Reverse Priority
+70°C
10-32V DC (Negative Ground)
203W x 112H x 28D mm (excluding bracket)
U-Bracket, Stand Mount, Remote Control, Power Cable Assembly, Sunshade
2
(HD1014)
1
Advertisement
Table of Contents

Related Manuals for Axis HD1014


Summary of Contents for Axis HD1014
- Page 1 10-32V DC (Negative Ground) - Dimensions: HD264 203W x 112H x 28D mm (excluding bracket) HD1014 267W x 159H x 30D mm (excluding bracket) INCLUDED U-Bracket, Stand Mount, Remote Control, Power Cable Assembly, Sunshade (Optional: Glass Mount Bracket - BKT101)
-
Page 2: Table Of Contents
Contents 1. Precautions ....................... 2. Accessories ....................... 3. Connections ........................6 4. Menu Operation ......................4.1 IR Remote Control ..................8 4.2 Menu Operation .................... 9 4.2.1 Desktop ..................9 4.2.3 Volume ..................11 4.2.4 Mode ..................12 4.2.5 Source ..................12 4.2.6 Setting .................. -
Page 3: Precautions
1. Precautions Storage and Keeping 1. Do not expose the monitor to excessive heat or cold. Storage temperature is -30 ~ +70°C; Operating temperature is -20 ~ +70°C; Battery operating temperature is 0-70°C; Humidity is Rh90%. 2. Never use this device near a bathtub, wash basin, kitchen, damp basement, swimming pool or similar places. - Page 4 Maintenance 1. Remove all the cable connections from monitor before cleaning the device. 2. Use mild household detergent to clean the device with slightly damp, soft cloth. 3. Never use strong solvents such as thinner or benzine. Risk of electric shock Do not open Caution: to reduce the risk of electric shock, Do not remove cover (or back).
-
Page 5: Accessories
2. Accessories U-Support Bracket Centre Mount Bracket Sun Shield Power Cable Angle Adjustment Screws IR Remote Control Special Notice! -
Page 6: Connections
3. Connections A: Camera 1 White 4 PIN Male : Red: VCC 10-32VDC B: Camera 2 Blue 4 PIN Male : Black: GND C: Camera 3 Green 4 PIN Male : White: Camera 1 Trigger D: Camera 4 Brown 4 PIN Male : Blue: Camera 2 Trigger E: Black 5 PIN Male : Green: Camera 3 Trigger... - Page 7 Basic functions of HD Quad-View Monitor • 7” or 10.1” HD quad-view monitor with LVDS interface, supports high resolution 1280*800. • Supports 4 x camera inputs in 720P/1080P and multiple TV system like PAL/NTSC/HD-AHD/HD-TVI/ HD-CVI, and 1080P video input. the same while setting to mirror image. •...
-
Page 8: Menu Operation
4. Menu Operation 4.1. IR Remote Control Turn on or enter Mute or unmute standby mode Open menu or return to Move the menu cursor left previous menu or decrease volume Move the menu cursor right or increase volume Move up the menu cursor or decrease Move down the menu cursor Switch TV system... -
Page 9: Menu Operation
4.2. Menu Operation 4.2.1. Desktop Pic. 4.2.1... - Page 10 Desktop interface is shown in Pic. 4.2.1. When Home Menu does not pop up. Touch the White border shown in Pic. 4.2.1 to pop up Home Menu. Pic. 4.2.2 When signal source is selected to be cameras, image display mode can be switched by sliding to left/ Pic.
-
Page 11: Volume
Touch the camera channel under split screen mode to zoom into a single full screen and touch it again to get back to split screen. 4.2.2. Home Menu Pic. 4.2.2 Home Menu is shown in Pic. 4.2.2. Touch the area out of the menu in Pic 4.2.2 to get back to Desktop. 4.2.3. -
Page 12: Mode
4.2.4. Mode Pic. 4.2.4 Mode setting interface (display mode selection) is shown in Pic 4.2.4. Press Up, Down, Left or Right on remote control to move the cursor up / down / left / right, then press Sel to switch to the corresponding display mode. The corresponding screen display modes can be switched by touching the icons on OSD. -
Page 13: Setting
4.2.6. Setting Pic. 4.2.6 Setting menu interface (for other functions) is shown in Pic 4.2.6. Operation is as Mode menu. 4.2.6.1. Camera Camera menu (settings for Camera channel) is shown in Pic. 4.2.6.1-1. To set other channels, press Menu on IR remote control and move the cursor to the channel selection area (shown as white border in Pic 4.2.6.1). - Page 14 Pic. 4.2.6.1-2 Camera Name setting interface (setting for each channel’s name), is shown in Pic. 4.2.6.1-2 Camera name can be 8 characters max. 4.2.6.2 Parking Line Pic. 4.2.6.1-2 Pic. 4.2.6.2...
- Page 15 Parking Line setting interface (setting for reverse grid), is shown in Pic. 4.2.6.2. Touch CALIBRATE icon to set reverse cursor. Press SEL or touch TYPE1/TYPE2 on screen to switch reverse cursor mode and drag the cursor directly to adjust. 4.2.6.3 Language Pic.
- Page 16 Pic. 4.2.6.4-2 Trigger Delay / Priority setting interface, as shown in Pic 4.2.6.4-2. Pic. 4.2.6.4-3...
-
Page 17: Auto Scan
4.2.6.5 Auto Scan Pic. 4.2.6.5 Auto Scan setting interface, is shown in Pic 4.2.6.5. Delay range: 1~60s 4.2.6.6 Power On Pic. 4.2.6.6 Power- On setting interface (power-on screen display mode setting), is shown in Pic 4.2.6.6-6. Power On setting only acts when power-on signal source is Camera. - Page 18 4.2.6.7 Standard Pic. 4.2.6.7-1 Standard setting interface (TV system setting in split-screen display mode), is shown in Pic. 4.2.6.7-1 Pic. 4.2.6.8-2 Pic. 4.2.6.8-3...
- Page 19 Standard setting is only for split screen display modes. When camera input resolution is lower than the size of the corresponding split screen, it will be centered and display in the original scale. Conversely, it will zoom out to be split screen in full format. As shown in Pic 4.2.6.8-2 and Pic.4.2.6.8-3.
- Page 20 HD264/HD1014...
Need help?
Do you have a question about the HD1014 and is the answer not in the manual?
Questions and answers