
Related Manuals for Spirit ESP0030 –Esprit CT100


Summary of Contents for Spirit ESP0030 –Esprit CT100
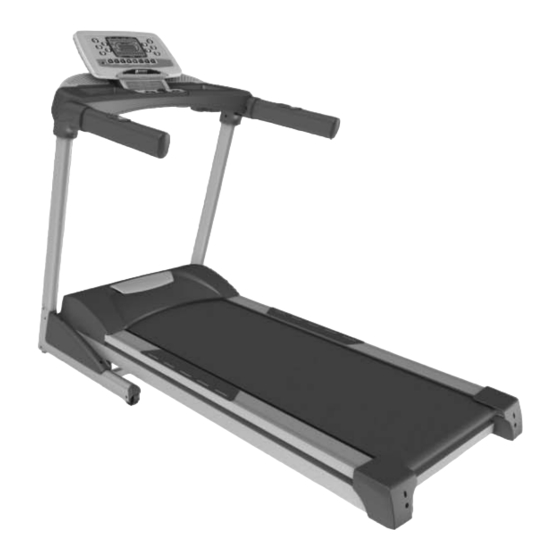
- Page 1 ESP0030 –Esprit CT100 OWNER’S MANUAL PLEASE CAREFULLY READ THIS ENTIRE MANUAL BEFORE OPERATING YOUR NEW TREADMILL! ALWAYS CONSULT A DOCTOR BEFORE STARTING AN EXERCISE PROGRAM...
-
Page 2: Safety Hints
SAFETY HINTS IMPORTANT: THIS UNIT IS INTENDED FOR HOUSEHOLD USE ONLY SAFETY PRECAUTIONS Thank you for purchasing our product. Even though we go to great efforts to ensure the quality of each product, occasional errors and/or omissions do occur. In any event should you find this product to be defective or missing a part please contact our Customer Service Department. - Page 3 CONGRATULATIONS ON YOUR NEW TREADMILL AND WELCOME TO THE SPIRIT FAMILY! Thank you for your purchase of this quality treadmill. Your new treadmill was manufactured by one of the leading fitness manufacturers in the world and is backed by one of the most comprehensive warranties available.
-
Page 4: Specifications
INTRODUCTION The treadmill has been designed and constructed to provide trouble free usage and enjoyable exercise. You can greatly improve your understanding and benefits of exercising by carefully reading the instructions given in this manual. Please familiarize yourself with the maintenance advice provided for you. SPECIFICATIONS •... -
Page 5: Assembly Pack Check List
ASSEMBLY PACK ASSEMBLY PACK CHECK LIST CHECK LIST #74. 3.5 × 12 m/m #99. 5/16" × 1/2" Sheet Metal Screw (4pcs) Button Head Socket Bolt (14pcs) #100. 5/16" × 18 × 1.5T #101. 5/16" × 23 × 1.5T Flat Washer (6pcs) Curved Washer (8pcs) #126. - Page 6 ASSEMBLY DRAWING Step1. Take out the Treadmill frome the carton and lay it aside on the smooth ground. Step 2. Connect the Computer Cable (Lower)(53) with the Right Upright (4). Step 3. Insert the Uprights (L, R)(5,4) into the Frame Base (2) with the 8pcs of 5/16" ×1/2" Button Head Socket Bolts (99), 4pcs of 5/16"...
-
Page 7: Assembly Drawing
ASSEMBLY DRAWING Step 4. Connecting the Computer Cable (Middle) (55) with the Computer Cable (Lower)(53). Step 5. Install the Console Support (6) into the Uprights (L,R) (5,4) with the 6pcs of 5/16" ×1/2" Button Head Socket Bolts (99) , 2pcs of 5/16" × 18 × 1.5T Flat Washers (100) and 4pcs of 5/16"... - Page 8 ASSEMBLY DRAWING Step 6. Install the Outer Handlebar Covers (L & R) (129 & 130) on the Console Support (6) with the 4pcs of 3.5 × 12 m/m Sheet Metal Screws (74) by using the Combination M5 Allen Wrench & Phillips Head Screw Driver (102) and tighten them.
- Page 9 ASSEMBLY DRAWING Step 7. Connect the Computer Cable (Middle) (55) with the Computer Cable (21-10). Connect the Connecting Cable (90-7) with the Connecting Cable (21-9). If there is HR receiver or Speaker, connect 5-Pin HR receiver upper cable (21-11) and 5- Pin HR receiver upper cable (90-8).
-
Page 10: Computer Operation Instructions
FUNCTIONS COMPUTER OPERATION INSTRUCTIONS After turning on and put on the safety key, the console will show up welcome greeting then display total running mileage, hours, program version and then enter ready mode. When total mileage accumulates to 100 km total running time to 150 hours, the system will show a lubrication prompt. After this prompt is shown two times, the message will be deleted automatically. -
Page 11: Button Function
FUNCTIONS Button Function: START:Press this button, while running, to start the treadmill after displaying 3, 2, 1, GO. STOP: Press this button to gradually stop the treadmill and end the workout. FAST: Press this button to increase workout speed. Press once each time increases 0.1KM/h(0.1MPH). -
Page 12: Random Program
FUNCTIONS Speedy Start (P0MANUAL mode) Press START button to speedily start the treadmill after turning on the power and putting on the safety key. Both speed and incline will be at the lowest value. The user has to adjust them to the desire levels manually. -
Page 13: User Mode
FUNCTIONS USER mode This mode provides five personal profiles. Follow the procedures as below. A. Use PROGRAM to select the USER mode. The program will automatically one without a profile. If five profiles are saved. The program will ask you if you want to override. Use UP/DOWM buttons to switch the user names. - Page 14 UNFOLDING FOLDING TRANSPORT UNFOLDING Pull locking knob and hold running deck and lower down to the floor. (As shown Figure 1_2.) FOLDING Pull the locking knob with right hand, left hand lift the running deck up to 30cm then two hands lift it until it is locked by the locking knob.
-
Page 15: Belt Tracking Adjustmeant
BELT TRACKING ADJUSTMEANT If during use you notice that walking belt either shifts to the right or the left of center, first remove "Safety Key" and unplug equipment from AC power source. Using M6 Allen wrench provided, turn left rear roller adjustment as indicated below clockwise no more the 1/4" of a turn. -
Page 16: Treadmill Lubrication
TREADMILL LUBRICATION Your treadmill should require little maintenance other then periodically applying lubricant. Lubricating under the treadbelt will ensure superior performance and extend its life expectancy. HOW TO CHECK TREADBELT FOR PROPER LUBRICATION? Lift one side of the treadbelt and feel the top surface of the treadboard. If the surface is slick to the touch, then no further lubrication is required. -
Page 17: Weight Training
AEROBIC EXERCISE Aerobic exercise is any sustained activity that sends oxygen to your muscles via your heart and lungs. Aerobic exercise improves the fitness of your lungs and heart - your body’s most important muscle. Aerobic exercise fitness is promoted by any activity that uses your large muscle -arms, legs, or buttock, for example. -
Page 18: Inner Thigh Stretch
WARM UP Quadriceps Stretch With one hand against a wall for balance, reach behind you and pull your right foot up. Bring your heel as close to your buttocks as possible. Hold for 15 counts and repeat with left foot up. Inner Thigh Stretch Sit with the soles of your feet together with your knees pointing outward. - Page 19 OVERVIEW CHART...
-
Page 20: Parts List
PARTS DESCRIPTION Q'TY LIST Main Frame Frame Base Incline Bracket Right Upright Left Upright Console Support Outer Slide Inner Slide Locking Knob Incline Motor Drive Belt Motor Bracket Motor Running Belt Running Deck Front Roller W/Pulley 16~3 Magnet Rear Roller Deck Cross Brace Wheel Sleeve Rear Wheel Sleeve... - Page 21 PARTS DESCRIPTION Q'TY LIST □25.4 × 25.4m/m_Square End Cap □30 × 60m/m_Square End Cap 800m/m_Safety Key Power Socket 3/8" × 7T_Nut Sensor Rack Power Cord 150m/m_Connecting Wire (White) 150m/m_Connecting Wire (Black) 10cm × 764 × 764_Connecting Wire (Black) Controller 2100m/m_Computer Cable (Lower) 700m/m_Computer Cable (Middle) 1000m/m_Sensor W/Cable 1/2"...
- Page 22 PARTS DESCRIPTION Q'TY LIST M8 × 50m/m_Flat Head Countersink Bolt 5/16" × 1/2"_Button Head Socket Bolt 5/16" × 18 × 1.5T_Flat Washer 5/16" × 23 × 1.5T_Curved Washer Combination M5 Allen Wrench & Phillips Head Screw Driver M6 (66 × 88)_Allen Wrench Lubricant Adjustable Foot Pad Beverage Holder Cover...
- Page 23 WARRANTY, SAFETY AND ASSEMBLY INFORMATION ESP0030 - Esprit CT100 IMPORTANT Please read and retain this manual as it will assist with identification for parts and service. ---------------------------------------------------------------------------------------------------------------------------- BOYLES FITNESS warrants their treadmill to be free from defects in material and workmanship under normal use and service conditions.
- Page 24 WARRANTY INFORMATION ESP0030 Congratulations on your purchase! As of January 1 2012, new legislation under the Australian Consumer Law requires certain information to be included in any product warranty issued in Australia. This warranty compliments the warranty found in the manual and has been developed in line with the Australian Consumer Law.
-
Page 25: Service Centre
A service representative will then assist you in the appropriate action to be taken. For efficient processing of your enquiry please have proof of purchase, the date of purchase and the retailer name you purchased the item from, and the brand on the product. Photos of the product, and scans of receipts, may be requested to assist with your claim.
Need help?
Do you have a question about the ESP0030 –Esprit CT100 and is the answer not in the manual?
Questions and answers