Table of Contents
Advertisement
Quick Links
Advertisement
Table of Contents

Subscribe to Our Youtube Channel
Related Manuals for Multitech Wireless EDGE


Summary of Contents for Multitech Wireless EDGE
- Page 1 ® MultiModem Wireless EDGE, GPRS, CDMA Modems with Ethernet Interface User Guide...
- Page 2 Copyright and Technical Support User Guide MultiModem® Wireless EDGE, GPRS, and CDMA Modems with an Ethernet Interface MTCBA-E-EN, MTCBA-G-EN-Fx, MTCBA-C-EN-Nx S000375E, Revision E Copyright This publication may not be reproduced, in whole or in part, without prior expressed written permission from Multi- Tech Systems, Inc.
-
Page 3: Table Of Contents
Table of Contents Table of Contents Chapter 1 – Introduction and Product Description .....................5 Product and Interface Descriptions ........................5 Ethernet Interface ............................5 MultiModem EDGE ............................5 MultiModem GPRS ............................5 MultiModem CDMA............................5 Application Example.............................6 Ship Kit Contents..............................6 Safety Warnings..............................7 Ethernet Ports Caution.............................7 Handling Precautions............................7 Safety Instructions for Hazardous Locations....................7 Installation Instructions ............................7... - Page 4 Table of Contents Packet Filters...............................37 Packet Filters > Packet Filters........................37 Packet Filters > DNAT Configuration ......................38 Packet Filters > DNAT Example ........................38 Packet Filters > Advanced ..........................40 GRE Tunnels ...............................41 GRE Tunnels > GRE Tunnels........................41 GRE Tunnels > GRE Routes Configuration ....................42 DHCP Server................................43 DHCP Server >...
-
Page 5: Chapter 1 - Introduction And Product Description
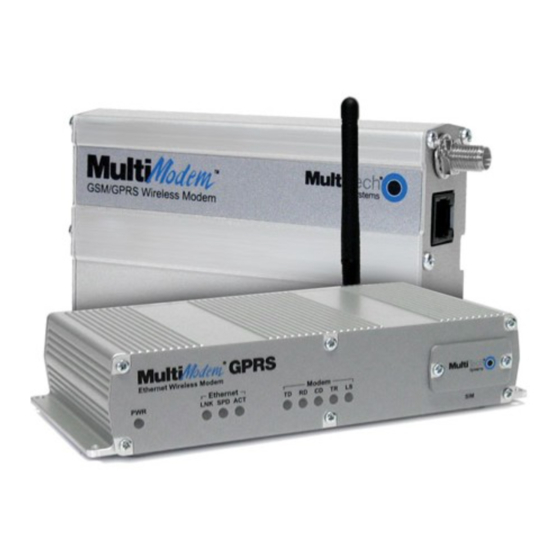
Chapter 1 – Introduction and Product Description Chapter 1 – Introduction and Product Description This User Guide describes the MultiModem® Wireless EDGE, GPRS, and CDMA modems with an Ethernet Interface. Product and Interface Descriptions Ethernet Interface The MultiModem wireless modems with an Ethernet interface provide shared Internet access with one IP address. -
Page 6: Application Example
Chapter 1 – Introduction and Product Description Application Example Ship Kit Contents The wireless modem is shipped with the following: Unbundled Package Bundled Package (Modem with Accessories) (Modem without Accessories) 1 modem 1 modem 1 fused DC power cable 1 power supply cable (type varies) 4 rubber feet for flat surface mounting 4 rubber feet for flat surface mounting 1 Quick Start Guide... -
Page 7: Safety Warnings
Chapter 1 – Introduction and Product Description Safety Warnings Ethernet Ports Caution The Ethernet ports are not designed to be connected to a Public Telecommunication Network. Handling Precautions All devices must be handled with certain precautions to avoid damage due to the accumulation of static charge. Although input protection circuitry has been incorporated into the devices to minimize the effect of this static build up, proper precautions should be taken to avoid exposure to electrostatic discharge during handling and mounting. -
Page 8: Specifications
Chapter 1 – Introduction and Product Description Specifications Features EDGE Modems GPRS Modems CDMA Modems Performance EDGE: E-GPRS Class 10, GPRS Class 10 CDMA2000 1xRTT GPRS: Class 12 Band, Quad-band GSM Quad-band GSM Dual-band 800/1900 MHz CDMA; Frequency 850/900/1800/1900 MHz 850/900/1800/1900 MHz 800 MHz and 800/1900 MHz with R-UIM support... -
Page 9: Chapter 2 - Getting Started
Chapter 2 – Getting Started Chapter 2 – Getting Started Setup a Wireless Account Please see the wireless account Activation Notices located on the MultiModem CD. Choose the one for your wireless network provider and follow the directions to activate your account. These directions may also be included in your ship kit. - Page 10 Chapter 2 – Getting Started Optional Fused DC Power Connection Fused DC Power Connection • Connect the direct-DC power supply cable into the DC power source on the vehicle or machine in which you are mounting the modem. Be sure the GND connection is correct.
-
Page 11: Front Panel Leds
Chapter 2 – Getting Started Front Panel LEDs Once the power is connected, the LEDs on the front panel will provide information about the Ethernet functions and the wireless modem functions. The front panel of the Ethernet EDGE has a power LED, 3 Ethernet LEDs, 5 modem LEDs, and a SIM card slot. -
Page 12: Set Your Pc's Tcp/Ip Address For Ethernet Functionality
Chapter 2 – Getting Started Set Your PC’s TCP/IP Address for Ethernet Functionality After the wireless account is established and the modem is properly connected, it is now time to set up the PC for the Ethernet functionality. First, you will have to set the TCP/IP address on your PC, if not previously set. Open the PC's Control Panel. -
Page 13: Using At Commands
Chapter 2 – Getting Started Using AT Commands Prerequisite Steps In order to communicate directly with the internal cellular module with AT commands, you first must disable PPP by logging into the Web Management software: Open Web Browser From the workstation, open a Web browser. Type the default Gateway Address: http://192.168.2.1 Login After entering the Address, the Login screen displays. -
Page 14: At Command For Verifying Signal Strength
Chapter 2 – Getting Started AT Command for Verifying Signal Strength In the command window, type AT+CSQ The modem responds with the received signal strength (rssi) and the channel bit error rate (ber). RSSI ranges from 0 to 31. BER ranges from 0 to 7 (7 is the highest error rate). -
Page 15: Configure The Ethernet Interface Using The Web Management Software
Chapter 2 – Getting Started Configure the Ethernet Interface Using the Web Management Software You are now ready to configure the Ethernet interface. This is accomplished by using the modem's factory- installed Web Management software. The software is accessed through a Web browser. Open a Web browser From the workstation, open a Web browser. -
Page 16: Wizard Setup
Chapter 2 – Getting Started After clicking the Wizard Setup selection, the Wizards Setup screen displays. Wizard Setup IP Configuration IP Address The default is 192.168.2.1. To change it, simply enter your own IP address. Mask The default is 255.255.255.0 Enter the primary DNS IP address for the system. -
Page 17: Set Time And Date
Chapter 2 – Getting Started IMPORTANT NOTE ABOUT SUBMIT AND SAVE & RESTART Click the Submit button located at the bottom of most screens in order to save any changes you make. Then you must click the Save & Restart button, located on the Menu bar, in order for your settings to take effect. -
Page 18: Connecting To The Internet
Chapter 2 – Getting Started Connecting to the Internet Connecting to the Internet Through Your Cellular Provider’s Service This section provides step-by-step instructions for connecting to the Internet, which must be accessed through your cellular provider. Important Note About Provider Fees: Your provider will charge you for your data usage. - Page 19 Chapter 2 – Getting Started From the workstation, open the command window by clicking the Start button and selecting Run. Type CMD to open the command window. Click OK. When the command window opens, type IPCONFIG /RELEASE to release your current IP received from the router.
-
Page 20: Chapter 3 - Using The Web Management Software
Chapter 3 – Using the Web Management Software Chapter 3 – Using the Web Management Software The Web Management software configures the Ethernet functionality of your MultiModem. Navigating the Web Management Software This section explains the menu structure and the navigation buttons of the router’s Web Management software. Menu Bar IP Setup: Sets up a General Configuration, HTTP, DDNS, SNTP, Static Routes, and Remote Configuration. - Page 21 Chapter 3 – Using the Web Management Software Screen Parts Menu Bar Submenu Title Submenu List Screen Buttons Screen Name Screen Input Area Screen Buttons Home: Click this button to return to the Home screen. Wizard Setup: Click this button to display the Wizard Setup screen on which you can quickly set up your wireless modem with basic configuration settings.
-
Page 22: Web Management Software Screens
Chapter 3 – Using the Web Management Software Web Management Software Screens The rest of this chapter describes each of the Web Management software screens. IP Setup IP Setup > General Configuration In the General Configuration, you will set the general system-based parameters. Multi-Tech Systems, Inc. -
Page 23: Ip Setup > Http Configuration
Chapter 3 – Using the Web Management Software General Configuration Date and Time: The system date and time display in these formats: DD/MM/YYYY / HH:MM:SS. SNTP Client must be enabled and you must have a live Internet connection for the date and time to display correctly. IP Configuration Enter the following addresses for the Ethernet interface. -
Page 24: Ip Setup > Ddns Configuration
Chapter 3 – Using the Web Management Software IP Setup > DDNS Configuration DDNS (Dynamic Domain Naming System) updates the IP address of the modem/router in a DDNS server for the configured domain name whenever the IP Address changes; thus, it leaves the domain name pointing to the current IP Address of the modem/router at all times. -
Page 25: Ip Setup > Sntp Configuration
Chapter 3 – Using the Web Management Software IP Setup > SNTP Configuration General Configuration SNTP Client: Enable or disable the SNTP Client to contact the configured server on the UDP port 123 and set the local time. The default is Disable. Server: Enter the SNTP server name or IP address to which the SNTP Client must contact in order to update the time. -
Page 26: Ip Setup > Static Routes
Chapter 3 – Using the Web Management Software Daylight Saving Start Time Start Ordinal: Set the start ordinal to use during Daylight Saving mode. Options are first/second/third/fourth/last. Default is first. Daylight Saving time usually starts at the same time on the same day of the week in the same month every year. -
Page 27: Ip Setup > Remote Configuration
Chapter 3 – Using the Web Management Software IP Setup > Remote Configuration Remote Configuration Add Network/Host for Remote Configuration: Select a network or host from the drop down box. The choices are Any, LAN, and WAN Interface. Choose all that apply. Click the Add button after each selection. Add Button: After clicking the Add button, the network or host is added and displays at the bottom of the screen. -
Page 28: Ppp
Chapter 3 – Using the Web Management Software PPP > PPP Configuration NAT Configuration Enable/disable NAT (Network Address Translation). The default is Enable. If NAT is enabled: • Your LAN can use one set of IP addresses for internal traffic and a second set of addresses for external traffic. - Page 29 Chapter 3 – Using the Web Management Software PPP General Enable/disable PPP. The default is Enable. Dial-on-Demand: Enable/disable Dial-on-Demand. The default is Enable. If you disable it, the modem will always stay connected. Idle Time Out: Set the amount of idle time that will pass before the modem will timeout. The default is 180 seconds.
-
Page 30: Ppp > Wakeup-On-Call
Chapter 3 – Using the Web Management Software PPP > Wakeup-on-Call The Wakeup-on-Call feature allows the modem to wake up and initiate a connection when there is an incoming call. If you desired some security with this feature, you can set up the modem to wake up based on Caller ID or SMS instead of allowing all incoming calls to wakeup the modem. -
Page 31: Ppp > Wakeup-On-Call Examples
Chapter 3 – Using the Web Management Software PPP > Wakeup-On-Call Examples Example 1 – Set Up the Ethernet Router to Activate on Incoming SMS Message Note: You must have firmware version 1.14 or above in order for Wakeup-on-Call to work. On the PPP >... - Page 32 Chapter 3 – Using the Web Management Software Example 2 – Determine if the Wireless Modem Is Supporting Incoming Calls and Caller ID On the PPP > PPP Configuration screen, make sure that PPP is Disabled. On the PPP > Wakeup-on-Call screen, make sure that Wakeup-on-Call is Disabled. Open a command prompt by clicking the Start button and selecting Run.
- Page 33 Chapter 3 – Using the Web Management Software Example 4 – Set Up the Ethernet Router to Activate on Matching Caller IDs Only: On the PPP > PPP Configuration screen, set up the following parameters: PPP General • Make sure that PPP is Enabled (the default). •...
-
Page 34: Ppp > Power-On Configuration
Chapter 3 – Using the Web Management Software PPP > Power-On Configuration The Power-On Configuration feature allows you to set an initialization string that will be sent to the modem upon boot Power-On Init String Configuration Power-On Init String: You can enter a string of 0 to 40 characters that will be sent to the modem upon boot up. -
Page 35: Networks & Services
Chapter 3 – Using the Web Management Software Networks & Services Networks & Services > Network Configuration Networks or Hosts can be added here. The options to Delete or Edit a network after it has been defined and added are available by using the table at the bottom of the screen. Network Configuration Enter the Name, IP Address, and Mask for a new Network or Host. -
Page 36: Networks & Services > Service Configuration
Chapter 3 – Using the Web Management Software Networks & Services > Service Configuration On this screen you can specify the standard set of well known services available on the system. These services enable the configuration of the user-defined services. The options to Delete or Edit a service after it has been defined and added are available by using the table at the bottom of the screen. -
Page 37: Packet Filters
Chapter 3 – Using the Web Management Software Packet Filters Packet Filters > Packet Filters. You can Delete or Edit a packet filter rule after it has been defined and added by using the table at the bottom of the screen. -
Page 38: Packet Filters > Dnat Configuration
Chapter 3 – Using the Web Management Software Packet Filters > DNAT Configuration Destination Network Address Translation (DNAT) is a process that allows the placing of servers within the protected network and making them available for a certain service to the outside world. The DNAT process running of the wireless modem/router translates the destination address of incoming packets to the address of the real network server on the LAN. - Page 39 Chapter 3 – Using the Web Management Software On the Packet Filters > DNAT Configuration screen, define the DNAT rule. Source – Select the original target network/host of the IP packets that you now want rerouted. The original target network/host is the one previously defined in the Network Configuration section.
-
Page 40: Packet Filters > Advanced
Chapter 3 – Using the Web Management Software Packet Filters > Advanced Connection Tracking H323: Enable/disable the forwarding of H323 packets across the firewall. PPTP: Enable/disable PPTP Packet Pass-through (PPTP NAT support). ICMP Configuration The Internet Control Message Protocol (ICMP) is used to test the network connections and the functionality of the firewall and is also used for diagnostic purposes. -
Page 41: Gre Tunnels
Chapter 3 – Using the Web Management Software GRE Tunnels GRE tunneling and GRE routing together are referred to Generic Routing Encapsulation (GRE). GRE Routing is an integral part of GRE tunneling. First, the GRE Tunnels are created using the GRE Tunnel Configuration. Then the routes for the remote networks that are to be routed through a tunnel need to be specified in the GRE Routes Configuration. -
Page 42: Gre Tunnels > Gre Routes Configuration
Chapter 3 – Using the Web Management Software GRE Tunnels > GRE Routes Configuration GRE Routes Configuration Remote Network: Select the remote network for which the traffic destined to it must be routed through the given tunnel. Tunnel Name: Select the name of the tunnel through which the traffic will be routed. Note: To add a tunneled route, the remote network and the tunnel must have been defined in Network Configuration. -
Page 43: Dhcp Server
Chapter 3 – Using the Web Management Software DHCP Server DHCP Server > Subnet Settings General Configuration DHCP (Dynamic Host Configuration Protocol) is a protocol that allows individual devices on an IP network to get their own network configuration information (IP address, subnet mask, broadcast address, etc.) from a DHCP server. -
Page 44: Dhcp Server > Fixed Addresses
Chapter 3 – Using the Web Management Software DHCP Server > Fixed Addresses DHCP Fixed Configuration The DHCP server can be made to assign a fixed IP address for a particular user by identifying the MAC address. This binding can be made permanent by configuring it here. The same IP address will not be used for any DHCP client with a different MAC address, even if there is no active DHCP connection with that IP address. -
Page 45: Tools > Service Status
Chapter 3 – Using the Web Management Software Tools > Service Status This screen displays the status of each service that is available at run time. The first column lists the services available at run time; the second column identifies the configuration (enabled/disabled); the third column reports the current status of each service. -
Page 46: Tools > Load Configuration
Chapter 3 – Using the Web Management Software Tools > Load Configuration Load Configuration Browse File for Load Configuration: Click the Browse button to open the file that allows you to locate the configuration file. When found, highlight the file name and press Enter so that the file name displays in the text box. -
Page 47: Statistics & Logs
Chapter 3 – Using the Web Management Software Statistics & Logs Statistics & Logs > Ethernet This is an example of the Ethernet Statistics & Logs screen. It shows Ethernet statistics. Statistics & Logs > Serial This is an example of the Serial Statistics & Logs screen. It shows serial statistics. Multi-Tech Systems, Inc. -
Page 48: Statistics & Logs > Ppp
Chapter 3 – Using the Web Management Software Statistics & Logs > PPP This is an example of the PPP Statistics & Logs screen. It shows PPP statistics when PPP is enabled. Multi-Tech Systems, Inc. MultiModem Wireless Modem with Ethernet Interface (S000375E) -
Page 49: Statistics & Logs > Ppp Trace
Chapter 3 – Using the Web Management Software Statistics & Logs > PPP Trace This is an example of the PPP Trace Statistics & Logs screen. It shows the PPP Trace messages. Statistics & Logs > SysInfo This is an example of the System Information Statistics & Logs screen. It shows the information of the module: processor details, uptime memory, utilization, version, date, binary details. -
Page 50: Statistics & Logs > Dhcp Stat
Chapter 3 – Using the Web Management Software Statistics & Logs > DHCP Stat This is an example of the DHCP Statistics & Logs screen. It shows the statistics of DHCP leases. Statistics & Logs > GRE Statistics This screen displays the statistics of active tunnels. Statistics &... -
Page 51: Appendix A - A Reference Table Of Commonly Supported Subnets
Appendix – A Reference Table of Commonly Supported Subnets Appendix A – A Reference Table of Commonly Supported Subnets This table lists commonly supported Subnets organized by Address. Network Number Hosts Available Broadcast Address 255.255.255.128 N.N.N.0 N.N.N.1-126 N.N.N.127 N.N.N.128 N.N.N.129-254 N.N.N.255 Network Number Hosts Available... - Page 52 Appendix – A Reference Table of Commonly Supported Subnets N.N.N.208 N.N.N.209-214 N.N.N.215 N.N.N.216 N.N.N.217-222 N.N.N.223 N.N.N.224 N.N.N.225-230 N.N.N.231 N.N.N.232 N.N.N.233-238 N.N.N.239 N.N.N.240 N.N.N.241-246 N.N.N.247 N.N.N.248 N.N.N.249-254 N.N.N.255 Network Number Hosts Available Broadcast Address 255.255.255.252 N.N.N.0 N.N.N.1-2 N.N.N.3 N.N.N.4 N.N.N.5-6 N.N.N.7 N.N.N.8 N.N.N.9-10 N.N.N.11...
-
Page 53: Appendix B - Wireless Antenna
Appendix B – Wireless Antenna Appendix B – Wireless Antenna The Antenna The antenna sub-system and integration in the application is a major issue: Choice of antenna (type, length, performances, thermal resistance, etc.) These elements could affect GSM performances such as sensitivity and emitted power. -
Page 54: Fused Dc Power Cable Dimensions
Appendix B – Wireless Antenna Fused DC Power Cable Dimensions How to Change the Fuse The Fused DC power cable is provided when a single unit is purchased. Multi-Tech Systems, Inc. MultiModem Wireless Modem with Ethernet Interface (S000375E) -
Page 55: Appendix C - Firmware Upgrade Using External Tftp Client
To obtain the latest version of the firmware, contact you Multi-Tech Sales Representative or contact Multi-Tech directly by phone or email: Phone: 763-785-3500 or 800-328-9717 See the Multi-Tech Web site: www.multitech.com Open the modem/router’s Web Management software using a Web Browser. Enter the Gateway Address http://192.168.2.1 (default) and complete the login. -
Page 56: Appendix D - Multi-Tech Systems, Inc. Warranty And Repair Policies
Please direct your questions regarding technical matters, product configuration, verification that the product is defective, etc., to our Technical Support department at (800) 972-2439 or email support@multitech.com. Please direct your questions regarding repair expediting, receiving, shipping, billing, etc., to our Repair Accounting department at (800) 328-9717 or (763) 717-5631, or email mtsrepair@multitech.com. -
Page 57: Replacement Parts
Please direct your questions regarding technical matters, product configuration, verification that the product is defective, etc., to our Technical Support department nearest you or email support@multitech.com. When calling the U.S., please direct your questions regarding repair expediting, receiving, shipping, billing, etc., to our Repair Accounting department at +(763) 717-5631 in the U.S.A., or email mtsrepair@multitech.com. -
Page 58: Appendix E - Waste Electrical And Electronic Equipment
Appendix E – Waste Electrical and Electronic Equipment Appendix E – Waste Electrical and Electronic Equipment July, 2005 Waste Electrical and Electronic Equipment (WEEE) The WEEE directive places an obligation on EU-based manufacturers, distributors, retailers and importers to take- back electronics products at the end of their useful life. A sister Directive, ROHS (Restriction of Hazardous Substances) complements the WEEE Directive by banning the presence of specific hazardous substances in the products at the design phase. -
Page 59: Index
Index Index Access Point Name..........16 Fax Specifications..........8 always-on network connection ......5 Firmware upgrade..........55 Antenna ............9, 53 Firmware Upgrade ........... 45 AT Commands ...........8 Front panels ............. 11 Auto Dialout configuration ........23 Fused DC power cable ........54 Autodiscovery configuration ......23 General Configuration –... - Page 60 Index Service Status in Tools ........45 Ship Kit Contents ..........6 Obtain DNS Server Address Automatically..12 Shutdown caution ..........17 Obtain IP Address automatically......12 SNTP configuration.......... 25 Operating Temperature........8 Specifications............. 8 Static Routes configuration......26 Ordering Replacement Parts......57 Statistics & Logs > DHCP Statistics ....50 Statistics &...
Need help?
Do you have a question about the Wireless EDGE and is the answer not in the manual?
Questions and answers