
Summary of Contents for Intelligent Weighing Technology Intell-Print OM7212
- Page 1 A Higher Level of Precision… A Higher Level of Performance Intell-Print Thermal Printer OM7212 User Operation Manual...
- Page 3 WARNINGS Do not subject your printer to excessive force or shock such as treading on it, dropping it, or hitting it. Do not install your printer in locations with poor ventilation or in locations in which the air contains salt or toxic gases. Do not use your printer at a voltage other than the specified voltage or at frequencies other than the specified frequencies.
- Page 4 ELECTRONIC EMISSION NOTICES FEDERAL COMMUNICATIONS COMMISSION (FCC) STATEMENT This equipment has been tested and found to comply with the limits for a Class A digital device, pursuant to Part 15 of the FCC Rules. These limits are designed to provide reasonable protection against harmful interference when operated in a commercial environment.
-
Page 5: Table Of Contents
T a b l e o f C o n t e n t s 1 INTRODUCTION ......................7 Features ......................7 SPECIFICATIONS .....................8 General Specifications .................8 Setting up the printer ..................9 Unpacking....................9 Selecting a Place ..................9 Connecting the Power Adapter ......................10 Battery..................................10 3.4.1 Operation Without a Battery Pack ................10... -
Page 6: Introduction
1 INTRODUCTION The OM7212 is a thermal line printer designed for portable, wireless applications. Features Easy paper loading with clamshell mechanism design Conforming to RS-232C serial Portable, powered by a Lithium-Ion Battery Wireless IrDA Communication (optional) Wireless Bluetooth Communication (optional) Paper out sensor Light weight Belt clip for hands free operation... -
Page 7: Specifications
2 SPECIFICATIONS General Specifications Print method Thermal line printing No. of columns 32 (Font A) and 42(Font B) Printing speed 60 mm/sec No. of dots per line 384 at 8 dots/mm resolution Dot Size 0.125 (W) x 0.125 (H) mm Character size 1.125 x 3.0 mm (9 x 24) (Font Size) -
Page 8: Setting Up The Printer
3 Setting up the printer Unpacking The items illustrated below are included in the printer package. If any items are damaged or missing, please contact your dealer for assistance: Printer Paper Roll Power Supply Manual Belt Clip Interface Cable (optional) Selecting a Place Protect your printer from excessive heat such as direct sunlight or heaters. -
Page 9: Connecting The Power Adapter
Connecting the Power Adapter This printer requires an external power supply. An approved Class 2 power supply is required for the operation of this product. Make sure the power switch is turned off. Insert the output plug of the power adapter into the printer DC jack. Plug in the adapter or the power supply’s cord to an outlet. - Page 10 The printer is equipped with a lithium-ion battery pack. Although the battery pack is charged when they are shipped from the factory, your unit may have discharged. Please recharge the pack with the appropriate AC adapter before using the printer. Turn the printer off and plug the adapter into an AC outlet and connect the cable to the printer.
-
Page 11: Replacing The Battery Pack
3.4.4 Replacing the Battery Pack Renew the battery pack if it discharges within an extremely short time. Replace the cell with: Li-ION 8.4V, 1800 mAH, OMNIPrint Part No.: OMBP-7212-18, or Li-ION 8.4V, 2400 mAH, OMNIPrint Part No.: OMBP-7212-24 Use of another cell may present a risk of fire or explosion. Replacement cells can be obtained from OMNIPrint by visiting www.omniprintinc.com. -
Page 12: Connecting The Interface Cable
Connecting the Interface Cable Properly shielded serial interface cable must be used to connect your computer to the printer. Observe the following precautions when connecting the printer to the host computer. Power to the host must be off. The printer power switch must be turned off. Attach the appropriate interface cable. -
Page 13: Loading Paper
Loading Paper Use a paper roll that meets the specifications. Do not use paper rolls that are glued to the core. Make sure data is not being transmitted to the printer while loading paper. Open the printer paper cover by firmly holding the printer in one hand and gently lift the paper cover by applying an equal force on both sides. -
Page 14: Attaching The Belt Clip
Attaching the Belt Clip Please follow the following procedure if you desire to use the included belt clip: Turn the printer over. Hold the printer such that the IrDA window is towards you. You will notice two rectangular holes in the middle of the printer case. Hold the belt clip facing the outside surface. -
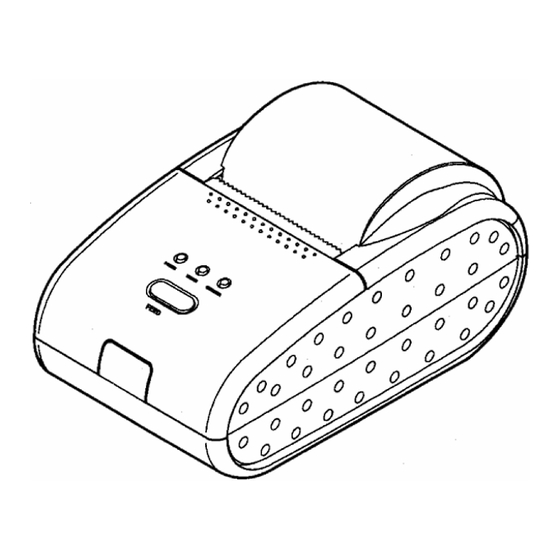
Page 15: External Appearance
4 External Appearance... -
Page 16: Control Panel
Control Panel The control panel features one button and three LEDs POWER SWTICH: The power switch is a slide type located in the rear of the printer. Use this switch to power the printer, reset, or get the printer out of sleep mode. FEED BUTTON: Press the FEED button once to advance one line or hold down for continuous paper feeding. -
Page 17: Accessories
7 Accessories 1) Paper: 58mm+/-0.5mm(width) , 1.75” max(roll diameter) , 85 microns (thickness) TP-60-70 2) Interface Cable: 6 foot long, shielded cable with molded connectors. CBL7205-625F Serial cable w/ DB-25F host side CBL7205-69F Serial cable w/ DB-9F host side 3) Power Supply: Output: 12VDC 2.0A , 2.1mm x 5.5mm female plug , center positive. OMPS7205-915-NA 120VAC input OMPS7205-9 15-EU... -
Page 18: Communications Interfaces
8 Communications Interfaces The standard communications interface for the OM7212 printer is RS-232. The printer uses an RJ12 connector for this serial interface. RS232 8.1.1 Serial Interface Specifications Data Transmission Method: Asynchronous serial interface Baud Rate: User selectable 2400 to 115200 Word Format: Start bit 1 bit... -
Page 19: Bluetooth
Bluetooth If your OM7212 is configured with the optional Bluetooth radio, it is capable of communicating via the Bluetooth Serial Port Profile (SPP). The Bluetooth SPP is a wireless serial port cable replacement connection. To determine if your printer is configured with a Bluetooth radio, print a test label as outlined in section 6 and look for the section labeled “Bluetooth”. -
Page 20: Pin Code
8.3.4 PIN Code Each Bluetooth enabled OM7212 contains a PIN code to help ensure you connect to the printer that you intend to. When establishing a Bluetooth connection for the first time, you will be prompted by the host device to enter the PIN of the OM7212. The PIN is the last four digits of the printer’s serial number. -
Page 21: 802.11B Network Identification Name
IP on your network, then you must configure the IP Address Allocation setting to static. If using static allocation mode, three additional settings must also be configured: Static IP Address, Static IP Address Mask, and Static IP Gateway. These settings will all depend on how the network is currently configured, and as such, cannot be enumerated here. -
Page 23: User-Configurable Printer Settings
9 User-Configurable Printer Settings Configuration commands are sent to the printer to change the printer’s non-volatile settings. After sending the desired sequence of command functions to the printer, allow the printer to remain idle for two seconds. Within that time, the printer will save the new settings to non-volatile memory. The POWER LED will blink red briefly during this process. -
Page 24: Select Serial Communication Parameters
Select Serial Communication Parameters ESC c c 32 , BaudRate ,Parity,DataBits,StopBits Range: BaudRate = 2400, 4800, 9600, 19200, 38400, 57600, or 115200 Parity = N (no parity), E (even parity), or O (odd parity) 7 DataBits StopBits Default: 19200,N,8,1 Description: Sets the serial communication parameters. The printer must be reset for the new settings to take effect. -
Page 25: Xon/Xoff Flow Control
XON/XOFF Flow Control ESC c c 34 , n , Range: n = 0 disables XON/XOFF flow control n = 1 enables XON/XOFF flow control Default: 0 (disabled) Description: Determines whether or not the printer uses XON and XOFF characters to control the data flow into the printer’s serial port. - Page 26 Functio 3 : Set Channel (Ad-hoc mode) 1 (P1) Parame 1 – 14: the channel # to use ters: P1 Range: The channel # to use for the 802.1 1b connectivity in Default: ad-hoc mode. Descrip <Esc>cc48,3,9, tion: Exampl Function: 4 : Set Encryption Mode Parameters: 1 (P1) P1 Range:...
-
Page 27: Tcp/Ip Protocol Network Settings
0: WEP keys are printed on test label 1: WEP keys are NOT printed on test label Range: If set, allows for a more secure network environment by Default: disabling the output of WEP keys on test label Descrip printouts. <Esc>cc48,7,1, tion: Exampl TCP/IP Protocol Network... -
Page 28: 802.11B Wireless Network Name
802.11b Wireless Network Name ESC c c 50 , Name Function: 2 : Set Network Name Range: (1 – 32 character string): desired printer identification name Default: “OM7212” Description: The network name to use for identification on the 802.1 1b network. Example: <Esc>cc50,“MyPrinter”... -
Page 29: Troubleshooting
Troubleshooting 1) IF THE POWER LED DOES NOT COME ON. Make sure the battery is securely plugged into the printer, the adapter, and the power outlet. Also, make sure that power is supplied to the power outlet. If the outlet is controlled by a switch or timer, use another outlet. If using the printer on batteries, make sure the battery is charged and securely plugged in. -
Page 30: Appendix 1 International Characters Set
APPENDIX 1 INTERNATIONAL CHARACTERS SET... - Page 31 Intelligent Weighing Technology serves the industrial and laboratory markets in North America with competitive pricing and value for money on a complete range of industrial and laboratory scales and balances, force measurement and load monitoring technology from 0.01 mg to 275 tons. We are the exclusive source for Intell-Lab , Intell-Industrial , Intell-Check , Intell-Count , Intell- Weigh , Intell-Base , Intell-Scan and Intell-Print...
Need help?
Do you have a question about the Intell-Print OM7212 and is the answer not in the manual?
Questions and answers