
Related Manuals for Alcatel Office 1350 Combo


Summary of Contents for Alcatel Office 1350 Combo
-
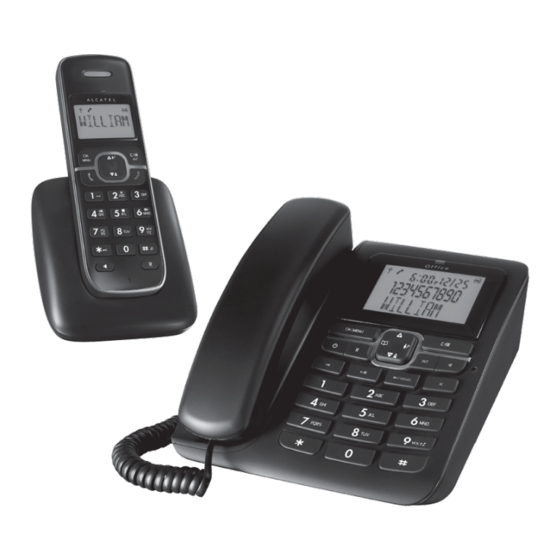
Page 1: User Guide
Office 1350 Combo USER GUIDE Trim size: 148mm(W) x 210mm Office 1350 Combo_Eng_Cover... -
Page 2: Technical Details
TECHNICAL DETAILS Free field range Up to 300 meters* Indoor range Up to 50 meters* Handset battery life Standby: 100 hours** (average values) Talking: 7 hours** Number of handsets Up to 5 Intercom mode Three-way conference (1 outside correspondent + 2 internal correspondents) Electrical connection / Ten Pao - S004LB0600045 / S004LV0600045... -
Page 3: Table Of Contents
TABLE OF CONTENTS IMPORTANT SAFETY INSTRUCTIONS ............... 5 INSTALLING YOUR PHONE ................. 7 CONNECTING THE CORDED BASE STATION ............ 7 INSTALLING THE CORDLESS HANDSET AND CHARGING THE BATTERIES .. 8 GETTING TO KNOW YOUR PHONE ..............9 OVERVIEW OF THE HANDSET ................9 DISPLAY ICONS AND SYMBOLS OF CORDLESS PHONE ........ - Page 4 CALLER DISPLAY (NETWORK DEPENDENT) ........... 26 VIEW THE CALL LIST ................... 26 STORE A CALL LIST NUMBER INTO THE PHONEBOOK ........26 DELETE AN ENTRY IN THE CALL LIST ............... 27 DELETE ALL CALL LIST ENTIRES ..............27 VIEW THE DETAILS OF THE CALL LIST ENTRY..........27 VIEW THE CALL LOG ...................
-
Page 5: Important Safety Instructions
IMPORTANT SAFETY INSTRUCTIONS When using your telephone equipment, basic safety precautions should always be followed to reduce the risk of fire, electric shock and injury, including the following: Read and understand all the instructions. Follow all warnings and instructions marked on the product. Unplug this product from the wall outlet before cleaning. - Page 6 Package contents The package contains the following items: • 1 Handset • 1 Base station • 1 Charger Pod with connected AC power adapter • 1 AC power adapter • 1 Telephone line cord • 2 Rechargeable Batteries • 1 User manual To use your cordless handset and base together, you must be able to establish a radio link between them.
-
Page 7: Installing Your Phone
INSTALLING YOUR PHONE Connecting the corded base station Use the coiled cord to connect the corded handset to the base station, making sure the plugs are inserted fully into the sockets on the handset and on the underside of the base, until they click in place. Plug the power supply cord &... -
Page 8: Installing The Cordless Handset And Charging The Batteries
Installing the cordless handset and charging the batteries 1) Slide open the battery compartment cover from the back of the handset. 2) Place the 2 supplied batteries into the battery compartment with the polarity markings as indicated. 3) Slide the battery compartment cover back until it clicks into place. 4) Put the cordless handset on the charger and charge for 14 hours before using the handset for the first time. -
Page 9: Getting To Know Your Phone
GETTING TO KNOW YOUR PHONE Overview of the Handset LEFT SOFT KEY In idle mode: Press to access the main menu In sub-menu mode: Press to confirm the selection During a call: Press to access Intercom/ Phonebook/ Redial List/ Call List EARPIECE DOWN In idle mode: Press to... -
Page 10: Display Icons And Symbols Of Cordless Phone
Display Icons and Symbols of Cordless Phone The LCD display gives you information on the current status of the telephone. Steady when the handset is in range of the base. Flashes when out of range of the base or not registered to the base. Steady when an intercom is in progress. -
Page 11: Corded Base Station
CORDED BASE STATION LCD DISPLAY In menu mode: Press to scroll up the menu items. In Phonebook list / Redial list / Call List: Press to scroll up the list. During a call or TAM message playback: Press to increase the volume. MENU/OK (OK/MENU) In idle mode: Press to access the main menu. - Page 12 PLAY / STOP ( In idle mode: Press to playback messages. During TAM message playback: Press to stop playing messages. 0 KEY In predial or editing mode: Press and hold "0" to insert a pause. CLEAR/MUTE ( In main menu mode: Press to go back to idle screen. In sub-menu mode: Press to go back to previous level.
-
Page 13: Corded Base Lcd Display
Corded Base LCD Display Icons Description Indicates a call is in progress. Indicates that handsfree is being used. Indicates the time of day. Indicates that the base ringer volume is switched off. This will display when you are in the phonebook menu. Indicates when you have a new Voice Mail message. -
Page 14: Using Your Phone
USING YOUR PHONE Using a cordless handset: Make a Call 4.1.1 Preparatory Dialling Enter the phone number and press <TALK> or <SPEAKERPHONE> to dial the number. When entering the number, if you make a mistake, press <C> key to delete digits. -
Page 15: End A Call
End a Call During a call connection, press <OFF> to end the call. Put the handset on the charger to end the call. Adjust Earpiece and Handsfree Volume There are 5 levels (VOLUME 1 to VOLUME 5) to choose from for each of the earpiece and handsfree volume. -
Page 16: Make An External Call
4.8.2 Store a Redial Number into the Phonebook Follow Steps 1 and 2 in section 4.8.1. Press <MENU/OK> to show ADD TO PB. Press <MENU/OK> and then enter the name you want it to have in the phonebook. Press <MENU/OK> and then modify the number, if necessary. Press <MENU/OK>... -
Page 17: Answer A Call
4.9.3 Call from the phonebook Press <PHONEBOOK> to access the phonebook and press <UP/DOWN> to select the desired phonebook entry. Lift up the corded handset or press <SPEAKERPHONE> to dial out the selected phone- book entry. 4.9.4 Call from the call log Press <UP>... -
Page 18: Emergency Call Without Main Power
4.14 Emergency Call without Main Power The corded base unit can make an emergency call with the corded handset when the mains AC power is disconnected. Pick up the corded handset and wait for several seconds to get the dial tone and then enter the phone number to make a call. -
Page 19: Find The Handset
4.15.3 Delete a Redial Number Follow steps 1 and 2 in section 4.15.1 Press <MENU/OK> and <UP/DOWN> to select DELETE? Press <MENU/OK> to show CONFIRM? Press <MENU/OK> to confirm the delete. 4.15.4 Delete All Redial List Entries In idle mode, press <DOWN> to open the redial list. Press <MENU/OK>... - Page 20 Using the corded base: In idle mode, press <INT> and the registered handset numbers will display, along with a "9". Enter the handset number you want to call, or press "9" to call all handsets. The called handset rings. Press <TALK> on the called handset to establish the internal call.
- Page 21 Using the corded base: During an external call: Press <INT> and enter the number of the handset you want to call, or enter "9" to call all the handsets. The external call is put on hold automatically and the called handset rings. Press <TALK>...
-
Page 22: Private Phonebook
PRIVATE PHONEBOOK Your phone can store up to 50 private phonebook entries with names and numbers in each handset and 50 entries in the base. Each phonebook entry can have a maximum of 20 digits for the phone number and 12 characters for the name. You can also select different ringtones for your phonebook entries. -
Page 23: Edit A Phonebook Entry
Edit a Phonebook Entry In idle: Press <MENU/OK>, <DOWN>, <MENU/OK> to access the phonebook. Press <UP/DOWN> to select the desired phonebook entry. Press <MENU/OK> and <UP/DOWN> to select EDIT. Press <MENU/OK> to display the current name. Edit the name and press <MENU/OK>. Edit the number and press <MENU/OK>... -
Page 24: Add A New Entry
Using the corded base: Add a New Entry In idle: Press <MENU/OK> to show PHONEBOOK. Press <MENU/OK> and <UP/DOWN> to show ADD. Press <MENU/OK> and the display will show the cursor at the beginning of the name position. Key in the name using the digit keys (maximum 12 characters). If you make any mistakes, press <C>... -
Page 25: View An Entry
5.10 View an Entry In idle: Press <PHONEBOOK> to display the first phonebook entry in alphabetical order. Press <MENU/OK> three times to display the first phonebook entry. Enter the first letter of the name you want to view using the alphanumeric keys and then scroll <UP/DOWN>... -
Page 26: Caller Display (Network Dependent)
CALLER DISPLAY (NETWORK DEPENDENT) This feature is available if you have subscribed to the Caller Display service with your network service provider. Your phone can store up to 20 received calls with date/time information in the base Call Log, and up to 20 in the cordless handset Call List. The number will be shown on the handset and base displays when the phone is ringing. -
Page 27: Delete An Entry In The Call List
Delete an Entry in the Call List Follow Steps 1 and 2 in Section 6.1. Press <MENU/OK> and <UP/DOWN> to show DELETE. Press <MENU/OK> to confirm. Delete All Call List Entries Follow Steps 1 and 2 in Section 6.1. Press <MENU/OK> and <UP/DOWN> to show DELETE ALL. Press <MENU/OK>... -
Page 28: Store A Call Log Number Into The Phonebook
Store a Call Log Number into the Phonebook Follow steps 1 and 2 in Section 6.6. Press<MENU/OK> to show ADD TO PB Press <MENU/OK> and the display will show the cursor at the beginning of the name position. Enter the name using keypad. Press <MENU/OK>... -
Page 29: Phone Settings
PHONE SETTINGS Your phone comes with a selection of settings that you can change to personalize your phone the way you like it to work. Using a cordless handset: Date and Time Settings You will need to set the correct time and date so that you know when you received answer- ing machine messages. -
Page 30: Alarm Settings
7.1.4 Set the Date Press <MENU/OK> and <UP/DOWN> to select HS SETTINGS. Press <MENU/OK> and <UP/DOWN> to select DATE & TIME. Press <MENU/OK> and <UP/DOWN> to select SET DATE. Press <MENU/OK> and then enter the date in the format you set in Section 7.1.1. Press <MENU/OK>... -
Page 31: Handset Settings
Handset Settings 7.3.1 Ringer Setup 7.3.1.1 Set the Ringer Melody for Internal Calls Press <MENU/OK> and <UP/DOWN> to select HS SETTINGS. Press <MENU/OK> and <UP/DOWN> to select RING SETUP. Press <MENU/OK> and <UP/DOWN> to select INT RING. Press <MENU/OK> and <UP/DOWN> to select the melody you want to hear for internal calls. - Page 32 7.3.2 Set Alert Tones Three different alert tones are set on by default, but can be turned off, if desired. Key Tone - a single beep is emitted when you press a key. Battery Tone - warning tones are emitted if the battery is low while you are talking on the phone, to alert you that you need to charge the handset batteries.
-
Page 33: Base Settings
Base Settings 7.4.1 Set the Base Ringer Melody Press <MENU/OK> and <UP/DOWN> to select BS SETTINGS. Press <MENU/OK> to show BS RINGER. Press <MENU/OK> and <UP/DOWN> to select the melody you want to hear when the base rings. Note: The respective ringer melody will be played while browsing the melody list. Press <MENU/OK>... - Page 34 7.4.4 Change the Dial Mode You should normally leave the dialling mode at its default setting of TONE (also called DTMF) unless the phone is connected to an old exchange that only recognises PULSE dialling. Press <MENU/OK> and <UP/DOWN> to select BS SETTINGS. Press <MENU/OK>...
-
Page 35: Set Date And Time
7.4.7 Reset your Cordless Handset You can reset your phone to the default settings. After reset, all your personal settings, call list entries, redial list entries and answering machine messages will be deleted, but your phone- book remains unchanged. Press <MENU/OK> and <UP/DOWN> to select DEFAULT. Press <MENU/OK>... -
Page 36: De-Register A Handset
De-register a Handset This operation should only be necessary if one of your handsets becomes faulty or lost and needs to be replaced. You will need to enter the 4-digit system PIN in order to de-register a handset from the base station. -
Page 37: Set The Dial Mode
Set the Dial Mode You should normally leave the dialling mode at its default setting of TONE (also called DTMF) unless the phone is connected to an old exchange that only recognises PULSE dialling. In Idle: Press <MENU/OK> and <UP/DOWN> to select SETTINGS. Press <MENU/OK>... -
Page 38: Change The System Pin
7.12 Change the System PIN A 4-digit system PIN code is used for changing the system settings of the base station, and is used to protect your phone from unauthorized use. The default system PIN code is 0000. Press <MENU/OK> and <UP/DOWN> to select SETTINGS. Press <MENU/OK>... -
Page 39: Registration
REGISTRATION IMPORTANT: When you purchase a phone system, all handsets are already registered to your base, so you do not need to register them. Handset registration is only necessary when you buy extra handsets or if a handset has become faulty. You can register additional handsets to have up to five handsets per base unit, with each handset's number (1 to 5) shown on its display. -
Page 40: Repeater Mode
REPEATER MODE With a repeater you can increase the range of your base station. At first, you must activate the repeater mode from your phone : On the cordless handset: Press <MENU/OK> and <UP/DOWN> to select BS SETTINGS. Press <MENU/OK> and <UP/DOWN> to select REPEATER. Press <MENU/OK>... -
Page 41: Answering Machine
10 ANSWERING MACHINE Your phone includes a telephone answering machine that records unanswered calls when it is on. The recording time is 32 minutes*. As well as recording incoming messages, you can record memos for other users of your phone. If the answering machine memory is full, the handset will display TAM FULL alternately with the handset's name or time, depending on the handset standby display mode set (see section 7.3.5), and the base will also display TAM FULL. - Page 42 10.2.2 Playback the Outgoing Message (OGM) Press <MENU/OK> and <UP/DOWN> to select ANS. MACHINE. Press <MENU/OK> and <UP/DOWN> to select TAM SETTINGS. Press <MENU/OK> and <UP/DOWN> to select OGM SETTINGS. Press <MENU/OK> and <UP/DOWN> to select ANS & REC or ANSWER ONLY. Press <MENU/OK>...
-
Page 43: Tam Messages
10.3 TAM Messages 10.3.1 Play the TAM messages When new messages are recorded on the answering machine, the icon flashes on the handset display. After a new message is played, it will be saved automatically as an old message, until it is deleted. Old messages will be played after all new messages are played completely. -
Page 44: Record A Memo On The Tam
10.4 Record a Memo on the TAM You can record your memo message for another user. When you record a memo, the message counter will increase by one and the message can be played back in the same way as answering machine messages. Memo recording can still function even when the answering machine is turned off. -
Page 45: Tam Settings
10.6 TAM Settings You can use the TAM SETTINGS menu through the handset to change the settings of your answering machine. 10.6.1 Set the Outgoing Message Language Press <MENU/OK> and <UP/DOWN> to select ANS. MACHINE. Press <MENU/OK> and <UP/DOWN> to select TAM SETTINGS. Press <MENU/OK>... - Page 46 10.6.3 Activate Remote Access Your phone lets you check your messages, or otherwise operate your answering machine, by calling the answering machine when you are away from home and then dialling a 4-digit remote access PIN from a tone-dialling phone, provided the Remote Access is turned on. Press <MENU/OK>...
-
Page 47: Remote Operations
10.7 Remote Operations If you are away from your home, you can call your answering machine to switch on or off the answering machine and listen to your messages remotely using another tone-dialling phone. Place a call from a tone-dialling phone. When the answering machine answers the call and starts playing the OGM, press the <... -
Page 48: Switching The Tam On/Off
When your answering machine memory is full and the answer mode is in ANS & RECORD, the answer mode will change to ANSWER ONLY automatically. It will change to ANS & RECORD mode automatically after some messages have been deleted. Using the corded base: 10.8 Switching the TAM On/Off 10.8.1 Using the Direct Key... - Page 49 10.9.1.2 Using the Menu Press <MENU/OK> and <UP/DOWN> to select ANS. MACHINE. Press <MENU/OK> and <UP/DOWN> to select TAM SETTINGS. Press <MENU/OK> and <UP/DOWN> to select OGM SETTINGS. Press <MENU/OK> and <UP/DOWN> to select ANS & REC or ANSWER ONLY. Press <MENU/OK>...
-
Page 50: Switch Between Ogms
10.10 Switch Between OGMs By default, the answer machine is set in ANS & REC mode which allows callers to leave a message. This mode can be changed to ANSWER ONLY which does not allow callers to leave a message. In that case, your callers will be prompted to call back later. When the answering machine is switched ON, you can select ANS &... -
Page 51: Record A Memo On The Tam
10.11.2 Delete a Message on TAM Press while a message is playing. You will hear a tone and the current message or memo playing will be deleted. 10.11.3 Delete All Messages on TAM 10.11.3.1 Using the direct key In idle mode, press and hold for 2 seconds to delete all old messages. -
Page 52: Incoming Call Messages (Icm)
10.12.2 Using the Menu Press <MENU/OK> and <UP/DOWN> to select ANS. MACHINE. Press <MENU/OK> and <UP/DOWN> to select MEMO. Press <MENU/OK> to start recording the memo, and RECORDING and a timer are shown on the display. Press <MENU/OK> to end your memo recording and the memo will then play back. Let it play to the end or press <MENU/OK>... -
Page 53: Tam Settings
10.14 TAM Settings 10.14.1 Set the Answer Delay You can set the number of rings before the answering machine answers and starts playing your OGM. You can set the answering machine to answer after two to eight rings or TIME SAVER. - Page 54 10.14.4 Turn On or Off the Base Screening You can select to turn on or off the call screening on the base. Press <MENU/OK> and <UP/DOWN> to select ANS. MACHINE. Press <MENU/OK> and <UP/DOWN> to select TAM SETTINGS. Press <MENU/OK> and <UP/DOWN> to select BS SCREENING. Press <MENU/OK>...
- Page 55 10.14.7 Change the 4-Digit Remote Access PIN Your phone lets you check your messages, or otherwise operate your answering machine, by calling the answering machine when you are away from home and then dialling a 4-digit remote access PIN from a tone-dialling phone. The 4-digit remote access PIN code is used to prevent other people from unauthorised access of your answering machine.
-
Page 56: Troubleshooting
11 TROUBLESHOOTING As a general rule, if a problem occurs, remove the batteries from all the handsets in your installation for about 1 minute, then disconnect and reconnect the power supply to the base and reinstall the handset batteries. Problem Cause Solutions No dialling tone when... -
Page 57: Safety
ATLINKS hereby declares that the Office 1350 combo conforms to the essential requirements and other applicable provisions of European directive 1999/5/EC. Trim size: 148mm(W) x 210mm P56... -
Page 58: Environment
13 ENVIRONMENT This symbol means that your inoperative electronic appliance must be collected separately and not mixed with the household waste. The European Union has implemented a specific collection and recycling system for which producers are responsible. This appliance has been designed and manufactured with high quality materials and components that can be recycled and reused. - Page 59 ALCATEL and ATLINKS are registered trademarks. The Alcatel logo and Alcatel name are trademarks of Alcatel and used under licence by ATLINKS. Model Office 1350 Combo Office 1350 Combo Duo / Trio G1 A/W No.: 10000200 Rev.0 (EN)
Need help?
Do you have a question about the Office 1350 Combo and is the answer not in the manual?
Questions and answers