
Related Manuals for Gefen EXT-HDMI1.3-848CP


Summary of Contents for Gefen EXT-HDMI1.3-848CP
- Page 1 ® 8x8 Crosspoint Matrix ® for HDMI EXT-HDMI1.3-848CP User Manual www.gefen.com...
- Page 2 Notice Gefen, LLC reserves the right to make changes in the hard ware, packaging and any accompanying doc u men ta tion without prior written notice. 8x8 Crosspoint Matrix for HDMI 1.3 is a trademark of Gefen, LLC HDMI, the logo, and High-Defi...
-
Page 3: Table Of Contents
CONTENTS Introduction Operation Notes Features Panel Layout Panel Descriptions Connecting and Operating The Gefen 8x8 Crosspoint Matrix For HDMI 1.3 Wiring Diagram Controlling the Matrix using the Front Panel Buttons Remote Description Remote Installation 10 Remote Confi guration 11 Routing Sources using the Remote... -
Page 4: Introduction
How It Works Connect up to eight Hi Def sources to the Gefen 8x8 Crosspoint Matrix for HDMI 1.3 using the supplied HDMI cables. Connect up to eight HDTV displays to the Matrix’s HDMI outputs. 3D content can be displayed when connecting a 3DTV and 3D source. -
Page 5: Operation Notes
OPERATING THE GEFEN 8X8 CROSSPOINT MATRIX FOR HDMI 1.3 • There is no internal scaling in the Gefen 8x8 Crosspoint Matrix for HDMI 1.3. All of the attached monitors must be able to display the resolutions output by the source devices. For maximum compatibility it is recommended that only one compatible / common resolution be used by all of the source devices. -
Page 6: Features
• Rack-mountable • HDCP-compliant Package Includes (1) Gefen 8x8 Crosspoint Matrix for HDMI 1.3 (8) 6 ft HDMI cables (M-M) (1) 6 ft DB9 Serial Cable (M-F) (1) IR Remote Control Unit (1) 24V DC Power Supply (1) Set of Rack Ears... -
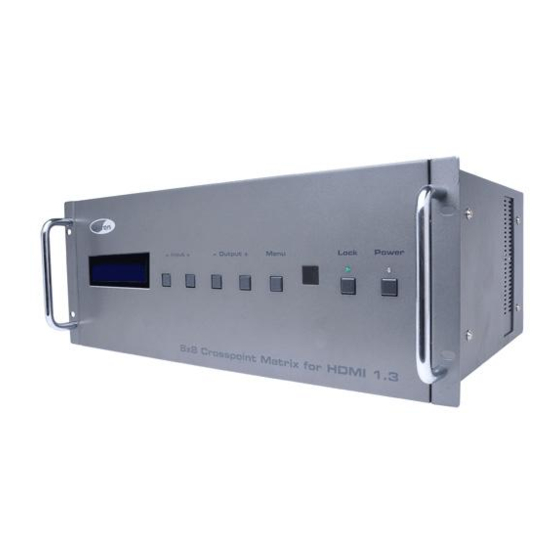
Page 7: Panel Layout
PANEL LAYOUT Front Panel Back Panel... -
Page 8: Panel Descriptions
/ source routing. Navigation Buttons These buttons are used to navigate between the inputs and outputs of the Gefen 8x8 Crosspoint Matrix for HDMI 1.3. For details on how these controls are used, see page 7. Menu Button Pressing this button changes between routing mode and status mode. - Page 9 (if the display supports audio). NOTE: If the source and display support 3D then the 8x8 Crosspoint Matrix for HDMI 1.3 will pass through the 3D signal. Output A must be connected to a 3DTV. HDMI CABLE 8x HDMI Sources 8x HDMI Displays EXT-HDMI1.3-848CP...
-
Page 10: Connecting And Operating The Gefen 8X8 Crosspoint Matrix For Hdmi
THE GEFEN 8X8 CROSSPOINT MATRIX FOR HDMI 1.3 How to Switch between Inputs and Outputs The main display of the Gefen 8x8 Crosspoint Matrix for HDMI 1.3 is a sixteen- character, two-line LCD. This display shows the current routing status The fi... -
Page 11: Remote Description
IR REMOTE DESCRIPTION RMT-848IR Remote LED Button Press Indicator This LED will be activated momentarily each time a button is pressed. Display and Source Selection Buttons These buttons are used to select which input source is routed to the HDTV display. -
Page 12: Remote Installation
IR REMOTE INSTALLATION Installing the RMT-848IR Battery Remove the battery cover on the back of the remote. Insert the included battery into the open battery slot. The positive (+) side of the battery should be facing up. Replace the battery cover. The remote ships with two batteries. - Page 13 DIP switches on the IR remote are set to IR channel 0 (toward the “1” and “2”), the Gefen 8x8 Crosspoint Matrix for HDMI 1.3 must be set to use IR channel See page 12 on how to change the IR channel on the Gefen 8x8 Crosspoint...
- Page 14 The image shown on Display 4 will be the Hi-Def source connected to HDMI In 6 on the Gefen 8x8 Crosspoint Matrix for HDMI 1.3. The number six will be displayed under the letter D in the front panel display, indicating that Input 6 has been routed to...
-
Page 15: Setting The Ir Channel On The Matrix
SETTING THE IR CHANNEL ON THE MATRIX Press the Input -, Input + and Output - buttons simultaneously. The Main LCD Display will show the following Use the Input + and Input - buttons to switch between OFF and ON states. Use the table below to set the correct IR channel. - Page 16 RS-232 SERIAL INTERFACE 5 4 3 2 1 1 2 3 4 5 9 8 7 6 6 7 8 9 Only Pins 2 (RX), 3 (TX), and 5 (Ground) are used on the RS-232 serial interface This feature allows for easy integration into automated systems capable of transmitting RS-232 commands.
-
Page 17: Rs-232 Commands
RS-232 COMMANDS Simplifi ed syntax was used for command implementation for faster operation with the device. RS-232 commands are not case-sensitive. Commands Command Description Routes the specifi ed Input to Output A Routes the specifi ed Input to Output B Routes the specifi... - Page 18 RS-232 COMMANDS A Command Routes the specifi ed Input to Output A. Syntax: A[no space]param1 Parameters: param1 HDMI Input (Source) [1 - 8] Example: A5 routes Input 5 to Output A. Notes: Individual routing to other outputs (B - H) can be accomplished by using a similar syntax and substituting the A with the range B though H.
- Page 19 RS-232 COMMANDS L Command Sets the specifi ed Input to use Slow Switching. Syntax: L[no space]param1 Parameters: param1 HDMI Input (Source) [1 - 8] M Command Returns the current routing status of the matrix in addition to the fi rmware version.
- Page 20 G=7, H=8). The IR address will be set to 0. Syntax: Parameters: None X Command The X command turns off the Gefen 8x8 Crosspoint Matrix for HDMI 1.3. Syntax: Parameters: None Y Command The Y command powers on the Gefen 8x8 Crosspoint Matrix for HDMI 1.3.
-
Page 21: Fast Switching (Fst)
WITCHING ECHNOLOGY Fast Switching Technology Fast Switching Technology (FST) is a Gefen software implementation for HDMI 1.3 products. FST was created to improve the lengthy HDMI authentication process, based on the HDMI and HDCP specifi cations. FST provides quicker A/V source switching and greatly improves the overall A/V system behavior and performance when more than one HDTV display is used in the system setup. - Page 22 FAST SWITCHING Changing between Fast Switching and Slow Switching Modes Each HDMI input can be set to use either Fast Switching or Slow Switching. Fast Switching should be used for the best performance. Press the Menu button on the front panel. The switching mode for each input will be displayed under each output.
- Page 23 FAST SWITCHING Once the switching mode has been set, press the Menu button to accept the changes. The front panel shows which inputs are set to Slow Switching and which inputs are set to Fast Switching. Press the Menu button again to return to the routing status screen.
-
Page 24: Edid Management
EDID MANAGEMENT External EDID Management The 8x8 Crosspoint Matrix for HDMI 1.3 features EDID Management. Before the source can send video or audio signals, the source device reads the EDID (Extended Display Identifi cation Data) from the output devices connected to the Splitter. -
Page 25: Rack Mount Installation
RACK MOUNT INSTALLATION Rack mount ears are provided for installing the Matrix in a 5U rack space. To mount the Matrix in the rack, do the following: 1. Locate the 4 side screws on each side of the Matrix. 2. Remove these screws (located closest to the front of the Matrix). 3. -
Page 26: Specifi Cations
SPECIFICATIONS Video Amplifi er Bandwidth ............... 225 MHz Single Link Range..............1080p / 1920x1200 Input Video Signal..................1.2 V p-p Input DDC Signal................5 V p-p (TTL) RS-232 Interface..................DB-9 (M) Input Connectors............(8) HDMI Type-A, 19-pin (M) Output Connectors............(8) HDMI Type-A, 19-pin (M) Power Supply..................24V DC / 4.16A Power Consumption................100 W (max.) Dimensions..............19.0”... -
Page 27: Warranty
Gefen warrants the equipment it manufactures to be free from defects in material and workmanship. If equipment fails because of such defects and Gefen is notifi ed within two (2) years from the date of shipment, Gefen will, at its option, repair or replace the equipment, provided that the equipment has not been subjected to mechanical, electrical, or other abuse or modifi... - Page 29 Rev D4 1.3I 20600 Nordhoff St., Chatsworth CA 91311 1-800-545-6900 818-772-9100 fax: 818-772-9120 www.gefen.com support@gefen.com...
Need help?
Do you have a question about the EXT-HDMI1.3-848CP and is the answer not in the manual?
Questions and answers