Table of Contents
Advertisement
Quick Links
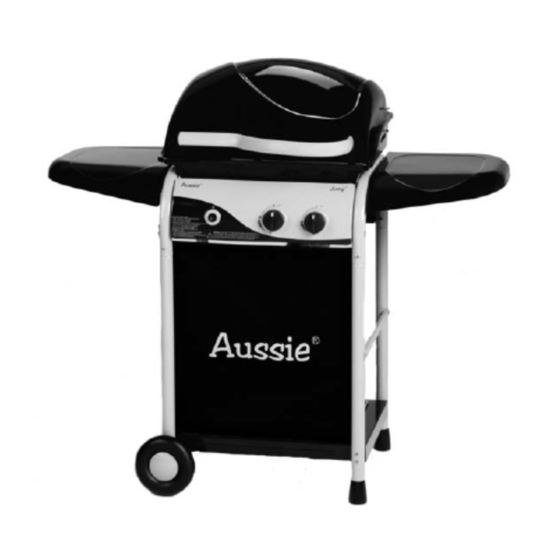
Aussie
LP Gas Grill
Assembly and Use Manual
FOR OUTDOOR HOUSEHOLD USE ONLY. NOT FOR COMMERCIAL USE.
For Customer Service, call 1-800-251-7558 or visit our web site at www.meco.net
• Failure to follow these instructions could result in fire or explosion which could cause death,
serious personal injury, or property damage.
• Read and follow instructions carefully before assembly or use.
• Do not use this product for any other purpose than which it is intended.
• These instructions must be kept with the user. SAVE THESE INSTRUCTIONS.
If you smell gas:
1. Shut off gas to the appliance.
2. Extinguish any open flame.
3. Open lid.
4. If odor continues, keep away from the
appliance and immediately call your gas
supplier or your fire department.
®
b b y y M M e e c c o o
M M O O D D E E L L 7 7 1 1 1 1 0 0 S S e e r r i i e e s s L L i i q q u u i i d d P P r r o o p p a a n n e e G G a a s s G G r r i i l l l l
®
TM
Joey
1. Do not store or use gasoline or other
flammable vapors and liquids in the vicinity
of this or any other appliance.
2. An LP cylinder not connected for use shall
not be stored in the vicinity of this or any
other appliance.
Advertisement
Table of Contents

Subscribe to Our Youtube Channel
Related Manuals for Aussie Joey 7110 Series


Summary of Contents for Aussie Joey 7110 Series
- Page 1 Aussie ® b b y y M M e e c c o o ® LP Gas Grill Assembly and Use Manual Joey M M O O D D E E L L 7 7 1 1 1 1 0 0 S S e e r r i i e e s s L L i i q q u u i i d d P P r r o o p p a a n n e e G G a a s s G G r r i i l l l l FOR OUTDOOR HOUSEHOLD USE ONLY.
-
Page 2: Table Of Contents
— NOTICE — MECO CORPORATION STRIVES TO BE A QUALITY SUPPLIER OF CONSUMER PRODUCTS. IF WE OMITTED ANY PARTS NEEDED FOR ASSEMBLY, OR YOU NEED TROUBLESHOOTING INFORMATION, PLEASE CONTACT US USING OUR TOLL FREE NUMBER. THANK YOU FOR PURCHASING A MECO CORPORATION PRODUCT. CONSUMER SERVICE DEPARTMENT 1-(800)-251-7558 8 am - 6 pm E.S.T Mon. -
Page 3: Parts Illustrations
PARTS ILLUSTRATIONS If you need replacement parts, refer to the Parts Illustrations and the Parts List to find the exact parts you need. If you have any questions which require help, contact Customer Service and be sure to mention the model number of your grill. (3) Cylinder Retainer Clip (1) Owner’s Manual... -
Page 4: Parts List
(33) Handle Spacer (34) Handle Spacer (35) Hood Handle (Tapered) (Fitted) (36) Front Metal Panel (38) Flame Diffuser (37) Fabric Panel (39) Cooking Grid (42) Main Burner (40) Warming Rack (41) Main Burner Electrode (44) Control Panel (43) LP Cylinder w/Manifold and Heat Shield (45) Control Knob... - Page 5 PARTS LIST (cont'd) Sidebrace, Right 03.6615.00 Sidebrace, Left 03.6616.00 Screw, ST 4.0 x 10 03.6583.00 Bolt, M4 x 10 (Clear Nickel) 03.6267.00 Wingnut, M4 Solid (Left Sidebrace) 03.6313.00 Crossbrace, Rear 03.6617.00 Right Side Table Black 03.6618.00 Left Side Table Black 03.6619.00 Bolt, M6x15 03.6208.00...
-
Page 6: Step 1) Cart Assembly
To reduce the risk of a cut injury: · Wear protective gloves when handling parts that have sharp edges. · Some assembly may require help from another person. Observe where noted. TOOLS: and/or STEP 1) Cart Assembly: (3) LP CYLINDER CLIP Attach the Legs to the Bottom Shelf with (8) M5 X 40 BOLT M5 x 40 Bolts threaded into the Bottom... -
Page 7: Step 2) Assemble Axle, Wheels & Wheel Covers
STEP 2) Assemble Axle, Wheels & Wheel Covers: Push Axle through center hole in Wheel and through lower hole in each leg. (FIG. 2A) Insert Axle pin through small hole in end of Axle until it snaps over it. (FIG. 2B) Align Wheel Cover pins with 3-holes in Wheel and push flush against Wheel. -
Page 8: Step 3) Assemble Hood/Bowl To Cart
Step 3) Assemble Hood/Bowl to Cart: (16) M6 LOCKNUT 4 PC (15) BOLT, M6X45 4 PC Bowl Bracket Legs (14) HOOD/BOWL ASSEMBLY Control Panel Bolt on each NOTE: REQUIRES 2-PERSONS side of grill · With Cart upright, align Bowl Bracket legs with Cart legs. -
Page 9: Step 5) Assemble Sidebraces
Step 5) Assemble Sidebraces: · Attach Right and Left Sidebraces (19 & 20) to legs with ST4.0 x 10 Screws. (FIG. 5A) Secure Bottom Heat Shield to Left Sidebrace with M4x10 Bolts and M4 Wingnuts. (FIG. 5B) Allow Heat Shield Edge to overlap Sidebrace edge. (22) BOLT, (21) SCREW, ST4.0 x 10 M4x 10MM... -
Page 10: Step 6) Assemble Side Tables
Step 6) Assemble Side Tables: Align bracket holes of Left and Right Side Tables with holes in Bowl Leg Brackets. Attach Side Tables with M6 x 15 Bolts underneath. (FIG. 6A 7 6B) (25) RIGHT SIDE (26) LEFT SIDE TABLE TABLE (27) BOLT, M6X15 8 PC... -
Page 11: Step 8) Attach Front Panels
Step 8) Attach Front Panels: Eyelet fits over Place Lower Metal Panel behind the Bolt and Nut front legs with short side to the right. Secure the 2-bottom screws. (FIG. 8A) Attach Top Fabric Panel to the top of FIG. 8B the legs. -
Page 12: Operating Your Lp Gas Grill
OPERATING YOUR LP GAS GRILL · Never fill the LP gas cylinder more than 80% of CONNECTING/DISCONNECTING THE GAS cylinder volume. (20 lb. maximum) Do not ask the propane supplier to over-fill the cylinder. USING GAS · If you obtain LP gas through a cylinder exchange dealer, make sure you get a safe and adequate O.P.D. -
Page 13: B) Disconnecting Lp Gas Cylinder
6) Swing the Cylinder Retainer Clip over round shoulder of the LP cylinder. Exert pressure at Rotate ends of clip until it stops at the cylinder Cylinder carry handle. Cylinder Carry Handle Cylinder Retainer Clip FIG. 11A Cylinder Retainer Clip 4) Cut the tie clamp securing the regulator and FIG. -
Page 14: Selecting A Location
6) Check for leaks by brushing the soap solution SELECTING A LOCATION on all gas valves, hose connections and fittings. (shown by the heavy arrows in (FIG. 12A & 12B) To reduce the risk of serious bodily injury or death: Make sure you generously brush the locations ·... -
Page 15: Lighting The Grill Using The Ignitor
To reduce the risk of serious bodily injury or death: · Open Hood before lighting the grill to prevent an explosion from any gas accumulation. · If lighting attempts fail, or the burners go out during operation, turn all control knobs “Off” to dissipate any accumulation of gas. -
Page 16: Manual Lighting The Grill
MANUAL LIGHTING THE GRILL Manual Lighting Hold flame near Burner. To reduce the risk of serious bodily injury or death: · Open Hood before lighting the grill to prevent an explosion from any gas accumulation. · If lighting attempts fail, or the burners go out during operation, turn all control knobs “Off”... -
Page 17: Warming Rack
· Do not attempt to extinguish a grease fire with water WARMING RACK or other liquids. Have an BC fire extinguisher Warming racks are a convenient way to keep cooked food accessible. Do not douse or spray the grill or cooking warm or to warm items such as bread or rolls. -
Page 18: Care And Maintenance
CARE AND MAINTENANCE 4) Remove the two Burner screws from the bottom of grill Bowl. (FIG. 15C) Lift Burner out from the top of the grill. To reduce the risk of a cut injury: · Be careful or wear protective gloves when cleaning grill parts that have sharp edges. -
Page 19: B) Storage
5) Use a pipe cleaner to clear insect nests from the inlet hole of main burner (FIG. 15D). Open up the main burner holes with a small nail or wire.Normal wear and corrosion may enlarge some holes, however, if large cracks or holes are found, replace the Burner. -
Page 20: Troubleshooting
TROUBLESHOOTING Possible Cause: Solution: Problem: Burner will not light Burner is not connected to Make sure burner tube is over the gas nozzle. See How to Clean using the ignitor the Burners #6 page 20: Re-install after cleaning. Valve. When lighting the Burner, push-in and turn control panel knob Not pausing long enough counter-clockwise to the high position. - Page 21 TROUBLESHOOTING (Cont’d) Problem: Possible Cause: Solution: Flames blow out High or gusting winds Turn front of grill to face wind or increase flame height. Gas in LP Cylinder is low Check LP gas cylinder. Refill if necessary. See “Low flame” problem above. Excess flow valve tripped Clean the grill.
-
Page 22: Important Notice-Lp Cylinder With Opd
IMPORTANT NOTICE This Gas Grill must be used with a LP Gas Cylinder equipped with an OPD (Overfill Prevention Device). This is a secondary device to prevent the overfill of your LP Gas cylinder. The proper methods for the filling of your LP Gas cylinder are by weight or volume, as described in NFPA 58. -
Page 23: Limited Warranty
MECO CORPORATION LIMITED WARRANTY This product is warranted to the original consumer purchaser against defects in material and workmanship under normal outdoor household use and correct assembly (if assembled by the consumer-purchaser). Burner and Cooking Grid are warranted for a period of one (1) year from the date of purchase. - Page 24 Aussie ® P/N 03.6602.00 REL. 11/06...
Need help?
Do you have a question about the Joey 7110 Series and is the answer not in the manual?
Questions and answers