Kaiser EH Series User Manual
Hide thumbs
Also See for EH Series:
- User manual (108 pages) ,
- User manual (68 pages) ,
- User manual (88 pages)
Table of Contents
Advertisement
Advertisement
Table of Contents

Subscribe to Our Youtube Channel
Related Manuals for Kaiser EH Series


Summary of Contents for Kaiser EH Series
- Page 2 DEAR CUSTOMERS, we thank to you for the acquisition of our technology. We are convinced that you have made a right choice. This product which satisfies the high quality demands and corresponds to world comprehensive standards realizes your cookeries, and his modern appearance which has been developed by the best European designers will decorate your kitchen splendidly.
- Page 3 LIEBE KUNDIN, LIEBER KUNDE, wir danken Ihnen für den Erwerb unserer Technik. Wir sind überzeug, dass Sie eine richtige Wahl getroffen haben. Dieses Produkt, das die hohen Forderungen zur Qualität befriedigt und weltumfassenden Standards entspricht, verwirklicht Ihre Kochkünste, und sein modernes Aussehen, das von besten europäischen Designer entwickelt worden ist, wird Ihre Küche prächtig schmücken.
-
Page 4: Table Of Contents
CONTENTS INSTALLATION INSTRUCTIONS Electrical connection Installation of the oven Preparation BRIEF DESCRIPTION Location drawing Control panel EQUIPMENT Cooking zones control Multifunction oven control Operation functions of the oven USAGE Mechanical timer Digital clock timer of the oven Prestige Digital clock timer with sensor of the oven Touch control Specialities of the oven Logic control Digital clock timer of the oven... - Page 5 INHALTSVERZEICHNIS FÜR DEN INSTALLATEUR Stromanschluss Einbau des Backofen Vorbereitung KURZBESCHREIBUNG Gesamtansicht Bedienblende AUSSTATUNG Kochfeldersteuerung Steuerung von Multifunktionsbackofen Betriebsfunktion des Backofens BENUTZUNG Mechanische Zeitschaltuhr Elektronische Zeitschaltuhr von Backofen Prestige Prestige Elektronische Zeitschaltuhr mit Sensor von Backofen Touch control Touch control Besonderheiten des Backofen Logic control 57 Logic control Elektronische Zeitschaltuhr von Backofen Logic control...
-
Page 6: Installation Instructions
INSTALLATION INSTRUCTIONS ELECTRICAL CONNECTION Before connecting the oven to the mains power supply, make sure that: The supply voltage corresponds to the specifications on the data plate on the front of the oven. The mains supply has an efficient ground connection complying with all applicable laws and regulations. -
Page 7: Für Den Installateur
FÜR DEN INSTALLATEUR STROMANSCHLUSS Vor der Durchführung des Stromanschlusses muss sichergestellt werden, dass: die Eigenschaften des Stromnetzes mit den Werten auf dem angebrachten Typenschild auf der hinteren Wand des Backofens übereinstimmen; das Stromnetz gemäß den geltenden Bestimmungen Rechtsvorschriften geerdet ist. Die Erdung ist eine notwendige Voraussetzung der Nutzung des Gerätes. -
Page 8: Installation Of The Oven
INSTALLATION OF THE OVEN The oven can be installed under a work top or in a cooking column. Figure shows the installation dimensions. Make sure that surrounding materials are heat resistant. Align the oven centrally with respect to the side walls of the units surrounding it and fix it in place with the screws and Allen screws provided. -
Page 9: Einbau Des Backofen
EINBAU DES BACKOFENS Der Backofen kann unter einer Arbeitsplatte oder in einen Schrank eingebaut werden. Die Einbaumaße müssen den auf der Abbildung dargestellten Massen entsprechen. Das Möbelmaterial muss hitzebeständig sein. Der Backofen muss zu den Möbelwänden zentriert, und mit den mitgelieferten Schrauben und Buchsen befestigt werden. -
Page 10: Brief Description
BRIEF DESCRIPTION LOCATION DRAWING Arrangement of functional assemblies 1. Vitroceramic cooking hob 2. Rotary handles of the cooking zones regulator 3. Rotary handles / keys of the oven temperature regulator 4. Rotary handles / keys of the oven operating functions 5. -
Page 11: Kurzbeschreibung
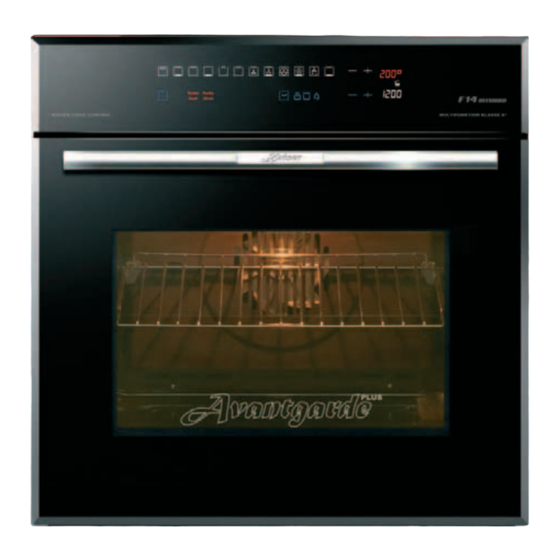
KURZBESCHREIBUNG GESAMTANSICHT Anordnung von Funktionsbaugruppen 1. Glaskeramik-Kochfeld mit Kochzonen 2. Drehknebel der Kochzonenregler 3. Drehknebel / Tasten des Backofentemperaturreglers 4. Drehknebel / Tasten der Backofenbetriebsfunktionen 5. Bedienblende 6. Backofentür 7. Elektronische Zeitschaltuhr 8. Bereich für Funktioneneinstellungen Verschiedene Modelle, je nach ihrer technischen Ausrüstung, sind mit verschiedenen Bedienblenden versehen, an denen die Bedienelemente sinnvoll angeordnet sind. - Page 12 CONTROL PANEL Control Panels of the models Prestige* * with Timer Control panels of the models Prestige* * with clock timer Control panels of the models Touch control* * with clock timer with sensor Control panels of the models Logic control* * with Digital clock timer 1.
-
Page 13: Bedienblende
BEDIENBLENDE Bedienblende von Modellen Prestige* * Prestige* * mit Kurzzeitwecker Bedienblende von Modellen Prestige* Prestige* * mit elektronischer Zeitschaltuhr Bedienblende von Modellen Touch control * mit elektronischer Zeitschaltuhr mit Touch control * * Sensorbedienung Bedienblende von Modellen Logic control* Logic control* * mit elektronischer Zeitschaltuhr 1. - Page 14 Control Panels of the models Prestige* * with Timer Control Panels of the models Belle Epoque with mechanical timer Control panels of the models Prestige* * with clock timer Control panels of the models Logic control* * with Digital clock timer 1.
- Page 15 Bedienblende von Modellen Prestige* * Prestige* * mit Kurzzeitwecker Bedienblende von Modellen Belle Epoque Belle Epoque mit mechaniche Zeitschaltuhr Bedienblende von Modellen Prestige* Prestige* * mit elektronischer Zeitschaltuhr Bedienblende von Modellen Logic control* Logic control* * mit elektronischer Zeitschaltuhr 1. Drehknebel der Kochzonenregler 2.
- Page 16 EQUIPMENT COOKNG ZONES CONTROL The cooking zones regulation ensues with the help of rotary handles 1 which are set up on the control panel 2 of the oven. The graphic symbols which are beside the rotary handles of the cooking zones shows which cooking zone the chosen rotary clutch manages.
-
Page 17: Ausstatung
AUSSTATUNG KOCHFELDERSTEUERUNG Die Kochzonensteuerung erfolgt mit Hilfe von Drehknebel 1, die auf der Bedienblende des Backofens 2 eingerichtet sind. Die graphischen Symbole, die sich neben den Drehknebel der Kochzonen befinden, zeigen, über welche Kochzone der gewählten Drehknebel verwaltet. Zum Einschalten oder zur Regulierung einer Kochzone müssen sie wie folgt vorgehen: Drehknebel im Uhrzeigersinn drehen 3 den Drehknebel in ausgewählte Position... -
Page 18: Multifunction Oven Control
MULTIFUNCTION OVEN CONTROL Oven operation functions are steered through turning of the rotary handle mode of operation 1 and rotary handle temperature regulator 2 on the control panel 3. The graphic symbols next to the rotary handles show the chosen operation modes. To turn off the oven bring the rotary handle operating mode... -
Page 19: Steuerung Von Multifunktionsbackofen
STEUERUNG VON MULTIFUNKTIONS- BACKOFEN Backofenbetriebsfunktionen werden durch Drehen von Drehknebel Betriebsart 1 und Drehknebel Temperaturregler 2 auf der Bedienblende 3 gesteuert. Die graphischen Symbole neben den Drehknebeln zeigen die gewählten Backofenbetriebarten. Abschalten Backofens Drehknebel Drehknebel Betriebsart Temperaturregler 2 in die Position «0» «0». -
Page 20: Operation Functions Of The Oven
OPERATION FUNCTIONS OF THE OVEN CONVENTIONAL COOKING A classical system in which top and bottom heat are used to cook a single dish. Place the food in the oven only once cooking temperature has been reached, i.e. when the heating indicator goes out. If you want to increase top or bottom temperature towards the end of the cooking cycle, set the temperature control to the right position. -
Page 21: Betriebsfunktion Des Backofens
BETRIEBSFUNKTIONEN DES BACKOFENS KONVENTIONELLES BACKEN Ein klassisches System, bei dem Unter- oder Oberhitze verwendet werden, für Zubereitung nur eines Gerichts geeignet ist. Speisen sollten möglichst eingeschoben werden, wenn Backofen bereits vorgegebene Temperatur erreicht hat, das heißt, nach Erlöschen der Kontrolllampe. Wenn die Unter- oder Oberhitze gegen Ende des Backvorgangs erhöht... - Page 22 SPIT Some ovens are completely equipped with stick engine and rotary spit for spit roast. The spit* allows to roast food in the oven rotary. It serves primarily for the roasting of shashliks, fowl, small sausages and similar dishes. The switch on and off of the spit actuation occurs simultaneously with the switch on and off of the Grill functions ATTENTION! No separate controlling rotary...
- Page 23 DREHESPIESS Einige Backöfen sind komplett mit Stabmotor und Drehspieß für Spießbraten ausgestattet. Der Spieß* erlaubt es, Speisen im Backofen rotierend zu rösten. Er dient hauptsächlich zum Rösten von Schaschliks, Geflügel, Würstchen u.ä. Speisen. Ein- Ausschaltung Spießantrieb erfolgt gleichzeitig mit der Ein- und Ausschaltung von Grillfunktionen oder ACHTUNG! Dem Spieß...
-
Page 24: Usage
MECHANICAL TIMER * To start using: turn the rotary handle 1 clockwise as far as it will go and then set the wanted time between 0 and 60 minutes. The machanical Timer cannot steer the oven operation and only serves as a signalling device to remind of the execution. -
Page 25: Benutzung
MECHANISCHER KURZZEITWECKER * Um in Betrieb zu nehmen: den Drehknebel 1 bis zum Anschlag im Uhrzeigersinn drehen, und dann auf die gewünschte Zeit zwischen 0-60 Minuten einstellen. Der mechanische Kurzzeitwecker kann die den Betrieb vom Backofen nicht steuern und dient nur als eine Signaleinrichtung, die an die Ausführung erinnert. - Page 26 MECHANICAL TIMER Setting the clock To set the current day time: Push the rotary switch 1 and turn it counter clockwise. Setting the end of cooking time The oven must switch off after the set end time. Before setting the end of cooking time you have to set the oven operating function and the temperature (see chapter «Multifunction oven control»).
-
Page 27: Mechanische Zeitschaltuhr
MECHANISCHE ZEITSCHALTUHR Tageszeiteinstellung Zur Einstellung der aktuellen Uhrzeit: Den Drehgriff 1 drücken und im gegen Uhrzeigersinn drehen. Einstellen der Endzeit Der Backofen muss in eingegebener Endzeit ausgeschaltet werden. Bevor Dauer Gerichtszubereitung eingegeben wird, müssen Backofenfunktion und die Temperatur der Zubereitung einstellen (siehe Kapitel »Steuerung «... - Page 28 Mechanical countdown timer The mechanical countdown timer does not control the oven operation and only serves as a signal device which indicates the end of the operating function. To switch on the countdown timer: Turn the rotary switch 1 counter clockwise and set the required time between 0 and 180 minutes When the set time has elapsed, the alarm will...
- Page 29 Mechanischer Kurzzeitwecker Der mechanische Kurzzeitwecker kann den Betrieb des Backofens nicht steuern und dient nur als eine Signaleinrichtung, Ablauf eingerichteten Zeit erinnert. Zum Einschalten des Kurzzeitweckers: Drehgriff gegen Uhrzeigersinn drehen, und die gewünschte Zeit zwischen 0-180 Minuten einstellen. Nach Ablauf der vorgegebenen Zeit ertönt ein akustisches Signal.
- Page 30 DIGITAL CLOCK TIMER* OF THE OVEN Prestige Setting the clock To set the current day time Press key 1 and 2 at the same time. With this setting a flashing dot 3 appears showing you are in clock setting mode. By pressing the electoral keys 4 ( you can set the time.
-
Page 31: Elektronische Zeitschaltuhr Von
ELEKTRONISCHE ZEITSCHALTUHR* VON Prestige BACKÖFEN Prestige Tageszeiteinstellung Zur Einstellung der aktuellen Uhrzeit: Tasten 1 und 2 gleichzeitig drücken Bei dieser Einstellung erscheint ein blinkender Punkt 3, er zeigt, dass Sie gerade bei der Zeiteinstellung sind. it den Wahltasten 4 ( oder ) die aktuelle Uhrzeit einstellen. - Page 32 Electronical countdown timer The countdown timer works independently of all other timer functions, and can be used even when the oven is switched off. To switch on the countdown timer Press key 1 The symbol countdown timer 2 appears on the display Press the choice keys 3 ( ) to set...
- Page 33 Elektronischer Kurzzeitwecker Der Gebrauch vom elektronischen Kurzzeitwecker ist von anderen Funktionen unabhängig und kann auch bei ausgeschaltetem Backofen verwendet werden. Zum Einschalten des Kurzzeitweckers: Taste 1 drücken Display erscheint Symbol Kurzzeitwecker 2. Mit den Wahltasten 3 ( oder ) die Zeitdauer einstellen und einige Sekunden warten.
- Page 34 Setting the cooking time The process in the oven should switch off after a wanted duration automatically. Before setting the duration you have to set the oven operating function temperature (see chapter «Multifunction oven control») Press key 1 to set the duration of preparation.
- Page 35 Einstellen der Betriebsdauer Der Vorgang im Backofen soll nach einer gewünschten Dauer automatisch abgeschaltet werden. Bevor Dauer Gerichtszubereitung eingegeben wird, müssen Backofenfunktion und die Temperatur der Zubereitung einstellen (siehe Kapitel »Steuerung « von Multifunktionsbackofen«). »). Drücken Sie die Taste 1, um die Dauer der Gerichtzubereitung einzugeben.
- Page 36 Setting the end of cooking time The oven must switch off after the set end time. Before setting the end of cooking time you have to set the oven operating function and the temperature (see chapter “Cooking”). Press key 1 to set the end of preparation. The meal preparation symbol 2 and symbol 3 ( AUTO ) appear on the display.
- Page 37 Einstellen der Endzeit Der Backofen muss in eingegebener Endzeit ausgeschaltet werden. Bevor die Endzeit eingegeben wird, müssen Sie die Backofenfunktion und die Temperatur Zubereitung einstellen (siehe Kapitel „Gebrauch vom Backofen“). " "). Taste drücken, Endzeit einzugeben. Symbol Display erscheinen das Symbol 3 ( AUTO ).
- Page 38 Setting cooking duration and end time You can combine the cooking duration and end of cooking time functions to set the start and end times for cooking. In this way you can program your electronic oven to cook while you are out or to defrost foods ready for you to cook when you get back.
- Page 39 Einstellen der Betriebsdauer und Endzeit Sie können die beiden Funktionen „Betriebsdauer“ „Endzeit“ kombinieren, wobei eine gewünschte Zeit eingeben, um den Backofen ein- und auszuschalten. So können Sie Ihren Backofen für die Zeit programmieren, wenn Sie nicht zu Hause sind; oder das Auftauen von Speisen bevor Sie nach Hause kommen.
- Page 40 The symbol 1 ( AUTO ) appears on the display, that comfirms a successful programming of the cooking duration and the current day time appears again. Press key 2 to set the end time (see chapter “Setting the end time”). The end time (3) appears on the display, that accords to the current day time plus duration (in our example 12:45, that means plus 30 minutes).
- Page 41 Display erscheint Symbol 1 ( AUTO ), ( AUTO ), das bestätigt eine erfolgreiche Programmierung Betriebsdauer aktuelle Tageszeit wird wieder angezeigt. Die Taste 2 drücken, um die Endzeit einzugeben (siehe Kapitel „Einstellen der " Endzeit“). "). Auf dem Display erscheint die Endzeit (3), die der (3), aktuellen Tageszeit plus Betriebsdauer entspricht (in unserem Beispiel 12:45, das heißt plus 30...
- Page 42 DIGITAL CLOCK TIMER WITH SENSOR* OF THE OVEN Touch control Symbols 1 ( AUTO ) and 0.00 will start flashing when the unit is switched on for the first time. Setting the clock To set the current day time: Press the middle key 2 for at least 3 seconds.
-
Page 43: Touch Control
ELEKTRONISCHE ZEITSCHALUHR MIT SENSOR - BEDIENUNG* VON BACKÖFEN Touch control Touch control Wird die Uhr zum ersten Mal eingeschaltet, blinken die Symbole 1 ( AUTO ) und 0.00 1 ( AUTO ) 0.00. Uhrzeiteinstellung Zur Einstellung der aktuellen Uhrzeit: Auf die mittlere Taste 2 mind. 3 Minuten lang drücken. - Page 44 Electronical countdown timer The countdown timer works independently of all other timer functions, and can be used even when the oven is switched off. To switch on the countdown timer Press the middle key 1 for 3 seconds. The symbol countdown timer 2 appears on the display Press the choice keys 3 or 4 ( ) to...
- Page 45 Elektronischer Kurzzeitwecker Der Gebrauch vom elektronischen Kurzzeitwecker ist von anderen Funktionen unabhängig und kann auch bei ausgeschaltetem Backofen verwendet werden. Zum Einschalten des Kurzzeitweckers: Die mittlere Taste 1 3 Sekunden land gedrückt halten. Display erscheint Symbol Kurzzeitwecker 2. Mit den Wahltasten 3 oder 4 ( oder die gewünschte Zeit einstellen.
- Page 46 Setting the cooking time The process in the oven should switch off after a wanted duration automatically. Before setting the duration you have to set the oven operating function temperature (see chapter “Cooking”) Press the middle key 1 for 3 seconds. Press key 1 again.
- Page 47 Einstellen der Betriebsdauer Der Vorgang im Backofen soll nach einer gewünschten Dauer automatisch abgeschaltet werden. Bevor Dauer Gerichtszubereitung eingegeben wird, müssen Backofenfunktion und die Temperatur der Zubereitung einstellen (siehe Kapitel „Gebrauch " vom Backofen“). "). Die mittlere Taste 1 3 Sekunden lang Drücken.
- Page 48 Setting the end of cooking time The oven must switch off after the set end time. Before setting the end of cooking time you have to set the oven operating function and the temperature (see chapter «Multifunction oven control»). Press the middle key 1 for 3 seconds Press key 1 again twice consecutively The symbol 2 and 0.00 appear on the display alternately and the symbol 3 (AUTO) flashes..
- Page 49 Einstellen der Endzeit Der Backofen muss in eingegebener Endzeit ausgeschaltet werden. Bevor die Endzeit eingegeben wird, müssen Sie die Backofenfunktion und die Temperatur Zubereitung einstellen (siehe Kapitel »Steuerung von Multifunktionsbackofen«). « »). Die mittlere Taste 1 3 Sekunden lang drücken. Die mittlere Taste 1 erneut zwei Mal hintereinander drücken.
- Page 50 Setting cooking duration and end times You can combine the cooking duration and end of cooking time functions to set the start and end times for cooking. In this way you can program your electronic oven to cook while you are out or to defrost foods ready for you to cook when you get back.
- Page 51 Einstellen der Betriebsdauer und Endzeit Sie können die beiden Funktionen "Betriebsdauer" „Endzeit“ kombinieren, wobei eine gewünschte Zeit eingeben, um den Backofen ein- und auszuschalten. So können Sie Ihren Backofen für die Zeit programmieren, wenn Sie nicht zu Hause sind; oder das Auftauen von Speisen bevor Sie nach Hause kommen.
- Page 52 The symbol 1 (AUTO) appears on the display, that confirms a successful programming of the cooking duration and the current day time appears again. Now set the wanted end time (see chapter «Setting the end time»). The end time (2) appears on the display, that accords to the current day time plus duration (in our example 12:45, that means plus 30 minutes).
- Page 53 Auf dem Display erscheint das Symbol 1 (AUTO), 1 (AUTO), das bestätigt eine erfolgreiche Programmierung der Betriebsdauer und die aktuelle Tageszeit wird wieder angezeigt. Programmieren Sie jetzt die gewünschte Endzeit (siehe Kapitel »Einstellen der Endzeit«). « »). Auf dem Display erscheint die Endzeit (2), die der aktuellen Tageszeit plus Betriebsdauer entspricht (2), (in unserem Beispiel 12:45, das heißt plus 30...
- Page 54 Adjusting beep volume To adjust beep volume: Press the choice keys 1 and 2 ( - or + ) simultaneously. The dot separating the hours from the minutes flashes. Then press the middle key 3. A flashing heading 4 appears ( ton1 ) - (loud sound).
- Page 55 Toneinstellung des Warnsignals Um die Lautstärke des Warnsignals einzustellen: Die Wahltasten 1 und 2 ( - oder 2 ( - + ). gleichzeitig drücken Punkt zwischen Stunden- und Minutenanzeige blinkt Dann die mittlere Taste 3 drücken. Eine blinkende Überschrift 4 erscheint ( ton1 ) - 4 ( ton1 ) - (lauter Ton).
-
Page 56: Specialities Of The Oven Logic Control
SPECIALITIES OF THE OVEN Logic control For each cooking function, your new oven's Logic control electronic controller suggests a default cooking temperature. This is based on our own experience in obtaining the best results. You can nevertheless change the default value to suit your own requirements. -
Page 57: Besonderheiten Des Backofen Logic Control
BESONDERHEITEN DES BACKOFENS Logic control Logic control Die elektronische Steuerung Ihres Backofens Logic control schlägt für alle Betriebsfunktionen Logic control eine empfohlene Temperatur vor. Das basiert sich auf unseren eigenen Erfahrungen, damit die besten Backergebnisse erreicht werden. Selbstverständlich können diese Temperaturwerte jederzeit nach Belieben ändern und somit Ihren Anforderungen anpassen. - Page 58 DIGITAL TIME SWITCH CLOCK OF THE OVEN Logic control Setting the clock To set the current time: Press key 1 and 2 at the same time. With this setting a flashing colon 3 appears showing you are in clock setting mode. By pressing the choice keys 4 ( you can set the time.
-
Page 59: Elektronische Zeitschaltuhr Von
ELEKTRONISCHE ZEITSCHALTUHR VON BACKÖFEN Logic control Logic control Tageszeiteinstellung Zur Einstellung der aktuellen Uhrzeit: Tasten 1 und 2 gleichzeitig drücken Bei dieser Einstellung erscheint ein blinkender Doppelpunkt 3, er zeigt, dass Sie gerade bei der Zeiteinstellung sind. it den Wahltasten 4 ( oder ) die aktuelle Uhrzeit einstellen. - Page 60 Usage of the oven You can start the process of cooking with a few easy handels. Switch on the oven by pressing key Pressing keys for the oven operating function Using the rotary handle for the oven operating function you choose the wanted oven function. According to the chosen program a recommended temperature is set in the oven automatically.
- Page 61 Gebrauch von Backofen Mit wenigen einfachen Handgriffen können Sie den Prozess der Zubereitung beginnen. Den Backofen mit Hilfe von Taste einschalten. Hilfe Tasten Backofenbetriebsfunktionen oder Hilfe Drehknebeles Backofenbetriebsfunktionen gewünschte Backofenfunktion wählen. Entsprechend des gewählten Programms, wird im Backofen automatisch eine empfohlene Temperatur eingestellt.
- Page 62 Oven light The oven is equipped with an intelligent light control to reduce the electricity consumption. The light stays on while the oven is warming up and for 2 minutes after the set temperature is reached, then switches off. Press any key to check on the food in the oven. The light switches on for another 3 minutes.
- Page 63 Innenbeleuchtung Backofen einem intelligenten Kontrollsystem der Beleuchtung ausgestattet, die den Konsum der Elektroenergie vermindert. Das Licht bleibt angeschaltet nur für die Zeit der Erwärmung und wird nach 2 Minuten nach dem Erreichen angegebenen Temperatur ausgeschaltet. Zur Kontrolle des Gerichtes einfach eine beliebige Taste drücken, und die Innenbeleuchtung schaltet sich für 3 Minuten ein.
- Page 64 Deactivating the child lock Press and hold key 1 for at least 3 seconds. Symbol 2 appears on the display Followed by symbol 3. The electronic control of the oven is ready for use again. Electronical countdown timer The countdown timer works independently of all other timer functions, and can be used even when the oven is switched off.
- Page 65 Ausschaltung der Kindersicherung Die Taste 1 mindestens 3 Sekunden gedrückt halten. Auf dem Display erscheint das Symbol 2 und danach das Symbol 3 Elektronische Steuerung des Backofens ist wieder Betriebsbereit. Elektronischer Kurzzeitwecker Der Gebrauch vom elektronischen Kurzzeitwecker ist von anderen Funktionen unabhängig und kann auch bei ausgeschaltetem Backofen verwendet werden.
- Page 66 Setting the cooking time The processes in the oven should switch off after a wanted duration automatically. Before setting the duration you have to set the oven operating function temperature (see chapter “Cooking”) The meal preparation symbol 1 appears on the display and shows that the oven is on.
- Page 67 Einstellen der Betriebsdauer Der Vorgang im Backofen soll nach einer gewünschten Dauer automatisch abgeschaltet werden. Bevor Dauer Gerichtszubereitung eingegeben wird, müssen Backofenfunktion und die Temperatur der Zubereitung einstellen (siehe Kapitel „Gebrauch " vom Backofen“). "). Display wird Symbol Gerichtzubereitung erscheinen informiert, dass Backofen in Betrieb ist.
- Page 68 Setting the end of cooking time The oven must switch off after the set end time. Before setting the end of cooking time you have to set the oven operating function and the temperature (see chapter «Multifunction oven control»). The meal preparation symbol 1 appears on the display and shows that the oven is on.
- Page 69 Einstellen der Endzeit Der Backofen soll in eingegebener Endzeit ausgeschaltet werden. Bevor die Endzeit eingegeben wird, müssen Sie die Backofenfunktion und die Temperatur Zubereitung einstellen (siehe Kapitel »Steuerung von Multifunktionsbackofen«). « »). Auf dem Display erscheint das Symbol Gerichtzubereitung 1, das mitteilt, dass der Backofen in Betrieb ist.
- Page 70 Setting cooking duration and end times You can combine the cooking duration and end of cooking time functions to set the start and end times for cooking. In this way you can program your electronic oven to cook while you are out or to defrost foods ready for you to cook when you get back.
- Page 71 Einstellen der Betriebsdauer und Endzeit Sie können die beiden Funktionen "Betriebsdauer" „Endzeit“ kombinieren, wobei eine gewünschte Zeit eingeben, um den Backofen ein- und auszuschalten. So können Sie Ihren Backofen für die Zeit programmieren, wenn Sie nicht zu Hause sind; oder das Auftauen von Speisen bevor Sie nach Hause kommen.
- Page 72 The symbol 1 (letter A) appears on the display, that comfirms a successful programming of the cooking duration and the current day time appears again. Press key 2 to set the end time (see chapter «Setting the end time»). The end time (3) appears on the display, that accords to the current day time plus duration (in our example 12:45, that means plus 30 minutes).
- Page 73 Display erscheint Symbol (Buchstabe ), das bestätigt eine erfolgreiche Programmierung Betriebsdauer aktuelle Tageszeit werden wieder angezeigt. Die Taste 2 drücken, um die Endzeit einzugeben (siehe Kapitel »Einstellen der Endzeit«). « »). Auf dem Display erscheint die Endzeit (3), die der aktuellen Tageszeit plus Betriebsdauer entspricht (in unserem Beispiel 12:45, das heißt plus 30 Minuten).
- Page 74 DIGITAL TIME SWITCH CLOCK OF THE OVEN Logic control F12 with full BITURBO sensor control Setting the clock To set the current time: Press key 1 and 2 at the same time. With this setting a flashing colon 3 appears showing you are in clock setting mode.
-
Page 75: Elektronische Zeitschaltuhr Von Backöfen
ELEKTRONISCHE ZEITSCHALTUHR VON BACKÖFEN Logic control F12 Logic control BITURBO mit Vollsensorbedienung BITURBO Tageszeiteinstellung Zur Einstellung der aktuellen Uhrzeit: Tasten 1 und 2 gleichzeitig drücken Bei dieser Einstellung erscheint ein blinkender Doppelpunkt 3, er zeigt, dass Sie gerade bei der Zeiteinstellung sind. - Page 76 Usage of the oven You can start the process of cooking with a few easy handels. Switch on the oven by pressing key 1. Using the key 2 for the oven operating function you choose the wanted oven function. According to the chosen program a recommended temperature is set in the oven automatically.
- Page 77 Gebrauch von Backofen Mit wenigen einfachen Handgriffen können Sie den Prozess der Zubereitung beginnen. Den Backofen mit Hilfe von Taste 1 einschalten. Hilfe Taste Backofenbetriebsfunktionen gewünschte Backofenfunktion wählen. Entsprechend des gewählten Programms, wird im Backofen automatisch eine empfohlene Temperatur eingestellt. Double grill 250°C Single grill 250°C Defrost 40°C...
- Page 78 Residual heat The term Residual heat is used to describe the heat which the oven has accumulated inside it while cooking foods. This heat is gradually dispersed over time and may still be a culinary resource if managed properly: your oven indicates the internal temperature, after turning the oven off, until it drops to 50°C.
- Page 79 Restwärme Unter Restwärme versteht man jene Wärme, die im Backofen nach der Zubereitung von Gerichten gespeichert bleibt. Diese Wärme sinkt im Laufe der Zeit und kann ggf. noch als Wärmestelle in der Küche verwendet werden: Nach dem Abschalten zeigt Ihr Backofen die Innentemperatur an, bis sie 50°C erreicht hat.
- Page 80 Oven light The oven is equipped with an intelligent light control to reduce the electricity consumption. The light stays on while the oven is warming up and for 3 minutes after the set temperature is reached, then switches off. Press any key (except ON/ OFF) to check on the food in the oven.
- Page 81 Innenbeleuchtung Backofen einem intelligenten Kontrollsystem der Beleuchtung ausgestattet, die den Konsum der Elektroenergie vermindert. Das Licht bleibt nur für die Zeit der Vorheizung angeschaltet und wird nach 3 Minuten nach dem Erreichen angegebenen Temperatur ausgeschaltet. Zur Kontrolle des Gerichtes einfach eine beliebige Taste (ausschließlich EIN/ AUS) drücken, und die Innenbeleuchtung schaltet sich für 3 Minuten ein.
- Page 82 Electronical countdown timer and alarm clock The countdown timer and alarm clock work independently of all other functions, and can be used even when the oven is switched off. Countdown timer emits the beeping sounds at the end of choosed time interval. To switch on the countdown timer Press key 1 to turn on the oven without a setting the cooking functions.
- Page 83 Elektronischer Kurzzeitwecker und Wecker Der Gebrauch vom elektronischen Kurzzeitwecker Wecker anderen Funktionen unabhängig und kann auch bei ausgeschaltetem Backofen verwendet werden.. Elektronischer Kurzzeitwecker ertönt die Signaltöne nach Ablauf der eingestellten Zeitdauer. Zum Einschalten des Kurzzeitweckers: Taste 1 drücken, um den Backofen einzuschalten ohne...
- Page 84 Setting the cooking time The process should switch off the oven after a wanted duration automatically. Before setting the duration you have to set an oven operating function temperature (see chapter “Cooking”). The symbol 1 appears on the display and shows that the oven is on.
- Page 85 Einstellen der Betriebsdauer Der Vorgang im Backofen soll nach einer gewünschten Dauer automatisch abgeschaltet werden. Bevor Dauer Gerichtszubereitung eingegeben wird, müssen Sie eine Backofen- funktion und eine Temperatur der Zubereitung einstellen (siehe Kapitel „Gebrauch " Backofen“). "). Auf dem Display erscheint das Symbol 1 und informiert, dass Backofen in Betrieb ist.
- Page 86 Setting the end of cooking time The oven must switch off after the set end time. Before setting the end of cooking time you have to set the oven operating function and the temperature (see chapter “«Multifunction oven control»). The symbol 1 appears on the display and shows that the oven is on.
- Page 87 Einstellen der Endzeit Der Backofen soll in eingegebener Endzeit ausgeschaltet werden. Bevor die Endzeit eingegeben wird, müssen Sie sowohl eine Backofenfunktion als auch die Temperatur der Zubereitung einstellen (siehe Kapitel »Steuerung « Multifunktionsbackofen«). »). Auf dem Display erscheint das Symbol 1, das mitteilt, dass der Backofen in Betrieb ist.
- Page 88 Setting cooking duration and end times You can combine the cooking duration and end of cooking time functions to set the start and end times for cooking. In this way you can program your electronic oven to cook while you are out or to defrost foods ready for you to cook when you get back.
- Page 89 Einstellen der Betriebsdauer und Endzeit Sie können die beiden Funktionen "Betriebsdauer" „Endzeit“ kombinieren, wobei eine gewünschte Zeit eingeben, um den Backofen ein- und auszuschalten. So können Sie Ihren Backofen für die Zeit programmieren, wenn Sie nicht zu Hause sind; oder das Auftauen von Speisen bevor Sie nach Hause kommen.
- Page 90 Set the wanted end time with the choice keys 7. The end time 8 appears on the display. A few seconds later this time will be registrated. The oven is in expectance state now. The current day time 6 is displayed (in our example 13:45). In our example the oven should be turned on at 14:20 with...
- Page 91 Mit den Wahltasten 7 die gewünschte Endzeit einstellen. Auf dem Display erscheint die Endzeit 8 (in 15:30). unserem Beispiel 15:30). Nach wenigen Sekunden wird diese Zeit vom Timer registriert. Der Backofen ist im Bereitschaftsmodus. Die aktuelle Tageszeit wird angezeigt 6 (in unserem Beispiel 13:45).
- Page 92 DIGITAL TIME SWITCH CLOCK OF THE OVEN Logic control F14 with full BITURBO sensor control Demo mode This is the mode of operation after an electric supply break and also after the first turning-on. The purpose of this mode is to show all performance capabilities of the electronic control with the help of a registered sequence of orders.
-
Page 93: Logic Control Biturbo
ELEKTRONISCHE ZEITSCHALTUHR VON BACKÖFEN Logic control F14 Logic control BITURBO mit Vollsensorbedienung BITURBO Vorführmodus So heißt die Betriebsart, in der der Backofen sich normalerweise befindet, wenn die Speisespannung ausgefallen ist, von daher auch beim ersten Einschalten. Der Zweck ist es, alle Möglichkeiten elektronischen Steuerung anhand... - Page 94 Setting the clock To set the current time: Press and hold the key 1 for 5 seconds. As a confirmation that the clock setting is possible, it appears a sound signal. The keys 2 and 3 are highlighted, the dividing colon 4 between indications of hours and minutes blinks By pressing the choice keys 2 or 3 you...
- Page 95 Uhrzeiteinstellung Zur Einstellung der aktuellen Uhrzeit: Die Taste 1 drücken und 5 Sekunden lang gedrückt halten. Jeder aktivierte Befehl wird mit einem Signalton bestätigt. Die Tasten 2 und 3 sind beleuchtet, der Doppelpunkt zwischen Anzeigen für Stunden und Minuten blinkt. it den Wahltasten 2 oder 3 die aktuelle Uhrzeit einstellen.
- Page 96 Usage of the oven You can start the process of cooking with a few easy handels. Switch on the oven by pressing key 1. Using one of the key 2 for the oven operating functions you choose a desired oven function. According to the chosen program a recommended temperature is set in the oven automatically.
- Page 97 Gebrauch von Backofen Mit wenigen einfachen Handgriffen können Sie den Prozess der Zubereitung beginnen. Den Backofen mit Hilfe von Taste 1 einschalten. Hilfe einer Taste Backofenbetriebsfunktionen 2, die gewünschte Backofenfunktion wählen. Entsprechend des gewählten Programms, wird im Backofen automatisch eine empfohlene Temperatur eingestellt.
- Page 98 Turbo heat function This function greatly reduces a time of heating of the oven with all of selected functions. Switch on the oven by pressing key 1. Choose a wanted oven function using one of the keys 2. Set a temperature you need by using the keys 3.
- Page 99 Funktion Turbo heat Turbo heat Diese Funktion beschleunigt gewaltig Aufheizen des Backofens bei jeder ausgewählten Funktion. Den Backofen mit Hilfe von Taste 1 einschalten. Mit Hilfe einer der Tasten 2 gewünschte Backofenfunktion wählen. gewünschte Temperatur Tasten 3 einstellen. Turbo heat-Funktion Turbo aktivieren, die Taste 4 drücken.
- Page 100 Oven light The oven is equipped with an intelligent light control to reduce the electricity consumption. The light stays on while the oven is warming up and for 3 minutes after the set temperature is reached, then switches off. To check a meal in the oven, touch the oven lighting key 1.
- Page 101 Backofenbeleuchtung Der Backofen verfügt über ein intelligentes Kontrollsystem der Beleuchtung, das den Energiekonsum reduziert. Das Licht bleibt nur für die Zeit der Erwärmung und 3 Minuten nach Erreichen eingestellten Temperatur an, dann schaltet es sich aus. Um das Gericht im Backofen zu überprüfen, drücken Beleuchtungstaste 1.
- Page 102 Setting the cooking time The process should switch off the oven after a wanted duration automatically. Before setting the duration you have to set an oven operating function temperature (see chapter «Usage of the oven»). Touch the key 1 one time to get the lighting symbol 2.
- Page 103 Einstellen der Betriebsdauer Der Vorgang im Backofen soll nach einer gewünschten Dauer automatisch abgeschaltet werden. Bevor Dauer Gerichtszubereitung eingegeben wird, müssen Sie eine Backofen- Funktion eine Temperatur Zubereitung einstellen (siehe Kapitel »Gebrauch « vom Backofen«). »). Berühren Sie die Taste 1 ein Mal, das Symbol 2 leuchtet auf.
- Page 104 Setting the end of cooking time The oven must switch off after the set end time. Before setting the end of cooking time you have to set the oven operating function and the temperature (see chapter “Cooking”) Touch the key 1 two times to get the lighting symbol 2.
- Page 105 Einstellen der Endzeit Backofen soll eingegebenen Zeit ausgeschaltet werden. Bevor die Endzeit eingegeben wird, müssen Sie sowohl eine Backofenfunktion als auch die Temperatur der Zubereitung einstellen (siehe Kapitel „Gebrauch vom Backofen“). " "). Drücken Sie die Taste 1 zwei Mal, das Symbol 2 leuchtet auf.
- Page 106 Setting cooking duration and end times You can combine the cooking duration and end of cooking time functions to set the start and end times for cooking. In this way you can program your electronic oven to cook while you are out or to defrost foods ready for you to cook when you get back.
- Page 107 Einstellen der Betriebsdauer und Endzeit Sie können die beiden Funktionen "Betriebsdauer" „Endzeit“ kombinieren, wobei eine gewünschte Zeit eingeben, um den Backofen ein- und auszuschalten. So können Sie Ihren Backofen für die Zeit programmieren, wenn Sie nicht zu Hause sind; oder das Auftauen von Speisen bevor Sie nach Hause kommen.
- Page 108 Electronical countdown timer The countdown timer clock works independently of all other functions, and can be used even when the oven is switched off. Countdown timer emits the beeping sounds at the end of choosed time interval. To switch on the countdown timer Touch the key 1 three times to get the lighting symbol 2.
- Page 109 Elektronischer Kurzzeitwecker Der Gebrauch vom elektronischen Kurzzeitwecker ist von anderen Funktionen unabhängig und kann auch ausgeschalteten Backofen verwendet werden. Elektronischer Kurzzeitwecker ertönt akkustische Signale nach Ablauf der eingestellten Zeitdauer. Zum Einschalten des Kurzzeitweckers: Drücken Sie die Taste 1, das Symbol 2 leuchtet auf.
- Page 110 Food probe The food probe is a thermometer which is being putted in the cooking food. With that thermometer you can control the internal temperature (core temperature) and then use to determine the end of the cooking time. It can happen, for example that the meat looks from the outside already cooked, however, is still bloody inside! The temperature which achieve the meals during...
- Page 111 Temperatursonde Die Temperatursonde (Bratenthermometer) ist ein — Thermometer, das in das Gericht gesteckt wird und interne Temperatur (Kerntemperatur) kontrollieren und so nutzen können, um das Ende der Garzeit zu bestimmen. Es kann beispielsweise vorkommen, dass das Fleisch von außen bereits gar aussieht, innen aber noch blutig ist! Die von den Gerichten während des Garens erreichte Temperatur ist eng mit hygienischen/...
- Page 112 Using of the food probe The socket 1 for the food probe 2 is situated on forward left angle in a niche of the oven and it’s protected by a metal cover. Important! The food probe doesn’t function if it has been attached to already operating oven! The electronic control informs about the activation of the food probe with double sound signal.
- Page 113 Verwendung der Temperatursonde Die Buchse 1 für die Temperatursonde 2 befindet sich vorderen Ecke links Backofenaussparung einem Metalldeckel geschützt. Wichtig! Temperatursonde funktioniert nicht, wenn es bei bereits eingeschaltetem Backofen eingesteckt Stecken Sie den Stecker 2 ganz ein. wird! Die Steuerung weist mit einem doppelten Signalton auf die Aktivierung hin.
- Page 114 When the food probe riches the preprogrammed temperature, the oven will be turned off. This is indicated by a sound signal. You can vary the value of the lowest core temperature in an area from +30 °C to +99 °C. We recommend you to keep to the following table which was taken from "THE NATIONAL FOOD SAFETY DATABASE (USA)"...
- Page 115 Wenn Temperatursonde vorgestellte Temperatur erreicht, dann wird Ofen ausgeschaltet. Dies wird durch einen Signalton angezeigt. Sie können den Wert der Mindest-Kerntemperatur in einem Bereich von +30 °C bis + 99°C variieren. +30 °C Wir empfehlen Ihnen, sich an die nachstehende +99 °C.
-
Page 116: Practical Advices
PRACTICAL ADVICES Baking It is recommended to bake pastry and cakes on the baking trais, which are provided as oven equipment. Choose a matching tray height. Depending on model the ovens have 4 or 5 heights. You also can bake on customary baking trais, which are to be placed on the grate. -
Page 117: Praktische Empfehlungen
PRAKTISCHE EMPFEHLUNGEN Backen Es wird empfohlen, die Gebäcke und Kuchen auf den Backblechen zu backen, die als Herdausrüstung mitgeliefert sind. Wählen passende Höhe für Backbleche. Je nach Modell verfügen die Backöfen über 4 bzw. 5 Höhen. kann auch handelsüblichen Kuchenformen und Backblechen gebacken werden, dann Rost... - Page 118 Pastry parameter Gebäckparameter bei Nutzung For conventional heating Konventioneller Beheizung Table 1 Tabelle 1 Kind of pastry Height Temperature Baking time, min. Gebäckart Höhe Temperatur °C Backzeit, min. ° Pastry in forms Formgebäck Meringue / Schaumgebäck / 80-100 60-70 Sandcake /Sandkuchen / 160-180 40-70 Barmcake / Hefekuchen /...
- Page 119 Pastry parameter Gebäckparameter bei Nutzung For thermocirculation. der Heißluft. Table 2 Tabelle 2 Temperature °C Baking time, min. King of pastry / Gebäckart / Temperatur °C Backzeit, min. ° Pastry in forms / Formgebäck/ Meringue / Schaumgebäck / 60-70 Sandcake / Sandkuchen / 65-70 Barmcake / Hefekuchen / 60-70...
- Page 120 Roast parameters for usage of Bratparameter bei Nutzung conventional heating Konventioneller Beheizung Table 3 Tabelle 3 Kind of meat Advices Height Temperature °C Roasttime min. Fleischgattung Empfehlungen Höhe Temperatur °C Bratzeit min. ° Stewed Beef / Rindfleisch 225-250 120-150 geschmort / Underdone Roastbeef / heated oven 225-250...
- Page 121 Roast parameters for usage of Bratparameter bei Nutzung thermocirculation der Heißluft Table 4 Tabelle 4 Fleischgattung Portion Temperatur °C Bratzeit min. ° Fowl / Hähnchen / 50-60 Game / Wildfleisch / 1-1,5 120-140 Veal / Kalbfleisch / 100-140 Pork / Schweinefleisch / 110-120 Beef / Rindfleisch / 120-150...
- Page 122 Note! The shown parameters concern roasting on the grid. If you use closed jars the temperature is to be set to 200 °C. After the run off of the predetermined halftime the meat should be reversed. It is more advantageousto roast bigger meat shares.
-
Page 123: Pflege Und Wartung
Bemerkung! dargestellten Parameter betreffen das Braten auf dem Rost. Bei der Verwendung von geschlossenen Gefäßen ist die Temperatur auf 200 °C einzustellen. ° . Nach Ablauf der Halbzeit, die für das Braten vorbestimmt ist, sollte das Fleisch umgewendet werden. Es ist günstiger größere Fleischportionen zu braten. -
Page 124: Care And Attendance
CARE AND ATTENDANCE IMPORTANT!!! As a safety precaution, before care attendance oven, always disconnect the plug from the power socket or the power cable from the oven. Replacement the oven light The oven light 1 must have these precise features: a) temperature resistance up to 300 °C. - Page 125 PFLEGE UND WARTUNG WICHTIG!!! Als Sicherheitsvorkehrung muss vor jeder Pflege- und Wartungarbeit des Backofens immer das Stromnetz abgeschaltet werden. Austausch der Ofenbeleuchtung Die Ofenbeleuchtung 1 muss folgende Merkmale aufweisen: a) hochtemperaturbeständig bis zu 300 ° . 300 ° . b) Stromversorgung: siehe Anschlusswerte V/Hz auf dem Typenschild.
- Page 126 Oven The inner walls of the oven are covered with easy to be cleaned high quality enamel. The very smooth surface counteracts against appearance of the remaining soiling on the walls of the oven very fast and can be also simply cleaned. The anti-acid-containing quality of this enamel permits a long-term qualitatively high exploitation of Your oven...
- Page 127 Backofen Die inneren Wände des Backofens sind hochwertiger einfach zu säubernden Emaille bedeckt. Die sehr glatte Oberfläche wirkt dem Erscheinen der restlichen Verschmutzungen auf den Wänden des Backofens sehr schnell entgegen und kann auch einfach gereinigt werden. Die antisäurehaltige Eigenschaft dieser Emaille erlaubt eine langfristige qualitativ hohe Ausnutzung ihres Backofens.
- Page 128 Kaiser The given construction differs from similar ones through the comfortable and practical access...
- Page 129 3fach-Teleskop-Auszug, je nach Modell), mit dem Ihr Herd ausgestattet ist, ermöglicht Ihnen, alle Bleche sowohl zusammen als auch getrennt voneinander und sogar während der Zubereitung eines Gerichtes herauszuschieben. Kaiser Kaiser Die gegebene Konstruktion unterscheidet sich von ähnlichen durch den bequemen und praktischen Zugriff zu jedem Blech und erlaubt Ihnen, Gebäck auf jedem herauszunehmen und zu...
- Page 130 Reversing the door For the ovens with the side opening doors. The refrigerator is delivered with the door hinge on the right. For comfortable use of the oven it is possible to reverse the door so that it opened to the left.
- Page 131 Türanschlag wechseln Für die Backöfen mit dem Seitentüranschlag Unsere Backöfen werden rechten Türnanschlag geliefert. Für bequeme Nutzung des Backofens können Sie den Türanschlag wechseln. Unten Reihenfolge für Türanschlagwechsel erläutert: Die Tür 1 vollständig öffnen. vier Befestigungsschrauben Türscharniers Backofengehäuse entfernen. Die Tür ausbauen. Gegenseite vier Kunststoffstöpsel 3 entfernen und den...
- Page 132 Alternate inspection Besides the current maintenance the user is dutybound to the following actions: alternate check and maintenance of oven elements and assemblies, let the oven be checked by the customer service after expiration of the warranty once in two years. Abolishment of noticed errors, Note! All installing and maintenance actions mentioned on the top as well as reparations are to...
- Page 133 Periodische Besichtigung Außer den laufenden Wartungsarbeiten ist der Benutzer zu folgenden Tätigkeiten verpflichtet: Periodische Überprüfung und Wartung von Herdelementen und Baugruppen, Nach Ablauf der Garantieperiode jede zwei Jahre Herd Kundendienst durchsehen lassen. Beseitigung von entdeckten Störungen. Anmerkung! Alle oben angeführten Einstell- und Nachstelltätigkeiten, sowie Reparaturen müssen durch eine...
- Page 134 Error Possible reason Advices Oven doesn’t Disturbance in power Check the work supply protection device of your home conduction. If defective - replace Interruption of the Set the current time stream supply on the display again and switch on the oven Zeros flash on Interruption of the...
- Page 135 Störung Mögliche Hinweise Ursache Der Ofen Sörung der Prüfen der funktioniert Elektroversorgung Schutzvorrichtug nicht n der häuslichen Leitung. Wenn fehlerhaft - ersetzen Unterbrechung der Erneut die Stromzufuhr aktuelle Zeit auf dem Display einstellen und den Herd in Betrieb nehmen Auf dem Unterbrechung der Erneut die Display blinken...
-
Page 136: Respect For The Environment
RESPECT FOR THE ENVIRONMENT The documentation provided with this oven has been printed on chlorine free bleached paper or recycled paper to show respect for the environment. The packaging has also been designed to avoid environmental impact. Packaging material ecological and can be re-used or recycled. By recycling the packaging, you will help save raw materials as well as reducing the bulk of domestic and industrial waste. -
Page 137: Umweltverträglichkeit
UMWELTVERTRÄGLICHKEIT Beitrag Umweltschutz wurde Dokumentation dieses Geräts chlorfrei gebleichtes oder Recycling-Papier gedruckt. Verpackung wurde deren Umweltverträglichkeit Wert gelegt; kann gesammelt oder recycelt werden, da es sich um umweltschonendes Material handelt. Durch Recycling Verpackung wird Reduzierung Rohstoffverbrauchs Volumens von Industrie- und Hausmüll beigetragen Verpackungs-Entsorgung Entsorgen Sie die Transportverpackung möglichst umweltgerecht. - Page 138 . ., —...
- Page 139 (Nr. : ......................................................: ......................... : ........................... : " ____ " ______________ 20___ . : " ____ " ______________ 20___ ................................................................................................................................................................
- Page 140 « is r» : (495) 488-75-10, 488-76-10 www.kaiser.ru E-Mail: service@kaiser.ru : 127238, , / 46. «Kaiser»: « », .: (495) 488-75-10, 488-76-10, , .58 « », .: (812) 372-23-12, 372-23-13, 376-75-36 - , .11, « », .: (812) 326-05-83, , .153, .227...
- Page 141 « », .: (861) 259-55-73, 259-55-23, , . 94 . ., .: (861) 271-36-11, , .104 « », .: (3912) 27-67-20, 65-34-41, , .12 « », .: (3912) 79-99-71, 41-05-75, . 87 . 014 .: (4712) 52-13-40, 58-66-11, « » », .: (4742) 31-20-42, 32-75-48, 33-15-35, «...
- Page 142 », .: (4852) 45-76-78, , .12 « is r» .: 8 (044) 331-50-77, 8 (044) 331-50-78, 8 (044) 496-55-44 : 8 (044) 391-03-00 www.kaiser.com.ua E-Mail: service@kaiser.com.ua Kaiser : « », .: (06442) 2-58-09, 4-84-01, , 11 « », .: (04463) 329-44, «...
- Page 143 « », .: (0522) 24-96-47, 24-45-22, « », .: (05447) 6-13-56, , 11 « », .: (06264) 56-4-56, 4-19-66, , 15 .: (0536) 74-72-10, 74-71-53, , 55 « », .: (056) 440-07-64, , 73 « », .: (03636) 3-94-06, - , 19 «...
Need help?
Do you have a question about the EH Series and is the answer not in the manual?
Questions and answers