
Related Manuals for SecurityMan ClockCamDVR


Summary of Contents for SecurityMan ClockCamDVR
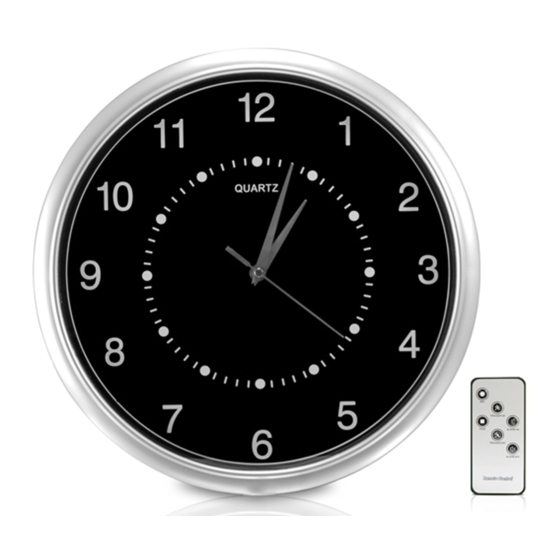
- Page 1 ClockCamDVR User’s Manual Wall Clock Color Camera with Micro SD Recorder & Remote Control...
- Page 2 The content of this manual is furnished for informational use only, is subject to change without Notice, and should not be construed as a commitment by SecurityMan Inc. SecurityMan Inc. assumes no responsibility or liability for any errors or inaccuracies that...
-
Page 3: Fcc Information
Warranty SecurityMan Inc. warrants that this product will be free from defects in title, materials and manufacturing workmanship for one year from the date of the purchase. If the product is found to be defective then, as your sole remedy and as the manufacturer’s only... - Page 4 Warranty Disclaimers SecurityMan Inc. makes no other warranties, express, implied or otherwise, regarding this product, and specifically disclaims any warranty for merchantability or fitness for a particular purpose. The exclusion of implied warranties is not permitted in some states and the exclusions specified herein may not apply to you.
-
Page 5: Limitation Of Liability
The liability of SecurityMan Inc. arising from this warranty and sale shall be limited to a refund of the purchase price. In no event shall SecurityMan be liable for costs of procurement of substitute products or services, or for any lost profits, or for any consequential, incidental, direct or indirect damages, however caused and on any theory of liability, arising from this warranty and sale. - Page 6 1 foot away from any heart pacemaker. Radio waves might potentially influence heart pacemaker and lead to respiratory disturbance. DO NOT use this product for any illegal activities. SecurityMan shall not be responsible for any consequences of illegal conducts made byusers. Conditions •...
- Page 7 • Keep product away from heat sources such as electric heater. • Do not use the wireless camera near aggressive chemicals. Warning • Do not shake or stricken the product. • In order to avoid inflammation or electric shock, this camera kit should be kept away from exposure to rain or moist, and it shall not be put in or near bath-rooms, washing pools, wash houses , moist basements, or swimming pools, unless it is well shielded.
-
Page 8: Table Of Contents
Table of Contents Introduction Safety Features Package Contents Product Basics Remote Control Setup and Operation Installation Playback and Backup File Troubleshooting Installation... -
Page 9: Introduction
ClockCamDVR is a fully functional wall clock with hidden camera and video recorder that records into a micro SD card, an economical total solution. The video recorder contains multifunctional features;... -
Page 10: Features
• Please adopt the original DC power supply provided, to avoid causing device damage, electric shock and fire hazards. • Unauthorized dismantlement of the device or replacement of device parts is forbidden. The manufacturer will not be responsible for any loss arising from such actions. •... -
Page 11: Package Contents
Package Contents ClockCamDVR Remote Control Adapter User manual Video Cable USB cable Screws Warning Stickers x 2 * Micro SD card is not included. -
Page 12: Product Basics
Product Basics Hour Hand Minute Hand Second Hand Camera Clock IR for Remote Control Buzzer MD On/Off SYNC Micro SD Slot Power Socket USB port DVR On/Off Video Out Power LED Record LED Mount Hole Clock Adjuster Turner Battery Compartment (Clock) -
Page 13: Remote Control
Remote Control STOP TRIGGER ON TRIGGER OFF Buttons Description: REC: Press to initiate manual recording. STOP: Press to stop manual recording. TRIGGER ON: Press to enable motion detection mode. TRIGGER OFF: Press to disable motion detection mode. Be sure to aim the RC (Remote Control) towards the IR receiver module on the clock- camera. - Page 14 recording or motion recording accordingly. During activation, clock-camera will make two beeping sound to indicate activation is successful. Press the STOP or TRIGGER OFF buttons to disable manual recording or disable motion recording accordingly. During disabling, the clock-camera will beep once to indicate disabling is successful. Tips: •...
-
Page 15: Setup And Operation
Insert a Micro SD (not included, support up to 32GB) into the Micro SD slot located at the back side of the ClockCamDVR as illustrated below. Make sure the Micro SD clicks in when attempting to insert. Simply press in on the Micro SD again to eject. Insert a standard AA cell battery (not included) in the clock battery compartment for the clock. - Page 16 Use the USB cable provided and plugs one end into the USB port of ClockCamDVR and plug the other USB end into a PC (Windows 2000, Xp, Vista, and 7). Turn the power switch to “DVR ON” position to power on the ClockCamDVR (For PC connection plug in the USB cable before power on DVR as instructed below).
- Page 17 Date: Click into “2010-01-01” and then click the buttons to adjust to current date. Time: Click into “00:00:08” and then click the buttons to adjust to current time. Time/Date Stamp: Click the button to select a time/date stamp format of YY/MM/DD, DD/MM/YY or MM/DD/YY (default MM/DD/YY).
- Page 18 level 2 detect up to 23ft, level 3 detect up to 20ft, level 4 detect up to 17ft, and level 5 detect less than 14ft. Video Standards: Click the button to select video standards between NTSC and PAL (default is NTSC). Please check your local listing for video standards used in your country. For example:.
- Page 19 SYNC button located at the back side of the ClockCamDVR for 5 seconds to complete the saving process. IMPORTANT: After all the settings are confirmed, click the SAVE button and then press- hold the SYNC button located at the back side of ClockCamDVR for 5 seconds to save and synchronize the settings.
- Page 20 To operate the ClockCamDVR use the remote control press the button to start manual video recording and press the STOP button to stop manual recording (remote control only). In manual recording mode, the DVR system will continuously record until the...
- Page 21 moving within and continues beyond the 15 seconds set; the DVR will accumulates all the motion events recording as one file which can accumulate up to 15 minutes before automatically generating another file for motion event recording. IMPORTANT: • To avoid false motion-triggering, please avoid installing the product nearby direct light or areas where there is drastic light change.
-
Page 22: Installation
LED light/sound and what they represent: In Manual Recording: Two quick red flashes of the "Record LED" to no red light means recording is active, solid red light means stop recording. In Motion Recording: Two quick red flashes of the "Record LED" to no red light means motion recording is active;... - Page 23 2. Connect one end of the power adapter jack to the ClockCamDVR power socket and plug the other end into an electrical power outlet as illustrated below. Then turn on the camera and recorder using the power ON/OFF switch located at the back side.
- Page 24 It is very important for the camera angle to display the areas intended for monitoring and recording. 4. Connect the ClockCamDVR system to a TV or an output source using the video cable provided to properly adjust the mounting height and camera angle. Change the TV output to the auxiliary mode, ie VIDEO 1, VIDEO2, LINE1, LINE1, and etc.
-
Page 25: Playback And Backup File
Playback and Backup File Use the USB cable provided to connect one end into ClockCamDVR (USB Mini) and then connect the other end into the USB port on the computer. Switch the power switch to DVR ON position and a mobile hard disk will mount as a driver letter labeled “Removable Disk”... - Page 26 Micro SD as formatting will permanently delete all the recorded files. Another method of playback, file backup, delete/all, or reformat is to move the Micro SD from the ClockCamDVR’s Micro SD slot and insert it into an external card reader slot if resources is available (card reader NOT included).
-
Page 27: Troubleshooting
2 minutes. Straighten the clock-camera back to the original position. 2. When connecting ClockCamDVR to a TV or output source and the picture becomes black and white, try to change the video standard to match your country video standards... - Page 28 3. ClockCamDVR does not mount as a mobile drive when connecting to a computer. Make sure to plug the USB receptacle into a USB built-in port of the computer and not through other third party USB hub(s). Ensure the power is switch to the off position, plug in the USB cable from the clock to the computer first and then turn the power switch back on.
-
Page 29: Installation
Installation Image Sensor ¼” CMOS, Color Effective Pixels 1280 x 720 (NTSC) Viewing Angle Vertical 35°, Horizontal 46° Recording Video Format .AVI Recording Resolution HD (1280x720)/D1 (800x592)/VGA (640x480) Recording Speed (data size) 30fps, approx 35MB/Min (Default HD quality) Pre-Alarm Recording Time 3 seconds Recording Mode Motion Detection, Manual (by remote control)
Need help?
Do you have a question about the ClockCamDVR and is the answer not in the manual?
Questions and answers