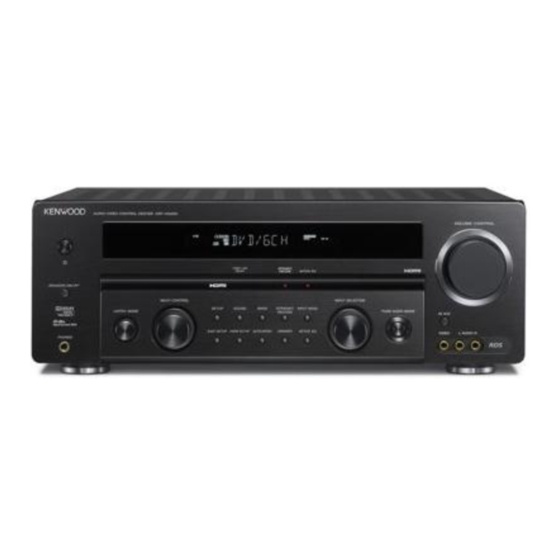
Kenwood KRF-V6400D Instruction Manual

Kenwood KRF-V6400D Instruction Manual

Audio video controll center
Hide thumbs Also See for KRF-V6400D:
Table of Contents

Advertisement

AUDIO-VIDEO CONTROL CENTER
KRF-V6400D
KRF-V5450D
INSTRUCTION MANUAL
Declaration of Conformity with regard to
the EMC Directive 2004/108/EC
Manufacturer:
Kenwood Corporation
2967-3 Ishikawa-machi, Hachioji-shi, Tokyo, 192-8525 Japan
EU Representative's:
Kenwood Electronics Europe BV
Amsterdamseweg 37, 1422 AC UITHOORN, The Netherlands
© B60-5810-08/00 (E/X)

Advertisement

Table of Contents
loading

Summary of Contents for Kenwood KRF-V6400D

  • Page 1 AUDIO-VIDEO CONTROL CENTER KRF-V6400D KRF-V5450D INSTRUCTION MANUAL Declaration of Conformity with regard to the EMC Directive 2004/108/EC Manufacturer: Kenwood Corporation 2967-3 Ishikawa-machi, Hachioji-shi, Tokyo, 192-8525 Japan EU Representative's: Kenwood Electronics Europe BV Amsterdamseweg 37, 1422 AC UITHOORN, The Netherlands © B60-5810-08/00 (E/X)
  • Page 2: Safety Precautions

    MAGNITUDE TO CONSTITUTE A RISK OF ELECTRIC operate, notify your dealer immediately. If the unit was shipped SHOCK TO PERSONS. to you directly, notify your shipper immediately. Kenwood recommends that you retain the original carton and packing THE EXCLAMATION POINT WITHIN AN EQUILATERAL materials in case you need to move or ship the unit in the future.
  • Page 3: Important Safety Instructions

    IMPORTANT SAFETY INSTRUCTIONS ¤ Caution : Read this page carefully to ensure safe operation. Read Instructions – All the safety and operating instructions should 12. Servicing – Do not attempt to service this product yourself be read before the product is operated. as opening or removing covers may expose you to dangerous Retain Instructions –...
  • Page 4: Table Of Contents

    Speaker setup (Detailed Setup) ......23 Display dimmer adjustment Speaker setup flow Listening with headphones Speaker configuration Muting the sound Speaker Level Remote control operations for Kenwood DVD Speaker Distance players .............. 43 Crossover LFE (Low Frequency Effect) Level Troubleshooting Lip Sync (KRF-V6400D only) HDMI setup ............
  • Page 5: Special Features

    The bass frequency from the subwoofer and the other speakers can be adjusted making better sound phase between speakers and natural sound field. \ \ Lip Sync function (KRF-V6400D only) Lip Sync function (KRF-V6400D only) This function corrects deviation between the video and audio. Automatic correction is also available provided that all of the playback component, this unit and the TV are connected through HDMI.
  • Page 6: How To Read This Manual

    • In this manual, KRF-V6400D is used for the illustrations of front panel and rear panel. • The illustrations of the main unit display panel and the examples of operations are shown for the purpose of explanation and may differ from the actual view or operation.
  • Page 7: Names And Functions Of Parts

    Names and functions of parts Main unit Main unit VOLUME CONTROL HDMI LINK STRAIGHT READY DECODE ACTIVE EQ SPEAKERS ON/OFF MULTI CONTROL INPUT SELECTOR SETUP SOUND BAND STRAIGHT INPUT MODE AV AUX LISTEN MODE PURE AUDIO MODE DECODE VIDEO L-AUDIO-R EASY SETUP HDMI SETUP AUTO/MONO...
  • Page 8 Use to operate the Kenwood DVD player.* RECEIVER key Use to turn this unit on and off. DVD key Press to switch the Kenwood DVD player ON/OFF. ° ACTIVE EQ key Press to switch the ACTIVE EQ function ON/OFF. KRF-V6400D/KRF-V5450D...
  • Page 9 TUNING 1/¡ keys ‹ Press to select a radio station. Close the cover. Use to operate the Kenwood DVD player.* £ Input source keys Press to select the input source. • * For how to be able to use the keys to operate the Kenwood DVD player, see <Remote control operations...
  • Page 10 Lights up when stereo broadcasting is tuned. TUNED Lights up when a radio station is tuned. TONE Lights up when the tone setting is on. MUTE Blinks when muting is on. CLIP Lights up when the input level is too high. KRF-V6400D/KRF-V5450D...
  • Page 11: Notes On Connections

    ¤CAUTION layout. The power of this equipment will not be completely cut off Surround Back speaker (KRF-V6400D only) from the wall outlet when the power switch is turned off. Install the equipment so that the wall outlet is easily Install on the rear of the listening position, at the same height as the surround speakers.
  • Page 12: Connecting Components Equipped With Hdmi Terminals

    • If the resolution of the incoming video signal is different from that of the TV, no video is output. In this case, adjust the resolution on the connected component. KRF-V6400D/KRF-V5450D...
  • Page 13: Connecting A Tv Monitor

    Connecting a TV Monitor Connect the TV monitor by selecting one of the desired method from connections A or C shown below. For the video and audio connections of the connected component, see the description on the page for the connected components. To output the audio of the TV monitor from the speakers connected to this unit: Use connection B (analog).
  • Page 14: Connecting A Cd Player

    Connecting a CD player Connect the audio line: Connection B (digital) or A (analog). AUDIO OUT OPTICAL OUT CD player KRF-V6400D/KRF-V5450D...
  • Page 15: Connecting A Dvd Player

    Connecting a DVD player Connect the audio line: Connection B (digital) or A (analog). Connect the video line: Connection C. Connect the TV monitor. Connect as shown in <Connecting a TV Monitor> #. AUDIO OUT COAXIAL DIGITAL VIDEO OUT (Analog) OUT (AUDIO) DVD player •...
  • Page 16: Connecting A Video Player

    VIDEO OUT AUDIO OUT OUT (AUDIO) (Analog) DVD Recorder, etc. • When the connected Video player and/or TV monitor have the HDMI terminals, it is recommended to use the HDMI connection. (See <Connecting components equipped with HDMI terminals> @.) KRF-V6400D/KRF-V5450D...
  • Page 17: Connecting An Audio Player

    Connecting an audio player AUDIO OUT Cassette deck and etc. Connecting to the [AV AUX] jacks A component that is usually not connected to this unit, such as a portable video camera, can be connected to the [AV AUX] jacks on the front panel of this unit.
  • Page 18: Connecting Speakers

    Connecting speakers KRF-V6400D KRF-V5450D Subwoofer Powered Subwoofer Right Left Front speakers Center speaker Surround Back speaker Right Left Surround speakers • Speaker impedance : 6 – 16Ω • Never short circuit the + and – speaker cords. • If the left and right speakers are connected inversely or the speaker cords are connected with reversed polarity, the sound will be unnatural with ambiguous acoustic imaging.
  • Page 19 How to connect the wire to terminals How to connect the wire to terminals How to connect the wire to terminals How to connect the wire to terminals (Screw type terminal) (KRF-V6400D only) (Screw type terminal) (KRF-V6400D only) (Push type terminal) (Push type terminal)
  • Page 20: Connecting Antennas

    Since antenna installation necessitates skill and experience, Release the lever. always consult your dealer before installation. The antenna should be placed at a distance from the power distribution wires. Otherwise, an electric shock accident may occur if the antenna falls down. KRF-V6400D/KRF-V5450D...
  • Page 21: Turning This Unit On

    Turning this unit ON RECEIVER After completing all of the necessary connections, connect the power cord to a wall power outlet. The standby indicator on the front panel lights red to indicate the standby mode. Press the [ (Power)] key of this unit or the [ RECEIVER] key of the remote control unit to turn this unit ON.
  • Page 22: Speaker Setup (Easy Setup)

    In this case, go through <Speaker setup (Detailed Setup)>. • Easy setup can set only the 5.1 channel system. For KRF-V6400D : If the setup for 6.1-channel system is required, go through <Speaker setup (Detailed Setup)>. • Surround Back speaker : KRF-V6400D only •...
  • Page 23: Speaker Setup (Detailed Setup)

    Speaker configuration receiver according to the environment of your listening room. Select the use of each speaker and its size. For creating the best listening environment, Kenwood recommends to perform the setup at the listening position. Enter the Detailed Setup mode.
  • Page 24: Speaker Level

    Front speaker (right) "R" meters (feet) approximately identical. Surround speaker (right) "RS" meters (feet) Select "TEST TONE". Surround Back speaker "BS" meters (feet) (KRF-V6400D only) [SETUP] Surround speaker (left) "LS" meters (feet) Subwoofer "SW" meters (feet) [MULTI CONTROL ∞/5] Select "DISTANCE". [SETUP] [SETUP] Select the test tone output method.
  • Page 25: Crossover

    Go to the next setting. Set the crossover frequency. Use [MULTI CONTROL ∞/5] to select crossover frequency. Lip Sync (KRF-V6400D only) Lip Sync (KRF-V6400D only) If the monitored video is delayed in time with respect to the [SETUP] audio from the speakers, the audio output timing can be delayed.
  • Page 26: Hdmi Setup

    Display Setting "AUDIO OUT" Sets the HDMI audio output destination. Adjusts the deviation in time between "LIP SYNC" (KRF-V6400D only) the output audio and video. Sets whether or not the HDMI control "LINK SET" functions are used. Interlocks power ON-OFF of components "POWER CONTROL"*...
  • Page 27: Lip Sync (Krf-V6400D Only)

    Lip Sync (KRF-V6400D only) Lip Sync (KRF-V6400D only) HDMI Link HDMI Link If the monitored video is delayed in time with respect to the This function selects whether or not the volume control and audio from the speakers, the audio output timing can be delayed.
  • Page 28: Preparation For Playing Music Or Movie

    Press [SPEAKERS ON/OFF] to select the speaker selected. system(s) to be used. "SP" indicator lights up when turning on the speaker system. • If the audio is lost as a result of change in the input signal while "MANUAL" is selected, press [LISTEN MODE]. KRF-V6400D/KRF-V5450D...
  • Page 29: Playback

    Playback Monitoring the input source in the original sound (STRAIGHT VOLUME CONTROL DECODE mode) The signal input from a source can be output directly without any sound field effect added to it. AV AUX INPUT SELECTOR STRAIGHT DECODE Select a source. Start playback from the selected source.
  • Page 30: Listening To Music With Pure Audio Mode

    To cancel Press [PURE AUDIO MODE]. PURE AUDIO MODE is also canceled when the [LISTEN MODE] or [STRAIGHT DECODE] key is operated. • The video other than the HDMI input video cannot be monitored when PURE AUDIO MODE is selected. KRF-V6400D/KRF-V5450D...
  • Page 31: Listen Mode

    6.1ch surround sound system 5.1ch surround sound system 2ch stereo sound system (KRF-V6400D only) TV / SCREEN TV / SCREEN TV / SCREEN Listen mode...
  • Page 32: Surround Play Using The Listen Mode

    Noise may be produced when a DTS source is played by selecting the analog input.) Start playing the selected source. Use [LISTEN MODE] to select the listen mode. Each press switches the listen mode. KRF-V6400D/KRF-V5450D...
  • Page 33: Tuning Into A Radio Station

    Tuning into a radio station This unit can store up to 40 stations in the memory and recall Use [TUNING 1/¡] to select the station. them by one-touch operation. "TUNED" lights when a broadcast is being received. Radio stations can be classified into RDS (Radio Data System) stations and other stations.
  • Page 34: Using Rds (Radio Data System)

    "01". Stations already stored in the preset memory may be replaced by RDS stations. (i.e., If the RDS AUTO MEMORY function detects 15 RDS stations, the stations currently preset at numbers 01–15 will be replaced by the RDS stations.) KRF-V6400D/KRF-V5450D...
  • Page 35: Presetting Radio Stations Manually

    Presetting radio stations Receiving preset stations manually The RDS auto memory function assigns preset numbers to RDS stations starting from preset number "1". Therefore, be sure to execute the RDS auto memory function before using the following operations to manually store AM stations and other FM Numeric keys stations, and RDS stations.
  • Page 36: Receiving Preset Stations In Order

    Current Affairs "AFFAIRS" Leisure "LEISURE" Information "INFO" Jazz Music "JAZZ" Sport "SPORT" Country Music "COUNTRY" Education "EDUCATE" National Music "NATION M" Drama "DRAMA" Oldies Music "OLDIES" Culture "CULTURE" Folk Music "FOLK M" Science "SCIENCE" Documentary "DOCUMENT" Varied Speech "VARIED" KRF-V6400D/KRF-V5450D...
  • Page 37: Tuning By Program Type (Pty Search)

    Using the DISPLAY key DISPLAY Press [PTY] to start searching. Example: Searching for a Rock Music broadcast. Display while searching. Blinks Display when a station is received. Goes out Pressing [DISPLAY] changes the contents of the display. Each press switches the display mode as follows: 1 PS (Program Service) name display Station name display 2 RT (Radio Text) display...
  • Page 38: Adjusting The Sound

    Use [MULTI CONTROL ∞/5] to adjust the level. [TONE] The level is adjusted from –10 to +10. Adjust the level of "TREB" (high frequencies). Use [MULTI CONTROL ∞/5] to adjust the level. [TONE] The level is adjusted from –10 to +10. KRF-V6400D/KRF-V5450D...
  • Page 39: Adjustments According To The Playing Source

    Adjustments according to the playing source The audio can be adjusted as desired according to the source Speaker level adjustment Speaker level adjustment being played. The output level from the desired speaker channels can be fine adjusted according to the properties of each source. The adjustment is only temporary for the current input selection.
  • Page 40: Midnight Mode

    Display Setting • This setup is not available when the center speaker setup "PANORAMA ON" PANORAMA mode is on. is "OFF". "PANORAMA OFF" PANORAMA mode is off. KRF-V6400D/KRF-V5450D...
  • Page 41: Center Image

    Center image Center image ¶ DTS Neo:6 Music mode only The output level of the center speaker can be adjusted. Press [SOUND] repeatedly to select "CENTER IMAGE". Use [MULTI CONTROL ∞/5] to adjust the center speaker output. More part of the center channel audio is distributed to the front left and right speakers as the number increases.
  • Page 42: Convenient Functions

    1 Slightly dark "MUTE" indicator blinks. 2 Dark 3 Normal • The brightness of the LED indicators changes in 2 levels. To cancel Press [MUTE] again so that the "MUTE" indicator goes off. MUTE can also be deactivated by adjusting volume. KRF-V6400D/KRF-V5450D...
  • Page 43: Remote Control Operations For Kenwood Dvd Players

    Remote control operations for Kenwood DVD players The remote control of this unit can control Kenwood DVD players directly without using the remote control supplied with the DVD player. Compatible DVD player models DV-4900, DV-4070B, DV-2070, DV-203, DVF-9010, DVF-K7010, DVF-5010, DVF-R9030, DVF-R7030, DVF-3530, DV-402, DV-5900, DV-5700,...
  • Page 44: Troubleshooting

    Set PURE AUDIO MODE to "OFF". º Display is turned off. PURE AUDIO MODE is on. While the PURE AUDIO MODE is on, the display is turned º off. Turn off the PURE AUDIO MODE. KRF-V6400D/KRF-V5450D...
  • Page 45: Resetting The Unit

    The remote control has not been changed to the operation Press the [DVD] key to activate the operation mode for the component you want to control before operation. e mode for the Kenwood DVD player you wish to control. Batteries are exhausted. Replace with new batteries.
  • Page 46: Glossary

    With this format, the audio for the surround back channel added to the DTS 5.1-channel audio is allocated to the two surround channels during recording. When the signal is decoded, the audio for the surround back channel is restored from the surround channels to deliver the 6.1-channel audio. KRF-V6400D/KRF-V5450D...
  • Page 47 DVI (Digital Visual Interface) is the standard for connection between PC and display. HDCP HDCP (High-bandwidth Digital Contents Protection) is copyright protection technology for prevention of illegal duplication of video contents. It is used in encryption of digital interfaces such as DVI and HDMI.
  • Page 48: Specifications

    Weight (net) ..............9.5 kg (20.9 lb) BASS ............... ±10 dB (at 100 Hz) TREBLE ..............±10 dB (at 10 kHz) • Kenwood follows a policy of continuous advancements in development. For this reason specifications may be changed without notice.

This manual is also suitable for:

Krf-v5450d

Table of Contents