
Related Manuals for Kenwood KRF-V6200D


Summary of Contents for Kenwood KRF-V6200D
- Page 1 AUDIO VIDEO CONTROL CENTER KRF-V7200D KRF-V6200D INSTRUCTION MANUAL © B60-5678-00/00 (E, X) KW...
-
Page 2: Before Applying Power
If the unit was shipped these items and their waste by products. to you directly, notify your shipper immediately. Kenwood Contact your local authority for details in locating a recommends that you retain the original carton and packing recycle facility nearest to you. -
Page 3: Important Safety Instructions
IMPORTANT SAFETY INSTRUCTIONS Caution : Read this page carefully to ensure safe operation. Read Instructions – All the safety and operating instructions 12. Servicing – Do not attempt to service this product yourself should be read before the product is operated. as opening or removing covers may expose you to dangerous Retain Instructions –... -
Page 4: Table Of Contents
Notes on instructions.............2 Convenient functions ............39 IMPORTANT SAFETY INSTRUCTIONS ..... 3 Remote control operations for Special features ................4 Kenwood DVD players ........40 Names and functions of parts ......5 Troubleshooting ..........41 Main unit ..................5 Specifications ............44 Remote control unit ...............6... -
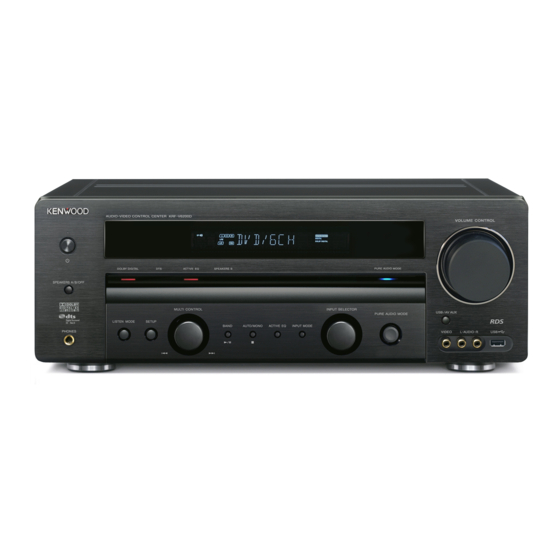
Page 5: Names And Functions Of Parts
Names and functions of parts Main unit Frequency display, AUTO DETECT indicator Input display, Preset channel display, DIGITAL indicator AUTO indicator PTY indicator Surround mode display DSP MODE Speaker indicator RDS indicator indicator Band indicators 6CH INPUT indicator DTS / DTS-ES CLIP indicator indicator MUTE... -
Page 6: Remote Control Unit
MEMORY key MUTE Use for manual memory of radio stations. RECEIVER key Use to turn this unit on and off. DVD key Use to turn on the Kenwood DVD player on and off. § ACTIVE EQ key MD/TAPE AV AUX TUNER CD/DVD Use to select ACTIVE EQ setting. -
Page 7: Preparing The Remote Control
fi PTY key Use for PTY search. Note: • * For how to be able to use the keys to operate the Kenwood DVD player, see <Remote control operations for Kenwood DVD players> ‚. Infrared ray system Preparing the remote control... -
Page 8: Setting Up The System
Setting up the system Make connections as shown in the following pages. Speaker placement When connecting the related system components, be sure to refer to the instruction manuals supplied with the components Front speaker Front speaker you are connecting. Do not connect the power cord to a wall outlet until all connections are completed. -
Page 9: Digital Connections
Digital connections The DIGITAL IN jacks can accept DTS, Dolby Digital, or PCM signals. Connect components capable of outputting DTS, Dolby Digital, or standard PCM (CD) format digital signals. If you have connected any digital components to this unit, be sure to read the <Selecting the input mode> ™ carefully. To AC wall outlet Australia Other countries... -
Page 10: Connecting A Dvd Player (6-Channel Input)
Setting up the system Connecting a DVD player (6-channel input) If you have connected a DVD player to this unit with digital connection, be sure to read the <Selecting the input mode> ™ carefully. KRF-V6200D FRONT SURROUND CENTER DVD / 6CH IN SUB WOOFER To AC wall outlet KRF-V7200D... -
Page 11: Connecting Audio Components
Connecting audio components To AC wall outlet REC OUT PLAY IN REC OUT PLAY IN CD/DVD MD / TAPE VIDEO 1 AUDIO Cassette deck or MD player CD or DVD player Other component English... -
Page 12: Connecting Video Components
Setting up the system Connecting video components About the S-VIDEO jacks If you use the S-VIDEO jacks to connect your video components, be sure to connect your monitor and video recording components also with S-VIDEO VIDEO 2 MONITOR jacks. S-VIDEO To AC wall outlet VIDEO2 VIDEO1... -
Page 13: Connecting Video Components (Component Video)
Connecting video components (COMPONENT VIDEO) To AC wall outlet REC OUT PLAY IN REC OUT PLAY IN PLAY IN CD/DVD MD / TAPE VIDEO 1 VIDEO 2 AUDIO MONITOR VIDEO1 VIDEO2 COMPONENT VIDEO VIDEO OUT AUDIO OUT* VIDEO DVD player Video component with recording function AUDIO OUT... -
Page 14: Connecting The Speakers (Krf-V7200D)
Setting up the system Connecting the speakers (KRF-V7200D) SUB WOOFER Powered subwoofer PRE OUT To AC wall outlet For 6.1-channel speaker configuration, connect the surround back speaker to this terminal. Select "BS MONO" in the speaker setup. ) SURROUND SPEAKERS (6-16 ) FRONT SPEAKERS (6-16 ) WHITE GREEN... -
Page 15: Connecting The Speakers (Krf-V6200D)
Connecting the speakers (KRF-V6200D) Surround Back speakers For 6.1-channel speaker Left Right configuration, connect the surround back speaker to this terminal (with power amplifier connected in between). Select "BS MONO" in the speaker setup ). Power Amplifier SURROUND SUB WOOFER BACK Powered subwoofer PRE OUT... -
Page 16: Connecting The Terminals
Setting up the system Connecting the terminals Connecting to the AV AUX jacks and USB jack œ Strip coating. ∑ Loosen. é Insert the cord. VIDEO L-AUDIO-R ® Secure. Notes: • Never short circuit the + and – speaker cords. •... -
Page 17: Connecting The Antennas
Connecting the antennas The broadcast reception cannot be made unless the antennas are connected. Connect the antennas correctly as instructed below. AM loop antenna AM loop antenna Place the supplied loop antenna as far as possible from the receiver, TV set, speaker cords and power cord. Adjust the FM 75 direction for best reception. -
Page 18: Speaker Settings
Speaker settings ¥ Use [MULTI CONTROL 5/∞] to select your listening Speaker setup (Easy Setup) position. The speaker settings can be completed by simply selecting the room type and listening position. The audio will be corrected automatically according to the characteristics of the speaker system in use. -
Page 19: Speaker Setting Flow
Speaker setting flow Getting into the setup mode The detailed settings below allow you to enjoy full performance The setup procedure is identical for all of the setting elements. of the receiver according to the environment of your listening Once you remember the following procedure, you can easily set room. -
Page 20: Speaker Setup ("Sp Setup")
Speaker settings • If "SURR OFF" is selected, no surround back speaker can be Speaker setup ("SP SETUP") selected. • "BS LRG" cannot be selected unless "SURR LRG" is selected. This sets up the speakers according to the speaker system in •... -
Page 21: Distance Setting ("Distance")
Distance setting ("DISTANCE") Low frequency effects level ("LFE LVL") This sets the distance from each speaker to the listening position. œ Measure the distance from the listening position to Low frequency effect signal is used exclusively for giving the field each speaker and jot down in the table below. -
Page 22: Normal Playback
Normal Playback Selecting the input mode (main unit only) Selecting the input mode (main unit only) Preparing for playback If you have selected a component connected to the DIGITAL IN Some preparatory steps are needed before starting playback. jacks (CD/DVD, VIDEO2 and DVD/6CH INPUT), make sure that the input mode setting is correct for the type of audio signal to be INPUT SELECTOR used. -
Page 23: Listening To A Source Component
Listening to a source component Listening to music with PURE AUDIO MODE VOLUME CONTROL The PURE AUDIO MODE allows you to enjoy music sources in high-quality stereo. INPUT SELECTOR USB/AV AUX PURE AUDIO MODE VOLUME PURE AUDIO MODE Input source keys œ... -
Page 24: Operation Of Usb Source
Operation of USB source Audio files such as MP3 files, WMA files and AAC files can be Fast forward and backward Fast forward and backward enjoyed through a USB device. (remote control only) (remote control only) For the information on usable USB devices and audio files, see <Playable USB device and files>... -
Page 25: Playable Usb Device And Files
Audio file Audio file Playable USB device and files • Playable Audio file MP3 (.mp3), WMA (.wma), AAC (.m4a) USB device USB device • Playable MP3 file • Playable USB device Format: MPEG 1 Audio Layer 3, MPEG 2 AUDIO Flash memories and digital audio players which work as mass- LSF (Low Sampling Frequency) Layer 3 storage-class devices. -
Page 26: Adjusting The Sound
Adjusting the sound One-touch low frequency emphasis (Bass One-touch low frequency emphasis (Bass Boost) (remote control only) Boost) (remote control only) You can adjust the sound quality when this unit is in the PCM stereo and analog stereo modes. Press [BASS BOOST]. MULTI CONTROL ACTIVE EQ •... -
Page 27: Ambience Effects
Ambience effects The below speaker placements are for 7.1 channel Surround modes surround sound system which are; This unit is equipped with listen modes that allow you to enjoy an • Dolby Pro Logic IIx enhanced sonic ambience with a variety of video sources. •... - Page 28 Ambience effects Dolby Digital Dolby Pro Logic IIx Dolby Digital is a highly sophisticated and versatile audio Dolby Pro Logic IIx transforms any stereo or 5.1-channel signal encoding/decoding technology. Dolby Digital technology can into six- or seven-channel, full range surround sound, creating a transmit mono, stereo (two-channel), or up to 5.1-channel seamless, natural surround soundfield that immerses you in the surround sound (discrete* multichannel audio).
- Page 29 DSP mode About indicators for surround mode About indicators for surround mode The DSP mode lets you add the atmosphere of a live concert or hall to almost any type of program source. These modes are particularly effective when used with stereo program sources, like CD, television, and FM radio.
-
Page 30: Surround Play
Ambience effects Surround play "DOLBY DIGITAL" "PLII MUSIC"* Pro Logic II surround Music mode and "PRO LOGIC" Select the listen mode according to the source being played back. "DOLBY DIGITAL" "PLII GAME"* Pro Logic II surround Game mode and "PRO LOGIC" "DOLBY DIGITAL"... -
Page 31: Dvd 6-Channel Playback
DVD 6-channel playback Notes: • Depending on the type of the signal or speaker setting, some Using a DVD player or the like equipped with six (5.1) output listen modes cannot be selected. channels and this unit, you can enjoy surround sound playback. •... -
Page 32: Listening To Radio Broadcasts
Listening to radio broadcasts This unit can store up to 40 stations in the memory and recall Using RDS (Radio Data System) them by one-touch operation. Radio stations can be classified into RDS (Radio Data System) RDS is a system that transmits useful information (in the form of stations and other stations. -
Page 33: Rds Auto Memory
RDS Auto Memory Presetting radio stations manually This function automatically stores up to 40 RDS stations in the preset memory. In order to use the PTY function, the RDS stations must be stored in the preset memory using the RDS AUTO The RDS auto memory function assigns preset numbers to RDS stations starting from preset number "1". -
Page 34: Receiving Preset Stations
Listening to radio broadcasts Receiving preset stations Receiving preset stations in order (P.CALL) Numeric keys P.CALL TUNER TUNER œ Press [TUNER] to select tuner as the source. œ Press [TUNER] to select tuner as the source. ∑ Enter the number of the preset station you want to receive (up to "40"... -
Page 35: Tuning By Program Type (Pty Search)
é Press [PTY] to start searching. Tuning by program type Example: Searching for a Rock Music broadcast. (PTY search) Display while searching. Blinks This function lets you set the tuner to automatically search for stations which are currently broadcasting the type of program (genre) you want to listen to. -
Page 36: Recording
Recording ® Start playback, then start recording. Recording mode setting in digital • If the audio reproduction stops in the middle due to change in audio source recording the input signals, etc., press [AUTO/MONO]. (main unit only) Recording audio (analog sources) When recording a multi-channel digital audio source, it is recommended to set up the recording mode properly to convert the digital input into the 2-channel analog output. -
Page 37: Further Adjustments
Further adjustments Speaker level adjustment Speaker level adjustment Fine adjustment of the sound The output level from the desired speaker channels can be fine You can make further adjustments to the sound while listening to adjusted according to the properties of each disc. playback in the surround mode. - Page 38 Further adjustments Panorama mode ( Panorama mode (Pro Logic IIx Music Pro Logic IIx Music and Center Width mode ( Center Width mode (Pro Logic IIx Music Pro Logic IIx Music Pro Logic II Music mode only) Pro Logic II Music mode only) and Pro Logic II Music mode only) and Pro Logic II Music mode only) When listening to music, you will be able to enjoy the...
-
Page 39: Additional Functions
Additional functions Listening with headphones (main unit Listening with headphones (main unit Convenient functions only) only) œ Press [SPEAKERS A/B/OFF] so that the speaker indicator goes off. Make sure the "SP" indicator is turned off. VOLUME CONTROL SPEAKERS A/B/OFF • If you turn off all of the speakers when in surround mode, the DIMMER surround mode will be canceled as well, resulting in stereo playback. -
Page 40: Remote Control Operations For Kenwood Dvd Players
Remote control operations for Kenwood DVD players The remote control of this unit can control Kenwood DVD players directly without using the remote control supplied with the DVD player. DV-4900, DV-4070B, DV-2070, DV-203, DVF-9010, DVF-K7010, DVF-5010, DVF-R9030, DVF-R7030, DVF-3530, DV-402, DV-5900, DV-5700,... -
Page 41: Troubleshooting
Troubleshooting Troubles are not always due to malfunction or failure of the system. In case of a trouble, check the following tables before calling for service. Amplifier Symptom Cause Remedy No sound from the speakers. The speaker cords are disconnected. Connect it properly referring to <Connecting the speakers>. - Page 42 The remote control has not been changed to the operation Press the [CD/DVD] or [DVD/6CH] key to activate the mode for the Kenwood DVD player you wish to control. operation mode for the component you want to control before operation.
- Page 43 In regard to contact cleaner In regard to contact cleaner Resetting the Microcomputer Resetting the Microcomputer Do not use contact cleaners because it could cause a malfunction. The microcomputer may malfunction (unit cannot be operated, Be specially careful not to use contact cleaners containing oil, for or shows an erroneous display) if the power cord is unplugged they may deform the plastic component.
-
Page 44: Specifications
Tone control BASS ............... ±10 dB (at 100 Hz) Notes: TREBLE ............±10 dB (at 10 kHz) 1. Kenwood follows a policy of continuous advancements in DIGITAL AUDIO section development. For this reason specifications may be changed without notice. Sampling frequency ....32 kHz, 44.1 kHz, 48 kHz, 96 kHz 2.
Need help?
Do you have a question about the KRF-V6200D and is the answer not in the manual?
Questions and answers