Table of Contents
Advertisement
Quick Links
XL42
OPERATORS MANUAL
Telex Communications (UK) Ltd.
Klark Teknik Building
Walter Nash Road
Kidderminster
Worcestershire
DY11 7HJ
England
Tel: +44 1562 741515
Fax: +44 1562 745371
Website: www.midasconsoles.com
XL42 Dual Channel Strip Operators Manual
DOC02-XL42 Issue B - December 2005
© Telex Communications (UK) Ltd.
In line with the company's policy of continual improvement, specifications and
function may be subject to change without notice. E&OE.
Advertisement
Table of Contents

Subscribe to Our Youtube Channel
Related Manuals for Midas XL42


Summary of Contents for Midas XL42
- Page 1 England Tel: +44 1562 741515 Fax: +44 1562 745371 Website: www.midasconsoles.com XL42 Dual Channel Strip Operators Manual DOC02-XL42 Issue B - December 2005 © Telex Communications (UK) Ltd. In line with the company’s policy of continual improvement, specifications and function may be subject to change without notice. E&OE.
-
Page 3: Important Safety Instructions
IMPORTANT SAFETY INSTRUCTIONS CAUTION RISK OF ELECTRIC SHOCK DO NOT OPEN WARNING: TO REDUCE THE RISK OF FIRE OR ELECTRIC SHOCK, DO NOT EXPOSE THIS APPLIANCE TO RAIN OR MOISTURE AVIS: RISQUE DE CHOC ELECTRIQUE. NE PAS OUVRIR These symbols are internationally accepted symbols that warn of potential hazards with electrical products. -
Page 5: Declaration Of Conformity
Declare that a sample of the following product:- Product Type Number Product Description Nominal Voltage (s) Current Freq XL42 Dual Channel Strip 230V/115V 70mA / 50/60Hz 140mA to which this declaration refers, is in conformity with the following directives and/or standards:-... -
Page 7: Table Of Contents
Contents Contents Thank you for using a Midas XL42 dual channel creative equaliser. The XL42 has been developed to meet the needs of demanding live sound engineers and meets the quality of build and performance that you would expect from a Midas product. - Page 8 Contents Contents XL42 Operators Manual - Page ii...
-
Page 9: Introduction
XL42s can be fitted in a standard rack together with any required dynamic processing, which can be inserted via the XL42's insert points; thus creating a custom 10 into 2 mixer via the output daisy chain feature. The resulting L and R outputs may then be routed to the master console via any convenient point, such as, a pair of aux returns, group inputs, matrix inputs etc. -
Page 10: Before You Start
Voltage Selection and Power Connection Mains power to the XL42 is supplied by means of a standard fused IEC power socket. The XL42 is designed to operate at nominal mains voltages of 115V and 230V AC at either 50 or 60 Hz, however, upon first use (and whenever the mains supply is changed) the input voltage selector on the rear of the unit must be set to reflect the local power supply. -
Page 11: After You Have Unpacked The Unit
After You Have Unpacked the Unit After You Have Unpacked the Unit Before unpacking the XL42, check packaging for signs of damage, as this could be an indication of damage to the unit inside. After unpacking the XL42, check the unit for signs of damage to the casing. Damage to consignments must usually be reported to the courier within 24 hours in order for a claim to be made. - Page 12 After You Have Unpacked the Unit After You Have Unpacked the Unit XL42 Operators Manual - Page 4...
-
Page 13: Front Panel
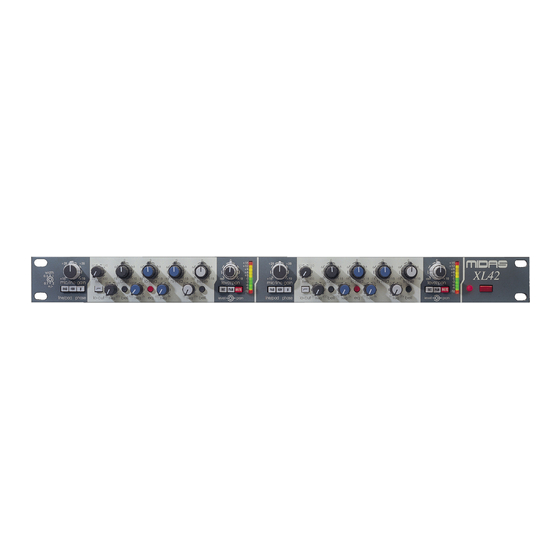
Front Panel Front Panel The XL42 is a highly featured 1U 19” rackmount, dual channel strip. The unit is split into two identical channel strips, each with identical functionality but having independent inputs and outputs. XL42 Operators Manual - Page 5... -
Page 14: Input Section
25dB of attenuation to the input signal and allows the connection of high output microphones or line level signals. If using the XL42's optional transformer- coupled input, the pad greatly reduces the risk of saturation at very low frequencies. -
Page 15: Eq Section
Otherwise equaliser position, equaliser band will work in full band acts like a traditional MIDAS shelving parametric mode. Otherwise, equaliser band response EQ. acts like a traditional MIDAS shelving response EQ. XL42 Operators Manual - Page 7... -
Page 16: Output Section
3dB. Pan control is enabled by switch (immediately below) and is adjusted using the outer control ring. With switch off, the XL42 is essentially two independent channel strips. With switch on, the output signal from each input strip is distributed between the two outputs. -
Page 17: Rear Panel
Rear Panel Rear Panel The XL42 rear panel houses both the input and output sockets as well as the insert points, remote control and Automute sockets, and power inlet and selector. XL42 Operators Manual - Page 9... - Page 18 XL42's input channels to the output so that the daisy chain may continue. A much larger console can be created by adding extra XL42s using the output from the last XL42 in the chain as the master output. Input impedances:...
- Page 19 Remote Control Automute Assigns: The 9-pin plug for the Automute system allows up to 8 Automute channels. The input channels of the XL42 can be set to mute on one of these 8 Automute channels by switching on the corresponding channel number on the DIP switch for the XL42's input channels.
- Page 20 Rear Panel Rear Panel XL42 Operators Manual - Page 12...
-
Page 21: System Connection
Plug the microphone or DI box into the XL42 and the output into the line input of your console. You can also use the XL42 EQ and bypass your console's EQ. Set PAN to off for mono operation or on for stereo operation. -
Page 22: Auto-Mute Operation
To assign an Automute address for each channel, the REMOTE CONTROL AUTOMUTE ASSIGNS should be turned on for the desired Automute address, that is, LEFT ASSIGN 2 would make the left-hand channel of the XL42 mute on channel 2 of the Automute system. -
Page 23: Daisy Chain Operation
As shown in the diagram above, each channel has its own input plus the output from the previous XL42 so that at the last point of the chain, the output is a combination of each input. - Page 24 Daisy-Chain Operation Daisy-Chain Operation XL42 Operators Manual - Page 16...
-
Page 25: Technical Specification
Distortion at 1kHz Mic (+ 40dB gain, 0dBu output) <0.03% Link (0dBu) <0.03% Output Impedance All Outputs Balanced Source to drive >600 Maximum Output Level All Outputs Balanced Source to drive >600 into >600 Ohm +21dBu XL42 Operators Manual - Page 17... - Page 26 Phantom Voltage Supply +48V ± 5% Maximum Phantom Current <10mA Dimensions Width 482mm (19 inches) Depth 250mm (10 inches) Height 44mm (1.75 inches) Weight Nett Shipping Options Mic Transformer Factory-Fit Only Output Transformer Factory-Fit or Retro-fit XL42 Operators Manual - Page 18...
- Page 27 Notes XL42 Operators Manual - Page 19...
Need help?
Do you have a question about the XL42 and is the answer not in the manual?
Questions and answers