
Related Manuals for Tysso PRP-076N


Summary of Contents for Tysso PRP-076N
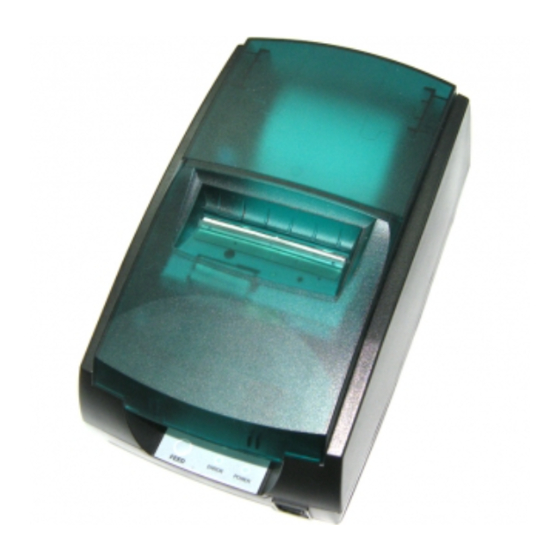
- Page 1 User’s Manual PRP-076N PRP-076C PRP-076D Impact Dot-Matrix Printer Specifications subject to change without notice...
-
Page 2: Table Of Contents
Table of Contents General Information ………………………………………………………………..2 1.1) Models 1.2) Features Quick Start…………………………………………………………………………..3 2.1) Unpacking & Parts Identification 2.2) Loading the Paper Roll and Ink Ribbon Printer Interface and Connection……………………………………………………5 3.1) Connecting the Interface Cable 3.2) Connecting to a Cash Drawer 3.3) Connecting the AC Adapter 4. -
Page 3: General Information
1. General Information 1.1) Models Note: International font can be combined with others languages, for example PRP-076C-BI-M-S, with cutter, Big5+International, beige, serial interface. 1.2) Features Main Features: -3.5 characters line/sec / 4.5 characters line/sec (32 bit ARM CPU) -76 mm ± 5 mm Max. label width -Low-noise dot matrix printing -High reliability due to a stable mechanism -Command protocol is based on the ESC/POS standard... -
Page 4: Unpacking & Parts Identification
2.1) Unpacking & Parts Identification Unpacking: Parts Identification: Power switch... -
Page 5: Loading The Paper Roll And Ink Ribbon
2.2) Loading the Paper Roll and Ink Ribbon a. Make sure that the paper roll matches the printer’s specification. Do not use paper rolls that have the paper glued to the core because the printer cannot detect the paper end correctly. Important: The printing quality and lifespan of the printer head cannot be guaranteed if any paper other than that recommended is used. -
Page 6: Printer Interface And Connection
3. Printer Interface and Connection 3.1) Connecting the Interface Cable Printer Interface: a) Before connecting/disconnecting the interface cable, make sure that power to the printer and all the devices connected to the printer is turned off. Connect the interface cable to the connector on the rear panel of the printer. c) In the case of a serial interface, tighten the connector screws. -
Page 7: Connecting To A Cash Drawer
3.2) Connecting to a Cash Drawer Important: Make sure that the printer is turned off and unplugged from the AC outlet and that the computer is turned off before making connections. Do not connect a telephone line into the peripheral drive connector. Failure to observe this may result in damage to the printer. - Page 8 CAUTION: DO NOT USE ANY AC POWER ADAPTERS OTHER THAN SPECIFIED. c. Turn on the power switch; the POWER lamp on the control panel will light up.
-
Page 9: Configuration
4. Configuration Printer Control Panel & Status Indication 4.1) Printer Status Power (POWER) LED: Green On: Power is on. Off: Power is off. Error (ERROR) LED: Red On: Offline (except during paper feeding using the FEED button and test printing, and the error state.) Off: Normal condition. -
Page 10: Dip Switch Settings
4.2) DIP Switch Settings The DIP switch panel is locating at bottom of the printer as shown: DIP Switch Functions: Switch Function Black mark mode Select Cutter Cut mode Partial Full Select characters per line (CPL) 7 40CPL/33CPL 42CPL/35CPL x 9 / 9 x 9 Unidirectional Two-byte character SW 7... -
Page 11: Printer Self Test
(*) Baud Rate is only available for serial interface models. 4.3) Printer Self Test This is to test whether the printer is working properly or not and also checks the printing quality, firmware version, and DIP switch settings 1. Hold the FEED button first and then turn on the power at the same time, release the button after around 2 seconds. -
Page 12: Driver Installation
4.5) Driver Installation 1. To install the PRP-076 driver, please insert the bundled CD disk into the CD-ROM drive. 2. In the CD-Rom menu, please go to Receipt Printer > PRP-076 folder and double click the SetupEn.exe file to begin the driver installation process and follow the installation instructions. -
Page 13: Safety And Maintenance
5. Safety and Maintenance 5.1) Safety Information Do not touch the HEAD of printer with anything. Do not touch the cutter blade. Only use the power supply that is come along with the printer. Do not bend the power cord excessively or place any heavy objects onto it. When connecting or disconnecting the plug, always hold the plug –... -
Page 14: Preventing Paper Jams
such a problem, paper dust collected in the paper holder and paper transport section and on the surface of the printer head must be removed periodically. Such cleaning is recommended to be carried out once six month or one million lines. Cleaning the Paper Holder Use a soft cloth to remove paper dust from the paper holder and paper transport section. -
Page 15: Appendix
6. Appendix Product Specifications 1.1) Printing Specifications 1) Printing method: 9 pins Impact Dot Matrix 2) Print density: 400 dpi (half dot) 385 dpi (half dot) 3) Printing direction: Bidirectional, adjustable by dipswitch 4) Printing width: 42CPL ( 7 x 9 ) / 35CPL ( 9 x 9 ) 40CPL ( 7 x 9 ) / 33CPL ( 9 x 9 ) 5) Printing speed: 4.5 characters line/sec... - Page 16 XON/XOFF protocol 2) Parallel port: 36 pin Centronics connector. 8 bits parallel, supports BUSY/nAck protocol 3) USB port: USB1.0 4) Ethernet port: Transmission speed: 10M (Max) Communication protocol: TCP/IP protocol Connector: 10 Base-T RJ-45 connector 5) Cash drawer port: DC 24V/1A, 6 wires RJ-11 socket 1.6) Electrical Characteristics 1) Supply voltage: Input: AC 110V/220V, 50~60Hz...
- Page 17 the paper roll stopper and other parts.) 2. CONFIGURATION 2.1) Interface 2.1.1) RS-232 serial interface 2.1.1.1) RS-232 Specifications Data transmission: Serial Synchronization: Asynchronous Handshaking: DTR/DSR or XON/XOFF control Signal levels: MARK = -3 to -15 V: Logic "1"/ OFF SPACE = +3 to +15 V: Logic "0"/ ON Baud rate: 9600, 19200 bps Data word length:...
- Page 18 Interface connector terminal assignments and signal functions Pin number Signal name Signal Source Description When using XON/XOFF handshake protocol, printer Printer transmits control code XON/XOFF Host Printer receives data from host Indicates printer current status, Printer whether the printer is Busy or Ready to receive data ——...
- Page 19 2.1.2.2) Parallel Interface Pin Assignments for Each Mode Mode Source Description /STB Host The computer presents the data on the data lines, and pulses DATA0 Host Indicates the 1st data bit through 8 DATA1 Host data bit DATA2 Host DATA3 Host DATA4 Host...
- Page 20 2.1.3.1) Ethernet Pin Assignments...
- Page 21 2.2 Connectors 2.2.1 Interface Connectors Refer to Interface explain. 2.2.2 Power Supply Connector This connector is used to connect the printer to an external power source. Power Supply Connector Pin Assignments Pin Number Signal Name +24 VDC Shell Frame GND 2.2.3 Drawer Kick-out Connector (Modular Connector) The pulse specified by ESC p or DLE DC4 is output to this connector.
-
Page 22: General Printer Commands
General Printer Commands COMMANDS LIST Command Name Print and line feed Print and carriage return ESC SP n Set right-side character spacing ESC ! n Select print mode(s) ESC % n Select/cancel user-defined character set ESC & Define user-defined characters ESC * m nL nH d1…dk Select bit-image mode ESC –... -
Page 23: International Character Fonts
International Character Fonts Esc t n Select character code table [format] ASCII Decimal [Range] 0 <= n <= 5, 16 <= n <= 19 [Description] Selects a page n from the character code table Page comment PC 437 (USA,Standard Europe) Katakana (Japan) PC 850 (Multilingual) PC 860 (Portuguese) - Page 24 Korean Optional Esc r n Select print color (PRP-076D only) [format] ASCII Decimal [Range] n=0, 48,1 ,49 [Description] Select print color Select Color 0, 48 Black 1, 49 Character code can also be selected by utility program: 1. To install the PRP-076 Default Code Page Setting utility, please insert the bundled CD disk into the CD-ROM drive.
- Page 25 Optional multilingual character model supports printing with one of the following characters: a. B - Traditional Chinese (Big 5) b. G - Simplify Chinese (GB) c. K - Korean d. J- Japanese Kanji (JIS) To enable/disable the multilingual character code use the following commands: (*) FS “&”...
- Page 26 Italy ° é ù à ò è ì Spain ì Ň ¿ ñ ¨ Japan ¦ ¥ Norway ¤ É Æ Ø Å Ü æ ø å é ü Denmark É Æ Ø Å Ü æ ø å é ü...
Need help?
Do you have a question about the PRP-076N and is the answer not in the manual?
Questions and answers