NETGEAR PS121v2 User Manual
Usb multifunction printer server
Hide thumbs
Also See for PS121v2:
- Installation manual (2 pages) ,
- Product data (2 pages) ,
- User manual (52 pages)

Related Manuals for NETGEAR PS121v2


Summary of Contents for NETGEAR PS121v2
- Page 1 NETGEAR USB Multifunction Printer Server PS121v2 User Manual NETGEAR, Inc. 4500 Great America Parkway Santa Clara, CA 95054 USA 202-10211-01 September 2006...
-
Page 2: Technical Support
In the interest of improving internal design, operational function, and/or reliability, NETGEAR reserves the right to make changes to the products described in this document without notice. NETGEAR does not assume any liability that may occur due to the use or application of the product(s) or circuit layout(s) described herein. - Page 3 Certificate of the Manufacturer/Importer It is hereby certified that the PS121v2 USB Multifunction Print Server has been suppressed in accordance with the conditions set out in the BMPT-AmtsblVfg 243/1991 and Vfg 46/1992. The operation of some equipment (for example, test transmitters) in accordance with the regulations may, however, be subject to certain restrictions. Please refer to the notes in the operating instructions.
- Page 4 v1.1, September 2006...
-
Page 5: Table Of Contents
Setting Up the Print Server to Interface with a Multi-Function Printer ......2-3 Initial Installation ....................2-4 Reserve the Print Server’s IP Address on Your Router ........2-7 Set Up Each Additional PC to Use the PS121v2 ..........2-8 Setting Up Your PS121v2 as a Standard Network Print Server .......2-9 v1.1, September 2006... - Page 6 Setting up PCs Running Windows 98SE or Windows ME .........2-9 Setting up PCs Running Windows XP or Windows 2000 ........2-9 Setting up a Macintosh Computer ..............2-16 Chapter 3 Operation Reserving a Printer for Exclusive Use by One PC ............3-1 Releasing the Print Server ..................3-3 Upgrading the Print Server Software ................3-3 Reading the Printer Port Status ..................3-4 Reading and Setting the Network Parameters ...............3-5...
-
Page 7: About This Manual
About This Manual This manual describes how to install, configure and troubleshoot the PS121v2 USB Multifunction Print Server. The information in this manual is intended for readers with intermediate computer and Internet skills. Conventions, Formats and Scope The conventions, formats, and scope of this manual are described in the following paragraphs: •... -
Page 8: How To Use This Manual
• button to access the full NETGEAR, Inc. online knowledge base for the product model. • Links to PDF versions of the full manual and individual chapters. - Page 9 NETGEAR USB Multifunction Printer Server PS121v2 User Manual Use the PDF of This Chapter link at the top left of any page. – Click the PDF of This Chapter link at the top right of any page in the chapter you want to print.
- Page 10 NETGEAR USB Multifunction Printer Server PS121v2 User Manual v1.1, September 2006...
-
Page 11: Introduction
Ethernet Port. 10/100 BASE-T standard Ethernet capable to connect any 10/100 Mbps hub and switch. • USB 2.0 port. The PS121v2 USB Multifunction Print Server has one 480 Mbps USB 2.0 port for connecting to the printer. v1.1, September 2006... -
Page 12: What's In The Box
Note: Product updates are available on the NETGEAR, Inc. web site at http://kbserver.netgear.com/products/PS121.asp. For a list of USB printers that have been tested with NETGEAR print servers, see the Support section of the NETGEAR Web site. Note: Other USB printers may also be compatible, or partially compatible, but NETGEAR has not tested them. -
Page 13: Hardware Description
5. Warranty & Registration card 6. Support information card If any of the parts are incorrect, missing, or damaged, contact your NETGEAR dealer. Keep the carton, including the original packing materials, in case you need to return the product for repair. -
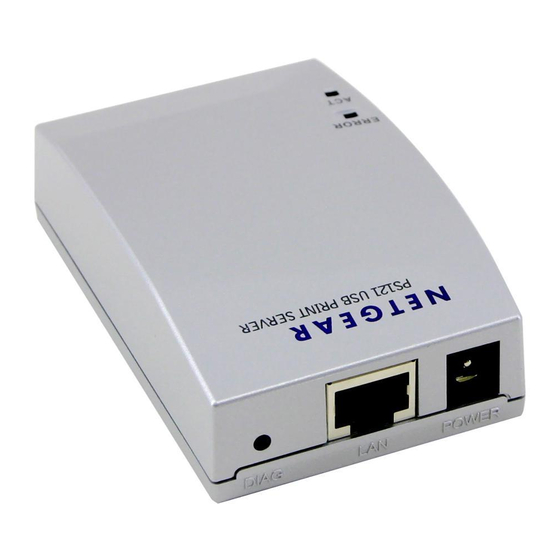
Page 14: Status Indicators
NETGEAR USB Multifunction Printer Server PS121v2 User Manual Status Indicators As illustrated in the figure below, the USB Multifunction Print Server has 2 LEDs. Figure 1-2 See the table below for a description of the LED indicator lights: Table 1-1. LED Descriptions... -
Page 15: The Usb Port
NETGEAR USB Multifunction Printer Server PS121v2 User Manual The USB Port The USB port of the PS121v2 USB Multifunction Print Server is a standard USB connector. PS121 USB 2.0 Port Figure 1-3 Note: The Model PS121 Mini Print Server does not support printers using parallel connectors. -
Page 16: Diagnostic/Reset Push Button
NETGEAR USB Multifunction Printer Server PS121v2 User Manual Diagnostic/Reset Push Button This button has 2 functions: • Restore the factory default settings • Print a test page containing all current settings Recessed Diagnostic/Reset Button Figure 1-4 The button is recessed. Use a pin or paper clip to press it. -
Page 17: Setup
Chapter 2 Setup This chapter describes how to install your PS121v2 USB Multifunction Print Server and set up basic connectivity on your Local Area Network (LAN). Verify Printer and Network Readiness Assure that the following are available: • You have a working Ethernet network running TCP/IP with at least one Windows 98SE, Me, 2000, or XP PC. -
Page 18: Overview Of Usb Multifunction Print Server Setup
Figure 2-1 PS121v2 Default Factory Settings When you first receive your PS121v2, the default factory settings are shown below. You can restore these defaults with the Factory Default Restore button on the rear panel as explained in “How to Restore the Factory Default Settings” on page 1-6. -
Page 19: Install And Configure The Ps121V2 Software
NETGEAR USB Multifunction Printer Server PS121v2 User Manual Install and Configure the PS121v2 Software The installation process depends on the type of functionality you want from the PS121v2 USB Multifunction Print Server and your network configuration. Choose How Your Print Server Will Function Your print server can be set up to interface with the printer as a multi-function printer or as a standard print-only printer. -
Page 20: Initial Installation
NETGEAR USB Multifunction Printer Server PS121v2 User Manual Initial Installation 1. Power on your computer, let the operating system boot up completely, and log in as needed. 2. Insert the Resource CD for the PS121v2 into your CD-ROM drive. The CD main page will load. Figure 2-2 Setup v1.1, September 2006... - Page 21 3. Click Install and Set Up the Print Server with This PC to start the installation wizard. Figure 2-3 4. Simply follow the installation instructions to connect your PS121v2 print server into your network. At the end of the “Connect Equipment” stage, it will search your network for the PS121v2 print server and will notify you accordingly.
- Page 22 NETGEAR USB Multifunction Printer Server PS121v2 User Manual 5. Click Next to proceed to the “Activate Network” stage, where the IP address settings and device name will be displayed. Figure 2-4 The settings recommended by the installation assistant will usually work well.
-
Page 23: Reserve The Print Server's Ip Address On Your Router
SmartWizard program or Web GUI. If you have a NETGEAR router, use the following instructions to reserve the IP address for the print server in your router. Otherwise, refer to your router manual. -
Page 24: Set Up Each Additional Pc To Use The Ps121V2
Set Up Each Additional PC to Use the PS121v2 After you have set up the PS121v2 in your network and connected it to one computer, you need to set up each additional computer to use the PS121v2. You do this by using the Resource CD to run the setup according to the steps below. -
Page 25: Setting Up Your Ps121V2 As A Standard Network Print Server
Setting Up Your PS121v2 as a Standard Network Print Server Setting up PCs Running Windows 98SE or Windows ME Before installing the PS121v2 USB Multifunction Print Server, make sure the driver for the printer you are going to use is already installed on your printer. - Page 26 Turn on your printer. d. Connect 12 V power adapter to the print server and plug it into a power source. e. Check the PS121v2 status lights and verify the following: • ERROR light: When the print server is powered on, the ERROR light will turn red briefly, and then turn off.
- Page 27 NETGEAR USB Multifunction Printer Server PS121v2 User Manual 2. Run the Windows Add Printer Wizard as follows: a. From the Windows Start menu of a computer connected to the PS121v2, click Printers and Faxes. b. Click Add a printer and then Next to proceed.
- Page 28 NETGEAR USB Multifunction Printer Server PS121v2 User Manual From the “Type of port” drop-down list, select Standard TCP/IP Port. Figure 2-10 g. Click Next to start the Add Standard TCP/IP Printer Port Wizard. Figure 2-11 3. Complete the Add Standard TCP/IP Printer Port Wizard as follows...
- Page 29 NETGEAR USB Multifunction Printer Server PS121v2 User Manual a. Click Next to proceed with the Add Standard TCP/IP Printer Port Wizard. The Add Port screen will display. Figure 2-12 b. From the Add Port screen, enter the IP address of the print server in the IP Address field.
- Page 30 NETGEAR USB Multifunction Printer Server PS121v2 User Manual d. The Port Settings tab page opens. In the Protocol section, select the LPR radio button, and enter PS121v2 as the Queue Name in the LPR Settings section. Click OK to close this tab page.
- Page 31 NETGEAR USB Multifunction Printer Server PS121v2 User Manual 4. Complete the Add Standard TCP/IP Printer Port Wizard as follows: a. From the Install Printer Software screen selection lists, find the manufacturer and model of the printer you connected to the USB port on the print server.
-
Page 32: Setting Up A Macintosh Computer
5. Click OK to return to the Untitled 1 window. 6. In the LPR Printer Selection box, click Change... 7. In the Printer Address field, type the IP address of the PS121v2 USB Multifunction Print Server. You can leave the Queue Name blank. -
Page 33: Operation
Chapter 3 Operation This chapter describes the non-printing operations that can be performed on the PS121v2 print server. Those operations are: • Reserving a multi-function printer for temporary exclusive use by one PC (Windows XP or Windows 2000 only) •... - Page 34 NETGEAR USB Multifunction Printer Server PS121v2 User Manual To temporarily reserve the print server: 1. Click the SmartWizard icon, , in the Windows system tray. A screen similar to the followng will be displayed: Figure 3-1 2. Click Reserve. The status icon will change to a red cross, indicating that the print server is now reserved.
-
Page 35: Releasing The Print Server
Figure 3-1. Note: If you have more than one PS121v2 print server on your network, your computer’s operating system will only be able to connect to the print server selected in the SmartWizard. If you want to connect to another print server, release the print server you reserved and select the device you want from the displayed list. -
Page 36: Reading The Printer Port Status
NETGEAR USB Multifunction Printer Server PS121v2 User Manual 1. Click the SmartWizard icon, , in the Windows system tray and click the Upgrade PS121v2 tab. Figure 3-3 2. Select the items you want to detect and click Detect. If a new version is available, it will be displayed in the New Version column. -
Page 37: Reading And Setting The Network Parameters
NETGEAR USB Multifunction Printer Server PS121v2 User Manual The browser will display a pop-up window prompting you for the user name and password. Figure 3-4 2. For the user name, type admin. If you have assigned a password enter it in the password box. -
Page 38: Non-Windows Computers
NETGEAR USB Multifunction Printer Server PS121v2 User Manual The device list will display all the PS121v2 print servers in your local network, displaying the device name, its MAC address, IP address, and gateway address. Figure 3-6 2. To edit the IP parameters associated with a print server: a. - Page 39 If you have not changed the password, type the default value of password. 3. To view the settings, click Server Status in the main menu. The browser will display, the PS121v2 name and firmware version, and its IP settings. Figure 3-8 Operation v1.1, September 2006...
- Page 40 NETGEAR USB Multifunction Printer Server PS121v2 User Manual 4. To edit the IP settings, click LAN IP Setup in the main menu. Figure 3-9 5. Edit the IP address, IP subnet mask, and gateway IP address, as desired, and click Apply.
-
Page 41: Changing The Web Gui Password
NETGEAR USB Multifunction Printer Server PS121v2 User Manual Changing the Web GUI Password If you want to restrict access to the Web GUI, change the password as follows: 1. Open your Web browser and type in the IP address of the print server in the browser’s Address text box. - Page 42 NETGEAR USB Multifunction Printer Server PS121v2 User Manual 5. Type the new password in both the New Password textbox, and the Repeat New Password text box. 6. Click Apply to change the password settings. 3-10 Operation v1.1, September 2006...
-
Page 43: Troubleshooting
If it is plugged directly into the wall, verify that it is not a switched outlet. • Make sure you are using the correct NETGEAR power adapter supplied with your print server. v1.1, September 2006... -
Page 44: No Lights Are Lit On The Print Server
• If the printer does not match the printer driver in the operating system, then set up the print server using the PS121v2 Resource CD. See “Set Up Each Additional PC to Use the PS121v2” on page 2-8 • Disable the printer's bidirectional feature, if it is turned on under Windows 98SE or Windows Troubleshooting v1.1, September 2006... -
Page 45: Checking The Current Status Of The Printer
NETGEAR USB Multifunction Printer Server PS121v2 User Manual Checking the Current Status of the Printer You can check the current status of the printer remotely from the Web configuration screen. The following conditions are displayed. • Current status — on-line, off-line, out of paper •... - Page 46 NETGEAR USB Multifunction Printer Server PS121v2 User Manual Troubleshooting v1.1, September 2006...
-
Page 47: Technical Specifications
Appendix A Technical Specifications This appendix provides technical specifications for the PS121v2 USB Multifunction Print Server Standards Compatibility IEEE 802.3u, 100BASE-TX, Fast Ethernet IEEE 802.3i 10BASE-T CSMA/CD NetBEUI, and TCP/IP protocols Data Rate 10/100 Mbps Interface 10BASE-T/100BASE-TX network port (RJ-45) USB 2.0 port... - Page 48 NETGEAR USB Multifunction Printer Server PS121v2 User Manual Technical Specifications v1.1, September 2006...
-
Page 49: Appendix B Related Documents
Appendix B Related Documents This appendix provides links to reference documents you can use to gain a more complete understanding of the technologies used in your NETGEAR product. Document Link Internet Networking and TCP/IP http://documentation.netgear.com/reference/enu/tcpip/index.htm Addressing Preparing a Computer for http://documentation.netgear.com/reference/enu/wsdhcp/index.htm... - Page 50 NETGEAR USB Multifunction Printer Server PS121v2 User Manual Related Documents v1.1, September 2006...
Need help?
Do you have a question about the PS121v2 and is the answer not in the manual?
Questions and answers