NETGEAR PS121 User Manual
Mini print server
Hide thumbs
Also See for PS121:
- User manual (52 pages) ,
- Installation manual (7 pages) ,
- Specification sheet (2 pages)

Related Manuals for NETGEAR PS121


Summary of Contents for NETGEAR PS121
- Page 1 User Manual for the NETGEAR PS121 Mini Print Server NETGEAR, Inc. 4500 Great America Parkway Santa Clara, CA 95054 USA Version v1.0 February 2004...
-
Page 2: Technical Support
Certificate of the Manufacturer/Importer It is hereby certified that the Model PS121 Print Server has been suppressed in accordance with the conditions set out in the BMPT- AmtsblVfg 243/1991 and Vfg 46/1992. The operation of some equipment (for example, test transmitters) in accordance with the regulations may, however, be subject to certain restrictions. - Page 3 EN 55 022 Declaration of Conformance This is to certify that the NETGEAR PS121 Mini Print Server is shielded against the generation of radio interference in accordance with the application of Council Directive 89/336/EEC, Article 4a. Conformity is declared by the application of EN 55 022 Class B (CISPR 22).
- Page 4 Certificate of the Manufacturer/Importer It is hereby certified that the NETGEAR PS121 Mini Print Server has been suppressed in accordance with the conditions set out in the BMPT-AmtsblVfg 243/1991 and Vfg 46/1992. The operation of some equipment (for example, test transmitters) in accordance with the regulations may, however, be subject to certain restrictions.
-
Page 5: Table Of Contents
PS121 Default Factory Settings ................3-2 First, Connect the Print Server and Printer to Your Network ..........3-3 Now, Install and Configure the PS121 Software .............3-4 Finally, Set Up Each Computer to Use the PS121 ............3-6 Chapter 4 Troubleshooting Basic Functioning ......................4-1 The mini print server has no power ................4-1... - Page 6 The print server is not found ..................4-2 Nothing is printing ....................4-2 I am using a DHCP server, and the Mini Print Server gets an IP Address conflict ..4-3 Troubleshooting the TCP/IP Settings Using Ping ............4-3 Restoring the Default Configuration ................4-4 Checking the Current Status of the Printer ..............4-4 Appendix A Technical Specifications...
-
Page 7: About This Manual
Screen text, file and server names, extensions, commands, IP addresses courier font Note: This format is used to highlight information of importance or special interest. This manual is written for the PS121 Print Server according to these specifications: Table 1-1. Manual Specifications... - Page 8 User Manual for the NETGEAR PS121 Mini Print Server About This Manual...
-
Page 9: Introduction
Windows® XP, Windows® 2000, Windows® Me, or Windows® 98SE 2nd edition system. For quick installation and setup, please see the Model PS121 Print Server Installation Guide. This manual describes in detail how to set up the Model PS121 single USB Mini Print Server and provides you with further reference information. -
Page 10: Key Features
Note: Product updates are available on the NETGEAR, Inc. web site at http://www.netgear.com/support/main.asp. For a list of USB printers that have been tested with NETGEAR print servers, see the Support section of the NETGEAR Web site. Note: Other USB printers may also be compatible, or partially compatible, but NETGEAR has not tested them. -
Page 11: What's In The Box
• Support information card If any of the parts are incorrect, missing, or damaged, contact your NETGEAR dealer. Keep the carton, including the original packing materials, in case you need to return the product for repair. To qualify for product updates and product warranty registrations, fill out the registration information within 30 days of purchase. -
Page 12: Hardware Description
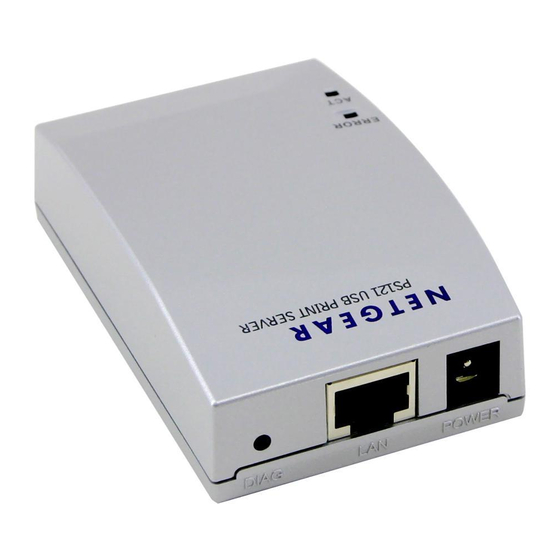
User Manual for the NETGEAR PS121 Mini Print Server Hardware Description The Model PS121 Mini Print Server LEDs indicate the status of the server and the Ethernet traffic. It has one 10/100 Mbps network port. The port operates in 10/100 Mbps when connected to a 10/ 100Mbps Ethernet network. -
Page 13: The Usb Port
User Manual for the NETGEAR PS121 Mini Print Server The USB Port The USB port of the Model PS121 Mini Print Server is a standard USB connector. PS121 USB Port Figure 2-3: Print Server USB Port Note: The Model PS121 Mini Print Server does not support printers using parallel connectors. If your printer uses a parallel connector, you should use one of the other NETGEAR Print Servers such as the Model PS101 Mini Print Server. -
Page 14: Diagnostic/Reset Push Button
User Manual for the NETGEAR PS121 Mini Print Server Diagnostic/Reset Push Button This button has 2 functions: • Restore the factory default settings • Print a test page containing all current settings Recessed Diagnostic/Reset Button Figure 2-5: Print Server recessed diagnostic/reset button The button is recessed. -
Page 15: Setup
Chapter 3 Setup This chapter describes how to install your NETGEAR PS121 Mini Print Server and set up basic connectivity on your Local Area Network (LAN). Verify Printer and Network Readiness Assure that the following are available: • You have a working Ethernet network running TCP/IP with at least one Windows 98SE, Me, 2000, or XP PC. -
Page 16: Overview Of Ps121 Print Server Setup
User Manual for the NETGEAR PS121 Mini Print Server Overview of PS121 Print Server Setup Before you share a printer with the NETGEAR PS121 Mini Print Server, you should have at least one computer connected to an Ethernet network and have one unused port on an Ethernet hub, switch, or router. -
Page 17: First, Connect The Print Server And Printer To Your Network
User Manual for the NETGEAR PS121 Mini Print Server First, Connect the Print Server and Printer to Your Network Connect the PS121 to your printer. Ensure that the PS121 power is OFF. Connect one end of the supplied USB cable (A) to the PS121, and the other end to the USB connector on your printer. -
Page 18: Now, Install And Configure The Ps121 Software
Print Manager software compatibility. Follow the steps below to install the software for PS121 and set it up on your network. Install the PS121 software. Power on your computer, let the operating system boot up completely, and log in as needed. - Page 19 User Manual for the NETGEAR PS121 Mini Print Server Run the Print Server Setup Wizard to Set Up a Fixed IP Address for the PS121. The Print Server Setup Wizard screen should be displayed. Click Next to proceed. The Print Server Wizard will now search your network for the PS121.
-
Page 20: Finally, Set Up Each Computer To Use The Ps121
Finally, Set Up Each Computer to Use the PS121 After you have set up the PS121 in your network, you need to set up each computer to use the PS121. You do this by using the NETGEAR Add Printer Port Wizard. For each computer on your network, use the NETGEAR PS121 Mini Print Server Resource CD to run the Add Printer Wizard according to the steps below. - Page 21 User Manual for the NETGEAR PS121 Mini Print Server Set up the correct printer driver for the printer port. Click Next to proceed to the Select Printer screen. If you see the exact Port/Printer Name Screen printer model number listed as the...
- Page 22 User Manual for the NETGEAR PS121 Mini Print Server If you need to use the Add Printer button because your printer is not on the list displayed in the Select Printer screen, follow these steps. Click Add Printer to open the Windows printer driver selection screen.
- Page 23 User Manual for the NETGEAR PS121 Mini Print Server You can accept the default name or enter a descriptive name of your own for the printer. Click click Next to proceed. Name Your Printer Screen Be sure to verify that the Do Not Share This Printer radio button is selected.
- Page 24 User Manual for the NETGEAR PS121 Mini Print Server After a short delay, the Confirm/ Troubleshoot Print test page dialog opens. Click OK to confirm that your printer successfully printed the test page. The test page will include the IP address...
-
Page 25: Troubleshooting
Chapter 4 Troubleshooting This chapter gives information about troubleshooting your NETGEAR PS121 Mini Print Server. After each problem description, instructions are provided to help you diagnose and solve the problem. For the common problems listed, go to the section indicated. -
Page 26: No Lights Are Lit On The Mini Print Server
If it is plugged directly into the wall, verify that it is not a switched outlet. • Make sure you are using the correct NETGEAR power adapter supplied with your mini print server. No lights are lit on the mini print server It takes a few seconds for the status light to be lit. -
Page 27: I Am Using A Dhcp Server, And The Mini Print Server Gets An Ip Address Conflict
If the printer does not match the printer driver in the operating system, then run the Add Printer Wizard. See “Finally, Set Up Each Computer to Use the PS121” on page 3-6 • Disable the printer's bidirectional feature, if it is turned on. -
Page 28: Restoring The Default Configuration
Restoring the Default Configuration This section explains how to restore the factory default configuration settings to the PS121. Use the Default Reset button on the rear panel of the mini print server. Use this method for cases when the administration password or IP address is not known. -
Page 29: Technical Specifications
Appendix A Technical Specifications This appendix provides technical specifications for the NETGEAR PS121 Mini Print Server Standards Compatibility IEEE 802.3u, 100BASE-TX, Fast Ethernet IEEE 802.3i 10BASE-T CSMA/CD NetBEUI, and TCP/IP protocols Data Rate 10/100 Mbps differential Manchester encoded Interface 10BASE-T/100BASE-TX network port (RJ-45) - Page 30 User Manual for the NETGEAR PS121 Mini Print Server Technical Specifications...
-
Page 31: Understanding Ip Addresses
Understanding IP Addresses This appendix provides information about understanding IP addresses, which you must assign to the NETGEAR PS121 Print Server when operating in a TCP/IP environment. IP Addresses and the Internet Because TCP/IP networks are interconnected across the world, every machine on the Internet must have a unique address to make sure that transmitted data reaches the correct destination. - Page 32 User Manual for the NETGEAR PS121 Mini Print Server Class A Network Node Class B Network Node Class C Network Node Figure 4-1: Three Main Address Classes The five address classes are: • Class A Class A addresses can have up to 16,777,214 hosts on a single network. They use an eight-bit network number and a 24-bit node number.
-
Page 33: Netmask
User Manual for the NETGEAR PS121 Mini Print Server • Class E Class E addresses are for experimental use. This addressing structure allows IP addresses to uniquely identify each physical network and each node on each physical network. For each unique value of the network portion of the address, the base address of the range (host address of all zeros) is known as the network address and is not usually assigned to a host. -
Page 34: Subnet Addressing
User Manual for the NETGEAR PS121 Mini Print Server Subnet Addressing By looking at the addressing structures, you can see that even with a Class C address, there are a large number of hosts per network. Such a structure is an inefficient use of addresses if each end of a routed link requires a different network number. - Page 35 User Manual for the NETGEAR PS121 Mini Print Server Note: The number 192.68.135.127 is not assigned because it is the broadcast address of the first subnet. The number 192.68.135.128 is not assigned because it is the network address of the second subnet.
-
Page 36: Private Ip Addresses
Netmask Formats 255.255.255.252 255.255.255.254 255.255.255.255 NETGEAR strongly recommends that you configure all hosts on a LAN segment to use the same netmask for the following reasons: • So that hosts recognize local IP broadcast packets. When a device broadcasts to its segment neighbors, it uses a destination address of the local network address with all ones for the host address. -
Page 37: Address Resolution Protocol
Protocol (DHCP) server. The DHCP server stores a list or pool of IP addresses, along with other information (such as gateway and DNS addresses) that it may assign to the other devices on the network. The most of NETGEAR routers have the capacity to act as a DHCP server. Understanding IP Addresses... - Page 38 User Manual for the NETGEAR PS121 Mini Print Server Understanding IP Addresses...
-
Page 39: Glossary
Glossary List of Glossary Terms Use the list below to find definitions for technical terms used in this manual. 10BASE-T IEEE 802.3 specification for 10 Mbps Ethernet over Category 3, 4, or 5 twisted pair wiring. 100BASE-Tx IEEE 802.3 specification for 100 Mbps Fast Ethernet over Category 5 twisted pair wiring. 1000BASE-T IEEE 802.3 specification for 1000 Mbps Gigabit Ethernet over Category 5 twisted pair wiring. - Page 40 .com, .edu, .uk, etc. For example, in the address mail.NETGEAR.com, mail is a server name and NETGEAR.com is the domain. Short for digital subscriber line, but is commonly used in reference to the asymmetric version of this technology (ADSL) that allows data to be sent over existing copper telephone lines at data rates of from 1.5...
- Page 41 User Manual for the NETGEAR PS121 Mini Print Server Internet Protocol is the main internetworking protocol used in the Internet. Used in conjunction with the Transfer Control Protocol (TCP) to form TCP/IP. IP Address A four-byte number uniquely defining each host on the Internet, usually written in dotted-decimal notation with periods separating the bytes (for example, 134.177.244.57).
- Page 42 User Manual for the NETGEAR PS121 Mini Print Server Network Address Translation NAT. A technique by which several hosts share a single IP address for access to the Internet. Network Interface Card. An adapter in a computer which provides connectivity to a network.
- Page 43 User Manual for the NETGEAR PS121 Mini Print Server Windows Internet Naming Service WINS. Windows Internet Naming Service is a server process for resolving Windows-based computer names to IP addresses. If a remote network contains a WINS server, your Windows PCs can gather information from that WINS server about its local hosts.
- Page 44 User Manual for the NETGEAR PS121 Mini Print Server Glossary...
-
Page 45: Index
Index 1597 B-6 finding B-6 Compatible NETGEAR products 2-2 Customer support 1-ii subnet addressing B-4 subnet mask B-4 features 2-2 Support 1-ii Hardware Description 2-4 Technical Support 1-ii troubleshooting 4-1 Tutorial IANA Animated Network Properties Configuration 2-3 contacting B-1 PC Networking 2-3...
Need help?
Do you have a question about the PS121 and is the answer not in the manual?
Questions and answers