NETGEAR PS111W Installation And Reference Manual
Hide thumbs
Also See for PS111W:
- Installation manual (22 pages) ,
- Datasheet (2 pages) ,
- Reference manual (142 pages)

Related Manuals for NETGEAR PS111W


Summary of Contents for NETGEAR PS111W
- Page 1 Installation and Reference for NETGEAR PS111W Print Sever NETGEAR, Inc. 4500 Great America Parkway Santa Clara, CA 95054 USA Phone 888-NETGEAR M-PS100NA-4 March 2002...
- Page 2 In the interest of improving internal design, operational function, and/or reliability, NETGEAR reserves the right to make changes to the products described in this document without notice. NETGEAR does not assume any liability that may occur due to the use or application of the product(s) or circuit layout(s) described herein.
- Page 3 Bestätigung des Herstellers/Importeurs Es wird hiermit bestätigt, daß das Model PS100 series Print Sever gemäß der im BMPT-AmtsblVfg 243/1991 und Vfg 46/1992 aufgeführten Bestimmungen entstört ist. Das vorschriftsmäßige Betreiben einiger Geräte (z.B. Testsender) kann jedoch gewissen Beschränkungen unterliegen. Lesen Sie dazu bitte die Anmerkungen in der Betriebsanleitung.
- Page 4 • Internet/World Wide Web NETGEAR maintains a World Wide Web Home Page that you can access at the universal resource locator (URL) "http://www.NETGEAR.com". A direct connection to the Internet and a Web browser such as Internet Explorer or Netscape are required.
-
Page 5: Purpose
PCs to connect to the same printer, processing and trafficking printing requests to any parallel device. These print servers are fast and easy to set up with NETGEAR Print Server with NETGEAR software configuration program. With Microsoft Internet Explorer or Netscape web browser, you can configure the print server even easier. -
Page 6: Conventions
NETGEAR Print Server Utility, a program developed by NETGEAR for fast and easy device configuration, and for web configuration, a built-in web server in the print server so you can use a browser to configure the print server... -
Page 7: Table Of Contents
MICROSOFT WINDOWS SYSTEM PRINTING..........22 4-1 P INDOWS ....................22 RINTING IN 4-2 NETGEAR P NSTALLATION ........23 RINT ERVER OFTWARE 4-3 S ERVER ......30 ETTING ECOGNIZE THE RINT Auto-IP ............................34 Wireless Configuration ........................36 NETGEAR Add Printer Wizard - Write Down the Port Name ............39... - Page 8 NetGear Print Server Manual 4-4 A DD A PRINTER TO YOUR SYSTEM TO PRINT ............42 CHAPTER 5 UNIX PRINTING USING TCP/IP................50 5-1 T IP A EMPORARY DDRESS ESOLUTION..............51 ........51 Assigning an IP Address to the Print Server Using DHCP ........51 Assigning an IP Address to the Print Server Using BootP ........52...
- Page 9 NetGear Print Server Manual UBNET DDRESSING........................85 IP A DDRESSES ......................86 RIVATE DDRESS ESOLUTION ROTOCOL..................87 IP C DHCP ....................87 ONFIGURATION BY APPENDIX C CONFIG FILE ......................88 CONFIG F TCP/IP S ETTINGS ..................88 APPENDIX D USING NETWARE 5 NDPS................90 VERVIEW ............................90 ................90 Creating an NDPS Manager Object ..................91...
-
Page 10: Chapter 1 Introduction
• Support for multiple operating systems (Windows 95, Windows 98, Windows Me, Windows NT, Windows 2000, Windows XP, Novell NetWare, and UNIX) • Easy configuration of the device with NETGEAR Print Server software that assures fast and easy setup for Windows 95, Windows 98, Windows Me, Window NT, Windows 2000, and Windows XP users. -
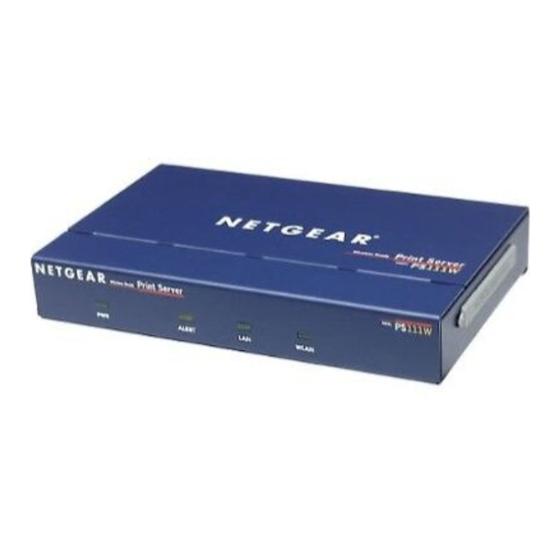
Page 11: Front Panel
NetGear Print Server Manual 1-2 Front Panel The LEDs that indicate the status of the server, wired, and wireless LAN are located on the front panels of the Model PS111W Print Sever, as illustrated bellow: 1-1 Front Panel of the Model PS111W Print Sever... -
Page 12: Leds
NetGear Print Server Manual LEDs There are 4 LEDs on the front panel of the Model PS111W Print Sever. See the table bellow: LED Descriptions Label Color Activity Description PWR (power) Green On Power is supplied to the print server. -
Page 13: Rear Panel
NetGear Print Server Manual 1-3 Rear Panel The rear panel of the Model PS111W Print Sever has a parallel port for printer. The Model PS111W Print Sever has one 10/100BASE-T network port. The 10/100BASE-T port is an auto negotiation port that operates in 100 Mbps and in half-duplex mode when connected to a Fast Ethernet network. -
Page 14: Chapter 2 Installation
• Customer Support Phone Card Call your reseller or NETGEAR Customer Support in your area if there are any wrong, missing, or damaged parts. Refer to "Customer Support" section for the location of customer support in your area. Keep the carton, including the original packing materials. Use them to repack the print server if you... -
Page 15: Connecting Devices To The Print Server
PS111W Print Server. Please note while the power is on; do not insert the NETGEAR MA401 802.11b Wireless PC Card in to PS111W Print Server. Doing so is simply not working and maybe damaging the Print Server and the PC card. Do not remove the NETGEAR MA401 802.11b Wireless PC Card out from PS111W Print Server, when the power is on. -
Page 16: Verifying Power
On the PS111W Print Sever Model, the green LAN LED on connected network port is on, and the green WLAN LED with the NETGEAR MA401 801.11b Wireless PC Card in PC card slot is on. Make sure the network interface cards installed in the workstations are in working condition and the software driver has been installed on the cards. -
Page 17: Chapter 3 Web Management For Print Server
3-1 Configuring Print Server for TCP/IP Using a web browser to configure a NETGEAR Print Server requires both the print server and the host workstation that the web browser runs on to be configured for TCP/IP. NETGEAR PS111W Print Server is set with the factory setting for DHCP environment, which means if you have a DHCP server (most recent broad band routers have provided this feature), PS111W will get its own IP address settings for TCP/IP. -
Page 18: Browser Menu Selections And Configuration Screens
NetGear Print Server Manual 3-3 Browser Menu selections and Configuration Screens This section describes the browser menu selections and corresponding configuration screens. Server Status The Server Status screen shows print server system data and the current settings for all of the other screens. -
Page 19: Configure Server
NetGear Print Server Manual Configure Server Clicking the Configure Server menu selection brings up the Configure Server screen. The Configure Server screen contains fields to change the print server name and to enable or disable the various network protocols supported by the print server. Figure 3-2 and following table show the Configure Server Screen and describe each of its fields. - Page 20 If you forget the password to the print Password server, the only way to reset it is by resetting the device to factory default through the NETGEAR Print Confirm Password Server Administration Program.
-
Page 21: Tcp/Ip
NETGEAR router, the default subnet mask is usually 255.255.255.0. Gateway This is the IP address of the router on your network. For example, in a network with a NETGEAR router, Address the gateway address is usually 192.168.0.1. -
Page 22: Appletalk
NetGear Print Server Manual AppleTalk The NETGEAR Print Server supports AppleTalk (EtherTalk), PAP, ATP, NBP, ZIP and DDP protocols, enabling Apple computers on the network to view and use the Print Server as a regular AppleTalk printer. The NETGEAR Print Server is enabled for AppleTalk printing by default. Further AppleTalk configuration may be configured through a web browser if the print server is configured for IP access. -
Page 23: Wireless
NetGear Print Server Manual Wireless The Wireless screen provides selections for many wireless related operations. See Figure 3-5. For wireless operation, there are two major configurations. 1. Wireless related setups. 2. Wired Equivalent Privacy (WEP) encryption. See the following Wireless Configuration Screen section for the detail. - Page 24 NetGear Print Server Manual number. • If using "802.11 Ad-hoc" or "Ad-hoc" mode, select the value you wish to use on your Wireless LAN. • If using "Infrastructure" mode, the Channel is selected automatically, to match the Channel used by the Access Point.
- Page 25 NetGear Print Server Manual WEP Data Privacy Fields Default setting; data is NOT encrypted before transmitted. Choose the data privacy encryption from one of the three Off – No data Off – No data encryption, encryption 64 Bit Encryption, or 128 Bit Encryption.
-
Page 26: Wireless Link Info
Link Quality: The quality of the link, which is excellent or poor Signal Strength: The signal amplification, which is excellent or poor Note: The information is only meaningful while there is a NETGEAR MA401 802.11b wireless PC card in the PS111W slot. -
Page 27: Printer Port
NetGear Print Server Manual Printer Port The Printer Port screen provides the status of the printer. See Figure 3-7. Figure 3-7 Printer Port Screen Printer Port Connected Shows the descriptive name for the new printer. Printer HandShake This sets one of the communication parameters between this device and the printer. -
Page 28: Logical Printer
NetGear Print Server Manual Logical Printer The logical printer screen is used to map different logical printer ports to printers attached to the Print Server. A logical printer port is used to specify a set of printer control commands to be sent to a printer for every print job sent through the logical port. - Page 29 NetGear Print Server Manual Buttons Cancel: If changed something that is not good, click on ‘Cancel’ button will load the value back from PS111W. No modification will be made into PS111W.
-
Page 30: Reset
NetGear Print Server Manual Reset Clicking the RESET button will reboot the print server. When you change settings for TCP/IP and Wireless, you will need to reset the print server. If the print server is rebooted, any print job in progress will be disrupted. -
Page 31: Chapter 4 Microsoft Windows System Printing
3. Setup your PC to recognize the print server and write down the port name let your PC add a special printer port by using NETGEAR Add Printer Wizard. Before add driver for the printer, NETGEAR Add Printer Wizard will add the port automatically. You will need the port name, so please write down the port name when provided to you. -
Page 32: Netgear Print Server Software Installation
To install and set up your network and your print server for the NETGEAR Print Server, you may use a PC with a Microsoft Windows (95, 98, NT 4.0, ME, 2000, or XP) operating system and with either the TCP/IP protocol or the NetBEUI protocol enabled. - Page 33 NetGear Print Server Manual The second screen provides you an important message as shown below. Click on Next button. Figure 4-2 Information...
- Page 34 • NETGEAR Add Printer Wizard A step-by-step guide program to configure the printer to print from your Microsoft Windows You MUST install the NETGEAR Add Printer Wizard so you can use the print server to print from Windows. • Administrative Tools Advance administrative tools including admin and IPSetup Use admin to manage the print servers on LAN.
- Page 35 NetGear Print Server Manual After make the proper selections, click on Next button. You can choose the location of the program. Figure 4-4 Destination Location Choose a program folder name. You click on Next button to accept the default name.
- Page 36 NetGear Print Server Manual The next screen shows you the progress of the installation. Figure 4-6...
- Page 37 NetGear Print Server Manual Before you finish the installation, you can choose to run the NETGEAR Print Server Setup Wizard and read the manual. You can uncheck either one or both of the selections and run it at a later time.
- Page 38 NetGear Print Server Manual You can open and access the group from your desktop as well. See Figure 4-9.
-
Page 39: Setting Up Your Pc To Recognize The Print Server
• The print cable is connected to the printer port. • The AC adapter is plugged into the wall socket. • The Ethernet cable is plugged into the LAN, or the wireless MA 401 PC card is installed in PS111W. Figure 4-9 NETGEAR Print Server software Icon... - Page 40 Double-click on the desktop icon, as showing Figure 4-8, that you named the group in the previous section, Figure 4-5. Double-click on NETGAER Print Server Setup Wizard in the NETGEAR Print Server window. The NETGAER Print Server window opens, as illustrated below.
- Page 41 Click on Next. The Printer Server Setup Wizard window shows the current available NETGEAR Print Server on LAN. Click on Refresh button to see the new added print server. If you still don’t see the one you’d like to see, wait a minute and click the Refresh button again.
- Page 42 NetGear Print Server Manual Select the PS111W print server and click on Next. The Printer Server Setup Wizard window shows the current print server Name. The default name is the Device Name on the base of the unit. Change it to a unique name, or leave it without changing it. See Figure 4-12 Select Name for Print Server.
-
Page 43: Auto-Ip
Auto-IP When NETGEAR PS111W Print Server is without an IP address due to as a DHCP client and there is no DHCP server to automatically get an IP address, it will self-assign a unique IP address. The address range is from 169.254.0.1 to 169.254.254.254 with the subnet mask 255.255.0.0 so that the print server can... - Page 44 NetGear Print Server Manual Figure 4-13 Set up TCP/IP for Print Server to get an IP address...
-
Page 45: Wireless Configuration
The next Printer Server Setup Wizard window, Figure 4-14, shows wireless settings for the print server. If there is no NETGEAR 802.11b MA401 Wireless PC card in the slot, and not planning for now, you can simply skip this step by going directly to the next step. - Page 46 NetGear Print Server Manual Figure 4-14 Wireless Configuration...
- Page 47 Click No, if you don’t need to add a printer to your system now. You can add a printer at a later time by opening the NETGEAR Print Server group and running NETGEAR Add Printer Wizard. Figure 4-16 Add a Printer...
-
Page 48: Netgear Add Printer Wizard - Write Down The Port Name
You can reach this setup procedure by answering Yes to the previous Figure 4-16 Information. Or open NETGEAR Print Server group and run NEYGEAR Add Printer Wizard. Make sure that the NETGEAR Print Server and the printer that connects to it are both powered on. Make sure that the cable connections between them are properly connected. - Page 49 NetGear Print Server Manual ADDPORT Window (Epson Connection) Click on No if you do not have an Epson Stylus Color printer attached to the port, and continue to step 8. Click on Yes if you do have an Epson Stylus Color printer (or plan to install one). You must disable the Epson printer.
- Page 50 NetGear Print Server Manual ADD PORT Window If this is not an Epson printer, skip the above procedure. The Add Port should be added successfully. See Figure 4-20 Add Port message. Figure 4-20 Add Port message Write Down the Port Name It is very important to remember and write down the port name.
-
Page 51: Add A Printer To Your System To Print
NetGear Print Server Manual 4-4 Add a printer to your system to print Select Printer Port for Add Printer Wizard After selected the printer, you need to select a printer port to print. See Figure 4-21 Select Printer Port for Add Printer Wizard. - Page 52 NetGear Print Server Manual Use the printer port name written at the last section. Scroll down and find the printer port name. For example, the printer port name here is ‘IP_192.168.1.108_P1’. See Figure 4-22 Find and select the printer port. For Windows 95, and 98 users, this window will show up after Add Printer (Figure 4-23 thereafter).
- Page 53 NetGear Print Server Manual Figure 4-23 Add Printer Wizard Click on Next If you have ever installed the printer driver in the system, Figure 4-24 Use Existing Driver window shows. You can choose to keep the existing driver, or replace it. If you don’t see Figure 4-24, go to the next step.
- Page 54 NetGear Print Server Manual Figure 4-24 Use Existing Driver for Add Printer Wizard Click on Next Name the printer. See Figure 4-25 Name Your Printer for Add Printer Wizard. If there are more than one printer drivers installed in the system, you may answer Yes to choose this as your default printer for your...
- Page 55 NetGear Print Server Manual Figure 4-25 Name Your Printer for Add Printer Wizard Click on Next See Figure 4-26 Printer Sharing. When you use print server for the printer, you don’t usually need to share the printer on the local machine. Keep the default answer as Do not share this printer.
- Page 56 NetGear Print Server Manual Figure 4-26 Share Printer for Add Printer Wizard Click on Next You can try to print a test page to the printer after your printer installed properly. See Figure 4-27 Print Test Page. It is OK not to print a test page in answering question Do you want to print a test page to No.
- Page 57 NetGear Print Server Manual Figure 4-27 Print Test Page for Add Printer Wizard Click on Next If you answer Yes to print a test page, see Figure 4-28. Figure 4-28 Printer print the test page Click on OK Complete the Add Printer Wizard. See Figure 4-29 Completing the Add Printer Wizard.
- Page 58 NetGear Print Server Manual Figure 4-29 Completing the Add Printer Wizard Click on Finish Now you can print through the PS111W print server. The Figure 4-18 Printer Select Window (Add Port) window remains on the screen. Click on End to close it.
-
Page 59: Chapter 5 Unix Printing Using Tcp/Ip
Chapter 5 UNIX Printing Using TCP/IP This chapter explains how to configure and set up the NETGEAR PS111W Print Sever and your UNIX system if you are operating in a UNIX networking environment. The print server can work with most... -
Page 60: Temporary Ip Address Resolution
NetGear Print Server Manual After you configure the print server as described in “Configuring Your Print Server Using FTP”, choose a printing method as described in Setting the Print Method” to configure each UNIX PC in your network. 5-1 Temporary IP Address Resolution If the IP address is left at 0.0.0.0 (the default value), a temporary IP address is assigned when the print... -
Page 61: Assigning An Ip Address To The Print Server Using Rarp
NetGear Print Server Manual Use these definitions for entering the information: NAME is the name of your print server. PA is the physical address of your print server. IP is the IP address of your print server. SM is the Subnet Mask IP address. -
Page 62: Assigning An Ip Address To The Print Server Using Arp
NetGear Print Server Manual In the example, a print server with an IP address of 192.10.2.54 is called PS_Rm203 and has a default name of PS123456. Add to the Ethernet Address table /etc/ethers: 00:c0:02:xx:yy:zz NAME Use these definitions for entering the information: 00:c0:02:xx:yy:zz is the location of your print server. - Page 63 NetGear Print Server Manual arp -s NAME 00:c0:02:xx:yy:zz Use these definitions for entering the information: NAME is the name of your print server. 00:c0:02:xx:yy:zz is the physical address of the print server. A sample entry is: arp -s PS_Rm203 00:c0:02:12:34:56...
-
Page 64: Configuring Your Print Server Using Ftp
Edit the CONFIG file by typing with a text editor. NETGEAR recommends that you edit the CONFIG file to provide a permanent IP address to the print server. The CONFIG file is shown in “CONFIG File.” Copy the CONFIG file back to the print server and then reset the device by using the commands: ftp NAME ftp>put CONFIG... -
Page 65: List Of Ftp Files And Commands Supported By The Print Server
NetGear Print Server Manual List of FTP Files and Commands Supported by the Print Server Table FTP Files in the Directory lists the file names that appear in the directory. FTP Files in the Directory File Name Purpose Mode CONFIG... -
Page 66: Setting The Print Method
NetGear Print Server Manual 5-3 Setting the Print Method The following three printing methods can be used in any environment: Line Printer Daemon (LPD) LPD is a standard print method for most UNIX systems. The benefit of this method is that it eliminates the need to install additional software on the host. -
Page 67: Configuring Lpd On System V
NetGear Print Server Manual Name of queue to add Use a single-word queue name that indicates the printer attached. Hostname for remote server Print server name as used in /etc/hosts.lpd. Name of queue on remote server It is the logical printer number (L1 to L3 or L1 to L8) to service this queue. -
Page 68: Configuring Lpd On Bsd
NetGear Print Server Manual Stop Print Services /usr/lib/lpshut Add a System Printer /usr/lib/lpadmin -p printer_name -v /dev/null Restart the Print Services /usr/lib/lpsched Enable printing to the new printer device enable printer_name Start accepting jobs for the new printer device accept printer_name... -
Page 69: Printing Using Lpd
Socket numbers are defined as listed in table Socket Number Definitions. Socket Number Definitions Logical Printer Number Socket Number 4010 4020 4030 Note: Some of the features described in this chapter may not available to every NETGEAR Print Server model. -
Page 70: Chapter 6 Appletalk Printing
AppleTalk networking environment. 6-1 Setting up Print Server for AppleTalk There are 3 different ways to configure AppleTalk on a NETGEAR PS100 series print server: The recommended approach is through the print server's browser interface in an IP networking environment. For more information, please refer to chapter 3, “Web Management for Print Server”. -
Page 71: Setting Up Host Computer
Printers attached to the NETGEAR printer are advertised on AppleTalk networks as xxxxxx_P1, xxxxxx_P2, xxxxxx_P3, where xxxxxx is the name of the print server. e.g. if the NETGEAR Print Server is a 3 port model and the printer server name is PS543283, the printers attached to it will be advertised as PS543283_P1, PS543283_P2, PS543283_3. -
Page 72: Using Pstool Utility
Windows workstations running the NETGEAR Print Server Administration program. The NETGEAR PSTool Utility is a program that runs under the Mac OS©. You first edit a NETGEAR Print Server configuration file using a text editor such as SimpleText, then use the NETGEAR PSTool Utility to send the configuration file to the NETGEAR Print Server. -
Page 73: Pstool Utility Config File Format
ASCII communication is more reliable 3104 AP_PCOMM3: The computer, Print Server and printer MUST all be configured to use the SAME protocol. Do not change this line. 9002 Note: NETGEAR does not support PS101 Print Server for AppleTalk printing environment. -
Page 74: Chapter 7 Using Advanced Management Tools
NETGEAR Print Server Administration Program All active NETGEAR print servers are listed on the screen as shown. If there is any print server missing from the screen, you may click on the Browse button to scan the network one more time. By default, the NetGear Administration Program only browses the network with NetBEUI to minimize unnecessary packets on the network. -
Page 75: Buttons
NetGear Print Server Manual also enabled and bound to the network adapter card in your Windows 95, Windows 98, Windows NT, or Windows 2000 system. Buttons Advanced Button Click on the Advanced button for detailed full configuration of the selected Print Server. See the later... - Page 76 The protocol currently used for communication between your PC and the Print Server is Enabled and grayed out, so it cannot be disabled. Browse Button Use this button to re-scan the network and update icons for any Print Servers located. Exit Button. The Exit button ends the NetGear setup utility.
-
Page 77: Advanced Print Server Configuration
NetGear Print Server Manual 7-2 Advanced Print Server Configuration From the main menu, click on the Advanced button to use the advanced configuration procedure. The Advanced Print Server Configuration screen opens. The Advanced Print Server Configuration screen contains the fields listed on tabs that can be selected in any order to customize the configuration of the print server. - Page 78 There is a factory default name. For any change, NETGEAR recommends that a name be determined before setting the print server in any network. This name should be no more than 16 characters with at least a non numeric letter. Spaces are not allowed, but dashes (-) and underscore marks (_) are accepted.
-
Page 79: Tcp/Ip Tab
This IP address is assigned to the print server. If you have a private LAN and do not plan to connect to the TCP/IP-based internet, NETGEAR recommends that you use the address from the IETP-designated private addresses (for example, 192.168.x.x or 10.x.x.x). -
Page 80: Appletalk Tab
NetGear Print Server Manual Subnet Mask This subnet mask defines the range of addresses that are reachable on your local LAN. Gateway This IP address is what the print server uses for stations with IP addresses not reachable on your local Address LAN. -
Page 81: Logical Port Tab
NetGear Print Server Manual Printer Type These are text fields, used to describe the printer driver used for each port. Currently the only printer driver supported for AppleTalk is LaserWriter. Communication Sets whether the port uses ASCII or Binary Communication Protocol. Binary communication is faster Protocol than ASCII, but ASCII communication is more reliable. -
Page 82: Physical Port Tab
NetGear Print Server Manual Physical Port Selects which physical printer port the logical port is mapped into. Converts LF to LF+CRAdd a carriage return (CR) every time the line feed (LF) character code is received by the print server when any print data is sent to this logical port. -
Page 83: Wireless Tab
NetGear Print Server Manual Physical Port Physical Port Tab Fields Field Description Current Selected Selects the physical port to be configured. Physical Port Physical Port Name If required, you can change the name of the Physical Port. Handshake Signal The default setting is "Busy". This should only be changed to "Ack and Busy" if advised to do so by Technical Support. - Page 84 NetGear Print Server Manual Wireless Tab Wireless Tab Fields Field Description Regulatory Domain It is illegal to use this device in any location outside of the regulatory domain. Station Name The name used to identify this Wireless station. SSID If using an ESS (Extended Service Set, with multiple access points) this ID is called an ESSID (Extended Service Set Identifier).
- Page 85 NetGear Print Server Manual communicate in "802.11 Ad-hoc" or "Ad hoc" mode, all Wireless stations MUST Channel No same Channel number. use the If using "802.11 Ad-hoc" or "Ad-hoc" mode, select the value you wish to use on your Wireless LAN.
-
Page 86: Link Info Screen
NetGear Print Server Manual WEP Authentication Options are "Open System" or "Shared Key". Some Wireless cards and Access Points do not support both methods. Check your documentation to determine the correct value to use. Link Info Screen Wireless Link Info... -
Page 87: Menu Options
NetGear Print Server Manual 7-3 Menu Options The NetGear Administration program contains a menu bar that provides a number of options including Control, Printer, and Help, which are outlined in the following section. Control Menu Control is the first item on the top menu bar is for print server control. Click on the Control selection, move the cursor down to select one of the menu selections and click again to carry out the intended action, as described below. -
Page 88: Printer Menu
NetGear Print Server Manual Default Configuration Click "Yes" to confirm setting to factory defaults, or "No" to leave the current configuration unchanged. Printer Menu Individual printer ports are displayed as options under the Printer Menu, and a pop-up window opens when any of the printer ports are selected, as in the example below. -
Page 89: Configuring Using Ip Setup
Windows environment. Please see Appendix E for IPSetup utility reference. With IPSetup tool, you can force an IP address to a NETGEAR Print Server. It sets up the subnet mask and default gateway as well as disables the DHCP. In this way, you can always get a known and fixed... -
Page 90: Appendix Atechnical Specifications
NetGear Print Server Manual Appendix A Technical Specifications This appendix provides technical specifications for the NETGEAR Model PS111W Print Server. General Specifications Network Protocol and Standards Compatibility IEEE 802.3u, 100BASE-TX, Fast Ethernet IEEE 802.3i 10BASE-T CSMA/CD IEEE 802.11b 11Mbps maximum CSMA/CA... - Page 91 NetGear Print Server Manual EN 55 022 (CISPR 22), Class B VCCI Class B ITE Safety Agency Approvals, Power Adapter Meets requirements of: CE mark, commercial UL listed (UL 1950) CSA certified (CSA 22.2 #950) TUV licensed (EN 60 950)
-
Page 92: Appendix Bunderstanding Ip Addresses
NetGear Print Server Manual Appendix B Understanding IP Addresses This appendix provides information about understanding IP addresses, which you must assign to the NETGEAR PS100 series Print Sever when operating in a TCP/IP environment. IP Addresses and the Internet Because TCP/IP networks are interconnected widely across the world, every machine on the Internet must have a unique address to make sure that transmitted data reaches the correct destination. -
Page 93: Netmask
NetGear Print Server Manual Class B addresses can have up to 65,354 hosts on a network. Class B addresses use a 16-bit network number and a 16-bit node number. Class B addresses are in this range: 128.1.x.x to 191.254.x.x. Class C addresses can have 254 hosts on a network. Class C addresses use 24 bits for the network address and 8 bits for the node. -
Page 94: Subnet Addressing
NetGear Print Server Manual Subnet Addressing By looking at the addressing structures, you can see that even with a Class C address there are a large number of hosts per network. Such a structure is an inefficient use of addresses if each end of a routed link requires a different network number. -
Page 95: Private Ip Addresses
255.255.255.252 /30 255.255.255.254 /31 255.255.255.255 /32 NETGEAR strongly advises that all hosts on a LAN segment use the same netmask for the following reasons: So that hosts recognize local IP broadcast packets When a device broadcasts to its segment neighbors, it uses a destination address of the local network address with all ones for the host address. -
Page 96: Address Resolution Protocol
DHCP server stores a list or pool of IP addresses, along with other information (such as gateway and DNS addresses) that it may assign to the other devices on the network. The NETGEAR Model RT328/RH348 router has the capacity to act as a DHCP server. -
Page 97: Appendix Cconfig File
This appendix provides information for editing a CONFIG file. CONFIG files are stored in the flash EEPROM of the NETGEAR PS100 series Print Sever and used for configuring the device using the FTP method. For more information about using the CONFIG file and to see an example of FTP commands, refer to the table of FTP Commands"on chapter 5 Unix. - Page 98 NetGear Print Server Manual Each Model PS104 and Model PS105 Print Server has one parallel port and supports three logical printers. PS100 series Print Sever, with two and three parallel ports respectively, supports eight logical printers. You cannot change the names. Each logical printer has four settings as shown below.
-
Page 99: Appendix Dusing Netware 5 Ndps
Services) under Novel NetWare 5.0. Overview The NETGEAR Print Server must be configured as a valid device on your TCP/IP network. To use NDPS (Novell Distributed Printing Services), the Novell server must be running Novell NetWare 5, and the PCs (clients) must be running IntranetWare Client 2.0 or later. -
Page 100: Creating An Ndps Printer Agent
NetGear Print Server Manual Browse the Database Volume and select where you want the NDPS Manager database to be assigned. Click on Create. The new NDPS Manager is displayed in the main browser window. To start the NDPS Manager in future, enter the following command at the console: LOAD NDPSM Then select the NDPS Manager object. -
Page 101: Workstation Configuration
NetGear Print Server Manual Select Remote (LPR on IP) in the Connection Type. Click on Next to view the Configure Port Handler Screen. In the Host Address IP field, enter the IP address previously assigned to the Print Server device, as illustrated below. - Page 102 NetGear Print Server Manual Click on Close. The printer appears in the main Printer Manager window under the Name listing and is now available for print jobs. Printer drivers are automatically downloaded from the server as required. The printer is now in your Windows printer list and may be used by any Windows application.
-
Page 103: Appendix Eip Setup
Clicking on Reset will set all values back to zero, and clicking on OK sets the data entered. Ensure that the IP address assigned to the device is not already in use. Following picture is the NETGEAR Print Server IP Address Configuration window. NETGEAR Print Server IP Address Configuration... -
Page 104: Appendix Fascii To Hexadecimal Conversion Table
NetGear Print Server Manual Appendix F ASCII to Hexadecimal Conversion Table Hexadecimal Value ASCII Character (SPACE) " &... - Page 105 NetGear Print Server Manual < >...
- Page 106 NetGear Print Server Manual...
Need help?
Do you have a question about the PS111W and is the answer not in the manual?
Questions and answers