ACN IRIS 3000 User Manual
Digital phone service
Hide thumbs
Also See for IRIS 3000:
- User manual (31 pages) ,
- Quick start manual (12 pages) ,
- Quick installation manual (2 pages)
Table of Contents
Advertisement
Advertisement
Table of Contents

Related Manuals for ACN IRIS 3000


Summary of Contents for ACN IRIS 3000
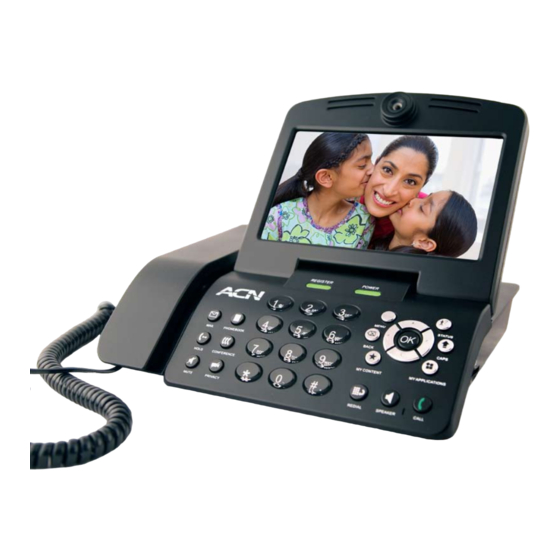
- Page 1 Digital Phone Service IRIS 3000 Videophone ™ User Manual...
-
Page 2: Table Of Contents
Contents 1. Y ACN V ..............4 IDEOPHON N E 1-1. Videophone components ......................4 1-2. Safety instructions ........................5 1-3. Getting to know your Videophone ....................6 1-4. Installing your Videophone ......................8 2. U ........9 SING THE ASIC UNCTIONS OF YOUR IDEOPHONE 2-1. - Page 3 3-5. Call log ............................20 3-5-1. Total calls........................21 3-5-2. Answered calls ......................21 3-5-3. Dialled numbers ......................21 3-5-4. Missed calls ........................ 21 3-5-5. Placing a call, saving or deleting a number ..............22 3-6. Settings ............................. 23 3-6-1. System settings ......................23 3-6-1-1.
-
Page 4: Your Acn Videophon N E
1. Your ACN Videophone 1-1. V IDEOPHONE COMPONENTS The following items should be included with your ACN Videophone. If an item is missing, please contact ACN Customer Service. Main Unit Handset Power Adapter *Warning: Use the Power Adapter that comes with your Videophone. Use of any... -
Page 5: Safety Instructions
1-2. S AFETY INSTRUCTIONS This guideline is to advise you on user safety and prevention of any financial loss. Read thoroughly before using your Videophone. There are two types of precautions which are explained as follows: CAUTION When unplugging the power adaptor, turn Do not install your Videophone in an Use a soft fabric when cleaning the LCD off the power switch before removing the... -
Page 6: 1-3. Getting To Know Your Videophone
1-3. Getting to know your Videophone FRONT Handset Videophone handset Speaker Plays ring tones and transfers audio in speakerphone mode. Captures images that are transmitted to the called party. Camera LCD Screen Displays your image and the image of the person you are talking to during a call. - Page 7 5 Ethernet ports on the back. One port is separate from the four other ports. The largest and most well-known example of a WAN is the Internet. KEYPAD The green LED light is on when your Videophone is connected to ACN’s Digital (1) REGISTER Phone Service.
-
Page 8: 1-4. Installing Your Videophone
NOTE: Your Videophone may take up to 3 minutes before it is ready to use. During this time the system will perform an initial software update and connect to ACN’s Digital Phone Service. The LCD screen will display a status as it moves through the process. When the... -
Page 9: Using The Basic Functions Of Your Videophone
2. Using the Basic Functions of your Videophone 2-1. P LACING A CALL 2-1-1. P LACING A CALL USING THE KEYPAD Pick up the handset or press the “Speaker” button • Enter the phone number • Press the “Call” button NOTE: Refer to Section 3-2 for instructions on entering characters. -
Page 10: Placing A Call From Your Phonebook
Select “Call Log” from the Main Menu Select the required call category Select the number you would like Select “Make A Call” and press the “OK” button to call and press the “OK” button 2-1-4. P LACING A CALL FROM YOUR HONEBOOK Press the “MENU”... -
Page 11: Receiving A Call
2-2. R ECEIVING A CALL When your Videophone rings the LCD screen will show the person calling or the name and phone number of the person calling. Pick up the handset or press the “Speaker” button to answer the call. If there is a picture associated with a contact, it will be displayed. -
Page 12: Your Videophone Information
2-6. Y IDEOPHONE INFORMATION Select the “Information” icon from the Main Menu to view information about your Videophone. Press the “Back” or the “OK” button on the front of your Videophone to exit. 2-7. U SEFUL FUNCTIONS DURING A CALL 2-7-1. -
Page 13: Brightness Control
Lowers the volume Increases the volume In order to control the volume during a call: • Press the “MENU” button • Select “Volume Control” by using the navigation buttons • Press the “OK” button • to adjust the volume • Press the “Back”... -
Page 14: Audio Conferencing (3-Way Calling)
2-7-6. A (3-W udio oNFereNCiNg AlliNg The Audio Conferencing function enables 3-way calling during a voice call. To activate press the “Hold” button during the call. This will place the existing caller on hold. Caller will see “Hold” Person called will see “On Hold” • Dial the number of the 3rd person you would like to conference in and press the “Call”... -
Page 15: 3. Set Up
• Factory Reset allows you to delete your configuration and reset to the factory defaults. If this is necessary, ACN Customer Service will provide you with the password to reset your Videophone • In the “Sound” menu, you can set your Ring Tones, Ring Volume, Sound Effects, Sound Volume and Audio Output. -
Page 16: Using The Keypad
Digital Photo • The Digital Photo Frame allows you to view the pictures from your memory stick or SD card as a slide show Frame Information • The Information screen shows you the main system settings for your Videophone 3-2. U SING THE KEYPAD Numeric keys •... -
Page 17: Entering Numbers
3-3-1. e NteriNg NuMBers Example: To enter “123”: • Press the “Caps” button until the appears at the top left of the screen. • Press the buttons consecutively. 3-3-2. e NteriNg letters • Press the ”Caps” button until the appears at the top left of the screen. • Press the corresponding buttons until the desired letter appears. -
Page 18: Add New Entry
3-4-1-1. A DD NEW ENTRY “Add New Entry” enables you to add new contact information such as name, phone number, set up a corresponding ring tone, as well as a photo of the contact. After entering the information select “Save”. If you do not want to save the information, select “Cancel”. Select “Add New Entry”... -
Page 19: Search
3-4-2. s eArCh You can search for a contact stored in your Phonebook by name or number and directly place a call, edit or delete the contact information. Select “Search” from the Search menu Phonebook menu 3-4-2-1. s eArCh BY NAMe You can search for a contact by name in your Phonebook by selecting “Search by name”. -
Page 20: Delete All
Updating information Deleting information Select “Edit” and press the “OK” To “Delete” a contact, select “Delete” button to update an entry, and then press the “OK” button then select “Save” Select “Yes” to confirm the deletion 3-4-3. d elete All You can choose to delete all of the information in your Phonebook by selecting “Delete All”, followed by “Yes”. -
Page 21: Total Calls
3-5-1. t otAl CAlls You can view a list of all answered calls, dialled numbers and missed calls by selecting “Total Calls”. You can also directly place a call from this menu. Select “Total Calls” from the Select the desired number or “Call Log”... -
Page 22: Placing A Call, Saving Or Deleting A Number
3-5-5. p lACiNg A CAll sAViNg or deletiNg A NuMBer You can directly place a call to a selected number in your “Call Log” in addition to saving or deleting numbers. Placing a call Select the required option from Select the desired number the “Call Log”... -
Page 23: Settings
The network settings of your Videophone are pre-configured to allow you to place and receive calls via the Internet. These settings can be accessed by selecting “Network”. Please do not attempt to adjust items in this menu. Contact ACN Customer Service for assistance. 3-6-1-2. F ACTORY RESET Factory Reset allows you to delete your configuration and reset to the factory defaults. -
Page 24: Sound
3-6-1-3. S OUND You can manage the settings for Ring Tones, Sound Effects and Volume by selecting “Sound”. Select “Sound“ from the System Select the required Use the buttons Settings menu Ring Tone to manage the Ring Volume Select “Sound Effect Type” and “Select Effect” Use the buttons to manage the sounds for the warning, connect and keypad tones... -
Page 25: Display
3-6-1-4. D ISPLAY You can activate and manage Video Output, LCD Brightness, Self View, Power Saving, Wallpaper and your Language options by selecting “Display”. You can also enable the Digital Photo Frame from this menu and set the timing for this feature. Select “Display”... - Page 26 Press the “OK” button Select the image to use as your Select “YES” to confirm the change of Wallpaper Wallpaper and press the “Back” button to save NOTE: A “No USB/SD device!” warning will appear if a USB or SD device is not inserted. Digital Photo Frame Digital Photo Frame Delay Language...
-
Page 27: Setting The Time
NOTE: You cannot change your display settings while on a call. To see the effects of the change simply place a call after adjusting your settings. The called party will be able to confirm whether the video you are sending is clearer. If you set the upload bandwidth speed too high it will distort the quality of the image. -
Page 28: Upgrade Settings
You can confirm the version and upgrade your Videophone’s software by selecting “Upgrade”. If the software is not the most current version, you can upgrade it via the Internet. Please do not attempt to adjust items in this menu. Contact ACN Customer Service for assistance. 3-6-4. A DMINISTRATOR SETTINGS The Administrator menu provide access to SIP, A/V Codec settings, DNS, Proxy and LAN settings. -
Page 29: Information
View another picture Select “View Another Picture” Select the desired image file and press the “OK” button Next picture Previous picture Select “Next Picture” to view Select “Previous Picture” to view the next image the previous image NOTE: The Videophone can only read JPG and PNG image files. If the size of your image is greater than 3 megapixels, increase the time delay between images to 20 seconds to allow enough time for each image to load. -
Page 30: Troubleshooting Guide
Troubleshooting Guide prOblem TrOUbleshOOTINg • Check that the power cable is connected correctly. I cannot turn on the power • Check that the power switch is in the “ON” position. • Check that the electrical outlet is working by connecting another electrical device to it. •... - Page 31 • Check that your Videophone is connected properly to the Internet. The other party’s screen is frozen and there is no audio. • Check that the called party’s Videophone was not disconnected from the Internet. When the Videophone is connected to a TV or monitor, •...
-
Page 32: Warning Messages
Connection to NTP server is in progress. • Initialising GUI Menu Image data for GUI is being decompressed Your Videophone is attempting to connect to the ACN Digital • REGISTRATION FAIL Phone Service registration server but there is no response •... - Page 33 After completing a call • Wait a minute…. User configuration is being saved or the menu is being updated • Invalid Password Your password is incorrect Setting User • Initialising the system… All personal information is being loaded Configuration • Initialising the Phonebook data Phone and Call Log data is being loaded...
- Page 34 1300 960 843 www.acnpaci c.com.au ACN Pacifi c Pty Ltd ABN 85108535708 PO Box 667 North Sydney NSW 2059...
Need help?
Do you have a question about the IRIS 3000 and is the answer not in the manual?
Questions and answers