Tandberg Data DLT VS160 Installation And Operation Manual
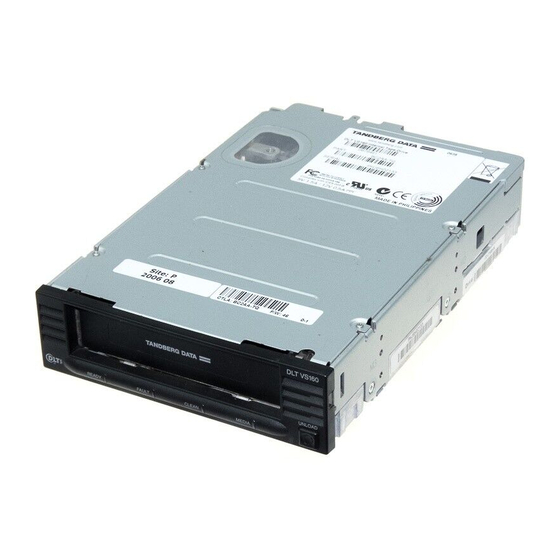
Internal drive
Hide thumbs
Also See for DLT VS160:
- Quick install manual (14 pages) ,
- Manual (1 page) ,
- Quick installation manual (13 pages)

Related Manuals for Tandberg Data DLT VS160


Summary of Contents for Tandberg Data DLT VS160
-
Page 1: Tape Drive
DLT VS160 Tape Drive Installation and Operations Manual TANDBERG DATA ASA P.O. Box 134 Kjelsås N-0411 OSLO, NORWAY Phone + 47 22 18 90 90 Part No. 432679-01 Telefax + 47 22 18 95 50 January 2003 © Tandberg Data ASA... - Page 2 Tandberg Data ASA assumes no responsibility for any errors, which may appear in this publication. It is the policy of Tandberg Data ASA to improve products as new techniques and components become available. Tandberg Data ASA therefore reserves the right to change specifications at any time.
-
Page 3: Table Of Contents
Installing Your Tandberg DLT VS160 Drive 2.1 Chapter Overview 2.2 Preparation 2.2.1 SCSI Requirements 2.2.2 Before You Start 2.3 Installing your Tandberg DLT VS160 Tabletop Drive 2.3.1 Installation Overview 2.3.2 Unpacking your Drive and Selecting a Location 2.3.2.1 Unpacking your Drive 2.3.2.2... - Page 4 4.2.1 Power-On Self-Test (POST) and Drive Connectivity Failure 4.2.2 If the Drive Becomes Unresponsive 4.2.3 Drive Makes Noises During System Startup 4.2.4 Drive Failures During Backup or Restore Operations 4.2.5 Tape-Backup Software Errors 4-10 Tandberg DLT VS160 Installation and Operations Manual...
-
Page 5: Introduction
The capacity you realize in practice depends on the data set, which affects the actual compression ratio. Your DLT VS160 Drive is built on a 5¼-inch, half-height form- factor, using a ½-inch tape. Its design includes a four-channel read/write head, Lempel-Ziv (DLZ) high-efficiency hardware data compression, and tape-mark directory to achieve fast data throughput and data access times. -
Page 6: Obtaining Drivers And Firmware Upgrades
Scope of This Manual This Installation and Operations Manual is intended to provide all the information you need to install and use your Tandberg DLT VS160 Internal Drive or Tandberg DLT VS160 Tabletop Drive. Tandberg DLT VS160 Installation and Operations Manual... -
Page 7: Installing Your Tandberg Dlt Vs160 Drive
SE devices attached to the same SCSI bus, the drive's performance is limited to the maximum data transfer speed and maximum cable lengths of the SE bus. The DLT VS160 is not compatible with a standard differential (Diff) or High- Voltage Differential (HVD) SCSI bus. -
Page 8: Installing Your Tandberg Dlt Vs160 Tabletop Drive
Installing Your Tandberg DLT VS160 Drive install an internal drive in the computer you have chosen to house the DLT VS160. If you are installing a DLT VS160 Internal Drive, refer to page 2-9 for instructions. Installing your Tandberg DLT... -
Page 9: Unpacking Your Drive And Selecting A Location
Note: Save the packing materials in case you need to move or ship your drive in the future. You must ship your DLT VS160 Tabletop Drive in the original or equivalent packing materials or your warranty may be invalidated. -
Page 10: Setting The Scsi Id
Setting the SCSI ID Regardless of the number of SCSI devices attached to the server or workstation that is to be the host for your DLT VS160 Tabletop Drive, each device must have a unique SCSI ID. Check the SCSI IDs on all other devices on the selected server or workstation, including the SCSI host adapter, and select an unused SCSI ID for your DLT VS160 Tabletop Drive. -
Page 11: When To Use Termination
2.3.4 When to Use Termination If your DLT VS160 Tabletop Drive is the only SCSI device on the selected server or workstation other than the SCSI host adapter, or it is the last physical device on the SCSI bus (at the end of the SCSI cable), it must be terminated. - Page 12 Failure to follow these instructions may result in damage to your DLT VS160 Tabletop Drive or other devices. Do not move on to step 2 until you have shut down...
- Page 13 SCSI device on the SCSI bus. SCSI Host Adapter DLT VS160 SCSI Cable To Next SCSI Device To SCSI Host Adapter Figure 2-3: Attach SCSI Cable to Server or Workstation or to Previous SCSI Device Tandberg DLT VS160 Installation and Operations Manual...
- Page 14 6. Make sure the power switch on the rear panel of your DLT VS160 Tabletop Drive is in the OFF position. Attach the female connector on the power cable to the power connector on the rear panel of the drive. Tandberg DLT VS160 Installation and Operations Manual...
-
Page 15: Installing Your Tandberg Dlt Vs160 Internal Drive
2. Select a server or workstation that is to be the host for your DLT VS160 Internal Drive. 3. Set the SCSI ID for your DLT VS160 Internal Drive, if necessary. 4. Shut down and turn off the server or workstation that is to host your DLT VS160 Internal Drive. -
Page 16: Unpacking Your Drive
Drive and SCSI host adapter. 9. Install an active LVD/SE terminator on the SCSI ribbon cable if your DLT VS160 Internal Drive if it is the last or only device on the SCSI bus. 10. Attach a power cable to your DLT VS160 Internal Drive. -
Page 17: When To Use Termination
Power Connector SCSI Connector Figure 2-5: SCSI ID Jumper Block Location To set the SCSI ID on your DLT VS160 Internal Drive, use the supplied jumpers to select the desired SCSI ID as shown in the following table: SCSI ID... - Page 18 Low-Voltage Differential/Single-Ended (LVD/SE) cable-end or inline terminator on the SCSI cable you intend to use with your DLT VS160 Internal Drive as shown in Figure 2-6. You can use a cable-end terminator as shown in Figure 2-6 or an inline terminator, whichever is most convenient..
-
Page 19: Installing Your Dlt Vs160 Internal Drive
Installing your DLT VS160 Internal Drive This is the final installation stage, which requires that you install your DLT VS160 Internal Drive in the host server or workstation and attach the SCSI and power cables. To install your DLT VS160 Internal Drive, follow these steps: 1. - Page 20 Remove the power cables from the host server or workstation and all attached accessories. 2. Remove the cover from the host server or workstation as described in the server’s or workstation’s manuals. Figure 2-8: Remove Server/Workstation Cover 2-14 Tandberg DLT VS160 Installation and Operations Manual...
- Page 21 3. Locate an available 5¼-inch drive bay and remove the front cover from the drive bay as described in the server’s or workstation’s manuals. 4. Slide your DLT VS160 Internal Drive into the open drive bay. Figure 2-9: Install Drive in an Open Drive Bay: Tower, 2U...
- Page 22 5. Locate the SCSI ribbon cable in the accessories package. Attach one end of the SCSI ribbon cable to the SCSI connector on the rear panel of your DLT VS160 Internal Drive. The SCSI connectors are keyed, preventing improper connection.
- Page 23 DLT VS160 Internal Drive. The connectors are keyed, preventing improper connection. SCSI Cable (Shown with Terminator Installed) Power Cable Figure 2-10: Attach SCSI and Power Cables to your DLT VS160 Internal Drive Tandberg DLT VS160 Installation and Operations Manual 2-17...
- Page 24 11. Turn on the host server or workstation and allow its operating system to start. 12. Refer to page 3-2 to learn about your DLT VS160 Internal Drive’s self-test and initialization features. 2-18 Tandberg DLT VS160 Installation and Operations Manual...
-
Page 25: Installing The Device Drivers
Administrator privileges, click the Start button, point to Settings, click Control Panel, double-click the Tape Devices icon, and make sure the DLT VS160 drive device driver is loaded. If the device driver is not loaded, repeat the installation beginning at step 1. - Page 26 Installing Your Tandberg DLT VS160 Drive 3. Right-click the My Computer icon on the Windows desktop, click Manage, then click Device Manager. 4. The DLT VS160 drive should be listed under the "? Other Devices" item as "QUANTUM VS160 SCSI Sequential Device."...
-
Page 27: Using Your Tandberg Dlt Vs160 Drive
Using Your Tandberg DLT VS160 Drive Chapter Overview This chapter explains how to use your Tandberg DLT VS160 Drive. It describes the front panel LEDs and controls, how to load, eject, and care for tape cartridges, and how to use the cleaning cartridge. -
Page 28: Indicator Activity During Power-On Self-Test (Post)
• As POST completes, the drive makes a slight buzzing noise for several seconds. This noise is normal and should be ignored The drive is now ready to use. Tandberg DLT VS160 Installation and Operations Manual... -
Page 29: Indicator Activity During Normal Operation: Ready Led
Using Your Tandberg DLT VS160 Drive 3.2.1.2 Indicator Activity During Normal Operation: Ready LED When your DLT VS160 Drive is in use, the Ready LED indicates the three states detailed in Table 2. The Ready LED operates independently of the other three LEDs. Ready LED... -
Page 30: Unload/Eject Button Features
Note: The Unload/Eject button features indicated by an asterisk (*) in Table 4 overwrite all data on the cartridge loaded in the drive. Use extreme caution when accessing these features to avoid loss of important data. Tandberg DLT VS160 Installation and Operations Manual... -
Page 31: Unload/Eject Button Feature Description
400MB of data and then unloads and ejects the cartridge. The process takes about two minutes. If the diagnostic test detects no errors, the drive returns to normal operating mode. If an error occurs, the appropriate LEDs illuminate. Tandberg DLT VS160 Installation and Operations Manual... -
Page 32: Using Cartridges
Using Cartridges Your Tandberg DLT VS160 Drive reads and writes Tandberg DLTtape VS1 Media cartridges (Tandberg Data part number 432637). Your DLT VS160 Drive can read – but not write – DLTtape™IV cartridges previously written using the DLT1/VS80 format. Note: Your Tandberg DLT VS160 Drive automatically ejects any other cartridge types and any cartridges whose format it cannot read. -
Page 33: Unloading A Cartridge
When you remove the cartridge from the drive, return the cartridge to its storage case to prolong cartridge life. To unload a cartridge from your DLT VS160 Drive, follow these steps: 1. Press the Unload/Eject button or use your backup software to unload the cartridge. -
Page 34: Cartridge Write-Protect Switch
The "locked" icon appears on the switch indicating that the cartridge is write-protected. Slide the switch to the left to allow your DLT VS160 Drive to write data to the cartridge. The "unlocked" icon appears on the switch. The indicator on the top of the cartridge also points to the appropriate icon, indicating the write-protect status of the cartridge. -
Page 35: Using The Cleaning Cartridge
3.3.5 Using the Cleaning Cartridge (Tandberg Data Part Number 432246) When the Clean LED is on, your DLT VS160 Drive's read/write head needs to be cleaned. See Chapter 4, Troubleshooting for other conditions that may indicate drive cleaning is necessary. - Page 36 Clean LED turns off and the drive ejects the cleaning cartridge. Note: If any LEDs blink or if the Clean LED is illuminated again when you insert another cartridge immediately after cleaning, see Table 3 on page 3-4 for more information. 3-10 Tandberg DLT VS160 Installation and Operations Manual...
-
Page 37: Troubleshooting
Troubleshooting This chapter provides troubleshooting information for your DLT VS160 Drive. Obtaining Drivers and Firmware Upgrades If the tape backup software does not detect the tape drive or to obtain the latest operating system drivers and/or firmware upgrades, see the Tandberg support website at: www.tandberg.com... - Page 38 Tandberg Technical Support. Media LED: A DLT1 (VS80) format Your DLT VS160 Drive can read, but not Illuminated DLTtape™ IV write, this cartridge. If attempting to read, no cartridge is loaded.
- Page 39 DLT to be the host for your DLT VS160 Drive, VS160 Drive. each must have a unique SCSI ID. Check the SCSI IDs on all other SCSI devices on...
- Page 40 2. Make sure an active LVD/SE terminator is in place on the SCSI ribbon cable for the internal drive. The SCSI bus might 1. If your DLT VS160 Drive is the last or be improperly only device on the SCSI bus, make sure terminated.
- Page 41 SE bus. There are fatal or The SCSI bus might 1. If your DLT VS160 Drive is the last or nonfatal errors for be improperly only device on the SCSI bus, make sure which you cannot find terminated.
- Page 42 6. Retry the operation with a different, known-good cartridge. 7. Clean the tape drive. Tandberg DLT VS160 Installation and Operations Manual...
- Page 43 6. Check the size of the files in the backup set. Small file size can impact performance. 7. Confirm that the backup application is using block sizes of at least 32KB, and preferably 64KB. See your backup application user documentation for details. Tandberg DLT VS160 Installation and Operations Manual...
- Page 44 If the drive still does not eject the cartridge, contact Tandberg Technical Support. The drive repeatedly Cartridge or drive The DLT VS160 Tape Drive rejects any rejects a cartridge. problem. unsupported cartridge, such as a DLTtape™ III, an SDLT cartridge, an incompatible cleaning cartridge, damaged media, a DLTtape™...
-
Page 45: If The Drive Becomes Unresponsive
• Remove and reinsert the tape cartridge. • Try a different tape cartridge, preferably a new one. • Clean the tape drive read/write head. • Verify drive settings in the system setup program. Tandberg DLT VS160 Installation and Operations Manual... -
Page 46: Tape-Backup Software Errors
If your tape backup software experiences errors, check each of the following conditions: • DMA conflicts during backup or compare operations. • Media unreadable. • See the User's Operating Guide supplied with your tape backup software application for more information. 4-10 Tandberg DLT VS160 Installation and Operations Manual...
Need help?
Do you have a question about the DLT VS160 and is the answer not in the manual?
Questions and answers