Grizzly G0690 Owner's Manual
10" cabinet table saw with riving knife
Hide thumbs
Also See for G0690:
- Owner's manual (92 pages) ,
- Parts list (12 pages) ,
- Owner's manual (92 pages)
Table of Contents
Advertisement
Quick Links
MODEL G0690/G0691
10" CABINET TABLE SAW
with RIVING KNIFE
OWNER'S MANuAL
Model G0690
Model G0691
232857
Copyright © NoVEMBEr, 2008 By grizzly iNdustrial, iNC. rEVisEd MarCh, 2011 (Bl)
WARNING: NO pORTION OF ThIS MANuAL MAy BE REpRODuCED IN ANy ShApE
OR FORM WIThOuT ThE WRITTEN AppROVAL OF GRIzzLy INDuSTRIAL, INC.
(For ModEls MaNuFaCturEd siNCE 11/10) #Bl11376 priNtEd iN ChiNa
Advertisement
Table of Contents

Subscribe to Our Youtube Channel
Related Manuals for Grizzly G0690


Summary of Contents for Grizzly G0690
- Page 1 Model G0690 Model G0691 232857 Copyright © NoVEMBEr, 2008 By grizzly iNdustrial, iNC. rEVisEd MarCh, 2011 (Bl) WARNING: NO pORTION OF ThIS MANuAL MAy BE REpRODuCED IN ANy ShApE OR FORM WIThOuT ThE WRITTEN AppROVAL OF GRIzzLy INDuSTRIAL, INC. (For ModEls MaNuFaCturEd siNCE 11/10) #Bl11376 priNtEd iN ChiNa...
- Page 2 This manual provides critical safety instructions on the proper setup, operation, maintenance, and service of this machine/tool. Save this document, refer to it often, and use it to instruct other operators. Failure to read, understand and follow the instructions in this manual may result in fire or serious personal injury—including amputation, electrocution, or death.
-
Page 3: Table Of Contents
Blade guard Breakdown ... 81 Miter gauge Breakdown ... 82 Fence Breakdown ... 83 Model g0690 Extension table Breakdown . 84 Model g0691 Extension table Breakdown . 85 labels and Cosmetic parts Breakdown ... 86 WARRANTy AND RETuRNS ... 89... -
Page 4: Introduction
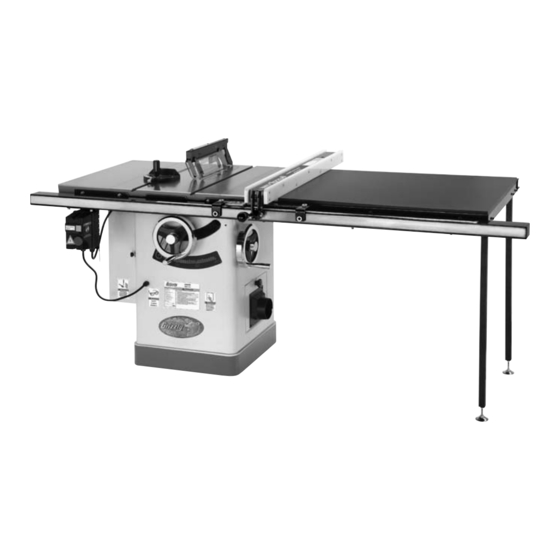
2 cast iron wings; the g0691 features an extension table with 50" rip capacity. Model g0690/g0691 (Mfg. 11/10+) -
Page 5: Identification
Extension Wing on/off switch Blade height handwheel table Blade tilt height scale lock Figure 3. identification (Model g0691 shown). Model g0690/g0691 (Mfg. 11/10+) Identification Blade guard right Extension Wing Blade tilt Blade tilt handwheel 4" dust port Fence lock handle... -
Page 6: G0690 Machine Data Sheet
The information contained herein is deemed accurate as of 8/16/2011 and represents our most recent product specifications. Model G0690 Due to our ongoing improvement efforts, this information may not accurately describe items previously purchased. PAGE 1 OF 3 Model G0690/G0691 (Mfg. 11/10+) - Page 7 The information contained herein is deemed accurate as of 3/7/2011 and represents our most recent product specifications. Model G0690 Due to our ongoing improvement efforts, this information may not accurately describe items previously purchased. Model g0690/g0691 (Mfg. 11/10+) PAGE 2 OF 3...
- Page 8 The information contained herein is deemed accurate as of 3/7/2011 and represents our most recent product specifications. Model G0690 Due to our ongoing improvement efforts, this information may not accurately describe items previously purchased. PAGE 3 OF 3 Model g0690/g0691 (Mfg. 11/10+)
-
Page 9: G0691 Machine Data Sheet
The information contained herein is deemed accurate as of 8/16/2011 and represents our most recent product specifications. Model G0691 Due to our ongoing improvement efforts, this information may not accurately describe items previously purchased. Model G0690/G0691 (Mfg. 11/10+) PAGE 1 OF 3... - Page 10 The information contained herein is deemed accurate as of 3/7/2011 and represents our most recent product specifications. Model G0691 Due to our ongoing improvement efforts, this information may not accurately describe items previously purchased. PAGE 2 OF 3 Model g0690/g0691 (Mfg. 11/10+)
- Page 11 The information contained herein is deemed accurate as of 3/7/2011 and represents our most recent product specifications. Model G0691 Due to our ongoing improvement efforts, this information may not accurately describe items previously purchased. Model g0690/g0691 (Mfg. 11/10+) PAGE 3 OF 3...
-
Page 12: Section 1: Safety
NOTICE This symbol is used to alert the user to useful information about proper operation of the machine. Safety Instructions for Machinery OWNER’S MANUAL. EYE PROTECTION. HAZARDOUS DUST. -10- WEARING PROPER APPAREL. HEARING PROTECTION. MENTAL ALERTNESS. Model g0690/g0691 (Mfg. 11/10+) - Page 13 DANGEROUS ENVIRONMENTS. ONLY USE AS INTENDED. USE RECOMMENDED ACCESSORIES. CHILDREN & BYSTANDERS. REMOVE ADJUSTING TOOLS. SECURING WORKPIECE. FEED DIRECTION. Model g0690/g0691 (Mfg. 11/10+) FORCING MACHINERY. GUARDS & COVERS. NEVER STAND ON MACHINE. STABLE MACHINE. AWKWARD POSITIONS. UNATTENDED OPERATION. MAINTAIN WITH CARE.
-
Page 14: Additional Safety For Table Saws
Additional Safety for Table Saws HAND POSITIONING. BLADE GUARD. RIVING KNIFE. KICKBACK. FEEDING WORKPIECE. -12- FENCE. PUSH STICKS/BLOCKS. CUT-OFF PIECES. BLADE ADJUSTMENTS. CHANGING BLADES. DAMAGED SAW BLADES. DADO AND RABBET OPERATIONS. CUTTING CORRECT MATERIAL. Model g0690/g0691 (Mfg. 11/10+) -
Page 15: Preventing Kickback
Make multiple, shallow passes when per- forming a non-through cut. Making a deep non-through cut will greatly increase the chance of kickback. Model g0690/g0691 (Mfg. 11/10+) Statistics show that most common acci- dents among table saw users can be linked to kickback. Kickback is typically... -
Page 16: Glossary Of Terms
The following is a list of common definitions, terms and phrases used throughout this manual as they relate to this table saw and woodworking in general. Become familiar with these terms for assembling, adjusting or operating this machine. Your safety is VERY important to us at Grizzly! Arbor: A metal shaft extending from the drive mechanism that is the mounting location for the saw blade. -
Page 17: Section 2: Power Supply
Full-Load Current Rating Full-Load Current Rating at 220V .. 12.8 Amps Model g0690/g0691 (Mfg. 11/10+) Circuit Information For your own safety and protection of property, consult a qualified electrician if fire, you are unsure about wiring practices or electrical codes in your area. -
Page 18: Grounding Instructions
Serious injury could occur if you connect the machine to power before completing the setup process. DO NOT connect to power until instructed later in this manual. Extension Cords Minimum Gauge Size ...12 AWG Maximum Length (Shorter is Better)...50 ft. Model g0690/g0691 (Mfg. 11/10+) -
Page 19: Section 3: Setup
Wrench ... 1 To reduce the risk of serious injury, read and understand this entire document before using the machine! Model g0690/g0691 (Mfg. 11/10+) unpacking at (570) 546-9663 for advice. Otherwise, filing a freight claim can be difficult. Lifting heavy machinery... -
Page 20: Hardware Recognition Chart
Recognition Chart -18- Model g0690/g0691 (Mfg. 11/10+) -
Page 21: Inventory
Sometimes parts are pre-installed for shipping, or they become hidden by packaging materials. Model g0690/g0691 (Mfg. 11/10+) Figure 5. Main table saw unit. Figure 6. Extension wings. Figure 7. Component inventory. -
Page 22: Fence Inventory G0690
Extension table 27" x 13 ⁄ " ... 1 Figure 8. inventory needed to install the fence on the Model g0690. hardware and Tools (Not Shown) Cap screws M6-1 x 16 (Front rail/tube) ... 3 Flat Washers 6mm (Front rail/tube) ... 3 lock Washers (Front rail/tube) ... -
Page 23: Cleanup
Cleanup Before cleaning, gather the following: Basic steps for removing rust preventative: Steps 2–3 Model g0690/g0691 (Mfg. 11/10+) Gasoline or products with low flash points can explode or cause fire if used to clean machin- ery. Avoid cleaning with these products. -
Page 24: Site Considerations
See below for required space allocation. Children or untrained people may be seriously injured by this machine. Only install in an access restricted location. G0690 -22- Physical Environment Electrical Installation Lighting Figure 10. Minimum working clearances. G0691 Model g0690/g0691 (Mfg. 11/10+) -
Page 25: Assembly
Assembly assembly steps are the same for the Model g0690 and g0691 except where noted. assembly consists of installing minor components, the exten- sion wings, front and rear rails, extension table, and the legs (Model g0691 only). To assemble the table saw:... - Page 26 (Figure 18). Note: After reinstalling wings, remove all excess masking tape with a razor blade. Figure 18. Masking tape location for adjusting the extension wing down. Model g0690/g0691 (Mfg. 11/10+)
- Page 27 Figure 19. Front rail installed (Model g0690 shown). 11. G0690 ONLy: install the 62" front rail rectan- gular tube onto the 50" front rail with the three M6-1 x 16 cap screws, 6mm flat washers, and 6mm lock washers, as shown in Figure Figure 20.
- Page 28 8mm flat washers, four 8mm lock washers, and four M8-1.25 hex nuts, as shown in Figure 24. Figure 24. Model g0690 extension table installed. using a long straightedge, adjust the exten- sion table so it is flat (both flush and paral- lel) with the main table and extension wings (Figure 25), then tighten the fasteners.
-
Page 29: Magnetic Switch
Foot Figure 28. Fence installed on rails. Model g0690/g0691 (Mfg. 11/10+) slide the miter gauge into the t-slot on the left hand side of the blade. Magnetic Switch... -
Page 30: Checking Fence Parallelism
Figure 32. aligning rail tape with scale pointer. on the Model g0690, if you move the pointer win- dow to the right side of the fence, you may have to trim the last two inches of the scale so it will not protrude past the end of the fence tube. -
Page 31: Blade Guard
Model g0690/g0691 (Mfg. 11/10+) the blade guard, when properly installed, should look like Figure 34, and should pivot freely so it touches the table surface in the down position. -
Page 32: Dust Collection
Dust Collection DO NOT operate the Model G0690 or G0691 without an adequate dust collection system. This saw creates substantial amounts of wood dust while operating. Failure to use a dust collection system can result in short and long-term respiratory illness. -
Page 33: Test Run
OFF. insert the switch disabling pin through the green oN button, as shown in Figure 39. Model g0690/g0691 (Mfg. 11/10+) Figure 39. switch disabling pin inserted into oN button. press the green oN button to test the dis- abling feature on the switch. -
Page 34: Section 4: Operations
"how to" books before beginning any projects. Regardless of the content in this section, Grizzly Industrial will not be held liable for accidents caused by lack of training. -32- Operation Overview... -
Page 35: Basic Controls
Fence Lock: after adjusting the fence to the desired width of cut, lock it in place by firmly push- ing the fence lock down until it stops. Model g0690/g0691 (Mfg. 11/10+) Non-Through & Through Cuts Non-Through Cuts... -
Page 36: Workpiece Inspection
Blade Size Requirements: • Body thickness: 0.071"-0.094" (1.8-2.4mm) • Kerf (tooth) thickness: 0.102"-0.126" (2.6-3.2mm) Blade Selection Ripping Blade Features: Figure 44. ripping blade. Model g0690/g0691 (Mfg. 11/10+) - Page 37 Crosscut blade features: Figure 45. Crosscutting blade. Combination blade features: Figure 46. Combination blade. Model g0690/g0691 (Mfg. 11/10+) Laminate blade features: Figure 47. laminate blade. Thin Kerf Blade: Blade Requirements Dado Blades Stacked Dado Blade (see below): Wobble Dado Blade: Figure 48.
-
Page 38: Blade Installation
& Blade rotation of saw Figure 49. Example of correct blade direction. re-install the arbor flange and the arbor nut, and tighten them against the blade with the wrenches included with the saw. do Not overtighten. Model g0690/g0691 (Mfg. 11/10+) -
Page 39: Blade Guard Assembly
Figure 50. Blade guard assembly components. Blade Guard Spreader Model g0690/g0691 (Mfg. 11/10+) In order to work properly, the spreader cannot be bent or misaligned with the blade. If the spreader gets accidentally bent, take the time to straighten it or just replace it. - Page 40 IMpORTANT: Whenever the blade guard cannot be used, the riving knife must be installed. Model g0690/g0691 (Mfg. 11/10+)
-
Page 41: Riving Knife
Figure 54. allowable top and bottom distances between riving knife and blade. Model g0690/g0691 (Mfg. 11/10+) To ensure that the riving knife works safe- ly, it MuST be aligned with and correctly adjusted to the blade. Refer to page 68 to check or adjust the riving knife alignment. -
Page 42: Ripping
Failure to follow this warn- ing could result in serious personal injury. ⁄ " above the Keep the blade guard installed and in the down position. Failure to do this could result in serious personal injury or death. Model g0690/g0691 (Mfg. 11/10+) -
Page 43: Crosscutting
ON, and allow it to reach full speed. hold the workpiece firmly against the face... -
Page 44: Blade Tilt/Bevel Cuts
Never try to dado a warped board by holding it down against the table. If kickback occurs, your hand will likely be pulled into the blade, resulting in serious personal injury. Model g0690/g0691 (Mfg. 11/10+) - Page 45 ALWAyS replace the blade guard after dadoing is complete. Model g0690/g0691 (Mfg. 11/10+) To cut a dado with a dado blade: adjust the dado blade to the desired depth of cut.
- Page 46 (depth of dado channel desired). set the saw up for the type of cut you need to make, depending on if it is a rip cut (page 40) or crosscut (page 41).
-
Page 47: Rabbet Cutting
ALWAyS replace the blade guard after dadoing is complete. Model g0690/g0691 (Mfg. 11/10+) Cutting Rabbets with a Dado Blade disCoNNECt saW FroM poWEr! adjust the dado blade to the height needed for the rabbeting operation. -
Page 48: Cutting Rabbets With A Standard Blade
Figure 67, adjust the saw blade height to intersect with the first cut, then perform the second cut to complete the rabbet. Blade Figure 67. second cut to create a rabbet. Model g0690/g0691 (Mfg. 11/10+) -
Page 49: Resawing
Not do so without using a resaw barrier and wearing a full face shield. the following instructions describe... -
Page 50: Auxiliary Fence
Figure 69. auxiliary fence. -48- Resawing Operations the table saw motor is pushed to its limits when resawing. if the motor starts to bog down, slow down your feed rate. Motor overloading and blade wear can be reduced by using a ripping blade. - Page 51 ALWAyS replace the blade guard after resawing is complete. plug in the table saw, turn it ON, and use a push stick or push block to feed the workpiece through the blade, using a slow and steady feed rate.
-
Page 52: Section 5: Shop Made Safety Accessories
We recommend using a bandsaw for making fingers in the next step because it tends to be safer. A table saw can be used, but it will over-cut the underside of the ends, produce a thicker kerf, and require you to stop the blade half-way through the cut, which can be dangerous. - Page 53 " hole in the center of the bar, then countersink the bottom to fit a screw. Model g0690/g0691 (Mfg. 11/10+) Mark a 4" line through the center of the coun- tersunk hole in the center, then use a jig saw with a narrow blade to cut it out.
- Page 54 Note: The featherboard should be placed firmly enough against the workpiece to keep it against the fence but not so tight that it is difficult to feed the workpiece. Model g0690/g0691 (Mfg. 11/10+)
-
Page 55: Push Sticks
⁄ " Grid Figure 80. template for a basic shop-made push stick (not shown at actual size). Model g0690/g0691 (Mfg. 11/10+) Supporting: a second push stick can be used to keep the workpiece firmly against the fence while cutting. When using a push stick in this manner, only apply pressure before the blade;... -
Page 56: Push Blocks
(see "using a push stick" on previous page). Push Stick Prohibition Zone Supporting Feeding Figure 82. using a push block and push stick to make a rip cut. CAUTION: Model g0690/g0691 (Mfg. 11/10+) -
Page 57: Narrow-Rip Auxiliary Fence & Push Block
Auxiliary Fence Cut a piece of ⁄ " thick plywood 5 as long as your table saw fence; cut a piece ⁄ " thick hardwood 3" wide and as long as your table saw fence, as shown in Figure Figure 84. -
Page 58: Using The Auxiliary Fence And Push Block
Figure 89. ripping with push block. Turn OFF the saw and allow the blade to come to a complete stop before removing the cut-off piece. Failure to follow this warn- ing could result in serious personal injury. Model g0690/g0691 (Mfg. 11/10+) -
Page 59: Outfeed & Support Tables
Outfeed & Support Tables one of the best accessories for improving the safety and ease of using a table saw is simply plac- ing a large table (outfeed table) behind the saw to catch the workpiece (see Figure 90). additionally,... -
Page 60: Section 6: Aftermarket Accessories From Grizzly
Feeder 220V G4181—1 hp power Feeder 220V -58- G7314z—heavy-Duty Mobile Base Make your Model g0690 mobile with this popular patented mobile base. the unique outrigger type supports increase stability and lower machine height. this heavy duty mobile base is rated for up to a 700 lb. - Page 61 T10222—Router Table Attachment T10223—Sliding Table Attachment accessorize your g0690 or g0691 Cabinet table saw with either of these attachments for the ulti- mate in table saw functionality. T10223 Figure 95. t10222-23 sliding table & router table attachments. Forrest Woodworker II Saw Blades T20778—10", 20 Teeth...
- Page 62 Figure 99. h3309 SHOP FOX ® T20916—zero Clearance Insert for G0690-91 Figure 100. t20916 zero Clearance insert. T20392—Success with Tablesaws the tablesaw is the cornerstone of any work- shop, yet, too many woodworkers still haven’t...
-
Page 63: Section 7: Maintenance
• Check/tighten the belt tension (page 73). Model g0690/g0691 (Mfg. 11/10+) Cleaning the Model g0690/g0691 is relatively easy. Vacuum excess wood chips and sawdust, and wipe off the remaining dust with a dry cloth. if any resin has built up, use a resin dissolving cleaner to remove it. -
Page 64: Lubrication
Figure 105. Worm gears and teeth. rear trunnion slide orientation gears teeth Worm gears teeth Model g0690/g0691 (Mfg. 11/10+) -
Page 65: Section 8: Service
7. arbor pulley loose. 8. Motor fan rubbing on fan cover. 9. arbor bearings at fault. 10. Motor bearings at fault. Model g0690/g0691 (Mfg. 11/10+) Troubleshooting possible solution 1. remove locking pin from oN button. 2. replace fuse/ensure no shorts. - Page 66 4. align blade to the table (page 67). 5. adjust blade position. 1. replace blade. 2. replace blade (page 36). 3. Make fence parallel to blade (page 69). 4. Make table parallel to blade (page 67). Model g0690/g0691 (Mfg. 11/10+)
-
Page 67: Blade Tilt Stops
Model g0690/g0691 (Mfg. 11/10+) indicator Figure 107. tilt indicator arrow. —if the blade is not 90° to the table, you will need to adjust the 90°... - Page 68 Jam Nut Figure 111. 45° stop bolt and jam nut. Continue adjusting the stop bolt until it con- tacts the cabinet when the blade is at 45°, then tighten the jam nut. Close the dust port. Model g0690/g0691 (Mfg. 11/10+)
-
Page 69: Miter Slot To Blade Parallelism
... 1 Metal shim stock ... as Needed Marker ... 1 your table saw will give the best results if the miter slot and the rip fence are adjusted paral- lel to the blade. if either of these are not exactly... -
Page 70: Spreader Or Riving Knife Alignment
Tools Needed hex Wrench 3mm ... 1 hex Wrench 5mm ... 1 To adjust the spreader/riving knife position: disCoNNECt thE saW FroM poWEr! remove the table insert. Model g0690/g0691 (Mfg. 11/10+) zone. -
Page 71: Fence Adjustments
Note: To adjust how tightly the mounting block holds the spreader/riving knife, adjust the center screw. reinstall the table insert. Model g0690/g0691 (Mfg. 11/10+) Follow Checking Alignment, Steps 1–3. — if the spreader/riving knife is in the align- ment zone, no additional steps are neces- sary. - Page 72 Figure 119. location of set screws used to adjust fence parallelism and clamping pressure. ⁄ " and even place the fence approximately 4" away from the blade. ⁄ ", or if the fence touches the ⁄ " and even from the front Model g0690/g0691 (Mfg. 11/10+)
-
Page 73: Fence Scale Calibration
Figure 121. adjusting fence with a Model g0690/g0691 (Mfg. 11/10+) the fence scale indicator window, shown in Figure 122, can be calibrated with the fence scale if you notice that your cuts do not accurately match what is shown on the fence scale. -
Page 74: Miter Gauge Adjustments
(Figure 125), adjust the set screws as need- ed, then tighten the cap screw. set screws Cap screws Figure 125. screws for adjusting miter bar in miter slot. Model g0690/g0691 (Mfg. 11/10+) positive stop Knob Button head Cap screws body. -
Page 75: Belt Tension & Replacement
⁄ " deflection when they are pushed with moderate pressure, as shown in Figure 127. Model g0690/g0691 (Mfg. 11/10+) Figure 127. Checking belt tension. — if there is more than the V-belts are pushed with moderate pres- sure, loosen the hex nuts, adjust the motor downward, then tighten the hex nuts. -
Page 76: Section 9: Wiring
You can view these pages in color at www.grizzly.com. -74- Note: Please gather the serial number and manufacture date of your WIRE/COMPONENT DAMAGE. MOTOR WIRING. CAPACITORS/INVERTERS. EXPERIENCING DIFFICULTIES. Model g0690/g0691 (Mfg. 11/10+) -
Page 77: Model G0690/G0691 Wiring Diagram
Model G0690/G0691 Wiring Diagram Figure 128. Magnetic switch. Figure 130. run capacitor. Figure 129. Motor wiring. Ground 6-20 Plug (As Recommended) Figure 131. start capacitor. READ ELECTRICAL SAFETY -75- Model g0690/g0691 (Mfg. 11/10+) ON PAGE 74! -
Page 78: Table Saw Body Breakdown
SECTION 10: pARTS Table Saw Body Breakdown -76- Model g0690/g0691 (Mfg. 11/10+) -
Page 79: Table Saw Body Parts List
PS06M PHLP HD SCR M5-.8 X 20 P0690036 DADO TABLE INSERT P0690040 NAME PLATE RIVET P0690041 SHIPPING BRACE Model g0690/g0691 (Mfg. 11/10+) REF PART # DESCRIPTION PB74M HEX BOLT M10-1.5 X 20 PW04M FLAT WASHER 10MM PLW06M LOCK WASHER 10MM PN02M HEX NUT M10-1.5... -
Page 80: Trunnion Assembly Breakdown
Trunnion Assembly Breakdown -78- Model g0690/g0691 (Mfg. 11/10+) -
Page 81: Trunnion Assembly Parts List
WIRING JUNCTION BOX P0690135 ORIENTATION PIN P0690136 ROLL PIN 4 X 28 PB121M HEX BOLT M12-1.75 X 100 PW06M FLAT WASHER 12MM Model g0690/g0691 (Mfg. 11/10+) REF PART # DESCRIPTION PLW05M LOCK WASHER 12MM PN09M HEX NUT M12-1.75 P0690141 MOTOR FRAME SUPPORT PSS14M SET SCREW M8-1.25 X 12... - Page 82 PWF10M FENDER WASHER 10MM PW01M FLAT WASHER 8MM PLW04M LOCK WASHER 8MM PSB14M CAP SCREW M8-1.25 X 20 P0690230 SPACER P0690231 POSITION PIN SET PLW02M LOCK WASHER 4MM PSS22M SET SCREW M4-.7 X 12 P0690234 TRUNNION Model g0690/g0691 (Mfg. 11/10+)
-
Page 83: Blade Guard Breakdown
FLAT WASHER 5MM 335V2 PLN03M LOCK NUT M6-1 339V2 PW02M FLAT WASHER 5MM 340V2 PB122M HEX BOLT M4-.7 X 8 Model g0690/g0691 (Mfg. 11/10+) PART # DESCRIPTION 341V2 PS62M PHLP HD SCR M6-1 X 30 342V2 P0690342V2 SPACER V2.10.10 P0690345... -
Page 84: Miter Gauge Breakdown
MITER STOP PIN P0690413 FLAT HD SCR M4-.7 X 20 P0690414 POINTER MITER GAUGE PW05M FLAT WASHER 4MM PLW02M LOCK WASHER 4MM PS07M PHLP HD SCR M4-.7 X 8 P0690418 MITER KNOB PWF08M FENDER WASHER 8MM Model g0690/g0691 (Mfg. 11/10+) -
Page 85: Fence Breakdown
PHLP HD SCR M5-.8 X 10 PLW01M LOCK WASHER 5MM P0690509 INDICATOR P0690510 FENCE BODY P0690511 SET SCREW Model g0690/g0691 (Mfg. 11/10+) REF PART # DESCRIPTION PB47M HEX BOLT M6-1 X 40 PLN03M LOCK NUT M6-1 PB116M HEX BOLT M10-1.5 X 45 PLN10M LOCK NUT M10-1.25... -
Page 86: Model G0690 Extension Table Breakdown
Model G0690 Extension Table Breakdown REF PART # DESCRIPTION P0690601 FENCE INSERT P0690602 GUIDE TUBE P0690603 SCALE P0690604 FRONT RAIL PSB01M CAP SCREW M6-1 X 16 PLW03M LOCK WASHER 6MM PW03M FLAT WASHER 6MM PB11 HEX BOLT 5/16-18 X 1-1/2... -
Page 87: Model G0691 Extension Table Breakdown
LOCK WASHER 6MM PW03M FLAT WASHER 6MM PB11 HEX BOLT 5/16-18 X 1-1/2 PLW04M LOCK WASHER 8MM PW01M FLAT WASHER 8MM Model g0690/g0691 (Mfg. 11/10+) REF PART # DESCRIPTION P0691611 REAR RAIL PB126M HEX BOLT M8-1.25 X 40 PN03M HEX NUT M8-1.25... -
Page 88: Labels And Cosmetic Parts Breakdown
MuST maintain the original location and readability of the labels on the machine. If any label is removed or becomes unreadable, REpLACE that label before using the machine again. Contact Grizzly at (800) 523-4777 or www.grizzly.com to order new labels. -86-... -
Page 89: Warranty Card
The following information is given on a voluntary basis. It will be used for marketing purposes to help us develop better products and services. Of course, all information is strictly confidential. Note: We never use names more than 3 times. _____________________________________________________________________ _________________________________________________________________________________ _________________________________________________________________________________... -
Page 91: Warranty And Returns
WARRANTy AND RETuRNS... - Page 92 Buy Direct and Save with Grizzly – Trusted, Proven and a Great Value! ® ~Since 1983~ Visit Our Website Today For Current Specials! ORDER 24 HOURS A DAY! 1-800-523-4777...
Need help?
Do you have a question about the G0690 and is the answer not in the manual?
Questions and answers