
Related Manuals for Avtech AVI201


Summary of Contents for Avtech AVI201
-
Page 1: Network Cameras
197Z AVI201 / 202 / 203 / 212 Network Cameras User’s Manual Please read instructions thoroughly before operation and retain it for future reference. The image shown above may differ from the actual product appearance. AVI201, 202, 203, 212 manual_V0.84... - Page 2 IMPORTANT SAFEGUARD CAUTION RISK OF ELECTRIC SHOCK CAUTION: To reduce the risk of electric shock, do not expose this apparatus to rain or moisture. Only operate this apparatus from the type of power source indicated on the label. The company shall not be liable for any damages arising out of any improper use, even if we have been advised of the possibility of such damages.
-
Page 3: Table Of Contents
TABLE OF CONTENTS 1. PRODUCT OVERVIEW......................1 1.1 Description ..............................1 1.2 Features ................................1 1.3 Package Contents............................1 1.4 Specifications*..............................2 2. HARDWARE OVERVIEW ......................3 2.1 Rear Panel ..............................3 2.2 Upper Side & Underside ..........................3 3. INSTALLATION ........................4 3.1 Install the Hardware ............................ -
Page 4: Product Overview
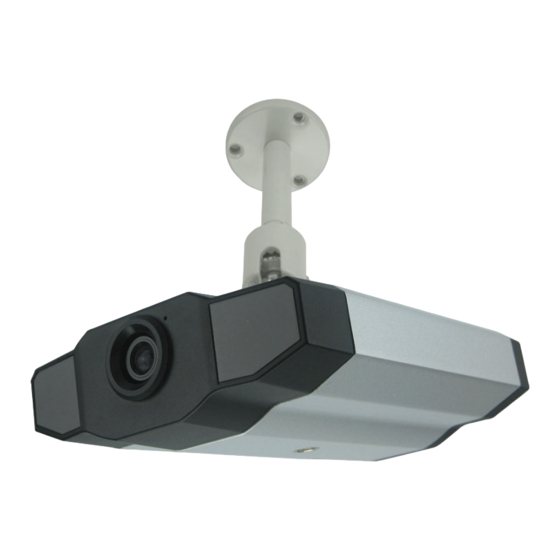
PRODUCT OVERVIEW 1. PRODUCT OVERVIEW 1.1 Description This camera series is a network-based digital surveillance device with a built-in web server for the purpose of remote monitoring and recording. It supports TCP/IP networking for live video transmission in the format of H.264, MPEG4 or MJPEG, and you can easily operate the camera via the web browser or the supplied video viewer AP software. -
Page 5: Specifications
PRODUCT OVERVIEW 1.4 Specifications* SPECIFICATIONS AVI201 AVI202 AVI203 AVI212 ▓ Network LAN Port LAN Speed 10/100 Based-T Ethernet DDNS, PPPoE, DHCP, NTP, SNTP, TCP/IP, Supported Protocols ICMP, SMTP, FTP, HTTP, RTP, RTSP Frame Rate NTSC:30, PAL:25 Number of Online Users... -
Page 6: Hardware Overview
Power Output Connector Connector AVI212 / AVI203 / AVI202 AVI201 CONNECTOR / BUTTON DESCRIPTION Reset Default This button is hidden in the pinhole. Press and hold the reset button until the network camera rebooted. This will reset all parameters, including the IP address to factory default settings. -
Page 7: Installation
INSTALLATION 3. INSTALLATION 3.1 Install the Hardware This camera can be installed in two ways: ceiling-mounted and desktop. During the installation, please make sure the upper side of the camera is always facing up, as shown in Figure 1 below, regardless of which installation way you’re using. This is to ensure the video output won’t be up side down. - Page 8 INSTALLATION Assemble the bracket: a). Align the stem with the central hole of the base, and rotate it to secure, as shown in Figure 3. b). Align the joint lock with the stem, and rotate it to secure, as shown in Figure 4. Figure 3: Connect the stem to the base Figure 4: Connect the joint lock to the stem 4.
-
Page 9: Assign An Ip Address And Access The Camera
INSTALLATION 3.2 Assign an IP address and Access the Camera Step 1. Install the Software Place the supplied Video Viewer AP software CD into your DVD- / CD-ROM drive. The installation process will automatically start. Follow the on-screen instructions to install the application programs. After installation, a “Video Viewer”... -
Page 10: Video Viewer Basic Operation
VIDEO VIEWER BASIC OPERATION 4. VIDEO VIEWER BASIC OPERATION 4.1 The Live View Page After setting up the network information, login user name and password, double-click “ ” on the PC desktop to open and log into the Video Viewer control panel. You will see a screen similar to the following with 6 major sections: ‧... -
Page 11: Address Book
VIDEO VIEWER BASIC OPERATION 4.2 Address Book This view is displayed when the Video Viewer is activated for you to log in / out the network camera from the current address list, or search the available IP address as follows: Click to view the pre-defined network camera access details. -
Page 12: Emap
VIDEO VIEWER MISCELLANEOUS CONTROL PANEL Click to search and view the available IP address(es) for the network camera connection. You can choose one address to add into the address book, edit the details, or update the address list. Button Function Description Select from the available IP address list, and click this button. - Page 13 VIDEO VIEWER MISCELLANEOUS CONTROL PANEL Step 3: If you want to relocate the cameras, you can click “ ” (Configure), and then move the cameras on the emap at will. You can also click “Remove” / “Remove All” to remove a camera or all the cameras on the emap.
-
Page 14: Manual Record
VIDEO VIEWER MISCELLANEOUS CONTROL PANEL 4.4 Manual Record Choose the record type and assign the record location Click “ ” (Miscellaneous Control) → “ ” (Record Setting) to go to the “Record Setting” page. Check the record type “Manual”, and assign the location to save the recordings by double-clicking the “Video Path” cell. Start manual recording Once the “Manual”... -
Page 15: Playback
VIDEO VIEWER MISCELLANEOUS CONTROL PANEL 4.5 Playback To play a recording, click “ ” (Miscellaneous Control) → “ ” (Status List), and select the “Record” tab. A list of all the recordings will be shown by defaults, and you can also sort out the logs you want to speed up the search time. For details, please see “5.6 Status List”... -
Page 16: Snapshot
VIDEO VIEWER MISCELLANEOUS CONTROL PANEL 4.6 Snapshot To take a snapshot of the current view, click “ ” (Snapshot) on the main control panel. Once the current view is captured, you’ll see an icon “ ” shown at the bottom right corner of the image display view. The snapshot will be saved in the path you specified in “... -
Page 17: Video Viewer Miscellaneous Control Panel
VIDEO VIEWER MISCELLANEOUS CONTROL PANEL 5. VIDEO VIEWER MISCELLANEOUS CONTROL PANEL Click “ ” (Miscellaneous Control) on the Video Viewer control panel, and 7 functions are available as follows: Click the button to show the current version of the Video Viewer. The audio / broadcast function is only for AVI202, AVI212 and AVI203 models. -
Page 18: Color Setting
VIDEO VIEWER MISCELLANEOUS CONTROL PANEL 5.1 Color Setting In the live view page, choose the desired network camera from the image display tab. Click “ ” (Miscellaneous Control) → “ ” (Color Setting) to go into the “Color Setting” page, and you can adjust the brightness / contrast / hue / saturation for the selected network camera. -
Page 19: Record Setting
VIDEO VIEWER MISCELLANEOUS CONTROL PANEL Function Description Select the IP address of the desired network camera from the IP Address / Port / User Name / Password drop-down list and check if the network information is correct. Specify the hard disk (HDD Number) and channel number (Channel) HDD Number / Channel within which have the video data you need. - Page 20 VIDEO VIEWER MISCELLANEOUS CONTROL PANEL Hard Disk Overwrite Check this checkbox to overwrite from the oldest recorded data when the HDD is full. Record Time Range There are two options available for you to set the recording time: Weekly & Custom. Weekly Choose the time box(es) within which you want to enable the recording.
-
Page 21: Server Setting
VIDEO VIEWER MISCELLANEOUS CONTROL PANEL Record Path Select and view the location for saving the recorded video and snapshot pictures. To change the saving path for the recorded video clips or snapshots, check the drive you want, click the cell of “Video Path”... -
Page 22: Log
VIDEO VIEWER MISCELLANEOUS CONTROL PANEL Click “ ” (Miscellaneous Control) → “ ” (Server Setting) → “General” → “Log” to go into the “Log” page. In the “Log” page, you can see all the logs for the network camera, such as “Power On”, “Reset Default”, “Net Login” and “SNTP Update”... -
Page 23: Online User
VIDEO VIEWER MISCELLANEOUS CONTROL PANEL To modify an existing account, select the account you want, change the setting, and click “Apply”. ‧ To remove an existing account, select the account you want, and click “Delete”. ‧ To save your changes, click “Apply”. ‧... -
Page 24: Trigger
Description Sensitivity Set the detection sensitivity: For AVI201 / 202 / 212 - 0 ~ 9,the higher the number, the lower the sensitivity. For AVI203 - Low / Normal / High. Motion Detection Set the motion detection area by selecting the area grids with your mouse. Pink grids represent Setting Area the area that is not being detected while the transparent grids are the area under detection. -
Page 25: Network
VIDEO VIEWER MISCELLANEOUS CONTROL PANEL Function Description Apply After setup, click “Apply” to confirm. Notify In this section, you can select to enable the function of E-mail and/or FTP notification. Item Description ‧ Method Email If the E-mail notification function is activated, the network camera will send the captured video clip to the assigned E-mail address(s) once motion-trigger or alarm-trigger recording happened. -
Page 26: Ddns
VIDEO VIEWER MISCELLANEOUS CONTROL PANEL Function Description Web Port Typically, the default TCP port used by HTTP is 80. However, in some cases, it is better to change this port number for added flexibility or security. The valid web port number ranges from 1 to 9999. Static IP Computers are communicated and recognized by their own unique IP addresses over the Internet. - Page 27 VIDEO VIEWER MISCELLANEOUS CONTROL PANEL Sign up Enter all the information necessary for signing up an account according to the website instructions. 1. Key in a user name for login. This name is not equal to the domain name. 2. Key in your E-mail address and input it again to confirm.
-
Page 28: Host Name
VIDEO VIEWER MISCELLANEOUS CONTROL PANEL address. Please read this email within 48 hours and complete the procedure to activate your account according to the instructions in the email. Go to the hyperlink in the email and you will see “Account Confirmed”. Your account is created successfully now. Input the user name and the password you preset before to log in. -
Page 29: Sntp
VIDEO VIEWER MISCELLANEOUS CONTROL PANEL SNTP SNTP (Simple Network Time Protocol) is for time setting. Click “ ” (Miscellaneous Control) → “ ” (Server Setting) → “Network” → “SNTP” to go into the “SNTP” page. Function Description GMT (Greenwich Mean Time) Once users choose the time zone, the network camera will adjust the local area time of the system automatically. -
Page 30: Mail
VIDEO VIEWER MISCELLANEOUS CONTROL PANEL MAIL Click “ ” (Miscellaneous Control) → “ ” (Server Setting) → “Network” → “MAIL” to go into the “MAIL” page. Enter the detailed E-mail information and press “Apply” to confirm. The information you set here will be applied when the function of E-mail notification is enabled in the "Trigger"... -
Page 31: Tools
VIDEO VIEWER MISCELLANEOUS CONTROL PANEL Item Description JPEG Choose the image size (4CIF / CIF) and picture quality (BEST / HIGH / NORMAL / BASIC) when the web transmission format is JPEG. MPEG Choose the image size (4CIF / CIF) and picture quality (BEST / HIGH / NORMAL / BASIC) when the web transmission format is MPEG. -
Page 32: Language Selection
VIDEO VIEWER MISCELLANEOUS CONTROL PANEL Language Selection This software is available in English / Chinese / French / German / Portuguese / Spanish / Japanese. Select a language from the drop-down list, and press “Apply”. You will be prompted to restart the application to make this change take effect. -
Page 33: Event
VIDEO VIEWER MISCELLANEOUS CONTROL PANEL Button / Function Description Range Unit Set different time range unit (One Day / One Week) of the event logs. Date Selection (From / To) Choose the specific date range including the event / record logs you might want. Record Type This section is enabled only when the “Record”... -
Page 34: Backup (For Dvr Only)
VIDEO VIEWER MISCELLANEOUS CONTROL PANEL Backup (For DVR only) Select “Backup” to search for the specific log(s) by date. Button / Function Description Set different time range unit (One Day / One Week) of the event logs. Range Unit Choose the specific date range including the event / record logs you might want. Date Selection (From / To) When all the search criteria are set, click to search the specified logs. - Page 35 VIDEO VIEWER MISCELLANEOUS CONTROL PANEL Function Description Playback / Download This area shows the detailed playback / download information, such as the file name, Info Display record date and time, and the speed, etc. Playback Progress Bar This area shows the playback progress and the progress percentage. Playback Operation This area is enabled only when the playback is started.
-
Page 36: Ie Web Browser
IE WEB BROWSER 6. IE WEB BROWSER 6.1 Access the Camera from an IE Web Browser You can view the images or operate your network camera from an IE web browser. Note: The supported PC operation systems are Windows 2000 and Windows XP. Step 1: Key in the IP address used by your network camera in the URL address box, such as “http://ipcam.dyndns.org”, and press Enter. - Page 37 IE WEB BROWSER Function Description Camera Snapshot Path Set the location where the snapshot pictures are saved. According to the bandwidth, set the required frame rate (FULL / HALF / ONE THIRD / Frame Rate QUARTER / ONE FIFTH / ONE TENTH / ONE FIFTEENTH). For details, please refer to “Video”...
-
Page 38: Quicktime Player
QUICKTIME PLAYER 7. QUICKTIME PLAYER You can also use the QuickTime player to log into the network camera and check the live view only. Note: QuickTime is Apple’s multimedia software. You need to have QuickTime installed in you computer first, and you can access the network camera to see the live view. -
Page 39: Appendix 1 Recording Time Table
APPENDIX 1 RECORDING TIME TABLE APPENDIX 1 RECORDING TIME TABLE The following table lists the recording time table for AVI202 and AVI203 and takes PAL video system image capture as an example. The compression format for AVI202 is MPEG4, and the one for AVI203 is H.264. ‧... - Page 40 APPENDIX 1 RECORDING TIME TABLE ‧ Table 2: dynamic state AVI202 AVI203 Resolution Quality Frame Rate MB/Hrs Frame Rate MB/Hrs full full 1743 Best 259.5 1/10 257.1 1/10 1/15 174.3 full full 1158 High 274.5 1/10 194.1 1/10 159.3 1/15 148.8 4CIF full...
- Page 41 APPENDIX 1 RECORDING TIME TABLE ‧ Table 3: Suggested Settings Note: It is recommended to take the following settings for Frame Rate / Resolution / Quality when you use AVI203 under the upload speed of 2M / 1M / 512Kbps. Upload H.264 MPEG4...
-
Page 42: Appendix 2 User Level For Remote Operation
APPENDIX 2 USER LEVEL FOR REMOTE OPERATION APPENDIX 2 USER LEVEL FOR REMOTE OPERATION ● For Video Viewer (AVI201 / 202 / 203 / 212) Supervisor Power User Normal User Guest Address Book ● ● ● ● Emap ● ●... - Page 43 APPENDIX 2 USER LEVEL FOR REMOTE OPERATION ● For Web Browser (AVI202) Supervisor Power User Normal User Guest Main Connection Mode ● ● ● ● Protocol ● ● ● ● Quality ● ● ● Change resolution ● ● ● Audio function ●...
-
Page 44: Appendix 3 Default Value
APPENDIX 3 DEFAULT VALUE APPENDIX 3 DEFAULT VALUE ‧ Default Value Items Default Value ‧ Default Network Settings: User Name admin Password admin Port IP Address 192.168.1.10 -41-... - Page 45 217Z AVI201 / 202 / 212 網路攝影機 使用手冊 在使用本機前請務必詳細閱讀安全須知及操作說明,並保存此手冊以備後續參考。 產品外觀以實機為主。 Chinese_AVI201, 202, 212 manual_V0.82...
- Page 46 安全須知 注意 RISK OF ELECTRIC SHOCK 注意: 為減低觸電的可能性,請勿讓此機器暴露在雨中或潮濕的環境下。請務必使用適當的變壓器。本公司不負責賠償任何因不當 使用本產品所引起的損害。即使本公司已被告知可能的相關風險,使用者仍應自行承擔不當使用所產生之後果。 圖示說明 此符號用於警告使用者 產品機殼內部有 “危險電壓”,觸碰有可能會造成觸電的可能性。 此符號用於告知使用者此機器附有操作與維護指示的重要文件。 本公提供的所有無鉛產品皆符合歐盟有害物質使用限制指引 (Restriction of Hazardous Substances, (RoHS)),意即本公司的生產流程與產品均嚴格遵守無鉛守則,而且不包含該指引內提供的任何有害 物質。 此劃叉的滾輪垃圾筒圖示代表在歐盟境內,本產品於丟棄時必須另行收集。此原則適用於您的產品與 任何標有此圖示的週邊設備。請勿隨意丟棄這些產品。請洽詢您當地的經銷商,以得知回收此設備的 程序。 此機器的製造符合無線電波干擾的規範。 免責聲明 本公司保留可隨時修改或刪除說明書內容的任何權利。本公司不保證此說明書的內容完全無誤、完整或實用。此說明書 內容更改以實際產品為準,將不另行通知。 授權 MPEG-4 THIS PRODUCT IS LICENSED UNDER THE MPEG-4 VISUAL PATENT PORTFOLIO LICENSE FOR THE PERSONAL AND NON-COMMERCIAL USE OF A CONSUMER FOR (i) ENCODING VIDEO IN COMPLIANCE WITH THE MPEG-4 VISUAL STANDARD ( ...
- Page 47 目錄 產品概觀 ..........................1 1.1 簡介 ................................1 1.2 產品特色 ................................. 1 1.3 包裝明細 ................................. 1 1.4 產品規格 ................................. 2 硬體概述 ..........................3 2.1 背板 ................................3 2.2 上方 & 下方 ..............................3 安裝 ............................4 3.1 硬體安裝 ................................. 4 3.2 指定...
- Page 48 網路瀏覽器 6. IE ........................31 6.1 透過 IE 網路瀏覽器存取攝影機 ........................31 6.2 IE 網路瀏覽器的工具列說明 .......................... 31 播放程式 7. QUICKTIME ......................33 附錄 預設值 ........................34...
-
Page 49: 產品概觀
產品概述 產品概觀 1.1 簡介 此攝影機系列屬於網路型數位監控裝置,內建了網路伺服器以方便進行遠端監控與錄影。此系列還支援 TCP/IP 網路協 定,能以 MPEG4 或 MJPEG 的格式來進行即時影像傳輸,而且還能透過網頁或隨附的影像觀看程式 AP 軟體來控制攝影機。 不論您身在何時何地,IP 網路影像監控就是如此輕鬆容易。 1.2 產品特色 影片傳輸不延遲,提供清晰流暢的影像 數位 / 類比影像輸出 位移偵測與警報通知功能 高畫質影像感測器 支 援 完 整 的 IP 監 控 系 統 , 例 如 : 中 控 管 理 系 統 (Central Management System, CMS) 軟 體 、 網 路 儲 存 設 備 (Network-Attached Storage, NAS)、網路影像錄影主機... -
Page 50: 產品規格
產品概述 1.4 產品規格 產品規格 AVI201 AVI202 AVI212 ▓ 網路 LAN 埠 是 LAN 速度 10/100 Based-T Ethernet DDNS、PPPoE、DHCP、NTP、SNTP、TCP/IP、 支援的協定 ICMP、SMTP、FTP、HTTP、RTP、RTSP Frame 速度 NTSC:30、PAL:25 線上使用者人數 安全性設定 多種使用者存取權限與密碼設定 是 (最多可同時控制 16 隻網路攝影機) 網路管理軟體 ▓ 影音 MPEG4 / MJPEG 影像壓縮格式 遠端控制影像 是 Brightness、Contrast、Saturation 和 Hue 影像調整... -
Page 51: 硬體概述
硬體概述 硬體概述 2.1 背板 連接孔 / 按鈕 說明 回復原廠預設值 此按鈕是隱藏在針孔之中。請按住此按鈕,直到網路攝影機重新開機為止。此舉將會重設所有參數 回原廠設定值,包括 IP 位址。 電源指示燈 將攝影機上電後,此指示燈會顯示為紅色。 聲音輸出 (僅限 AVI202 / AVI212) 支援到聲音裝置的連接,例如喇叭,以進行遠端聲音傳輸。 聲音輸入 (僅限 AVI202 / AVI212) 支援到聲音裝置的連接,例如麥克風,以進行本機端聲音傳輸。 使用影像傳輸線 (例如有 BNC 接頭的 RCA 線,或者同軸電纜) 連接到螢幕的影像輸入孔,以進行 影像輸出 影像輸出。 * 影像傳輸線為選購配備。 使用隨附的 RJ45 網路線,將攝影機連線上網。 連接到... -
Page 52: 安裝
安裝 安裝 3.1 硬體安裝 本攝影機有兩種安裝方式:吸頂式和桌上式。不論選擇何種安裝方式,請確認攝影機的上方永遠朝上 (如圖 1 所示),以 確保影像輸出不會顛倒。 註:以下安裝圖片皆以吸頂式安裝為範例。 註:如需得知詳細的連接方式,請參閱第 3 頁的 “2. 硬體概述”。 所需工具:電鑽 x 1 (未隨附銷售包裝提供) 1. 備妥安裝攝影機所需的所有組件。 如圖 1 所示,在銷售包裝內找出網路攝影機、支架包裝盒、一包螺絲和壁虎,以及一個防塵帽。 打開支架包裝盒後,會看到支架被分解成三個部分:底座、聯結桿和聯結鎖。 圖 1:安裝攝影機所需的組件 圖 2:將底座鎖到天花板 2. 鎖住支架底座。 先將支架底座鎖在您要安裝攝影機的位置。... - Page 53 VIDEO VIEWER 基本操作 3. 組合支架: a).將聯結桿對準底座中間的孔,然後旋轉鎖緊 (如圖 3 所示)。 b).將聯結鎖對準聯結桿,然後旋轉鎖緊 (如圖 4 所示)。 圖 3:將聯結桿接到底座 圖 4:將聯結鎖接到聯結桿 4. 連接攝影機和支架。 吸頂式: 將攝影機上方的螺絲孔對準聯結鎖的螺紋,然後旋轉鎖 緊攝影機 (如圖 4 所示)。 桌上式: 將攝影機下方的螺絲孔對準聯結鎖的螺紋,然後旋轉鎖 緊攝影機。 圖 4:連接攝影機和支架 圖 5:插入防塵帽 圖 6:安裝完成圖 5. 將防塵帽插入攝影機另一個螺絲孔。 吸頂式: 將防塵帽插入攝影機下方的螺絲孔 (如圖 5 所示)。 桌上式:...
-
Page 54: 指定 Ip 位址與存取攝影機
VIDEO VIEWER 基本操作 3.2 指定 IP 位址與存取攝影機 步驟 1. 安裝軟體 將隨附的 Video Viewer AP 軟體光碟放到 DVD- / CD-ROM 光碟機中。安裝程序會自動啟動。請遵照螢幕上的指示安裝此軟 體。安裝完成後,電腦桌面會出現 “Video Viewer” 捷徑圖示。 步驟 2. 使用隨附的 RJ45 網路線讓攝影機連線上網 步驟 3. 搜尋可用的 IP 位址進行登入 a) 連按兩下桌面上的 “ ” 圖示進入 Video Viewer 控制面板。依據預設, Video Viewer 控制面板右側會顯示 “Address Book”... -
Page 55: Video Viewer 基本操作
VIDEO VIEWER 基本操作 4. VIDEO VIEWER 基本操作 4.1 即時影像顯示頁面 在設完網路資訊、登入使用者名稱和密碼之後,連按兩下電腦桌面上的 “ ” 來開啟和登入 Video Viewer 控制面板。 您會看見類似以下的畫面,分成六個主要區域: ‧ 連接到多台網路攝影機 (例如:4 台攝影機) ‧ 連接到一台網路攝影機 ‧ 1 分割顯示 ‧ 4 分割顯示 按鈕 功能 說明 若連接了兩隻或兩隻以上的網路攝影機,按一下對應的藍色標籤即 可切換到另一個攝影機畫面。顯示在藍色標籤上的攝影機名稱是可 影像顯示 以自訂的 (例如:“01”、“02”、“03” 和 “04”)。預設的攝影機名稱為 “Camera1”。如需設定攝影機名稱的相關資訊,請參閱第 16 頁的 “General (一般設定)”。本軟體最多可同時控制... -
Page 56: Address Book (連線位址簿)
VIDEO VIEWER 基本操作 4.2 Address Book (連線位址簿) 當 Video Viewer 啟動時會顯示此畫面,讓您可以從此畫面登入 / 出網路攝影機,或者搜尋可連線的 IP 位址,畫面如下: 連 連 線 線 位 位 址 址 簿 簿 按一下可顯示預設的網路攝影機詳細資訊。 若要登入,請從位址簿選擇一組 IP 位址,然後連按兩下該位址;若要登出,請連按兩下已連線的 IP 位址。 您也可以自訂新的 IP 位址資訊,或者修改或刪除現有的 IP 位址。 按鈕 功能 說明 按一下可新增一組 IP 位址來登入 DVR。輸入所需的網路攝影機存取資訊, 然後按一下... -
Page 57: Manual Record (手動錄影)
AP MISCELLANEOUS CONTROL PANEL 搜 尋 搜 尋 按一下可搜尋和查看可連線的 IP 位址來連接到網路攝影機。您可以選擇一組 IP 位址加入連線位址簿、編輯詳細資 訊,或者更新連線位址簿清單。 按鈕 功能 說明 從可用的 IP 位址清單選取一組 IP 位址,然後按一下此按鈕。輸入所需 Add into address book 的網路攝影機存取資訊,然後按一下 “Apply” (套用) 和 “Close” (關 (加入連線位址簿) 閉),將選取的位址加入連線位址簿。 從可連線的 IP 位址清單選擇一組 IP 位址,然後按一下此按鈕編輯相關 Setting (設定) 設定。... -
Page 58: 影像回放
AP MISCELLANEOUS CONTROL PANEL 4.4 影像回放 若要回放錄影檔,請按 “ ” (Miscellaneous Control) → “ ” (Status List),然後選擇 “Record” (錄影) 標籤。預設 會顯示所有的錄影檔清單,您也可以依類型列出想要的記錄來加快搜尋的速度。詳情請參閱第 26 頁的 “5.6 Status List (狀態清單)”。 若要立即回放某錄影檔,請從清單選取一筆記錄,然後按 “Play” (播放) 按鈕,或者連按兩下選取的記錄進行回放。接 著,在主要控制面板下方會出現類似以下畫面的回放控制面板。 有關回放控制面板的詳情,請參閱第 30 頁的 “回放畫面”。 -10-... -
Page 59: 快照
AP MISCELLANEOUS CONTROL PANEL 4.5 快照 若要擷取目前畫面的影像,請按一下主控制畫面的 “ ” (Snapshot)。擷取完影像後,影像顯示畫面的右下角會出現 “ ” 圖示。 快照影像會儲存在您於 “ ” (Record Setting) 指定的位置下。如需得知詳細的快照路徑設定資訊,請參閱第 14 頁的 “5.3 錄影設定”。 4.6 Information (資訊) 按一下可顯示目前的網路連線詳細資訊: 1) IP Address (IP 位址) 7} Quality (影像品質) 2} Transfer Type (傳輸類型) 8} Resolution (解析度) 3} Stream Format (影像格式) 9) Server Time (伺服器時間) 4) AV Option (AV 選項) -
Page 60: Video Viewer 其他控制功能畫面
VIDEO VIEWER 其他控制功能畫面 5. VIDEO VIEWER 其他控制功能畫面 按一下 Video Viewer 控制面板上的 “ ” (Miscellaneous Control) 會顯示如下的七項功能: 可顯示 Video Viewer 的目前版本。 按一下 聲音 / 廣播功能僅限 AVI202、AVI212 才支援。 按鈕 功能 說明 Audio On / Off 按此按鈕可開啟 / 關閉網路攝影機的聲音功能。 (聲音開 / 關) 在電腦使用廣播功能,將聲音傳到網路攝影機那端。在使用本功能之前,請 確認以下事項已就緒:... -
Page 61: 顏色設定
VIDEO VIEWER 其他控制功能畫面 5.1 顏色設定 在即時畫面下,選取想要變更顏色設定的網路攝影機標籤。按一下 “ ” (Miscellaneous Control) → “ ” (Color Setting) 進入 “Color Setting” (彩色設定) 頁面,即可調整選取網路攝影機的亮度 / 對比度 / 色度 / 飽和度。 按 “ ” (Set) 可套用變更到選取的網路攝影機 。 按 “ ” (Default) , 再按 “ ” (Set) 可回復預設彩色設定 。 註:您必須擁有... -
Page 62: 錄影設定
VIDEO VIEWER 其他控制功能畫面 功能 說明 ‧若要快速找出想要的事件,請勾選或取消勾選 “System” (系統) / “Manual” (手 動錄影) / “Alarm” (警報) / “Motion” (位移偵測) 事件類型 , 然後選取想要的事件 。 ‧若想要查看較早或較晚的事件記錄,而該記錄沒有顯示在目前的頁面中時,請 按一下 “Prev. Page” (前一頁) 或 “Next Page” (下一頁)。 ‧若要更新事件清單,請按一下 “Reload” (重新載入)。 File Path (檔案路徑) 指定備份下來的檔案要儲存的位置。 若要在下載時同步觀看備份的影像,請先勾選 “Display” (顯示)。您會在下載備份 影像到電腦時看見影像內容。... - Page 63 VIDEO VIEWER 其他控制功能畫面 事件前 後錄影時間 Prev / Post Event Record Time ( 在此區中,您可以按住並拖曳滑桿來設定事件前 / 後的錄影時間 (0 ~ 10 秒)。 硬碟覆寫 Hard Disk Overwrite ( 勾選此核取方塊後,在硬碟已滿時,會直接從最舊的錄影檔案開始進行覆寫。 錄影時間範圍 Record Time Range ( 設定錄影時間的方式有兩種:Weekly (每週) & Custom (自訂) Weekly (每週) 選取您要啟用錄影的時間方塊。時間間隔為一天 0 ~ 24 小時,而且每一天都有三條時間軸,各自代表三種不同的 錄影類型。...
-
Page 64: 伺服器設定
VIDEO VIEWER 其他控制功能畫面 c). 在新增錄影設定後,會在自訂錄影清單中看見剛加入的項目。 若要刪除特定項目,請選擇要刪除的項目,然後按 “Delete” (刪除)。 若要修改特定項目,請選取要修改的項目、變更開始時間和結束時間,然後按 “Update” (更新)。 錄影檔案存放路徑 Record Path ( 選擇和查看要儲存錄影影片和快照圖片的位置。 若要變更錄影檔或快照的儲存位置,請先勾選要用來儲存的磁碟機、連按二下 “Video Path” (影像路徑) 或 “Picture Path” (圖片路徑),然後選擇要儲存影片檔或快照的新位置。 5.4 伺服器設定 按一下 “ ” (Miscellaneous Control) → “ ” (Server Setting) 進入 “Server Setting” (伺服器設定) 頁面,即可檢 視、設定或修改所有網路攝影機的設定。您在此所做的所有變更都將套用到連線的網路攝影機。... -
Page 65: Log (記錄)
VIDEO VIEWER 其他控制功能畫面 Log (記錄) 按一下 “ ” (Miscellaneous Control) → “ ” (Server Setting) → “General” → “Log” 進入 “Log” (記錄) 頁面。 在 “Log” (記錄) 頁面會看見網路攝影機的所有事件記錄,例如:“Power On” (開機)、“Reset Default” (回復預設值)、 “Net Login” (網路登入) 和 “SNTP Update” (SNTP 網路對時) 等等。 ‧若要更新記錄,請按... -
Page 66: Online User (線上使用者)
VIDEO VIEWER 其他控制功能畫面 欄位 說明 Supervisor Power User Normal User Guest (系統管理員) (超級使用者) (一般使用者) (訪客) ● ● ● ● Address Book (連線位址簿) Miscellaneous Control (其他控制功能) Color Setting ● (彩色設定) Backup ● (備份) Record Setting ● ● ● ● (錄影設定) Server Setting ●... -
Page 67: Network (網路設定)
VIDEO VIEWER 其他控制功能畫面 ‧ AVI201 ‧ AVI202 / AVI212 位移偵測觸發: 您可以在此區選擇啟用位移偵測觸發功能。在啟用此功能之前,請先設定位移偵測區域。如需得知位移偵測區域設 定的詳細資訊,請參閱第 25 頁的 “Detection (位移偵測設定)”。 項目 說明 Motion (位移偵測) 您可以在此區選擇啟用位移偵測觸發功能。 Duration (持續時間) 設定位移偵測觸發時的錄影時間 (5 / 10 / 20 / 40 秒)。 警報觸發 (僅限 AVI202 / 212): 您可以在此區選擇啟用警報觸發功能。 Notify (通知) 您可以在此區選擇啟用... -
Page 68: Ddns
VIDEO VIEWER 其他控制功能畫面 選擇要用來連接到網路攝影機的網路類型,共支援 3 種網路連線類型:Static IP (固定 IP)、PPPOE 和 DHCP。 註: PPPOE 與 DHCP 網路類型皆需要申請 DDNS 服務以取得一個 “主機名稱” 來對應浮動的 IP 位址 。 詳情請參閱 “DDNS” 一節。 功能 說明 Web Port (埠號) 一般而言,HTTP 所使用的 TCP 埠多半為 80 埠。然而有些情形下,建議您最好變更此埠值以增加彈性或安全 性。有效數值範圍為 1 到 9999。 Static IP (固定... - Page 69 VIDEO VIEWER 其他控制功能畫面 ‧ 依據網站上的指示,輸入所有簽署帳號所需提供的資訊。 當完成申請後,您可以看到 “Account Created” 的畫面(帳號已建立),Dyndns 系統會寄相關指示到您的電子信箱, ‧ 以讓您完成接下來的帳號啟動。您必須遵照電子確認信中的指示,完成啟動帳號的程序。也就是說,在接獲電子 確認信後,必須於 48 小時內到指定網址完成帳號啟動設定。完成帳號啟動後,您會看到 “Account Confirmed” 的 視窗。代表您的帳號已經成功建立。 -21-...
- Page 70 VIDEO VIEWER 其他控制功能畫面 請使用申請的 DDNS 帳號、密碼登入 DynDNS,並按 ”My Service” 按鈕。 ‧ 按 ”Add Host Services” 按鈕。 ‧ 按 ”Add Dynamic DNS Host” 按鈕。 ‧ ‧ 輸入並選擇主機名稱。 -22-...
-
Page 71: Sntp
VIDEO VIEWER 其他控制功能畫面 主機名稱已建立。您可使用 DDNS 服務所取得的「主機名稱」做為虛擬的固定 IP 位置,來對應浮動 IP 位址。 ‧ SNTP (網路對時) SNTP (Simple Network Time Protocol / 網路對時) 頁面可用來設定時間。按 “ ” (Miscellaneous Control) → “ ” (Server Setting) → “Network” (網路設定) → “SNTP” (網路對時) 進入 “SNTP” (網路對時) 頁面。 功能... -
Page 72: Mail (郵件管理)
AP MISCELLANEOUS CONTROL PANEL MAIL (郵件管理) 按 “ ” (Miscellaneous Control) → “ ” (Server Setting) → “Network” (網路設定) → “MAIL” (郵件管理) 進 入 “MAIL” (郵件管理) 頁面。輸入詳細的電子郵件資訊,然後按 “Apply” (套用) 確認。在 "Trigger" (觸發) 功能表 啟用電子郵件通知功能後,就會套用在此所設的資訊。 功能 說明 Server (伺服器) 輸入您從電子郵件系統供應商取得的 SMTP 伺服器位址。 Mail From (寄信人信箱) 輸入完整的電子郵件位址,以確保電子郵件不會被... -
Page 73: Detection (位移偵測設定)
AP MISCELLANEOUS CONTROL PANEL 項目 說明 Maximum Exposure Limits 您可以調整最大曝光時間來達到光線補償的目的。 (最大曝光時間) 曝光時間控制共有五種等級。最短的曝光時間為 LEVEL 0,最長的則為 LEVEL 5。此 設定會影響到影像品質。 Detection (位移偵測設定) 當監視畫面裡有任何動作發生時,就會觸發位移偵測功能。選擇要設定的頻道,然後按下 “Edit” (編輯) 按鈕進入位移 偵測區域設定視窗。 功能 說明 Motion Detection Setting Area 使用電腦滑鼠設定位移偵測區域。粉紅色格子代表未被偵測的區域,而透明的格子代表 (位移偵測設定區域) 有偵測的區域。您可以設定多個偵測區域。 Select All (選取全部) 按 “+” (選取全部) 選取全區域進行偵測。 Clear All (全部清除) 按... -
Page 74: Status List (狀態清單)
AP MISCELLANEOUS CONTROL PANEL 功能 說明 Update Server (更新伺服器) 選取網路攝影機的 IP 位址。確認選取網路攝影機的網路設定是否正確。 Current Version (目前版本) 在 “Firmware” (韌體) 下,您會看見目前的韌體版本。 例如:1022-1020-1001 Add (新增) 要升級網路攝影機的韌體版本,按 “Add” (新增) 尋找並選取韌體檔案。 升級檔案有很多。請逐一進行升級。 Update Firmware (更新韌體) 要開始升級網路攝影機韌體,按 “Update Firmware” (更新韌體) 開始 進行升級程序。升級後會看見螢幕顯示一串訊息: “Update Firmware Succeeded! Don’t plug off power, the machine will reboot automatically!”... - Page 75 AP MISCELLANEOUS CONTROL PANEL 按鈕 說明 Query (查詢) 按此鈕可更新記錄清單。 Delete (刪除) / 按一下 “Delete” (刪除) 可刪除選取記錄,或者按 “Delete All” (全部刪除) 刪除目前顯 示的記錄清單。 Delete All (全部刪除) 秘訣:若要一次選取多筆記錄,請按住鍵盤上的 [Ctrl] 鍵,然後點選您要刪除的記錄。 Play (播放) 按一下可回放選取的錄影記錄。之後會出現回放控制面板讓您操作。如需得知詳細的 回放操作資訊,請參閱第 30 頁的 “錯誤! 表格製作不正確。”。 Repair (修復) 按一下可修復有問題的記錄。 Apply (套用) 此按鈕僅在您於...
-
Page 76: 登入 / 登出事件清單
AP MISCELLANEOUS CONTROL PANEL 登入 / 登出事件清單 選擇 “All” (全部) 顯示所有的事件記錄 (Login / Logout),或者 “Condition” (依條件) 來依日期來搜尋特定記錄。 全部 ‧ All ( ‧ Condition ( 依條件 備份清單 (限 DVR) 網路攝影機本身並不支援網路備份功能。當 Video Viewer 連線到 DVR 時,才可使用此功能。您可以遠端觀看備份 清單並回放選取項目。 選擇 “All” (全部) 顯示所有的下載記錄,或者 “Condition” (依條件) 來依日期來搜尋特定記錄。 -28-... - Page 77 AP MISCELLANEOUS CONTROL PANEL ‧ All ( 全部 按鈕 說明 Query (查詢) 按此鈕可更新記錄清單。 Delete (刪除) / 按一下 “Delete” (刪除) 可刪除選取記錄,或者按 “Delete All” (全部刪除) 刪除目前顯示 的記錄清單。 Delete All (全部刪 秘訣:若要一次選取多筆記錄,請按住鍵盤上的 [Ctrl] 鍵,然後點選您要刪除的記錄。 除) Play (播放) 按一下可回放選取的錄影記錄。之後會出現回放控制面板讓您操作。如需得知詳細的回 放操作資訊,請參閱第 30 頁的 “錯誤! 表格製作不正確。”。 Repair (修復) 按一下可修復有問題的記錄。...
-
Page 78: 回放畫面
AP MISCELLANEOUS CONTROL PANEL 回放畫面 當您選取某筆記錄回放時,您會立即進入回放模式,而且會出現以下回放控制面板。 功能 說明 回放 / 下載資訊顯示 此區會顯示詳細的回放/ 下載資訊,例如:檔案名稱、錄影日期和時間,以及速度等等。 回放進度列 此區會顯示回放進度列和目前回放的進度。 回放操作 此區僅在開始回放時方能使用。 (倒轉) / (快轉) / (停止) / (暫停) / (播放) 倒轉 / 快轉 按一下可加快 2 倍倒轉 / 快轉、兩下為 4 倍、三下為 8 倍,四下則為 16 倍 (最快)。 De-Interlace (去交錯) 減低影片暫停時的畫面跳動現象。... - Page 79 IE 網路瀏覽器 6. IE 網路瀏覽器 6.1 透過 IE 網路瀏覽器存取攝影機 您可以透過 IE 瀏覽器遠端觀看影像或操作網路攝影機。 註:支援的電腦作業系統 (O/S) 是 Windows 2000 與 Windows XP。 步驟 1:在 URL 網址列輸入網路攝影機使用的 IP 位址,例如 “http://ipcam.dyndns.org”,然後按 [Enter] 鍵。之後會提示您 輸入使用者名稱和密碼來登入網路攝影機。 如果您設定的網路攝影機埠號並非 80 埠,就需要另行輸入埠號,格式為 “http://ip 位 址 埠 號 ”。 以浮動 IP 網路類型為例:主機名稱 “ipcam.dyndns.org” / 埠號 “202”。則請在 URL 的網址列中,輸入 “http://ipcam.dyndns.org:202”,然後按...
- Page 80 IE 網路瀏覽器 功能 說明 Camera Snapshot Path (快照存放路徑) 設定快照圖片要儲存的位置。 (主機設定) 視頻寬來設定所需的 Frame 速度:FULL (全速) / HALF (半速) / ONE THIRD (三分之一) / Frame Rate (Frame 速度) QUARTER (四分之一) / ONE FIFTH (五分之一) / ONE TENTH (十分之一) / ONE FIFTEENTH (十五分之一)。詳情請參閱第 24 頁的 Video Viewer “Video (影像設定)” 一節。 System Type (系統影像類型) 設定連接的網路攝影機的系統類型...
- Page 81 QUICKTIME 播放程式 7. QUICKTIME 播放程式 您也可以使用 QuickTime 多媒體播放軟體來登入網路攝影機,並只能觀看即時畫面。 QuickTime 是 Apple 公司的多媒體播放軟體。您必須先將 QuickTime 安裝到您的電腦,然後才能存取網路攝影機觀看即時畫面。 註: 步驟1: 進入 Apple 的官方網站來下載 QuickTime。網站位址如下: http://www.apple.com/quicktime/win.html a). 按一下 “ d ” (下載) 進入下載頁面,然後選擇下載免費的播放軟體。 b). 輸入您的電子郵件地址,然後按 “ w ” (免費下載) 來下載最新版的 QuickTime 多媒體播 放軟體。 c). 下載結束後,執行 “ e ”...
- Page 82 附錄 1 預設值 附錄 預設值 ‧ 預設值 項目 預設值 ‧ 預設網路值: 使用者名稱 admin admin 密碼 埠號 IP 位址 192.168.1.10 -34-...
Need help?
Do you have a question about the AVI201 and is the answer not in the manual?
Questions and answers