Grizzly H5527 Owner's Manual
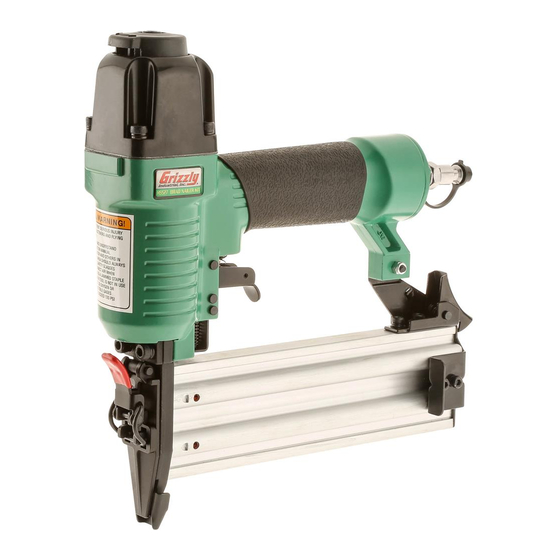
18 gauge brad nailer
Hide thumbs
Also See for H5527:
- Parts list (3 pages) ,
- Owner's manual (21 pages) ,
- Owner's manual (24 pages)
Table of Contents
Advertisement
Quick Links
Download this manual
See also:
Owner's Manual
Advertisement
Table of Contents

Subscribe to Our Youtube Channel
Related Manuals for Grizzly H5527


Summary of Contents for Grizzly H5527
- Page 1 18 GAUGE BRAD NAILER OWNER'S MANUAL COPYRIGHT © JULY, 2003 BY GRIZZLY INDUSTRIAL, INC., REVISED MARCH, 2008 (TS) WARNING: NO PORTION OF THIS MANUAL MAY BE REPRODUCED IN ANY SHAPE OR FORM WITHOUT THE WRITTEN APPROVAL OF GRIZZLY INDUSTRIAL, INC.
- Page 2 ���� ������ �������� �������� ������ ������������ �� ��� ������ ������ ���������� ����������� ��� ������� �� ���� ������������������ ������� �� ����� ���������� ��� ������ ��� ������������ ����� �� ���� ������ ��� ������ �� ������� �������� ������� ��������� ����������� ������������� �� ������ ���...
-
Page 3: Safety Instructions For Pneumatic Tools
Keep work area well lighted. H5527 18 Gauge Brad Nailer SAFETY Indicates an imminently hazardous situation which, if not avoided, WILL result in death or serious injury. - Page 4 24. BE AWARE OF HOSE LOCATION WHEN TOOLS. Hoses can easily become RISK a tripping hazard when laid across the floor or spread out in a disorga- nized fashion. RECOMMENDED ALLOW UNTRAINED USING PNEUMATIC H5527 18 Gauge Brad Nailer...
-
Page 5: Additional Safety Instructions For Nailers
5. COMPRESSED AIR RATING: Do not connect the nailer/stapler to com- pressed air that exceeds 120 PSI. H5527 18 Gauge Brad Nailer Staplers 6. HOSE USAGE: Make sure your air hose is designed for the tool in use, is in good condition, and is long enough to reach your work without stretching. - Page 6 Always consider safety first, as it applies to your individual working conditions. Use this and other tools with caution and respect. Failure to do so could result in serious personal injury, damage to equipment or poor work results. H5527 18 Gauge Brad Nailer...
-
Page 7: Machine Data
Foreword The specifications, details, and photo- graphs in this manual represent the Model H5527 as supplied when the manual was prepared. However, owing to Grizzly’s pol- icy of continuous improvement, changes may be made at any time with no obliga- tion on the part of Grizzly. - Page 8 SETUP After you open the nailer box, you should find the following. Model H5527 Inventory (Figure 1) A. Carrying Case ... 1 B. Brad Nailer ... 1 C. Hex Wrenches 3mm, 4mm ... 1 Each D. Safety Glasses ... 1 Figure 1.
-
Page 9: Compressed Air System
Compressed Air System The Model H5527 is designed to be oper- ated at 60-100 PSI using clean, dry, regu- lated, compressed air. DO NOT exceed the 120 PSI maximum operating pres- sure for your model. Before using your new nailer, regulate the air pressure on your air compressor to the minimum PSI for your model. - Page 10 — If you find that the safety nose mechanism is not working properly, check the lubrication of its sliding components. H5527 18 Gauge Brad Nailer...
- Page 11 2. Grip the nailer firmly, and depress the magazine latch, as shown in Figure 3. Figure 3. Releasing magazine latch. H5527 18 Gauge Brad Nailer OPERATIONS 3. Pull the magazine cover back until it 4. Point the nailer down and insert a stick Figure 4.
- Page 12 — If the nail either went too far or not far enough, then adjust the air pres- sure. More air pressure will make the nail go deeper and less air pres- sure will decrease the nail penetra- tion. H5527 18 Gauge Brad Nailer foreign...
-
Page 13: Clearing Jammed Nails
Locate and remove the jammed nail with a pair of needle-nose pliers, then latch the magazine cover closed. H5527 18 Gauge Brad Nailer To clear a jammed nail from the dis- charge area: 1. DISCONNECT NAILER FROM THE AIR SUPPLY! 2. -
Page 14: Replacing Pistons/O- Rings
4 cap screws. 12. For more assistance, or to install a complete O-ring set, refer to the appro- priate breakdown diagram in the back of this manual for component loca- tions. H5527 18 Gauge Brad Nailer... - Page 15 Stock up with extra bottles to avoid costly downtime. H5527 18 Gauge Brad Nailer G8114— G8115— G8116— Multi-purpose red rubber air hose is flex- ible and abrasion resistant.
-
Page 16: Cleaning And Lubrication
Lubricating Special oil has been included with your new Grizzly nailer to help maintain its useful life. Place two to six drops of oil in the nailer air inlet (as shown in Figure 11) before every use, or after 2 hours of continuous use. - Page 17 H5527 PARTS BREAKDOWN H5527 18 Gauge Brad Nailer...
- Page 18 PORP036 O-RING 35.7 X 3.5 P36 PH5527062 PH5527063 AIR PLUG 1/4" NPT MALE PH5527064 CARRYING CASE PAW05M HEX WRENCH 5MM PAW04M HEX WRENCH 4MM PH5527067 COMPLETE O-RING KIT PH5527068 PISTON REPAIR KIT PH5527069 SAFETY GLASSES H5527 18 Gauge Brad Nailer...
-
Page 19: Troubleshooting
5. Nails are wrong angle. Nailer does not fire. 1. Nail is jammed in magazine or 2. Piston shaft is damaged. 3. Air pressure too low. H5527 18 Gauge Brad Nailer ing are damaged. from moving freely in maga- zine. of lubrication. -
Page 20: Warranty And Returns
WARRANTY AND RETURNS Grizzly Industrial, Inc. warrants every product it sells for a period of 1 year to the original purchaser from the date of purchase. This warranty does not apply to defects due directly or indirectly to misuse, abuse, negligence, accidents, repairs or alterations or lack of mainte- nance.
Need help?
Do you have a question about the H5527 and is the answer not in the manual?
Questions and answers