Table of Contents
Advertisement
Advertisement
Table of Contents

Related Manuals for ALLEN & HEATH XONE 92


Summary of Contents for ALLEN & HEATH XONE 92
- Page 1 USER GUIDE Publication AP5345...
-
Page 2: Warranty
Limited One Year Warranty This product has been manufactured in the UK by ALLEN & HEATH and is warranted to be free from defects in materials or workmanship for period of one year from the date of purchase by the original owner. To ensure a high level of performance and reliability for which this equipment has been designed and manufactured, read this User Guide before operating. -
Page 3: Important Safety Instructions
Important Safety Instructions WARNINGS - Read the following before proceeding : CAUTION ATTENTION: RISQUE DE CHOC ELECTRIQUE – NE PAS OUVRIR Read instructions Retain these safety and operating instructions for future reference. Adhere to all warnings printed here and on the console. Follow the operating instructions printed in this User Guide. -
Page 4: Precautions
Important Mains plug wiring instructions. The console is supplied with a moulded mains plug fitted to the AC mains power lead. Follow the instructions below if the mains plug has to be replaced. The wires in the mains lead are coloured in accordance with the following code: TERMINAL WIRE COLOUR... -
Page 5: Table Of Contents
Introduction This user guide presents a quick reference to the XONE:92. We recommend that you read this fully before starting. Included is information on installing, connecting and operating the console, panel drawings, system block diagram and technical specification. For further information on the basic principles of audio system engineering, please refer to one of the specialist publications available from bookshops and audio equipment dealers. -
Page 6: Front And Rear Panel Drawings
PHONO PHONO PHONO PHONO CAUTION MIDI OUT INPUT INPUT INPUT INPUT AVIS: RISQUE DE CHOC ELECTRIQUE - NE PAS OUVRIR. WARNING: THIS APPARATUS MUST BE EARTHED. TO REDUCE THE RISK OF FIRE OR ELECTRIC SHOCK DO NOT EXPOSE APPARATUS TO RAIN OR MOISTURE. LINE LINE LINE... -
Page 7: Welcome To The Xone:92
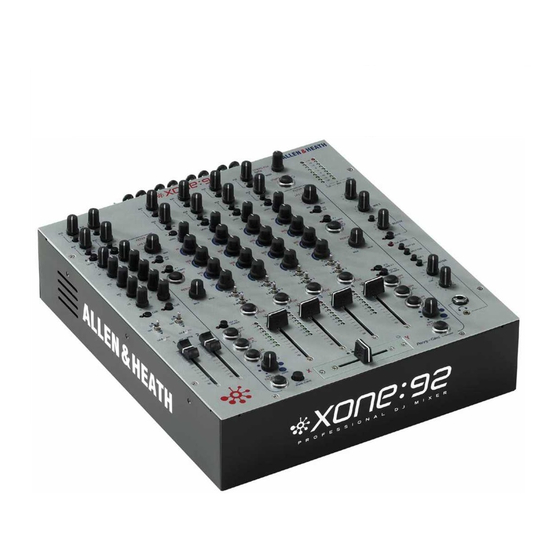
Welcome to the XONE:92 The Allen & Heath XONE:92 presents a unique combination of performance tools for the professional DJ in a stylish and solidly built club format. Above all, it features sound quality second to none. XONE:92 has been designed and constructed using the same rigorous standards we apply to our large format professional consoles used and respected by top engineers throughout the world. - Page 8 PHONO PHONO PHONO PHONO CAUTION MIDI OUT INPUT INPUT INPUT INPUT AVIS: RISQUE DE CHOC ELECTRIQUE - NE PAS OUVRIR. WARNING: THIS APPARATUS MUST BE EARTHED. TO REDUCE THE RISK OF FIRE OR ELECTRIC SHOCK DO NOT EXPOSE APPARATUS TO RAIN OR MOISTURE. LINE LINE LINE...
-
Page 9: The Application
The XONE:92 Application This diagram shows an example hook-up to demonstrate how the XONE:92 can be connected in a typical DJ application. Note that you do not need to connect the channels in the order shown, also that the connector types on the equipment you connect to may be different to that shown. Use cables appropriate to your application. -
Page 10: Quick Start
Quick Start We recommend that you read through all sections of this User Guide before starting. However, we provide these notes so that you can plug up and experiment with sounds from your XONE:92 immediately if you prefer to read the full guide later. Please note that you should first read and understand the Important Safety Instructions printed at the beginning of this guide. - Page 11 8 Check the sound using the Cue system. With the music playing press the large CUE switch. The switch lights as well as the CUE ACTIVE led to show that the cue monitor is active. The channel signal is now sent to the headphones. Slowly turn up the headphones level control until you hear the music.
- Page 12 Changing the crossfader curve. The control knob to the left of the crossfader sets the crossfader curve. In the normal fully anticlockwise position the signal dips by 5dB at the middle position for smooth fading between tracks. Turn the knob clockwise gradually for an increasingly dipless response; whereby the signal starts to dip only once the fader has passed the mid position.
-
Page 13: Gain And Operating Levels
Gain and Operating Levels It is most important that the system level settings are correctly set. It is well known that many DJs push the level to maximum with meters peaking hard in the belief that they are getting the best from the system. -
Page 14: Connecting Mains Power
Connecting Mains Power Read the SAFETY INSTRUCTIONS printed at the front of this User Guide and on the rear panel. Check PHONO PHONO CAUTION MIDI OUT that the correct mains lead with moulded plug has INPUT INPUT INPUT been supplied with your console. The power supply AVIS: RISQUE DE CHOC ELECTRIQUE - NE PAS OUVRIR. -
Page 15: Plugging Up The System
Plugging Up The System The XONE:92 uses professional grade 3 pin XLR, 1/4" TRS jack and RCA PHONO sockets. To ensure best performance, we recommend that you use high quality audio cables and connectors, and take time to check for reliable and accurate cable assembly. It is well known that many audio system failures are due to faulty interconnecting leads. -
Page 16: Cables And Connectors
PHONO PHONO PHONO PHONO CAUTION MIDI OUT INPUT INPUT INPUT INPUT AVIS: RISQUE DE CHOC ELECTRIQUE - NE PAS OUVRIR. WARNING: THIS APPARATUS MUST BE EARTHED. TO REDUCE THE RISK OF FIRE OR ELECTRIC SHOCK DO NOT EXPOSE APPARATUS TO RAIN OR MOISTURE. LINE LINE LINE... - Page 17 1 CH1-2 MIC input. Balanced XLR. Plug in a 7 AUX 1-2 output. Impedance balanced TRS DJ, guest or announcement microphone here. Use jacks. Depending on the application of the Aux mix good quality low impedance dynamic mics such as these stereo line level outputs can be used to feed those specifically designed for vocals.
-
Page 18: Mic/Rtn Input Channel
MIC/RETURN Input Channel These controls adjust the level and tone of each source before they are mixed. Two input channels are provided. Each has two inputs. MIC/RETURN channels 1 and 2 are used for microphone or alternative stereo line source. They provide corrective source equalisation. - Page 19 3 MIC/RTN switch. MIC/RETURN Channels 1 MID 2 This is similar to MID 1 but affects the lower and 2 are the ‘MIC’ channels. They can select mid frequencies centred at 250Hz. Boosting can either the XLR microphone input or the alternative enhance the warmth of the sound while cutting can jack stereo line return input.
-
Page 20: Phono/Line Input Channel
PHONO/LINE Input Channel These controls adjust the level and tone of each source before they are mixed. Four STEREO music channels are provided. Each has two inputs. STEREO LINE inputs 1 to 4 are used for CD decks or alternative stereo music sources and can be routed through the crossfader and Filter effects stage. - Page 21 3 PHONO/LINE switch. Channels 1 to 4 are the LO This is similar to the HI control but affects the low (bass) frequencies below the 250Hz turning stereo ‘MUSIC’ channels. In the up position the switch selects the PHONO input, indicated by the point.
-
Page 22: Crossfader And Vcf
Crossfader and VCF The crossfader is applied to the stereo music channels and lets you smoothly fade from one track into another using a single fader. It is also used as a creative performance tool to layer or interact between two sounds when cut or scratch mixing . -
Page 23: Replacing The Crossfader
Replacing the Crossfader The VCF Filters The crossfader on a DJ mixer is heavily used and A voltage controlled filter is an audio filter where can suffer considerable wear and tear. The audio the cut-off frequency is altered by a DC control design using VCAs prevents clicks and scratchiness voltage rather than a variable resistor. -
Page 24: Lfo Modulation
LFO modulation 8 RESONANCE control. Adjust this to change The XONE:92 VCF filters are further enhanced by the ‘Q’ or ‘sharpness’ of the filters. This affects how two independent LFOs. The LFOs can be applied they respond around the cut-off frequency. At the to either VCF for additional cyclic filter modulation minimum MILD setting the filters have a gentle roll- effects. -
Page 25: Filters Type Select
Filter Type Select HPF. Press this switch to select the high- The filters are ‘state variable’. This means that they pass filter. Frequencies below the cut-off point are provide three simultaneous filter types, high-pass, removed. The cut-off point is adjusted using the band-pass and low-pass. -
Page 26: Master Mix And Monitor System
Master Mix and Monitor System The XONE:92 provides two stereo main mix outputs with independent level control on balanced XLR and jack connections to drive the house PA amplifier system or additional zone feeds. You can make a music only recording by connecting to the independent record output. -
Page 27: Glossary
4 HEADPHONES level control. Adjusts the level 8 CUE/ADD MIX control. Allows the main mix of the signal in the stereo headphones. This does output to be added to the CUE signal. Turned fully not affect the level of the local booth monitor. anticlockwise, only the active CUE is heard through the headphones when CUE is active. -
Page 28: Midi Control Of External Devices
MIDI Control of External Devices MIDI is short for Musical Instrument Digital Interface conceived in the 1980’s so that keyboards and other electronic instruments could have a common interface allowing them to communicate with each another. Applications now include sound and lighting consoles, computer sequencing, show control and performance effects control. -
Page 29: Midi Control Codes
MIDI Control Codes XONE:92 control Controller Code Generated Controller Name VCF 1 FREQ CC12 Effect Control 1 VCF 2 FREQ CC13 Effect control 2 Crossfader movement CC92 Tremolo Level Data Controller (internal option) CC94 Celeste Level Tap Temp LFO 2 MIDI Clocks Start/Stop MIDI Start/Stop-rewind... -
Page 30: Midi Implementation Chart
XONE:92 MIDI Implementation Chart O = Available X = Not used Function Transmitted Received Remarks Basis Channel Internal DIP switch setting Default Option Mode Default Messages Altered Note Number Velocity Note ON Note OFF Aftertouch Keys Channel Pitch Bend Control Change Internal jumper option Program Change System Exclusive... -
Page 31: Glossary
Glossary The following section is included to help you understand some of the technical terms and jargon referred to with consoles of this type. It is by no means a complete reference. Please refer to specialist audio publications should you wish to know more. Amplitude Another term used for signal level. - Page 32 DJ Disc Jockey. The console operator sequencing Hum Apart from not knowing the words… this is and playing the music tracks. Some simply play the the audible noise that usually results from mains tracks, others talk over with introductions and interference pickup, earth loops, bad announcements, and others provide an entertaining interconnections and induced power supply and...
- Page 33 Omni-directional The response of a microphone Sampler Another performance effect popular with which picks up sounds equally all round. Not suited DJs. The channel signal is sent to a digital to live vocal applications as they are more prone to processor that samples (stores) a short duration of feed back.
-
Page 34: Specifications
Specifications 0dBu = 0.775 Volts rms, +4dBu = 1.23V rms 0dBV = 1 Volt rms, -10dBV = 316mV rms Main meters Peak reading 9 led Max output level MIX 1 +22dBu into 47 ohm -20 to +10 MIX 2 +20dBu into 47 ohm +21dBu into 47 ohm Mic EQ 4-Band +/-15dB... -
Page 35: Block Diagram
XONE:92 BLOCK DIAGRAM CROSSFADER XFADE CURVE MIDI OUT PRE-EQ POST-EQ FILTER 2 MIX XFADER - CC92 FILTER 1 MIX PRE/POST EQ SELECT MIDI FILTER 1 FILTER 2 FADER STEREO INPUTS TEMPO/DATA LFO DEPTH LFO DEPTH METER TEMPO TEMPO ADJUST 1,2,3,4 DATA MIDI DATA - CC94 4 BAND EQ... -
Page 36: Installer Link Options
Installer Link Options CAUTION : The following service instructions are for use by qualified personnel only. To reduce the risk of electric shock do not perform any servicing other than that described in the operating instructions unless you are qualified to do so. Refer all servicing to qualified service personnel. -
Page 37: Input Channel
Input Channel There are two configuration options designed into the input channel; one to convert the RIAA turntable input to operate with Line sources, the other to disable the input level +10dB gain. To disable the functions plug the jumpers on to one leg of the connector. This retains them for future use if needed. Input Gain Disable Locate and remove the two jumper sleeves JP5, JP6 illustrated in detail to disable the input gain. - Page 38 VCF 1 and 2 Filter PCB There are several configuration options on the filter PCB. These are maximum resonance limit, VCF filter disable, and change default MIDI setup (Filter 2 Only). To disable the functions plug the jumpers on to one leg of the connector.
-
Page 39: Cue Sheet
XONE:92 CUE SHEET Photocopy and use to log your console settings. XONE:92 User Guide... -
Page 40: Internet Site
Check out my Internet site : http://www.xone.co.uk XONE:92 User Guide...
Need help?
Do you have a question about the XONE 92 and is the answer not in the manual?
Questions and answers