Table of Contents

Subscribe to Our Youtube Channel
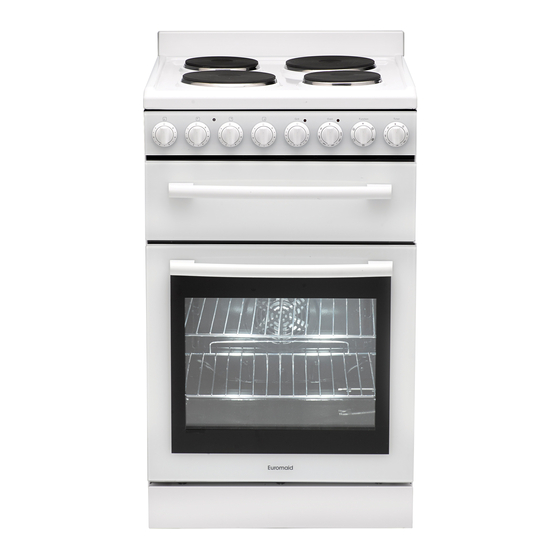
Related Manuals for Euromaid F54CW


Summary of Contents for Euromaid F54CW
- Page 1 540mm Separate Grill Upright Cooker USER MANUAL Front Control Models White F54CW F54EW F54RW F54GW FD54CW FD54EW FD54RW S/Steel F54CS F54ES F54RS F54GS FD54CS FD54ES FD54RS Rear Control Models White R54CW R54EW R54RW Euromaid price, quality, performance...
-
Page 2: Table Of Contents
Contents Conditions of use .........................3 Safety precautions ........................3 Other important safety information ....................3 Warnings for use of grill, oven, and appliance hob ..............4 Disposal of packaging .......................4 Installation, cleaning and servicing ...................5 Product description ........................6 First time use of the appliance ....................9 Using the oven ...........................10 Using the grill ..........................14 Using the hotplates of your cooker ..................15... -
Page 3: Conditions Of Use
• Gas models are NOT APPROVED for installation in • The cooktop area including the entire hob will marine craft, caravans or mobile homes. become very hot when in use. Care MUST BE TAKEN when using this part of the appliance. The Manufacturers and Importers / Distributors and Retailers shall not be liable to any legal liability, • Install cooker, shelving and fittings in accordance personal injury and property damage due to with this Manual. incorrect operation or incorrect Installation. • Ensure all specified vents, openings and air spaces are not blocked. Other important safety information According to the electrical safety regulations This appliance must not be used as a space the appliance equipment must be properly heater. earthed. Do not obstruct the ventilation slots on front Do not use corrosive cleaners e.g. oven or back of appliance. cleaners that contain caustic soda. Do not remove any labels or use abrasive/ corrosive cleaners on. Euromaid 540mm Upright Cooker CONDITIONS OF USE... -
Page 4: Warnings For Use Of Grill, Oven, And Appliance Hob
(vegetable oils) when roasting uncovered food used should have completely flat bases. causes deposits inside the oven which are very difficult to remove. • Ensure cookware states it is suitable for use on ceramic glass. Some aluminium and copper based • If you have an upright cooker with a gas oven that cookware can cause minor pitting of the ceramic does not light within about in 5 - 8 seconds, allow 1 glass surface. minute for gas to disperse clear before trying again. • DO NOT use the ceramic cook top as extra bench space or as a cutting board. • AVOID dropping heavy objects onto the ceramic glass surface as damage can occur • Immediately clean glass when sugary liquids have spilt eg. stewed fruit, jam, melted sugar. Disposal of packaging Please recycle the cardboard, and also any polystyrene packaging where possible. Euromaid 540mm Upright Cooker WARNINGS FOR USE OF GRILL, OVEN, AND APPLIANCE HOB... -
Page 5: Installation, Cleaning And Servicing
Installation Instructions must be followed. result in shattering of the glass. • In order to avoid accidental tipping of the appliance • DO NOT use steam cleaners as a method to clean (for example, by a child climbing onto the open this appliance. oven door), the anti tilt bracket and stability bolt must be installed propoerly and securely to the floor. • Always clean the appliance immediately after any food spillage. • Where the appliance is installed next to cabinets, the cabinet material must be capable of • To be serviced only by an authorized person. withstanding 85º. • Appliances requiring connection to 220-240V and • Only authorised personnel should carry out must be earthed. servicing (Certificate of Compliance to be retained). • Gas models are NOT APPROVED for installation in marine craft, caravans or mobile homes. • WARNING - Always ensure the appliance is switched off before cleaning or any maintenance is carried out such as changing of light globes. Euromaid 540mm Upright Cooker INSTALLATION, CLEANING AND SERVICING... -
Page 6: Product Description
1 1. G rill tray wire rack insert (reversible to adjust height) 1 2. E namelled grill tray (1 supplied) 1 3. F an & element cover 1 4. O ven rear fan forced element 1 5. H idden oven base element 1 6. R ear adjustable anti slip feet (2) 1 7. A nti tilt floor bracket 1 8. K ick panel (stability bolt located behind kick panel) 1 9. Front adjustable anti slip feet (2) Euromaid 540mm Upright Cooker PRODUCT DESCRIPTION... - Page 7 Gas F54GW / F54GS • Adjusts grilling temperature. 5. Oven temperature control knob • Adjusts oven temperature. Grill Oven Function Timer 6. Function switch control knob • Sets oven function / mode. 7. 120 Minute Ringer Timer (Some models fitted with 3 1. Hotplate elements / burners control knobs button clock with digital display) • Sets elements or burners cooking temperature. • Sets “reminder” alarm count-down time, or if oven is being used, the cooking time until oven 2. Grill indicator lamp switches OFF. • Comes on when grill is below set temperature, NOTE: The gas burner control knobs have to be cycles on and off during grilling. held down for approximately 5 seconds to ignite. 3. Oven indicator lamp • Lamp is on when oven element is heating up oven, then cycles on and of. Euromaid 540mm Upright Cooker PRODUCT DESCRIPTION...
- Page 8 • Sets “reminder” alarm count-down time or if • Comes on when a hotplate is turned on. oven is being used, switches oven OFF after cooking time set has ended. 3. G rill Indicator Lamp 9. Ceramic Cook top Control Knob • Comes on when grill is below set temperature, cycles on and off during grilling. • Adjusts temperature of ceramic cook top. 4. Oven Indicator Lamp Can be rotated in either direction. • Lamp is on when oven element is heating up 1 0. Programmable Clock (where fitted) oven, then cycles on and off. • Sets cooking reminder times. 5. Grill Temperature Control Knob • Sets automatic cooking duration and stop time • Adjusts grilling temperature. NOTE: Clock time must be set before oven can 6. Oven Temperature Control Knob operate. • Adjusts oven temperature. Euromaid 540mm Upright Cooker PRODUCT SPECIFICATION...
-
Page 9: First Time Use Of The Appliance
• The 5 position side rack system can house both the standard oven shelves and baking tray. Digital Timer with 3 buttons Level 5 Level 4 Level 3 If you have purchased a model fitted with a 3 button Level 2 programmable timer, you must set the time of day Level 1 before you can operate your appliance. • After the appliance has been electrically connected “00.00” will be displayed and the“ ” will flash. • To set the time of day, press the “–” or“+” buttons. 15 seconds after the last change, the “ ” will disappear, confirming the time has been set. NOTE: The clock has a 24-hour display Euromaid 540mm Upright Cooker FIRST TIME USE OF THE APPLIANCE... -
Page 10: Using The Oven
1) Oven Function Knob Function 2) Oven Temperature (thermostat) Knob Oven Description of each oven function (mode) • Selection of cooking temperature is carried out by turning the knob clockwise to the required Lamp “ ” temperature, between 60ºC to MAX. The lamp of the oven is on. No heating elements are on. • If the appliance is electric the “oven indicator lamp” will come on when the oven is heating up. When Conventional cooking / no fan it goes out it means that it reaches the required (uses hidden bottom element) “ ” temperature. The oven indicator lamp going ‘on & off’ during use is then normal. This means that oven Suitable for cakes, biscuits, slow cooking and ideal temperature is being constantly maintained at the for blind baking. Good for slow cooking at lower selected level. tempeartures (below 150 degrees celcius). Do not use lowest shelf position as base of food can burn as it is close to the element. 10 Euromaid 540mm Upright Cooker USING THE OVEN... - Page 11 ” heating indication will flash for this period unless the “ ” selection button is pressed. The clock will return to the time of day display when either of the above tow actions occur. Remarks • If you press “ + ” up key or “ – ” down key for more 1 Heating indication than 3 seconds, the value will change quickly. 2 Clock indication • When setting the Time of Day or Duration Timer the 3 Hour indication “ : ” does not blink although will blink when in either either normal Time of Day mode or Duration Timer 4 Second indication is displayed. 5 Minute indication 6 Up 7 Set 8 Down Euromaid 540mm Upright Cooker USING THE OVEN 11...
-
Page 12: Oven Cooking Guide
When using you could use position 3 of the oven Meat/Poultry/Fish Fan Forced - Rec. Temp (ºC) Minutes per kilogram Rare 35-40 Medium 45-50 Beef Well done 55-60 Medium Lamb Well done Veal Pork Chicken 45-60 Duck 60-70 40–45 (less than 10kg) Turkey 35–40 (more than 10kg) Fish 160-170 12 Euromaid 540mm Upright Cooker USING THE OVEN... - Page 13 Baking tins dark Change to shiny light tins Baking temperature too low Raise the temperature Food too low in oven Cook one shelf higher Baked products are pale, flat and under cooked Baking time too short Increase cooking time Incorrect baking tin size Use correct size tin Baking temperature too low Raise the temperature Baking time too short Increase cooking time Cakes fallen in centre Proportions of ingredients incorrect for recipe Check recipe Opening door too early during baking Do not open door until the last quarter of cooking time Roast meat and potatoes Poor hot air circulation Elevate food onto a rack to allow air circulation not browning in fan oven Oven temperature is too low Increase temperature to 200 - 220 Not long enough in oven Continue cooking for another 15+ minutes NOTE: Condensation on oven door is normal, especially when kitchen is cold Also spacing and size of food on trays and the number of baking dishes in the oven can affect air circulation. Euromaid 540mm Upright Cooker USING THE OVEN 13...
-
Page 14: Using The Grill
Build-up of Clean grill enamelled fats in grill tray and wire rack after every use Trim fat from meat prior Excess grill to cooking Grill information smoke Grilled steaks Cut slits into fat with • The grill function is suitable for tender cuts of and chops knife towards meat or meat, steak, chops, sausages, fish, bread, cheese curling remove all fat prior to toasties and other quick-cooking foods. grilling • Preheat for 3 minutes. • Place food once the grill chamber afetr pre-heating is finished • The grill drawer door must be closed during grilling. 14 Euromaid 540mm Upright Cooker USING THE GRILL... -
Page 15: Using The Hotplates Of Your Cooker
NOTE: Stored heat in the hotplate can be used for the last few minutes of cooking. Simply turn off the control. • The high-speed radiant hotplates heat rapidly from Choosing Cooking Pots a cold start. Look at this diagram below which shows you which • The radiant elements can be unplugged and the cooking pot and pans to use on the hotplates and trim rings can be removed for cleaning the spillage which ones that should not be used. bowls • Always use pots and pans with flat bottoms. Uneven or thin bottoms will waste energy and cook slowly. • Always use pots and pans which are slightly larger than the hotplate. Small pans waste energy. • Always put dry pots and pans on the hotplates. • Do not use pots and pans which are too large. Pans which overhang the hotplate more than 50 mm can damage the hob or surrounding surfaces. Euromaid 540mm Upright Cooker USING THE HOTPLATES OF YOUR COOKER 15... - Page 16 • Over time, the hotplates can discolour from spills • A glass scraper should be used to remove burnt during cooking. We recommend to use Hillmark on and very stubborn spills created during cooking, ‘Shine On’ hotplate protector, on a regular basis Warm soapy water, followed by wiping with a dry to extend the life of the hotplates and reduce the soft cloth is fine for daily cleaning. risk of rusting as this forms a protective waterproof • Periodic care, approximately once a month, should coating on the hotplates. This can be purchased be carried on the ceramic glass surface. We from major hardware outlets and supermarkets. recommend the use of Hillmark ‘Cerapol’ ceramic cooktop cleaner to remove stubborn stains. • To maintain and protect the ceramic glass surface over time Hillmark ‘Ceraseal’ ceramic cooktop protector is recommended. This silicon based product creates a thin film of the ceramic glass surface. • Scratches can appear on the glass surface although do not effect the use of the cooktop. 16 Euromaid 540mm Upright Cooker USING THE HOTPLATES OF YOUR COOKER...
-
Page 17: Using The Hotplate Gas Burners
• Used with WOK, large size pots and pans. • For rounded bottom woks use WOK adapter. A Burner cap 2. Small Burner B Ignition plug • Used for simmering. C Thermocouple • Used with small pots and pans. D Wok burner cap 3. Semi-rapid Burner • Used for normal cooking. • Used with middle size pots and pans. To conserve gas, place the pan centrally over the burner and adjust the flame so that it does not go past the edges of the cookware. Euromaid 540mm Upright Cooker USING THE HOTPLATE BURNERS OF YOUR GAS COOKER 17... -
Page 18: Fitting Oven Accessories And Cleaning
Cleaning the electric cook top Radiant hotplates • Remove all spilt food with the razor blade scraper supplied while the hotplate is still warm turned off) – NOT HOT. • If aluminium foil, plastic items or foods with a high sugar content melt onto glass, use the razor blade scraper to remove immediately before the hotplate has cooled, otherwise pitting of the surface may occur. High sugar content foods include jam, fruit, carrots, tomatoes and peas. These coiled hotplates are self cleaning. To clean the • When the ceramic hotplate has cooled, wipe clean trim rings, lift front of element and remove trim ring. with dishwashing detergent on a damp cloth. Then wash in warm, soapy water. To clean the spillage bowl, lift element and pull out of socket. Remove NOTE: Do not use abrasive sponges or scourers, spillage bowl and wash in warm soapy water oven sprays or stain removers on ceramic hotplates. These may damage, scratch or stain the DO NOT PUT ELEMENTS IN WATER! ceramic cook top. Any pitting, staining or scratching will not be covered by warranty. 18 Euromaid 540mm Upright Cooker FITTING OVEN ACCESSORIES AND CLEANING... -
Page 19: Cleaning The Oven
• Clean the sides an bottom of compartment with hot soapy water. If stronger action is needed use a non abrasive Figure 2 cleaner applied with a nylon scourer. Cleaning the Oven • The burner caps and crowns are removable for cleaning. • Open the door fully. • Flame port blockage should be removed by means • Remove oven shelves and side racks. of a match stick or brush. • Clean in hot soapy water. • If the caps, crowns and cups are heavily soiled, use • Thoroughly dry with a soft cloth to remove excess a non-abrasive cleaning compound. water that may be present. • Do not clean them with abrasive or caustic type cleaners, or put in a dishwasher as they will be damaged. Euromaid 540mm Upright Cooker FITTING OVEN ACCESSORIES AND CLEANING 19... - Page 20 Removing the Inner Pane of Glass • Triple Glazed oven door: Remove the top frame (G) by unscrewing the 2 screws, located on the left and right sides • Gently pull out the inner pane of glass (fig. 2). Also remove the centre pane of door glass, not shown here. • Clean the glass panes with an appropriate cleaner. Dry thoroughly, and place on a soft surface. • Now you can also clean the inside of the outer glass. Cleaning the door glass • Clean the glass door using non-abrasive products or sponges and dry it with a soft cloth. Fig. 2 Fig. 1 • Do not use the oven without the inner door panes fitted correctly. When re-fitting inner glass door panes ensure they go back in facing the same way they came out. The doors are coated with a very slight reflective coating to reflect the heat back into the oven cavity and keep the outer door cooler to touch. • Do not use harsh abrasive cleaners or sharp metal scrapers to clean the oven door glass since they can scratch the surface, which may result in shattering of the glass. 20 Euromaid 540mm Upright Cooker FITTING OVEN ACCESSORIES AND CLEANING...
- Page 21 Fitting oven accessories and cleaning Replacing the Oven Lamp • Disconnect the oven from the power supply at the fuse-box by means of the switch used to connect the appliance to the electrical mains or unplug the appliance if a gas model. • Remove the glass cover of the lamp-holder by rotating anti-clockwise. Be aware that the glass may be difficult to remove if there is a build up of oil and grease created during cooking. In this case the glass may need to be cleaned with hot soapy water to break this build up. • Remove the lamp and replace with a lamp resistant to high temperatures (300ºC) with the following characteristics: • Voltage: 220-240V • Wattage: 25W • Type: E 14 Replace the glass cover. Reconnect the appliance to the mains power supply. Euromaid 540mm Upright Cooker FITTING OVEN ACCESSORIES AND CLEANING 21...
-
Page 22: Solving Problems
Oven not hot enough for cleaning Door seal is worn or has moved Replace seal or refit it Power failure or interruption Reset time of day Digital timer display flashing Household fuse blown or power Check fuses, power supply supply is off Unit smoking when first Protective oils being removed This is normal used Odour on first use of This is normal oven Allow 1–4 hours for odour to dissipate (open all windows) 120 minute timer buzzer Timer not wound sufficiently Turn timer knob past 15 minute mark not audible Then turn to the required number of minutes Oven shelf tight Oven shelf not inserted correctly, may be upside Remove shelf and insert as per diagram down or back to front Clock display off Household fuse blown or power Check fuses, power supply supply is off NOTE: Only service centers should carry out servicing. Otherwise warranty may be void. 22 Euromaid 540mm Upright Cooker SOLVING PROBLEMS... -
Page 23: Installing Cooker - Power Connections
Min6 — Min6 Min6 Min1.5 Min2.5 Min6 Min6 Connecting the supply cable to the mains Install an approved circuit breaker with a minimum contact opening of 3 mm, between the appliance and the mains fuse box. The circuit breaker should be sized according to the load and should comply with current regulations (the earth wire should not be interrupted by the circuit breaker). The supply cable should be positioned so that it does not reach a temperature of more than 50ºC with respect to the room temperature, anywhere along its length Before switching fuse ON in meter-box check: • Earth continuity. The electrical safety of this appliance can only be guaranteed if the cooker is correctly installed and earthed, in compliance with regulations on electrical installations. • The electrical capacity of the system and sockets will support the maximum power of the appliance, as indicated on the data plate • Go to section 19 “Installing your new cooker” NOTE: All Upright cookers must comply to local regulations to Australian Stanadrd AS/NZS 3000:2007 guidelines. Qualified Electrician will have a copy of these guides that MUST be adhered to. Euromaid 540mm Upright Cooker INSTALLING COOKER – POWER CONNECTIONS 23... -
Page 24: Installing The Gas Cooker
Read these points before connecting to the gas supply; When installing, fit a safety tap at the end of the pipeline. The appliance leaves the factory tested • The gas connection point is a 1/2” BSP external and set for the type of gas indicated on the thread located at the rear of the appliance as shown plate inside the bottom guard, close to the gas in the Rear View. connection pipe. Make sure that the type of gas to • A regulator is supplied for natural gas appliances be supplied to the appliance is the same as that which must be fitted in the supply line to the shown on the plate. appliance. For LPG the supplied brass Test Point For maximum efficiency and minimum consumption, Adapter / Fitting must be fitted to the supply line. ■ make sure that the gas supply pressure complies • It is recommended to fit the regulator or test point with the values shown in the gas used is different fitting to the appliance connection point, then fit from that specified (or variable).a suitable pressure either hard piping or a flexible connection from regulator must be installed on the supply pipeline. the regulator or test point fitting to consumer hard piping. Ensure installation allows withdrawal of appliance. For flexible hose installation AS/NZS 5601.1 clauses 5.9 and 6.10.1.9 must be followed. 24 Euromaid 540mm Upright Cooker INSTALLING THE GAS COOKER... - Page 25 Installing the gas cooker Operation on Natural Gas Read these points about operation on NG/SNG and look carefully at the diagram: • The appliance regulator provided must be orientatedto give access the manometer test point. • The arrow showing the direction of the flow must be facing the correct way from gas source into the cooker. • The regulator has a 1/2”BSP internal thread at inlet and outlet Test Point Operation on Universal LPG An inlet fitting with pressure test point is provided. The inlet fitting has 1/2" BSP internal thread for both inlet and outlet. The inlet fitting must be orientated so that the pressure test point is accessible. When the installation is complete, always check that all the unions are absolutely tight using a soapy solution. Never use a flame to make this check. Euromaid 540mm Upright Cooker INSTALLING THE GAS COOKER 25...
-
Page 26: Testing The Operation Of The Gas Cooker
Checking the Function of the Regulator • If you are satisfied that the cooker is operating With the appliance operating check the outlet pressure: correctly, then turn it off and show the customer how to use it. Make sure you ask the customer to When all burners of the appliance are operating at ■ operate the clock and controls. maximum, NOTE: If the cooker cannot be adjusted to perform When the smallest burner of the appliance is ■ correctly, then inform the customer of the problem operating at minimum. and put a warning notice on the cooker. If the Under these conditions the outlet pressure should not problem is dangerous, then disconnect the cooker. vary from the nominal outlet pressure of 1.0kPa by more If there is a fault, then the customer should be than ±20% of the nominal outlet pressure (±0.20kPa for advised to contact the manufacturer’s local service Natural Gas). organisation or the retailer. 26 Euromaid 540mm Upright Cooker TESTING THE OPERATION OF THE GAS COOKER... -
Page 27: Installing Your New Cooker
• The appliance must not be installed in a corner. It screwed onto the rear of the cooker. must be installed at least 100mm from the side wall. • The flexible pipe for gas models must have sufficient loops so the cooker can be moved for service. • The vents; openings and air spaces MUST NOT be blocked. • The anti-tilt floor bracket must be installed to avoid accidental tipping. • The stability bolt must be installed to avoid accidental moving. • You must not pull the cooker by the door handles. • Power socket, if provided for gas models, and electricity isolation switch for electric models and gas models without a 20A plug, is to be installed in an accessible position near the cooker (but not behind cooker). Packaging of Front control models • If the supply cord or cable is damaged, it must be replaced by an approved service agent or a similarly qualified person in order to avoid a hazard. Packaging of Rear control models Euromaid 540mm Upright Cooker INSTALLING YOUR NEW COOKER 27... - Page 28 Installing your new cooker Locating the cooker Front control models - gas Study the diagrams below to be sure of the dimensions required to locate the cooker safely. Make sure that the top of the cooker is at least 10mm higher than the The installation of splash back level of the bench tops. Unscrew leveling legs by about 10mm to give clearance to the anti-tilt floor bracket. • To fit splash back, align the 2 tabs of the splash The appliance has been designed to fit in a 550mm back with the corresponding holes in the hob and wide gap in kitchen cabinets. The cooker may also be push downwards. installed at the end of a line of benches or with a free • Fit screws. space on either side. NOTE: To ensure cooker stability, both the anti-tilt floor bracket and anti-movement / stability bolt (this is fitted to the cooker during and located behind the kick panel) must be installed on all cookers (electric and gas). Rear control models 28 Euromaid 540mm Upright Cooker INSTALLING YOUR NEW COOKER...
- Page 29 • Slide the cooker back into the anti-tilt plate so that rear cover rests against the rear wall. Then check the height and level of the cooker. If required, pull the cooker back out and adjust the leveling feet as required. 25mm from side of bracket on both sides to cupboards or walls Kick Panel Stability Bolt Stability Bolt Bracket Stability Bolt Hole in Floor Euromaid 540mm Upright Cooker INSTALLING YOUR NEW COOKER 29...
-
Page 30: Technical Specifications
1650-1800 hob power (W) 6000 product dimension (mm) 540*630*1140 package size (mm) 636*740*1200 gross/net weight (kg) 63.5/54 Model R54CW oven capacity (L) grill capacity (L) voltage (v) 220-240 frequency (Hz) 50/60 circuit breaker (A) (9.07kW) 37.79 Amp oven power (W) 1710-2030 grill power (W) 1650-1800 hob power (W) 5400 product dimension (mm) 540*630*1140 package size (mm) 636*740*1200 gross/net weight (kg) 65.5/56 30 Euromaid 540mm Upright Cooker TECHNICAL SPECIFICATIONS... - Page 31 1650-1800 hob power (KW) 5000 product dimension (mm) 540*630*910 package size (mm) 636*740*976 gross/net weight (Kg) 63/55.5 Model F54RW, F54RS oven capacity (L) grill capacity (L) voltage (v) 220-240 frequency (Hz) 50/60 circuit breaker (A) (9.37kW) 39.04 Amp oven power (W) 1710-2030 grill power (W) 1650-1800 hob power (W) 6000 product dimension (mm) 540*630*910 package size (mm) 636*740*976 gross/net weight (Kg) 60/52.5 Euromaid 540mm Upright Cooker TECHNICAL SPECIFICATIONS 31...
- Page 32 Technical specifications Model F54CW, F54CS oven capacity(L) grill capacity(L) voltage (v) 220-240 frequency (Hz) 50/60 circuit breaker (A) (9.07kW) 37.79 Amp oven power (W) 1710-2030 grill power (W) 1650-1800 hob power (W) 5400 product dimension (mm) 540*630*910 package size (mm) 636*740*976 gross/net weight (kg) 63.5/56 32 Euromaid 540mm Upright Cooker TECHNICAL SPECIFICATIONS...
-
Page 33: Notes
Notes Euromaid 540mm Upright Cooker NOTES 33... - Page 34 Euromaid price, quality, performance www.euromaid.com.au...
Need help?
Do you have a question about the F54CW and is the answer not in the manual?
Questions and answers