
Related Manuals for SecurityMan SM-825DTH


Summary of Contents for SecurityMan SM-825DTH
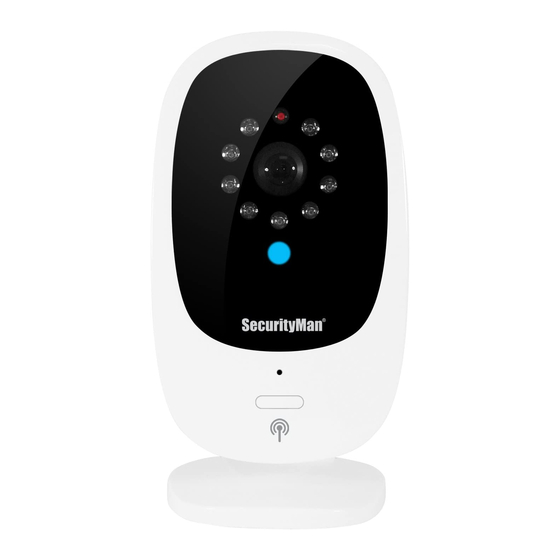
- Page 1 User’s Guide App Based iSecurity WiFi Camera For Smartphone and Tablet (Standalone or IWATCHALRM Add-On) Model: SM-825DTH...
- Page 2 SecurityMan. The content of this manual is furnished for informational use only, is subject to change without notice, and should not be construed as a commitment by SecurityMan. SecurityMan Inc assumes no responsibility or liability for any errors or inaccuracies that may appear in this book.
- Page 3 Limitation of Liability The liability of SecurityMan Inc, arising from this warranty and sale shall be limited to a refund of the purchase price. In no event shall SecurityMan be liable for costs of procurement of substitute products or services, or for any lost profits, or for any consequential, incidental, direct or indirect damages, however caused and on any theory of liability, arising from this warranty and sale.
-
Page 4: Table Of Contents
Table of Contents Introduction Features Contents Product Basics Hardware setup Mobile device setup (Smartphone / tablet) Adding the camera to the app (Smart Config Method) APP (camera live) live view and settings Live View Icons Back Live View Snapshot Refresh Talk Stream Quality Settings... - Page 5 App and manage all alerts effortlessly. It also comes equipped with 2-way audio so you can communicate from wherever, wherever. Simply download our free App, connect your SM-825DTH, and enjoy all the benefits of a WiFi based IP camera.
- Page 6 • DO NOT use this product to carry out any illegal activities such as sneak preview, and etc. SecurityMan shall not be responsible for any consequences of illegal conducts made by users. • DO NOT put the plastic package bags in reach of children or babies. Young children can choke on these items if they put them into their mouths.
- Page 7 • DO NOT touch, shake or hold the antenna. Touching, shaking or holing the antenna might influence the receiving of electromagnetic wave, and thereby influence the receiving effect. • DO NOT use the camera in complex environment, the obstruction of stumbling block will affect the electromagnetic wave and influence the receiving range.
-
Page 8: Product Basics
Product Basics HARDWARE SETUP Insert your Micro SD memory card (not included) into the TF slot located on the back side of the camera. Then insert the female end of the cameras AC adapter into the DC in port located behind the camera and the other end into a wall outlet closest to you. -
Page 9: Mobile Device Setup (Smartphone/Tablet)
MOBILE DEVICE SETUP (Smartphone/Tablet) Open the App Store (iOS) or Google Play (Android) on your mobile device. Then search for and install the “CAMERALIVE” application. ADDING THE CAMERA TO THETHE APP (Smart Config Method) The CAMERALIVE app has a built in “user friendly” step-by-step interactive guide that you can follow when adding the camera. - Page 10 Tap on the SEARCH IN LAN option, and then select SMART CONFIG. “Press and Release” the pair button on the front of the camera. At this point the green power LED located on the front of the camera will start to flash rapidly indicating that it is in pair mode.
- Page 11 Once your camera has been detected by the app the green power LED on the camera should start to flash steady. When prompted, give your camera a name (front door, living room, etc) input the default camera password 123456 and tap save. Once completed, your cam- era will be added to the device list area.
-
Page 12: App (Camera Live) Live View And Settings
When you have a live view of the camera image, you can then swipe up, down, left & right to move the camera in the corre- sponding direction (Not applicable for SM-825DTH model). LIVE VIEW ICONS 1. -
Page 13: Back
BACK Tapping on the Back option will return you to the previous screen. LIVE VIEW Cameras live feed. SNAPSHOT Takes a snapshot of the current live view and saves it to your phones photo album. REFRESH Refreshes the connection between the phone and the camera, and should only be used when the live view becomes frozen, disconnected or unstable. -
Page 14: Settings Menu And Options
SETTINGS MENU AND OPTIONS The camera settings and configuration menu options allow you to change device and admin password, enable/disable motion detection recording, playback events and much more. Here is a list of options available. Camera Name Change Admin Password Video Rotation Motion Detection Set Date &... -
Page 15: Camera Name
CAMERA NAME Displays the camera’s name The Device ID (DID) section provides you with the cameras ID which is used to add the camera to the app, unique to each device and is not configurable. FIRMWARE VERSION The Firmware Version section displays the cameras current firmware version and is not configu- rable. -
Page 16: Event (List Video Playback)
EVENT LIST (VIDEO PLAYBACK) NOTE: For best results, we recommend using a Micro SD card class 6 or higher (Support up to 32GB). The Event List option is to view and playback recorded events that are stored on the Micro SD card inserted into the back of the camera. -
Page 17: Overwrite
The load option will bring up all the events stored for the set search criteria. Locate the event you want to playback and tap on it to play it. OVERWRITE The overwrite option enables and disables the out overwrite feature. Enabling the loop record feature allows the camera to loop back to begin deleting old files stored on your memeory card to make room for new files. -
Page 18: Video Rotation
VIDEO ROTATION Video Rotation allows you to change the cameras flip the live view so that you can mount the camera upside down. Options include normal, horizontal, vertical and 180 degrees. To change the image orientation, simply tap on the video rotation option and select from the options provided. -
Page 19: Wifi
WIFI Used to change or connect the camera to your Wi-Fi network. To connect or change the net- work, simply tap on the WIFI option, select the WIFI network you want to connect too. Then enter the password associated to the selected network and tap join to connect to the network. - Page 20 Create a directory (Camera, Security, etc) name for the recordings to be stored in and select the account type (Dropbox or Baidu). Now tap on account settings to login to the storage type account. Enter the storage credentials, click on the sign in option when done and then tap on the apply option to apply the settings.
-
Page 21: Apply
APPLY Applies all the changes made to the camera ADDING A CAMERA TO APP (Alternative Methods) The CAMERALIVE app has multiple “user friendly” step-by-step interactive guides that you can follow when adding a new camera to the app. Below are all methods that can be used with step by step instructions on how to use them. - Page 22 Search In LAN QR Scan Manual Input SEARCH IN LAN The Search In LAN option consist of 3 methods that add your new camera to your wireless network and Smartphone all in one shot. Smart Config Broadcast in LAN AP Mode...
- Page 23 SMART CONFIG (direct wifi setup) Please refer to the “adding the camera to the app (SMART CONFIG Method)” section at the start of this user’s manual. BROADCAST IN LAN The Broadcast in LAN option performs a search for cameras currently connected to your network.
- Page 24 Identify the DID (device ID) that corresponds to the Serial ID printed on your cameras QR code and select it. Once selected, you will be prompted to give your camera a name (front door, living room, etc). After naming your camera, input the default camera password 123456 and tap save.
- Page 25 Select the Wi-Fi network you want to put the camera on, input the Wi-Fi password associated with the selected network and press ok. Wait for your camera to reboot and press next. Identify the DID (device ID) that corresponds to the Serial ID printed on your cameras QR code and select it.
- Page 26 QR SCAN The QR Scan option does not require you to setup any network or WIFI information (for wifi setup refer to SMART CONFIG or AP MODE) and is a quick and easy way to add a camera to a secondary device (wife, kids, etc) once it the camera has already been added to a network.
- Page 27 Once your QR code has been scanned, you will be prompted to give your camera a name (front door, living room, etc). After naming your camera, input the default camera password 123456 and tap save. Once completed, your camera will be added to the device list area. MANUAL INPUT The Manual Input option does not require you to setup any network or WIFI information (for wifi setup refer to SMART CONFIG or AP MODE) and is a quick and easy way to add a camera...
- Page 28 Tap on the Manual Input option, and then manually input the serial id number (alpha numeric) located underneath the camera into the DID field. Once you are done inputting the serial ID, give your camera a name (front door, living room, etc).
- Page 29 Specifications Lens 1/4 “ CMOS color Sensor OV9712 SM-825DTH Focal Length 3.6mm WiFi IP Camera Viewing Angle 70 degree System P2P (Cloud Technology) Video Compression H.264 Resolution 720P HD (1280 x 720) Video Rate 30fps Motion Detection Transmission Wi-Fi WiFi Interface 802.11b/g/n...
- Page 30 www.securitymaninc.com...
Need help?
Do you have a question about the SM-825DTH and is the answer not in the manual?
Questions and answers