Table of Contents
Advertisement
Quick Links
Advertisement
Table of Contents

Related Manuals for Doro PHONEEASY 115


Summary of Contents for Doro PHONEEASY 115
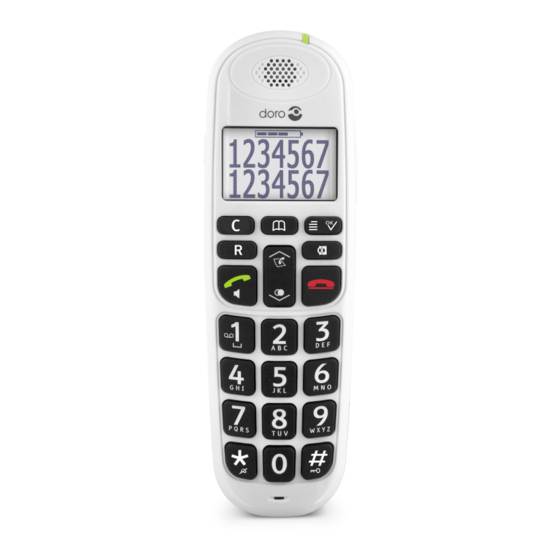
- Page 1 PhoneEasy ® English...
- Page 3 English Phonebook 10. Mute Boost (sound 11. Menu key/OK amplification) 12. Volume Intercom 13. Call log/Up Recall key 14. Ringer LED Call key/Speaker phone 15. Paging Redial/Down 16. Answering machine Ringer on and off functions Keypad lock and unlock 17. Touch screen/base display End call / Switch on/off handset...
-
Page 4: Table Of Contents
English Contents Installation ..............1 Connection ............1 Basic setup ............1 Operation..............3 Making a call............3 Receiving a call ............ 3 Redial ..............3 Speaker mode............4 Mute..............4 Call timer ............. 4 Entering text............4 Keypad lock ............4 Paging .............. - Page 5 English Sound ................10 Ringer..............10 Tones ..............11 Settings ..............11 Handset settings ...........11 Base settings............12 Expanded system (two or more handsets) ....13 Answering machine............15 Setup from handset..........15 Use from handset ..........16 Use from base unit ..........18 Out of memory............19 Remote access .............19 Others ................20 Range ..............20 Eco Functionality ..........20...
-
Page 6: Installation
English Installation This device is intended for the analogue telephone network lines in AT, BE, BG, CH, CY, CZ, DE, DK, EE, ES, FI, FR, GB, GR, HU, IE, IS, IT, LV, LT, LU, MT, NL, NO, PL, PT, RO, SI, SK, SE. Connection Connect the mains adapter to an electrical wall socket and to y on the base. - Page 7 10. Enter current date. Press w/0. Note! If the PhoneEasy 115 base unit’s display is showing – – the answer machine is disconnected, or time/date is not set. You need to set the correct date and time to gain full functionality.
-
Page 8: Operation
English Enter the alarm time. Press w/0. Scroll to Ringtone . Press w/0. Press w/0. Note! When the alarm goes off, ALARM is displayed. Turn off the signal with any key. The volume is determined by the handset ringer volume. If the handset Ringervolume is set to Off, the alarm still sounds at Level 1. -
Page 9: Speaker Mode
English Speaker mode To switch between handset/speaker press q. When activated is displayed. Note! Please remember that in speaker mode, it is only possible for one person at a time to talk. To save power, speaker and the display light ceases to operate at low battery strength. Mute Switch on/off the microphone during a call with z. -
Page 10: Paging
English Note! The emergency numbers 999, 112 and 911 can be dialled without unlocking the keypad. Paging Press J on the base unit to page the handset/s. The handset/s will ring and Paging is displayed. The signal will stop automatically, or press J again, or press k on the handset. -
Page 11: Phonebook
English CAUTION The handset volume can be very loud. Boost should only be used by persons with impaired hearing ability. Phonebook The phonebook will store 100 contacts. Contacts in the phonebook are arranged alphabetically. Each name can be up to 10 characters in length, and phone numbers can be up to 24 digits in length. -
Page 12: Copy Contacts To Another Handset
English Scroll to the contact you want to edit. Press w/0. Scroll to Edit. Press w/0. Edit the name. Delete/backspace with C. Press w/0. Edit the number. Delete/backspace with C. Press w/0. Select the required Group. Press w/0. Copy contacts to another handset Only for expanded system, with two or more handsets. -
Page 13: Speed Dial
English to Edit group. Press w/0. Scroll Scroll to the group you want to edit. Press w/0. Scroll to Rename group/Set ringtone. Press w/0. Make your selections and then press w/0 to confirm. Speed dial Once a contact has been saved as Speed dial you only need to press one key to make a call. -
Page 14: Retrieving And Dialling
English along with the date and time. New call/New calls will be displayed in standby mode. Note! This function requires a subscription from your service provider. Contact your service provider for more information. Retrieving and dialling Press . Press w/0. Or press w/0 and select Call log . -
Page 15: Caller Identification Messages
English Scroll to Delete/Delete all Press w/0. Press w/0 to confirm. Caller identification messages The following messages will be displayed occasionally: Unknown Unknown number, e.g. international call. Private Information about the number is blocked. Number cannot be displayed. Message indication from your network operator*. -
Page 16: Tones
English Note! Melody 6–Melody 10 will continue for up to 9 seconds if the call is answered in another phone. Select Melody 1–Melody 5 if you want to avoid this. Tones Press w/0. Scroll to Sound. Press w/0. Scroll to desired function e.g. Tones . Press w/0. Scroll to desired setting. -
Page 17: Base Settings
English Display Level 1 = normal) Select Handset name = the text/name displayed in standby. Press w/0 to confirm. Lan- The handset's menu language. guage Auto On = the call is answered when the handset answer is lifted from the base. Off = the call is answered by pressing q. -
Page 18: Expanded System (Two Or More Handsets)
English Flash Recall time. time 600 ms = New Zealand 300 ms = France/Portugal 100 ms = others including UK/AUS System Change PIN code (default code is 0000). Base Reset the base to default settings. Enter the reset PIN code (default code is 0000) and press w/0. - Page 19 English Enter the base unit’s PIN code (default code is 0000). Press w/0. If the registration is successful the unit will return to standby mode within one minute. Intercom/internal call Press C. If using more than 2 handsets: Enter call number 1 –...
-
Page 20: Answering Machine
English Answering machine When the answering machine is switched on calls are answered after a set number of rings, your outgoing message is heard and the caller can leave a message. Total memory capacity is up to 15 minutes. Most functions can be accessed from both base unit and handset. -
Page 21: Use From Handset
English Note! The Time Saver function answers calls after approximately 6 ring signals, until the first new message has been registered - then the answering machine switches to answering after approximately 2 signals. This is useful when using remote access; if you call up the answering machine and there is no reply after four rings that means there are no messages recorded and you can hang up before you are charged for the call. - Page 22 English Note! Even when answering machine is OFF it will still answer after 10 rings, see Remote access, p.19. Outgoing message The outgoing message (max 3 minutes) is heard by incoming callers. There are two separate outgoing messages, one for Answer only (callers cannot leave a message) and one for normal answering function Answer / Record.
-
Page 23: Use From Base Unit
English Confirm with w/0. Personal message (MEMO) Press w/0. Scroll to Answer machine. Press w/0. Scroll to Record MEMO. Press w/0. After the long beep you can record your message (speak 20 cm from the handset). Press w/0 to end recording. The message will be played back to you. -
Page 24: Out Of Memory
English Skip to previous/Skip forward Delete current message. To delete all old messages after playback: Press and hold X until you hear a beep. Increase/decrease the volume Note! If the base unit display is showing – – the answer machine is disconnected, or time/date is not set. -
Page 25: Others
English Delete current message Press once to repeat current message. Press twice to skip to previous message. Playback of messages. (During playback 5 is used to stop playback) Skip forward Turn the answering machine ON Turn the answering machine OFF Note! Using a PIN code prevents other people from accessing your machine without permission. -
Page 26: Battery
English Battery CAUTION Risk of explosion if battery is replaced by an incorrect type. Use only original batteries. The use of non-original batteries may be dangerous and may invalidate the phone’s guarantee. When the batteries are relatively new they will last for approximately 100 hours standby time or approximately 10 hours call time. -
Page 27: Care And Maintenance
English No number shown when ringing This function requires a Caller ID subscription from your service • provider. Warning tone/Not possible to make calls The batteries may be running low (charge the handset). • The hand unit may be nearly out of range. Move closer to a base •... -
Page 28: Warranty
English Protect the unit from moisture. Rain/snowfall, moisture and all • types of liquid can contain substances that corrode the electronic circuits. If the unit gets wet, you should remove the battery and allow the unit to dry completely before you replace it. Do not use or keep the unit in dusty, dirty environments. -
Page 29: Specific Absorption Rate (Sar)
English This guarantee does not apply if other batteries than DORO original batteries have been used. Specific Absorption Rate (SAR) This device meets applicable international safety requirements for exposure to radio waves. PhoneEasy 115 measures 0.035 W/kg measured over 10 g tissue. - Page 30 Doro PhoneEasy ® Doro PhoneEasy 115 duo ® Doro PhoneEasy 115 trio ® Doro PhoneEasy 115 quad ® LAST PAGE English Version 1.0 © 2011 Doro AB. All rights reserved. www.doro.com REV 2867 — STR 20110831-2...
Need help?
Do you have a question about the PHONEEASY 115 and is the answer not in the manual?
Questions and answers