Table of Contents
Advertisement
Quick Links
Advertisement
Table of Contents

Related Manuals for Doro 132


Summary of Contents for Doro 132
- Page 1 Manual...
- Page 3 132/133R...
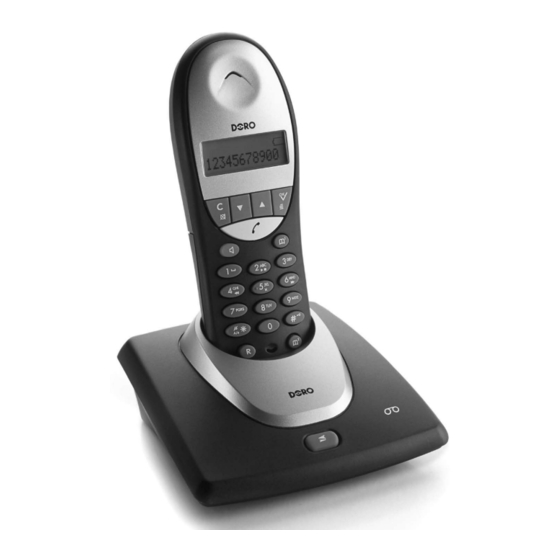
- Page 4 English (see page 6-32) 1 DOWN scroll/Redial function 7 Shared Phone book 2 Erase/Back/Mute button /Key lock button 3 Hands free button 9 Private Phone book 4 Talk button 10 Menu/OK button /Ringer on/off button 11 UP scroll/Caller ID button 6 Recall button...
-
Page 5: Table Of Contents
Caller ID Automatic disconnect ..28 Out of memory ....28 Remote activation ....28 Settings Remote control ....29 Handset ringer ....19 Other Warning tones..... 19 Language ......20 Reset handset defaults ..20 Troubleshooting in general ......30 Specific Absorption Rate (SAR) ........31 Guarantee ......32 www.doro.com... -
Page 6: Installation
Do not place the base unit close to other electrical equipment such as TV sets, computer screens, telecom equipment, fans, etc. This will minimise the risk of interference. Do not place the base unit in areas where it will be exposed to direct sunlight or other major heat sources! www.doro.com... -
Page 7: Belt Clip
When the telephone is installed for the first time, the batteries must be charged for 24 hours before using the telephone. Use original batteries only. The guarantee does not cover any damage caused by incorrect use of batteries. Please dispose of any batteries in a responsible and environmentally friendly manner. www.doro.com... -
Page 8: Battery Indicator
In such ideal conditions the telephones range can be up to 300 metres. In densly populated areas, houses, apartments, etc. the range will be reduced. Try to get the best range by relocating base unit, the ideal location is a high and unobstructed place. www.doro.com... -
Page 9: The Display
Ringer off. Mute function. Key Lock Battery charge indicator 12:47 Current time and handset number (if >1 handset is used). Only 133R: Symbol displayed when the answer machine is on. Flashes when a new incoming message has been recorded. www.doro.com... -
Page 10: Operation
Timer Within approximately 10 seconds of the connection of a call, a timer will be shown on the display. The timer is a simple way to help you keep track of how long the call lasts. www.doro.com... -
Page 11: Redial Function
This function locks the buttons on the handset to prevent unintentional usage. 1. Press and hold until the display shows 2. To deactivate the key lock press and hold once again. Calls can still be received, even if the key lock is active. When the call is finished, the handset returns to locked mode. www.doro.com... -
Page 12: Hands Free Function
The signal will stop automatically after a while or on the handset is pressed. The page can also be cancelled by pressing on the base unit again. www.doro.com... -
Page 13: Phonebook
..........j k l 5 6 .......... M N O 6 Ö ..........m n o 6 ö 7 .......... P Q R S 7 ..........p q r s 7 ß 8 .......... T U V 8 Ü ..........t u v 8 ü 9 .......... W X Y Z 9 ..........w x y z 9 * .......... Change between upper/lower case 0 .......... ? ! 0 + - : ‘ “ # .......... # * @ \ / - ( ) = § www.doro.com... - Page 14 If you need to insert a pause in the telephone number, press and hold # until the display shows P. If you need to change a number, store the new number in the same location as the old one. www.doro.com...
- Page 15 12.). Press 6. Press C to return to standby mode. Deleting a phonebook entry 1. Press either 2. Scroll to required entry using . Press 3. Scroll to Delete using . Press 4. Press again to confirm. 5. Press C to return to standby mode. www.doro.com...
-
Page 16: Menu
Call intern Intercom calls between different handsets. Setup HS Setting the ringer, language, button sound, etc. Setup BS Setting the PBX function, PIN number, etc. Date/Time Setting the time and date. Ans. machine (only 630R) Setting and operating the answering machine. *Only functions in certain countries and also requires special subscription. www.doro.com... -
Page 17: Caller Id
If you do not wish to dial press and hold C to return to standby. Display time/date and other information 1. Press 2. Scroll to the required entry using 3. Press 4. The time and date will be displayed. Press again to display the telephone number. www.doro.com... - Page 18 Delete or Delete list. , scroll using 4. Press to confirm. Storing numbers in the handset phonebook 1. Press 2. Scroll to the required entry using 3. Press , scroll using to Store No. 4. Press . Name registration is completed as discribed in Phone book (refer to page 12). www.doro.com...
-
Page 19: Settings
Heard if the handset is taken out of range. Key beeps Heard when you press the buttons and when charging commences. 1. Press 2. Scroll to Setup HS using . Press 3. Scroll using to Tones. Press 4. Scroll to required signal using . Press 5. Scroll to required setting using . Press to confirm. www.doro.com... -
Page 20: Language
4. Scroll to required setting using . Press to confirm. Reset handset defaults Resetting will return most functions to the original manufacturer default setting. 1. Press 2. Scroll to Setup HS using . Press 3. Scroll using to Set back. Press 4. Press to confirm. www.doro.com... -
Page 21: System Settings
PBX systems the recall timing may need adjustment. The standard setting is 100 ms for UK/AUS. For New Zealand set to 600ms. 1. Press 2. Scroll to Setup BS using . Press 3. Scroll using to Flash time. Press 4. Scroll to required setting using . Press to confirm. www.doro.com... -
Page 22: Pbx Function
1. Press 2. Scroll to Date/time using . Press 3. Enter the year using the handset keypad (20XX). Press 4. Enter the date using the handset keypad (DD.MM). Press 5. Enter the time using the handset keypad (HH:MM). Press to confirm. www.doro.com... -
Page 23: Expanded System
3. Enter the allocated number of the handset that you wish to call, Should an external call come in while an intercom call is in progress, a tone will be heard. You can then terminate the intercom call by pressing , to receive the external call press www.doro.com... -
Page 24: Transferring Calls Between Handsets
4. Enter the allocated number of the handset that you wish to call, 5. Press on the calling handset. 6. Scroll to Conference using . Press Press to disconnect one party, any one of the handsets can terminate the conference call allowing the other continue the conversation with the external caller. www.doro.com... -
Page 25: The Answering Machine
7. Your OGM will be repeated after a few seconds. Repeat this procedure if you want to change the message, any old OGM will automatically be erased when the new one is recorded. 8. Press and hold to return to standby. www.doro.com... -
Page 26: Using The Answering Machine
2. Scroll to Ans. machine using . Press 3. Scroll using to Del all old. Press 4. Press to confirm. If the display shows No old mess, all messages have been deleted. Note: Remember to regularly delete ICM messages to avoid the memory getting full! www.doro.com... -
Page 27: Setting Up The Answering Machine
If on the other hand themachine answers after two rings new messages have been recorded. www.doro.com... -
Page 28: Voice Control
PIN number is still 0000 the answering machine will not answer. 2. Enter your PIN number (see page 21). 3. The number of ICM messages will be announced and playback will begin. Press to stop playback. 4. To switch the answering machine ON press 5. Replace the handset. www.doro.com... -
Page 29: Remote Control
In general, the answering machine should react to tones approximately 0.5 – 1 second in length, but longer tones may be necessary on certain telephone networks. If you do not enter any remote control command, the answering machine will disconnect after a few seconds. www.doro.com... -
Page 30: Other
Check that the telephone cord has been correctly connected to the base unit and to the line socket. Check the charge status of the handset batteries. Try connecting another telephone, known to be in working order, to the line socket. If that phone works, then it is likely that the equipment is faulty. www.doro.com... -
Page 31: Specific Absorption Rate (Sar)
If the telephone still does not work, contact the place of purchase. Don’t forget the receipt or a copy of the invoice. Declaration of conformity Doro declares that the apparatus ’Doro 132 & Doro 133R’ complies with the essential requirements and other relevant positions of Directive 1999/5/EC. A copy of the Declaration of Conformity can be found at www.doro.com/dofc... -
Page 32: Guarantee
(prices correct at the time of going to press), and is operational between 9AM - 5PM Monday-Friday excluding Bank Holidays. Alternatively, E-mail on: tech@doro-uk.com You can contact us in writing: Consumer Support Group, Doro UK Ltd., 22 Walkers Road, North Moons Moat, Redditch, Worcestershire, B98 9HE, (regarding any Spares or Technical query), or Telephoning (Spares only): 01527 584377 Web site: www.doro-uk.com Guarantee This product is guaranteed for a period of 12 months from the date of purchase. -
Page 33: Australia And New Zealand
This guarantee does not affect your statutory rights. AUSTRALIA NEW ZEALAND DORO Australia Pty Ltd Atlas Gentech (NZ) Limited PO Box 6760 Private Bag 14927 Baulkham Hills BC NSW 2153 Panmure... - Page 34 English Version 1.1...
Need help?
Do you have a question about the 132 and is the answer not in the manual?
Questions and answers