Table of Contents
Advertisement
Quick Links
Advertisement
Table of Contents

Related Manuals for Doro 130R


Summary of Contents for Doro 130R
- Page 1 Manual doro 130R...
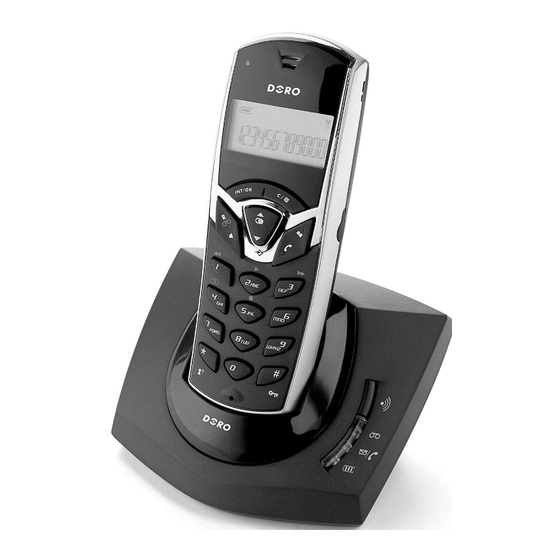
- Page 3 English 1 New message Voice or 9 Talk button CID(flashing)/Answering machine 10 Phone Book button mode(permanently on) 11 Mute/Erase button 2 Scroll up and Redial/Pause button 12 Page button 3 OK/Intercom button 13 Answering machine indicator 4 Recall/Answering machine button Answer ON (permanently on)/ 5 Hands free button Memory full (flashing) and Caller...
-
Page 4: Table Of Contents
Remote activation of the Keytone ........18 answering machine ....30 Auto - Answer ......18 Remote control ......31 Call Timer ......... 19 Reset handset defaults..... 19 Other Registering a new handset ..19 Troubleshooting ......32 Guarantee ........ 34 www.doro.com... -
Page 5: Installation
Only use with the supplied power adapter/s. New Zealand Purchasers Before use please change the Recall (R) button timing to setting 600ms as described on page 21. This will ensure correct operation of additional network services such as ”Call Waiting”. www.doro.com... -
Page 6: Battery
When the battery is running low, a warning signal sounds. If the handset is not recharged at this time, the phone will cease to function until it is recharged. will only be displayed when the battery is fully charged. www.doro.com... -
Page 7: Range
This telephone supports the use of the mute button on the headset cable. Please note Immediately reduce the ringer and earpiece volume on the handset when connecting an optional headset. The performance of a non-original DORO headset cannot be guaranteed. www.doro.com... -
Page 8: The Display
Steady light as long as the handset is placed in the base unit, i.e. it will not go out when the battery is fully charged. Charge unit indicator (+1...) Steady light as long as the handset is placed in the base unit, i.e. it will not go out when the battery is fully charged. www.doro.com... -
Page 9: Operation
The 5 most recently dialled numbers can easily be redialled using 1. Press and scroll using to the required telephone number 2. Press the displayed telephone number will now be dialled. Volume control The volume can be adjusted during a call by pressing www.doro.com... -
Page 10: Mute Button
In order to return to the original caller press , listen for the dial tone, then press If this product is connected to a business PBX system, press the recall button followed by the extension number to transfer a call. www.doro.com... -
Page 11: Hands Free Function
The switchover between speaker and microphone is automatic and dependent on the sound level of the incoming call and the microphone respectively. It is therefore essential that there are no loud noises in the immediate vicinity of the telephone, as this will disrupt the speaker function. www.doro.com... -
Page 12: Caller Identification
Besides showing telephone numbers, the display may also show a number of messages. NO NUMBER It is an International call or a call from a PBX (no information received) WITHHELD Information on the number is blocked. The call could also be from a PBX. www.doro.com... - Page 13 5. Enter a name by pressing the corresponding number button until the required letter is displayed, see the table on page 15. Press C to delete or make changes. 6. Press OK. 7. The display will show NORMAL RING. Scroll to the desired ringer signal. 8. Press OK to save. www.doro.com...
-
Page 14: Menu
3-PHONE BOOK Under this setting you can store or change entries in the phone book. 4-HANDSET Setting the handset ring signal, handset name, key tone etc. 5-BASE Setting the base unit ring signal, flash time and reset. 6-LANGUAGE Used to change the language of the display texts. www.doro.com... -
Page 15: Phone Book
8. If you want to store more numbers, press OK or hold C down to conclude. The symbol “o” will indicate that the entry is stored with a special VIP ringer melody. If you need to insert a pause in the telephone number, press . The display shows P. www.doro.com... - Page 16 1. Press 2. Scroll to PHONE BOOK. Press OK. 3. Scroll to DELETE or DELETE ALL. Press OK. 4. Scroll the name/number you wish to delete. Press OK. 5. If you selected to delete all, press OK again to confirm. www.doro.com...
-
Page 17: Handset Settings
HS NAME. Press OK. 4. Delete the name using C, press the number button corresponding to the first letter of the name required one or more times, see the table on page 15. 5. Press OK to save. www.doro.com... -
Page 18: Prefix Memory
When activated this feature allows incoming calls to be connected immediately the handset is lifted from the base unit. 1. Press 2. Scroll to HANDSET. Press OK. 3. Scroll to AUTO ANS. Press OK. 4. Scroll to the required setting. Press OK to save. www.doro.com... -
Page 19: Call Timer
REGISTER. Press OK. 5. When ENTER PIN is displayed, enter the units PIN number (0000 when supplied). Press OK. 6. If the registration is successful the handset will emit a happy tone in a few seconds (max 60 secs). www.doro.com... -
Page 20: Settings
BASE. Press OK. 3. Scroll to EMERGENCY. Press OK. 4. Enter your current base unit PIN code (0000 at default). Press OK 5. Scroll to the required setting. 6. Enter number (up to 5 digits). Press OK to save. www.doro.com... -
Page 21: Base Unit Ringer
BASE. Press OK. 3. Scroll to CHANGE PIN. Press OK. 4. Enter the current PIN number (0000 when supplied). Press OK. 5. Enter your new PIN number. Press OK. 6. Enter the new PIN number again. Press OK. www.doro.com... -
Page 22: De-Registering Another Handset
Press OK. 6. Press OK to confirm. Language Display texts can be shown in different languages. 1. Press 2. Scroll to LANGUAGE. Press OK. 3. Scroll to the required language. Press OK to save. www.doro.com... -
Page 23: Expanded System
Refer to the Registration chapter for more information. If you wish to use several handsets with one base unit, you should ensure that the base unit is positioned “in the middle”, to evenly divide the base unit range among the handsets. www.doro.com... -
Page 24: Intercom
5. To connect all three parties in a conference call, press and hold until a beep is heard. Press on either handset to terminate the conference call, the other handset can then continue the conversation with the external party. www.doro.com... -
Page 25: The Answering Machine
English The answering machine (130R) About the answering machine The answering machine has to be turned on in order to receive messages. On incoming calls the answering machine will respond after the selected number of rings (please refer to page 30). When the answering machine answers the incoming call the caller will hear your outgoing message (OGM) followed by a tone, at this point they can leave a incoming message (ICM) up to 3 minutes in length (user selectable). -
Page 26: Switching The Answering Machine On/Off
English The Answering Machine (130R) Switching the Answering Machine On/Off 1. Press 2. The total number of (new) recorded ICM’s will now be announced (if any), listen to them or press to get to the menu for answering machine. 3. Scroll to ANS MODE. Press OK. 4. Scroll to the required setting (ON/OFF). -
Page 27: Day/Time Stamp
English The Answering Machine (130R) Day/Time Stamp The answering machine has a voice function that announces the day and time when each message (ICM) was recorded. 1. Press 2. The total number of (new) recorded ICM’s will now be announced (if any), listen to them or press to get to the menu for answering machine. -
Page 28: Personal Messages - Memo
English The Answering Machine (130R) Personal Message - MEMO MEMO – is a personal message recorded directly onto the answering machine without dialling. This means that the machine may be used as an electronic notebook, where messages, reminders or other notes to family members or col- leagues can be recorded. -
Page 29: Recording Time
English The Answering Machine (130R) Recording Time The recording time of incoming messages can be selected between 30, 60, 90 or 120 seconds. 1. Press 2. The total number of (new) recorded ICM’s will now be announced (if any), listen to them or press to get to the menu for answering machine. -
Page 30: Out Of Memory
English The Answering Machine (130R) Out of memory The answering machine can receive a maximum of 59 messages, but will only record up to 15 minutes in total (this includes the outgoing message). If the memory is full, no new messages will be accepted until the existing messages have been played and erased. -
Page 31: Remote Control
English The Answering Machine (130R) Remote control The answering machine functions can be remotely accessed using the keys of an ordinary tone dialling telephone. Dial the telephone number to which the answering machine is connected, enter the current remote code after the OGM message has played. Once the code is accepted, several remote options are available. -
Page 32: Other
Check the charge status of the handset batteries. Try connecting another telephone, known to be in working order, to the line socket. If that phone works, then it is likely that the equipment is faulty. www.doro.com... - Page 33 Also try holding the buttons down longer, approximately 1 second per digit. If the telephone still does not work, contact your local Doro Support department or the place of purchase. Don’t forget the receipt or copy of the invoice.
-
Page 34: Guarantee
(As a matter of precaution, we recommend disconnecting the telephone during a thunderstorm). This guarantee does not affect your statutory rights. AUSTRALIA NEW ZEALAND DORO Australia Pty Ltd Atlas Gentech (NZ) Limited PO Box 6760 Private Bag 14927 Baulkham Hills BC NSW 2153... - Page 35 Only the 7 digits of the local number should be dialled from your telephone. DO NOT dial the area code digit or the “0“ prefix. Answering Machines Please note when set to answer after 2 rings this product may block CID information when used in conjunction with certain distinctive ring signals (FaxAbility). www.doro.com...
- Page 36 Australia (English) Version 1.1...
Need help?
Do you have a question about the 130R and is the answer not in the manual?
Questions and answers