NetComm NB16DG User Manual
N600 dual band wifi gigabit modem router
Hide thumbs
Also See for NB16DG:
- Quick start manual (4 pages) ,
- Specifications (2 pages) ,
- Setup manual (43 pages)
Table of Contents
Advertisement
Quick Links
Advertisement
Table of Contents

Related Manuals for NetComm NB16DG


Summary of Contents for NetComm NB16DG
- Page 1 N600 Dual Band WiFi Gigabit Modem Router NB16DG USER GUIDE...
- Page 2 Copyright©2013 NetComm Wireless Limited. All rights reserved. The information contained herein is proprietary to NetComm Wireless Limited. No part of this document may be translated, transcribed, reproduced, in any form, or by any means without prior written consent of NetComm Wireless Limited.
-
Page 3: Table Of Contents
NB16DG Default Settings ....................................8 Interfaces .......................................9 Safety and Product Care ................................10 Transport and Handling ................................10 Installation and Configuration of the NB16DG ........................... 11 Placement of your NB16DG ..................................11 Avoid obstacles and interference .................................. 11 Cordless Phones ......................................11 Choose the “Quietest”... -
Page 4: Overview
The individual reading this manual is presumed to have a basic understanding of telecommunications terminology and concepts. Prerequisites Before continuing with the installation of your NB16DG, please confirm that you comply with the minimum system requirements below. An activated ADSL or configured WAN connection. -
Page 5: Product Introduction
Power Supply Unit. Ethernet Cable (RJ-45). Wireless Security Card. Warranty Card. If any of these items are missing or damaged, please contact NetComm Wireless Support immediately by visiting the NetComm Wireless Support website at: http://www.netcommwireless.com/contact-forms/support NetComm Wireless NB16DG User Guide... -
Page 6: Product Features
Users are able to share a single Internet connection via both a wired and wireless connection to the NB16DG. With two built-in antennas providing a 2 transmit, 2 receive (2T2R) 802.11n concurrent dual band wireless access point, this router provides wireless speeds of up to 600Mbps. -
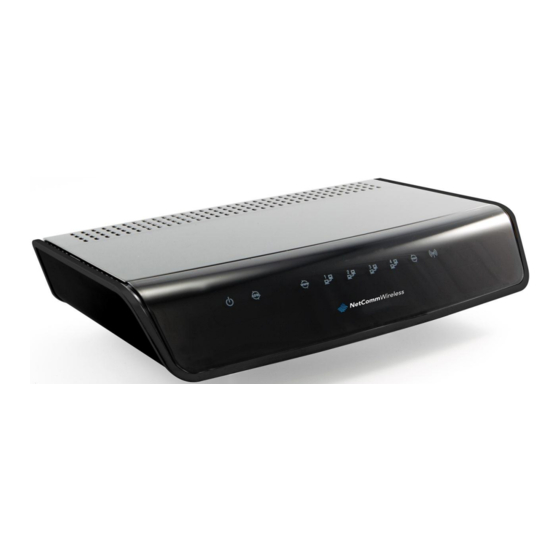
Page 7: Physical Dimensions And Indicators
LED Indicators The NB16DG has been designed to be placed on a desktop. All of the cables exit from the rear for easy organization. The display is visible on the front of the NB16DG to provide you with information about network activity and the device status. See below for an explanation of each of the indicator lights. -
Page 8: Physical Dimensions
Physical Dimensions The following page lists the physical dimensions of the NB16DG. 37mm 145mm 215mm NB16DG DIMENSIONS Length 215 mm Width 145 mm Height 37 mm Weight 386 grams NB16DG Default Settings The following tables list the default settings for the NB16DG. -
Page 9: Interfaces
Interfaces The following interfaces are available on the NB16DG: NUMBER INTERFACE DESCRIPTION Power Jack Connection point for the included power adapter. Connect the power supply here. Power button Turns the NB16DG on or off. Activate the WiFi WPS (2.4GHz) function by press/hold the WPS/RESET button for 3 seconds. -
Page 10: Safety And Product Care
Disconnect the power line from the device before servicing. Transport and Handling When transporting the NB16DG, it is recommended to return the product in the original packaging. This ensures the product will not be damaged. In the event the product needs to be returned, ensure it is securely packaged with appropriate padding to prevent damage during courier transport. -
Page 11: Installation And Configuration Of The Nb16Dg
If you experience difficulties connecting wirelessly between your WiFi Devices and your NB16DG, please try the following steps: In multi-storey homes, place the NB16DG on a floor that is as close to the centre of the home as possible. This may mean placing the NB16DG on an upper floor. -
Page 12: Hardware Installation
Wait approximately 60 seconds for the NB16DG to power up. Connecting via a cable Connect the yellow Ethernet cable provided to one of the ports marked ‘LAN’ at the back of the NB16DG. Connect the other end of the yellow Ethernet cable to your computer. -
Page 13: Web Based Configuration Interface
Web Based Configuration Interface First-time Setup Wizard Please follow the steps below to configure your NB16DG Wireless router via the web based configuration wizard. http://192.168.20.1/ Open your web browser (e.g. Internet Explorer/Firefox/Safari) and type into the address bar at the top of the window. -
Page 14: Adsl
PPP over Ethernet (or PPPoE) Enter the Username and Password as supplied by your Internet Service Provider. Enter the appropriate VCI and VPI as supplied by your Internet Service Provider Click Next to continue. NetComm Wireless NB16DG User Guide www.netcommwireless.com... -
Page 15: Wan
Enter the MAC Address of your device which is registered with the ISP Static IP Address Enter the Static IP Address Enter the Static Subnet Mask Enter the Static Gateway Enter the Static Primary and Secondary DNS. NetComm Wireless NB16DG User Guide www.netcommwireless.com... - Page 16 You can change the WiFi 2.4GHz security key if you wish by using the Security Key Type drop down list and then typing in a new security key in the Security Key field. The Security key must be at least 8 characters long. Click Next to continue. NetComm Wireless NB16DG User Guide www.netcommwireless.com...
- Page 17 If you want to change the system username or password, enter the new username in the Desired Username field and then enter the new password into both the Desired Password and Retype Password fields and then click Next. (If you do not wish to change the password, leave the fields blank and click Next). NetComm Wireless NB16DG User Guide www.netcommwireless.com...
- Page 18 Confirm the setup information and click Finish if everything is correct. You can also click Back to go back and change any of the previously configured settings. When you click Finish, the wizard applies your settings and the Advanced Status view is displayed. Your Dual Band WiFi Modem Router is ready to use. NetComm Wireless NB16DG User Guide www.netcommwireless.com...
-
Page 19: Basic View
When you log in to the router, the Basic View is displayed. Basic View gives you the most important information at a glance. Status The Status tab displays the following information: ADSL Line Status ADSL Sync Speed The current WAN IP Address Number of clients connected on Wireless 2.4GHz Number of clients connected on Wireless 5GHz NetComm Wireless NB16DG User Guide www.netcommwireless.com... -
Page 20: Wireless 2.4Ghz
Set the SSID (WiFi Network Name) Set the Wireless Security Key If you make any changes to the Wireless 5GHz configuration, Click the Save and apply the changes button to make these changes active. NetComm Wireless NB16DG User Guide www.netcommwireless.com... -
Page 21: Adsl
If you make any changes to the ADSL configuration, click the Save and apply the changes button to make these changes active. Note: Saving any configuration changes on this page will make the xDSL connection the primary method of connecting to the Internet and disable the WAN connection. NetComm Wireless NB16DG User Guide www.netcommwireless.com... -
Page 22: Wan
Select the correct WAN type and enter the appropriate information in the fields provided. When you have finished, click Save and apply the changes to make them active. Note: Saving any configuration changes on this page will make the xDSL connection the primary method of connecting to the Internet and disable the ADSL connection. NetComm Wireless NB16DG User Guide www.netcommwireless.com... -
Page 23: Advanced Configuration
Advanced Configuration To access the advanced configuration options of your NB16DG, you need to log in to the web configuration and change to Advanced view. http://192.168.20.1/ To do this, open your web browser (e.g. Internet Explorer/Firefox/Safari), type into the address bar at the top of the window and press the Enter key. -
Page 24: Status
Status NetComm Wireless NB16DG User Guide www.netcommwireless.com... - Page 25 The number of data packets which have passed into and out of the router. Unicast packets The number of unicast packets which have passed into and out of the router. Multicast packets The number of multicast packets which have passed into and out of the router. NetComm Wireless NB16DG User Guide www.netcommwireless.com...
-
Page 26: Network Setup
Network Setup Network Setup This page allows you to configure the ADSL and Ethernet WAN (Wide Area Network) connection settings on the NB16DG. ADSL Ethernet over ATM (RFC1483 bridged) with NAT NetComm Wireless NB16DG User Guide www.netcommwireless.com... - Page 27 VLAN ID into a packet header in order to identify which CLAN the packet belongs to. You may enable VLAN tagging and specify the ID with a value between 1 and 4094. IP over ATM (RFC1483 routed) NetComm Wireless NB16DG User Guide www.netcommwireless.com...
- Page 28 VLAN ID into a packet header in order to identify which CLAN the packet belongs to. You may enable VLAN tagging and specify the ID with a value between 1 and 4094. PPP over Ethernet NetComm Wireless NB16DG User Guide www.netcommwireless.com...
- Page 29 VLAN ID into a packet header in order to identify which CLAN the packet belongs to. You may enable VLAN tagging and specify the ID with a value between 1 and 4094. NetComm Wireless NB16DG User Guide www.netcommwireless.com...
- Page 30 PPP over ATM NetComm Wireless NB16DG User Guide www.netcommwireless.com...
-
Page 31: Rfc 1483 Bridged
VLAN ID into a packet header in order to identify which CLAN the packet belongs to. You may enable VLAN tagging and specify the ID with a value between 1 and 4094. RFC 1483 Bridged NetComm Wireless NB16DG User Guide www.netcommwireless.com... - Page 32 VLAN ID into a packet header in order to identify which CLAN the packet belongs to. You may enable VLAN VLAN TAG tagging and specify the ID with a value between 1 and 4094. NetComm Wireless NB16DG User Guide www.netcommwireless.com...
- Page 33 VLAN ID into a packet header in order to identify which CLAN the packet belongs to. You may enable VLAN tagging and specify the ID with a value between 1 and 4094. NetComm Wireless NB16DG User Guide www.netcommwireless.com...
- Page 34 VLAN ID into a packet header in order to identify which CLAN the packet belongs to. You may enable VLAN tagging and specify the ID with a value between 1 and 4094. NetComm Wireless NB16DG User Guide www.netcommwireless.com...
- Page 35 VLAN ID into a packet header in order to identify which CLAN the packet belongs to. You may enable VLAN tagging and specify the ID with a value between 1 and 4094. NetComm Wireless NB16DG User Guide www.netcommwireless.com...
- Page 36 VLAN ID into a packet header in order to identify which CLAN the packet belongs to. You may enable VLAN tagging and specify the ID with a value between 1 and 4094. NetComm Wireless NB16DG User Guide www.netcommwireless.com...
- Page 37 DHCP Server This page allows you to change the Dynamic Host Configuration Protocol (DHCP) server settings on the NB16DG. The DHCP Server enables computers or devices connecting to the NB16DG to automatically obtain their network configuration settings. By default, the DHCP server is enabled.
- Page 38 You can enter a new fixed mapping by entering the MAC address of the device and the IP address you wish to allocate to it. Select the Enable checkbox to activate the DHCP fixed mapping entry. NetComm Wireless NB16DG User Guide www.netcommwireless.com...
- Page 39 DEFINITION Wireless Module (2.4GHz) Select to enable or disable the 2.4GHz Wireless network function of the NB16DG. Network ID is used for identifying the Wireless LAN (WLAN). Client stations can roam freely over this product and other Access Points that have the same Network ID.
- Page 40 DEFINITION Wireless Module (5GHz) Select to enable or disable the 5GHz Wireless network function of the NB16DG. Network ID is used for identifying the Wireless LAN (WLAN). Client stations can roam freely over this product and other Access Points that have the same Network ID.
- Page 41 Change Password This page allows you to change the NB16DG web configuration password. Type in the old password (the factory default username and password is admin) and then type in the new password. Re-enter the new password in the Reconfirm field and click Save.
-
Page 42: Forwarding Rules
192.168.20.40, and a VPN server (the default port is 1723) at 192.168.20.60, then you would need to specify the following virtual server mappings: Note: At any given time, only one IP address can be bound to a particular Service Port. NetComm Wireless NB16DG User Guide www.netcommwireless.com... - Page 43 Some applications like online games, video conferencing and Internet telephony require multiple connections to the internet. As such, these applications cannot work with a pure NAT router such as the NB16DG. The Port Triggering feature allows some of these applications to work with this router.
- Page 44 The device also supports UPnP. If the DMZ host operating system supports this function enable it to automatically configure the UPnP Setting required network settings. Click Save to save the settings or Undo to cancel. NetComm Wireless NB16DG User Guide www.netcommwireless.com...
-
Page 45: Security Settings
The Security Settings page allows you to configure the security management on the router such as Packet filters and MAC Control. The following pages describe the various security options available Status The Status page lists any currently configured filtering for the Outbound, Inbound and Domain filters. NetComm Wireless NB16DG User Guide www.netcommwireless.com... - Page 46 The Packet Filter also works with Scheduling Rules, and gives you more flexibility on Access control. Note: For further instructions on scheduling rules, please refer to the “Scheduling” section later in this guide Click Save to save the settings or Undo to cancel. NetComm Wireless NB16DG User Guide www.netcommwireless.com...
- Page 47 To access the Inbound Packet Filter page, click on the Inbound Filter button on the bottom of the Outbound Filter page. All the settings on this page are the same as those for the Outbound Filter shown on the previous page. Click Save to save the settings or Undo to cancel. NetComm Wireless NB16DG User Guide www.netcommwireless.com...
- Page 48 The router action that you want when someone is accessing a URL that matches the specified domain suffix. Select Drop Action to block the access and/or select Log to log this access. Enable Select to enable the rule. Click Save to save the settings or Undo to cancel. NetComm Wireless NB16DG User Guide www.netcommwireless.com...
- Page 49 If any part of the Website’s URL matches the pre-defined word then the connection will be blocked. For example, you can use pre-defined word "sex" to block all websites if their URLs contain the pre-defined word "sex". Enable Tick to enable the rule. Click Save to save the settings or Undo to cancel. NetComm Wireless NB16DG User Guide www.netcommwireless.com...
- Page 50 MAC addresses that are not in the list to associate to the wireless LAN. Note: Click the "Next Page" or the "Previous Page" buttons to see the entire list Click Save to save the settings or Undo to cancel. NetComm Wireless NB16DG User Guide www.netcommwireless.com...
- Page 51 You can also change the web server port. When enabled, the router can detect the following (and more) DoS attack types: SYN Attack WinNuke Port Scan Ping of Death Land Attack Click Save to save the settings or Undo to cancel. NetComm Wireless NB16DG User Guide www.netcommwireless.com...
-
Page 52: Advanced Settings
SNMP options. Status The Status page displays the current System time, and lists any configured Dynamic DNS (DDNS) accounts, any Static or Dynamic Routes added or any Quality of Service (QoS) rules in place. NetComm Wireless NB16DG User Guide www.netcommwireless.com... - Page 53 Enter the email addresses to send a copy of the current syslog to. Email Subject Enter the email subject to show on any sent emails. View Log… View the current system log. Email Log Now Email the current syslog to the entered email addresses. NetComm Wireless NB16DG User Guide www.netcommwireless.com...
- Page 54 To enable the Dynamic DNS feature on the unit, select the Enable option, choose the appropriate Dynamic DNS Provider and enter the details supplied by your Dynamic DNS provider. Click Save to save the settings or Undo to cancel. NetComm Wireless NB16DG User Guide www.netcommwireless.com...
- Page 55 Select a schedule for the new rule to apply. Previously created schedules are visible here or you can select the rule to Schedule always apply. Note: For further instructions on scheduling rules, please refer to the “Scheduling” section later in this guide Click on Save to store your setting or Undo to discard your changes. NetComm Wireless NB16DG User Guide www.netcommwireless.com...
- Page 56 Note: If "Remote" access is enabled, the default setting of 0.0.0.0 means any IP obtain SNMP protocol Information. Click the Save button to store your setting or the Undo button to discard your changes. NetComm Wireless NB16DG User Guide www.netcommwireless.com...
- Page 57 These settings are used to setup the static and dynamic routing features of the NB16DG. Dynamic Routing: Routing Information Protocol (RIP) will exchange information about different host destinations for working out routes throughout the network.
- Page 58 System Time This page allows you to change the System time setting on the NB16DG. OPTION DEFINITION Time Zone Select the time zone where this device is located. Auto-Synchronization Select the "Enable" checkbox to enable this function. Enable Daylight Saving Enables or disables the router’s automatic daylight saving adjustment feature.
- Page 59 In the example below, the rule is called “Work Hours” and it is only active between 08:00 and 17:30. You are then able to select the scheduling rule name specified from the Packet Filter configuration section to perform the configured filtering at the scheduled time as per the screenshot below. NetComm Wireless NB16DG User Guide www.netcommwireless.com...
- Page 60 This example would prevent any access to the IP address 66.102.11.104 from any device connected to the router, 7 days a week, only between the hours of 08:00 and 17:30. Click the Save button to save the settings or the Undo button to cancel. NetComm Wireless NB16DG User Guide www.netcommwireless.com...
- Page 61 LAN IPv6 Address The IP Address to use for the IPv6 service connection. LAN IPv6 Link-Local Address The current local LAN IPv6 address of the NB16DG. Autoconfiguration Select to enable or disable IPv6 auto configuration (if supported by your Internet Service Provider).
- Page 62 TR-069 The TR-069 client allows the NB16DG to be automatically configured from a TR-069 server. Enter the applicable configuration options to enable the router to contact the TR-069 server and retrieve any configuration options. OPTION DEFINITION TR-069 Select to enable or disable the TR-069 automatic configuration function.
- Page 63 Use the drop down list to type of routing for the selected VID. WAN type Use the drop down list to select which WAN type the VLAN uses. WAN Map VLAN ID Enter the VLAN ID to tag packets on the WAN interface. NetComm Wireless NB16DG User Guide www.netcommwireless.com...
-
Page 64: Toolbox
The Restore settings page allows you to restore a previously saved configuration of the router. This is handy for reverting to a working configuration when making changes to the router’s settings. To restore the router configuration, click the Browse button, select the saved configuration file and then click the Restore button. NetComm Wireless NB16DG User Guide www.netcommwireless.com... - Page 65 The miscellaneous page provides options to send a Wake-on-LAN packet to a specified IP, ping a specified domain name or IP address and brighten or dim the front LEDs of the router. Logout The Logout menu item logs you out of the router. NetComm Wireless NB16DG User Guide www.netcommwireless.com...
-
Page 66: Additional Product Information
To check the connection, click on the Airport icon and there should be a tick on the wireless network name. Note: For other operating systems, or if you use a wireless adaptor utility to configure your wireless connection, please consult the wireless adapter documentation for instructions on establishing a wireless connection. NetComm Wireless NB16DG User Guide www.netcommwireless.com... -
Page 67: Troubleshooting
STEP CORRECTIVE ACTION Make sure you are using the correct IP address of the NB16DG. You can check the IP address of the device from the Network Setup configuration page. Check that you have enabled remote administration access. If you have configured an inbound packet filter, ensure your computer’s IP address matches it. -
Page 68: Technical Data
Regulatory Compliance A-Tick Electrical Specifications It is recommended that the NB16DG be powered by the supplied 12V DC, 1.5A power supply. A replacement power supply is available from the NetComm Wireless Online shop. Environmental Specifications / Tolerances The NB16DG housing enables it to operate over a wide variety of temperatures from 0˚C - 40˚C (operating temperature). -
Page 69: Legal & Regulatory Information
The power supply that is provided with this unit is only intended for use with this product. Do not use this power supply with any other product or do not use any other power supply that is not approved for use with this product by NetComm Wireless. -
Page 70: Product Warranty
Consumer Protection Laws which cannot be excluded, NetComm Wireless’s liability for any breach of that guarantee, condition or warranty is limited to: (i) in the case of a supply of goods, NetComm Wireless Limited doing any one or more of the following: replacing the goods or supplying equivalent goods;... -
Page 71: Contact
Contact Address: NETCOMM WIRELESS LIMITED Head Office PO Box 1200, Lane Cove NSW 2066 Australia Phone: +61(0)2 9424 2070 Fax: +61(0)2 9424 2010 Email: sales@netcommwireless.com techsupport@netcommwireless.com NetComm Wireless NB16DG User Guide www.netcommwireless.com...
Need help?
Do you have a question about the NB16DG and is the answer not in the manual?
Questions and answers