Table of Contents
Advertisement
Quick Links
Advertisement
Table of Contents

Related Manuals for Planet IPX-1980


Summary of Contents for Planet IPX-1980
- Page 1 User ’s Manual IPX-1980 Internet Telephony PBX System...
- Page 2 Copyright Copyright© 2012 by PLANET Technology Corp. All rights reserved. No part of this publication may be reproduced, transmitted, transcribed, stored in a retrieval system, or translated into any language or computer language, in any form or by any means, electronic, mechanical, magnetic, optical, chemical, manual or otherwise, without the prior written permission of PLANET.
- Page 3 Any error messages that displayed when the problem occurred ♦ Any software running when the problem occurred ♦ Steps you took to resolve the problem on your own Revision User’s Manual for PLANET Internet Telephony PBX System Model: IPX-1980 Rev: 1.0 (June, 2012)
-
Page 4: Table Of Contents
TABLE OF CONTENTS CHAPTER 1 INTRODUCTION..........................7 1.1 F ................................8 EATURES 1.2 P ............................9 ACKAGE ONTENTS 1.3 P .............................9 HYSICAL PECIFICATION 1.4 S ..............................11 PECIFICATION CHAPTER 2 INSTALLATION PROCEDURE ......................13 BASIC SYSTEM CONFIGURATION........................13 2.1 W ................................13 OGIN 2.2 C WAN ............................14 ONFIGURING THE 2.3 R .............................16... - Page 5 3.7.1 Follow Me..............................37 3.7.2 VoiceMail..............................38 3.8 C ..............................39 UEUE 3.8.1 Create Agent............................39 3.8.2 Agent Registration ..........................42 3.8.3 Agent Log Off ............................42 CHAPTER 4 ADVANCED ............................43 4.1 O ................................43 PTIONS 4.1.1 General..............................43 4.1.2 General..............................44 4.1.3 Global SIP Settings ..........................46 4.2 V ................................49 OICE 4.3 M...
- Page 6 IPX-1980 IP PBX ..............74 OW TO COMBINE TWO IN THE SAME NETWORK 7.3 H IPPBX ..................78 OW TO COMBINE TWO IN DIFFERENT NETWORK 7.4 R IPX-1980....................81 EMOTELY REGISTER PHONE TO THE CHAPTER 8 HOW TO USE SKYPE ACCOUNT IN IPX-1980................86...
-
Page 7: Chapter 1 Introduction
With the IPX-1980, standard SIP phones can be easily integrated in your office. Users may build up the VoIP network in minutes by applying the IPX-1980 with PLANET IP Phone series, ATA (Analog Telephone Adapter) series and Gateway series. -
Page 8: Features
1.1 Features PBX Features • 30 Concurrent calls / Up to 100 registers • BLF (Busy Lamp Field) • DID (Direct Inward Dialing Number) • Conference Room • Automated Attendant (AA) • Interactive Voice Responses (IVR) • Built-in voice mail server •... -
Page 9: Package Contents
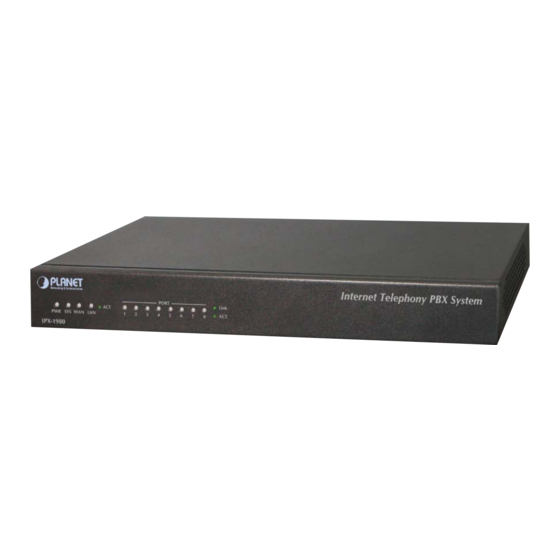
1.2 Package Contents Thank you for purchasing PLANET Internet Telephony PBX system, IPX-1980. This Quick Installation Guide will introduce how to finish the basic setting to connect the web management interface and the Internet. Open the box of the Internet Telephony PBX system and carefully unpack it. The box should... - Page 10 LED definitions Front Panel LED State Descriptions Front Panel LED State Descriptions PBX Power ON PBX Power OFF Enabling system Flashing System is working System is off Flashing LAN is connected successfully Ethernet not connection Flashing PBX network connection established Waiting for network connection 12V DC 12V DC Power input outlet...
-
Page 11: Specification
1.4 Specification Product Internet Telephony PBX System Model IPX-1980 Hardware 1 x 10/100Mbps RJ-45 port 1 x 10/100Mbps RJ-45 port 8 x RJ-11 connection Protocols and Standard RFC 793 TCP Protocols and Standards RFC 826 ARP RFC 1034, 1035 DNS... - Page 12 Display 100 Registered User’s Status: Unregistered / Registered / On-Call Multiple Service Providers Lines / SIP Accounts (10) Simultaneous Trunk Links: 10 concurrent trunk calls Analog/GSM, VoIP Trunk, Peer Trunk Management Two-stage / One-stage call to Trunk by Trunk Group Configuration Built in 8 FXO PSTN trunk By adding external FXO analog gateway to use Terminal trunk Line Built-in SIP Proxy Server Following RFC-3261...
-
Page 13: Chapter 2 Installation Procedure
Chapter 2 Installation Procedure Basic System Configuration 2.1 Web Login Step 1. Connect a computer to a LAN port on the IPX-1980. Your PC (DHCP client mode) will obtain an IP addres s automatically. (It is usually in the 192.168.0.x range.) Step 2. -
Page 14: Configuring The Wan
2.2 Configuring the WAN Step 1. Go to System → System Connection to find Network & Country. Figure 2-2. Network & Country button Figure 2-3. Network setting page... - Page 15 Step 2. Edit your WAN information. There are three types of WAN connection. They are Static IP, PPPoE (Point-to-Point Protocol over Ethernet), DHCP. You can find detail setting process in the user manual. Figure 2-4. WAN connection type selection item...
-
Page 16: Remote Management
In the below case, the default gateway is 192.16 8.0.1 and the user’s PC is 192.168.0.100. Figure 2-8. Check the IP address for the PC and IPX-1980 Every Time after save the change please press the “Activate Changes“ to make modification effect. -
Page 17: Chapter 3 Basic Configuration
3.1 Preparation Before Operation What kind of IP Phone can be used with IPX-1980 IP PBX? Our IPX-1980 is base on SIP 2.0 (RFC 3261) any IP phone model base on same protocol can be work with IPX-1980. 3.2 Before Making a Call 3.2.1 System Information... - Page 18 1. To login IPX-1980 must segment PC to same domain as IPX-1980 AN or LAN IP address. 2. For security reason, please modify the username and password after ou login. You can modify in this page: “System”---“Management” Every Time after save the change please press the “Activate hanges“...
-
Page 19: Basic Configuration
Common Button Besides of the device info in the home page, the following common buttons are displayed as well: Log out Log out GUI Reboot Reboot the IP PBX system Factory Defaults Restore all settings to factory default Activate Changes Activate the changes for your current configuration System Menu System Menu includes the following sub menu:... - Page 20 Extension Settings Item Explanation Search Search extension precisely or fuzzily. Show all Show all extensions. Extension Be connected to the phone eg: "888" Name Extension name (English letter is supported only) e.g.: "Tom" Password Password of SIP/IAX2 extension e.g.: "12u3b6" Caller ID Caller's ID e.g.: "801"...
- Page 21 Agent Check this option if this User or Phone is a Call Agent. Check this option if the User or Phone is located behind a NAT (Network Address Translation) enabled gateway. Pickup Group Select your pickup group. Delete VMail Voicemail will not be checkable by phone if you choose this option.
-
Page 22: Time Based Rules
3.2.3 Time Based Rules You can set working time rule and after-working time rule, and deal with your inbound call based on this time rule. Please set from this page: 【Time Based Rule】---【New Time Rule】: New Time Rule: Item Explanation Rule Name Define the time rule name. -
Page 23: Outbound Call
3.3 Outbound Call 3.3.1 Trunks If you want to set up outbound call to connect to PSTN (Public Switch Telephone Network) or VoIP provider, please configure on this page: 【Basic】->【Trunks】 Planet IP PBX supports 3 kinds of trunks: Analog/GSM line, Custom VoIP, Peer. How to add each trunk: 1) Analog/ GSM Line Click 【Add a Dial Rule】->【Analog/GSM】... - Page 24 Item Explanation Description Define description for the trunk. Lines Individual lines of the PBX e.g.: Analog Port #3: The third analog port of the PBX. You can configure the Analog/GSM line through PLANET IP PBX. Same Analog line couldn't be used in multiple trunks. If you don't have available Analog/GSM trunk, you can't set up trunk.
- Page 25 Dial Plan Choose a dial plan for this trunk; define it in the submenu named 【Outbound Routes】. Host IP Address of the other IPX-1980 IP PBX Check this option; extension user will be configured after NAT (Network Address Translation). Without...
-
Page 26: Outbound Routes
3.3.2 Outbound Routes Outbound Routes is to define what trunk is used for outbound call by extension user. If you don't allow extension user call out, please ignore this part. Please configure on this page: 【Basic】->【Outbound Routes】 On this page, you can configure basic match pattern of outbound routes and create different dial plan. -
Page 27: Inbound Call
through Failover Choose a failover trunk for using when the above chosen trunk is not available. Dialing Rules Define the number match pattern for dialing. Define custom digit from 2 to 9 pattern digit from 1 to 9 digit from 0 to 9 One digit or multiple digits Delete[ ]digits prefix If deleted one digit prefix, when dial 12345, digit 2345 will be sent. - Page 28 Analog Channel DID If you want to direct the inbound call from a trunk (Analog) to a specified extension, call queue, conference or IVR, please configure on this page:【Add Analog Channel】 Channel Choose Analog Port of trunk DID Extension Select Extension, call queue, conference or IVR for DID. VoIP Channel DID I f you want to direct the inbound call from a VoIP trunk to a specified extension, call queue, conference or IVR, please configure on this page:【Add VoIP Channel】...
-
Page 29: Ivr
3.4.2 IVR IVR will improve office efficiency based on your requirement. Please configure on this page【IVR】 Item Explanation Name Set a name for the IVR Extension If you want to listen to the IVR by dialing extension, please input an extension Number. Please Select Select IVR audio file, please configure in this page: 【IVR Prompts】... -
Page 30: Ivr Prompts
3.4.3 IVR Prompts Record or play IVR music from extension. Please configure on this page:【IVR Prompts】 Click【Record a new voice】to display the diagram as below: File name Define a name for the recorded IVR file Extension used for recording Select an extension for recording, click【Record】 button, the selected extension will ring, and then you can record IVR. -
Page 31: Black List
Name Define a name for this ring group Strategy Select strategy : "Ring all" or "Ring in order" Ring Group Members Select ring group members in available channels, click If not answered You can choose forward the call to extension, extension, Voicemail, RingGroup, IVR or Hangup. -
Page 32: Pickup Call
phone. Please operate as the following diagram: Reference Parameters and Explanation of Blacklist: Item Explanation When the extension user (in the system) input *30 to add a blacklist number, this number will be added to the "Black List" When the extension user input *31+ blacklist number, this number will be deleted from the "Black List". -
Page 33: O Nthe Call
3.6 On The Call 3.6.1 Call Parking If you picked up a call at your seat, but it's not convenient to talk in public, you need go to the conference room to talk secretly. At this time, you can input 700 to park this call; the system will tell you a parking number 701 which you can input for continuing conversation when you go to the conference room. -
Page 34: Conference
Reference Parameters and Explanation of Transfer: Item Explanation Blind Transfer Default is #, it can be defined in【Feature Codes】 Attended Transfer Default is *2, it can be defined in【Feature Codes】 Disconnect Call Default is *, it can be used after you use function key " *2 ". it can be defined in【Feature Codes】... - Page 35 Item Explanation Conference Number The number that users call in order to access the conference room, the default number is "900". PIN Code Participants enter the conference room by this code. Admin PIN Code Administrator enters the conference room by this code. Conference DialPlan Use the dialplan when you invite the other participant.
-
Page 36: Monitor
In the conference, admin can add new participant (extension user or external number) into the conference. Add new participant: 3.6.4 Monitor Monitor the specified extension, also you can monitor in different time. Please click【Monitor】--【New Monitor】to configure:... -
Page 37: Settings Before Leaving Office
Item Explanation Extension Select an extension which need to be monitored Monitoring Time Always monitor or monitor in different time. Monitor Settings Set inbound record and outbound record. 3.7 Settings before leaving office 3.7.1 Follow Me If you don't want to lose any call, you can use this function. Please click【Follow Me】---【New Follow Me】... -
Page 38: Voicemail
external number. Set External Number Set external number, like Mobile number. 3.7.2 VoiceMail If you don't want to configure "Follow Me", you can record the message of incoming call, and email the message to your defined mailbox. Click【Extension】---【Extension Settings】 【VoiceMail】must be opened and【VM Password】must be configured before using "VoiceMail"。If no answer, when default ring time is over, the system will play and ask you to leave your message, press # to end recording. -
Page 39: Call Queue
Listen to the message 1. If you would like using this function, you must write correct email address "extension settings" 2. You need configure SMTP and Email model in【VoiceMail】, please check e details in the following chapter【VoiceMail】 3.8 Call Queue 3.8.1 Create Agent Check agent in the 【Extension Settings】... - Page 40 Item Explanation Queue Number This option defines the extension number that may be dialed to reach this Queue. Queue Name This option defines a name for this Queue, e.g. "Sales" Ring Strategy RingAll -- Ring All available Agents until one answers (default). RoundRobin -- Take turns ringing each available Agent.
- Page 41 Item Explanation Agent TimeOut(s) This option defines the time in seconds that an Agent's phone rings before the next Agent is rung, e.g. "15" Auto Pause Pause an Agent if they fail to answer a call. Wrap-Up-Time(s) After a successful call, how many seconds needed to wait before sending another call to a potentially free agent (Default is 0, which means No Delay).
-
Page 42: Agent Registration
3.8.2 Agent Registration You need register for using after creating agents. Agent Registration when hook off Agent Registration when hook on 3.8.3 Agent Log Off If agent would leave and log off, none of agent will answer calls then. Agent Log Off:... -
Page 43: Chapter 4 Advanced
Chapter 4 Advanced 4.1 Options Options Include local extension settings and new extension default settings【General】, caller ID setting 【Global Analog Setting】, and NAT FAX setting 【Global SIP Setting】. 4.1.1 General Click【General】to display the dialog as below: Item Explanation Local Extensions Set up the digit of local extensions Operator Extension Set up Operator Extension. -
Page 44: General
Allow multiple extensions to be Allow multiple extensions to be assigned to one analog assigned to one analog phone phone. Allow extensions to be Alpha If extension is Alpha, outside line can't call in, but Numeric (SIP/IAX users) extension can call out. VoiceMail This user will have a voicemail account after choosing this option. - Page 45 Bell-US -- Used in the United States(FSK) DTMF -- Used for caller ID under DTMF mode, like: Denmark, Sweden and Netherlands etc; V23 -- used in the UK; V23-Japan -- used in Japan; Caller ID Start This option allows one to define the start of a Caller ID signal: Ring -- to start when a ring is received.
-
Page 46: Global Sip Settings
4.1.3 Global SIP Settings Item Explanation UDP Port to bind to SIP standard port is 5060 Start RTP Port RTP port range End RTP Port RTP port range DTMF Mode Set default DTMF mode for sending DTMF, support auto, RFC2833, inband, info. Default: RFC 2833. Max Registration/Subscription Maximum duration (in seconds) of incoming Time... - Page 47 Item Explanation External IP Address that we're going to put in outbound SIP messages if we're behind a NAT External Host Alternatively, you can specify an external host, and Asterisk will perform DNS queries periodically. Not recommended for production environments! Use external IP instead External Refresh How often to refresh external host if used.
- Page 48 TOS for RTP audio packets Sets Type of Service for RTP audio packets TOS for RTP video packets Sets Type of Service for RTP video packets Enable Relaxed DTMF Relax DTMF handling RTP Time Out Terminate call if 60 seconds of no RTP activity when we're not on hold RTP Hold Time Out Terminate call if 300 seconds of no RTP activity when...
-
Page 49: Voicemail
4.2 VoiceMail Details configuration on VoiceMail: VoiceMail Reference/ Voice Message Options/ Playback Options. If you need send message by mail to your defined mailbox, you must configure SMTP and Email model. Click【Voicemail】to display the dialog as below: Item Explanation Extension for checking The number that users call in order to access their voicemail messages accounts, the default number is "600". - Page 50 Minimum message time Choose the minimum duration of a voicemail message in this selection box. Message time below this threshold will be deleted automatically. Say message Caller-ID Choose this option to play Caller's ID before voicemail message is played. Say message duration Choose this option to play the duration of message before the voicemail message is played.
- Page 51 Email Settings Item Explanation Attach recordings to e-mail This option defines whether or not voicemails are sent to the Users' e-mail addresses as attachments. Sender Name Display the Sender name when you receive a voicemail. From Sender's email address Subject Subject of the mail Message The message pattern...
-
Page 52: Music Settings
4.3 Music Settings Management for music on hold, music on ringback, music on call queue. Click【Music Settings】 to display the dialog as below: Music Settings: Please define different music file for different music folders. Music Management:... -
Page 53: Disa
Item Explanation Directory Load music in the music file. Files Display music in the music file, or you can delete it. Enter The Music File Name Input music file name which you want to upload.(GSM/ WAV format, If it's WAV, it must be accord with PCM 16 bits, 8000HZ format) TFTP Server IP address Please enter your TFTP server IP address. -
Page 54: Paging And Intercom
seconds. Digit Timeout(s) The maximum amount of time permitted between digits when the user is typing in an extension. Default is 5 seconds. Extension for this DISA If you want this DISA to be accessible by dialing an extension, (Optional) you can define an extension number for this DISA. -
Page 55: Monitor
1. For Paging/ Intercom function extension(IP phone) must enable Auto Answer 4.6 Monitor Monitor is used for recording the defined extensions. Click【Monitor】---【New Monitor】to display the dialog as below: Item Explanation Extension Define an extension. Monitoring Time Set monitoring time Inbound Record Check to record inbound calls Outbound Record Check to record outbound calls... -
Page 56: Pin Set
Phone book. EX: Name: David / Number: 123456789. When system receive the call 123456789, the extension answer this call it will display “David” For now our IPX-1980 can only caller ID mode. 4.8 PIN Set... -
Page 57: Feature Codes
PIN Set Name Set the PIN Sets Name PIN List Enter a list of one or more PINs. One PIN per line. 4.9 Feature Codes Click【 Feature Codes】to display the dialog as below, you can define relevant parameter. - Page 58 Item Explanation Extension to Dial for Set Call Parking number. Parking Calls What extensions to park What extensions to park calls on, e.g.: (701-720) calls on How many seconds a call Set the call time by second, if it's time out, system will call the can be parked for previous extension again.
-
Page 59: Auto Provision
callee are immediately transferred to conference. Return to conference with The administrator can invite another person by pressing 0 when participant he/she is in the conference. When you press 0, you will get a dialtone to enter the number of part A you also would like to invite. After the call has been established and you talk to B, you can press ** to direct him to the conference, or *# to hang up the current call and return to the conference yourself... - Page 60 Method 1: Click【 Extension】->【Creat New User】 ,select the relative IP Phone manufacture, and input relative MAC in the part of Auto Provision, Save and Activate. Method 2: Click【Auto Provision】 to download auto provision script file model, this script file model support csv and txt format, Mac, Extension, Fullname must be filled,<password>,<IP Phone version>...
-
Page 61: Chapter 5 Status
Chapter 5 Status This chapter will introduce you the status of record list, call logs, system info, register status etc. 5.1 Record List Check the record list of defined extension or conference, you can delete the record list. Click【Status】------【Record List】---【Monitor】and【Conference】will be displayed as below: Monitor List Interface... - Page 62 Conference List interface...
-
Page 63: Call Logs
Duration in the call logs is not real charged duration, if you need billing, PSTN must support polarity reversal function, and meanwhile, you must configure relevance parameters of polarity reversal in trunk configuration for the IP PBX. For now our IPX-1980 can only caller ID mode. 5.3 Register Status Check SIP/ IAX2 User, and SIP/IAX2 Trunk status. -
Page 64: System Info
5.4 System Info Check OS version, firmware version and memory, etc from here. Click【System Info】to displays the dialog as below:... -
Page 65: Chapter 6 System
Chapter 6 System This chapter will introduce you how to configure the system of PLANET IP PBX. 6.1 Network And Country Configure WAN/ LAN IP, and tone zone. Click【System】----【Network And Country】to display the dialog as below: Item Explanation IP Assign Support Fixed IP, DHCP, PPPoE Primary DNS Specify a name server to resolve domain names... -
Page 66: Troubleshooting
Please be remind: DNS response delay or no answer will effect the BLF function un-normal working, so if your network connection not so stable, but you still want the BLF function can works normal, we recommend to keep the DNS item “Blank”. 6.2 TroubleShooting You can ping other network device through PLANET IP PBX and track network route by command "Traceroute"... -
Page 67: Dhcp Server Settings
6.3 DHCP Server Settings ZX 50 series support DHCP , Click【System】--【Network Advanced】->【DHCP Server Settings】 to show the following dialog: 6.4 DDNS & VPN After configure DDNS, you can visit by domain remotely. Click【System】--【DDNS & VPN】to display the dialog as below: DDNS Settings: VPN Settings:... -
Page 68: Time Settings
1. DDNS supports the domain provided by Planet DDNS / Dyndns.org/ o-ip.com/ Zoneedit.com 2. VPN supports N2N/L2TP only 6.5 Time Settings Click【System】--【Time Settings】to display the dialog as below:... -
Page 69: Management
Item Explanation NTP Server Specify the NTP server that you wish to use. You may type either the domain name or the IP address of the server, and it may be either remote or local. The default server is pool.ntp.org. Be aware that the PBX needs to be able to connect to a NTP server for perfect function. -
Page 70: Data Storage
Click【System】-【Management】---【Access Permit】to display the diagram as below: After you added a permitted IP, you can only login the system by this IP, other IP address isn't effective to login the system 6.7 Data Storage Upload the voicemail, monitor, conference, call logs, etc to the defined FTP server for storage. Click【System】-【Data Storage】to display the diagram as below:... -
Page 71: Backup
Item Explanation Enable Uploading Enable periodical FTP uploading. Server Address Set FTP Server addresses (IP address or Domain). User Name FTP account name. Password FTP account password. Directory Define a directory on the FTP server. 1. Upload Voicemail, Conference record, Monitor and Call logs to the defined TP Server automatically when flash storage is over 40%. -
Page 72: Update
6.9 Update Click【Update】to upgrade your system by uploading backup file: Extract the downloaded firmware package which includes one TFTP server and one upgrading file. Run TFTP server, you will see the following interface: Go into the "update" page, and upload firmware; Enter the package name Enter TFTP Server IP address, in this example we are “192.168.0.137”... -
Page 73: Chapter 7 Operating Instruction
Chapter 7 Operating Instruction This chapter will introduce you how to use PLANET IP PBX by example. 7.1 How to connect the IPX-1980 IP PBX to the Internet 7.1.1 IP PBX behind the Router If your office accesses the public network through router, you can put the IP PBX behind the router. -
Page 74: How To Combine Two Ipx-1980 Ip Pbx In The Same Network
Below is the structure of how to combine two IP PBX in the same LAN: Register the IPX-1980-A as a peer in IPX-1980-B (via IAX2 trunk), so the extensions in IPX-1980-A can make calls to IPX-1980-B’s extensions via this “special” trunk. - Page 75 3. All the extensions under IPX-1980-A are in the format 6XX. 4. All the extensions under IPX-1980-B are in the format 8XX 5. Extensions under IPX-1980-A can make calls to extension under IPX-1980-B with format 8XX. 6. Extensions under IPX-1980-B can make calls to extension underIPX-1980-A with format 6XX.
- Page 76 Advance Options: Select IAX protocol Step 2: Set up an IAX trunk in IPX-1980-B to connect to IPX-1980-A via this IPX-1980B Peer. In the page Trunks--> Add a Trunk Step 3: Set Dial Rule in IPX-1980-B, all calls starting with 6 will be sent to IPX-1980-A.
- Page 77 Above is the way to route IPX-1980-B’s call to IPX-1980-A, Accordingly, if you want to call from IPX-1980-A to IPX-1980-B, continue as below: Step 5: Set Dial Rule in IPX-1980-A all calls starting with 8 will be sent to IPX-1980-B.
-
Page 78: How To Combine Two Ippbx In Different Network
601 call 801, and 801 will ring and you can pick up the call. 7.3 How to combine two IPPBX in different network The general environment for two IPX-1980 in different locations is: two IPX-1980 IP PBX are both in the Internet and using the public IP. - Page 79 Step 1: Set port forwarding in the router for IPX-1980-A For the IPX-1980-A is behind the router, you need forward the IAX2 port in your router, so all the packets received on the router WAN port (210.11.25.127:4569) will be forwarded to the IPX-1980-A (192.168.1.21:4569).
- Page 80 192.168.1.21. Step 3: Set port forwarding in the router for IPX-1980-B Use the same method as Step 1 to do port forwarding in router-B for IPX-1980-B as above. Setp4: Combine two IPX-1980 and make calls Accordingly, set the 601 users in IPX-1980-A and 801 users in IPX-1980-B, and build the correct dial rules as above, you can make calls between two the IPX-1980 IP PBX.
-
Page 81: Remotely Register Ip Phone To The Ipx-1980
7.4 Remotely register IP phone to the IPX-1980 1. Build one DDNS if you have no static IP for accessing the internet. To get one free domain from www.dyndns.org. Like ours: 2. If the IPPBX is behind the Router, please open port 5060 for signaling and the 10001-10200 port for RTP. - Page 82 Extern IP Replace with your external IP address this your public IP or domain Extern Host Replace with your external IP address this your public IP or domain Extern Refresh Set time for fresh, default 10 Local Network Address Replace with your local network address and mask NAT mode If your IPPBX behind the Router, set default yes 5.
- Page 83 Then we begin to register the soft phone.
- Page 84 It is registered. Now try our own IP phone. It is registered. 7.5 How to customization on hold music 1. in [Music Management], [Upload music file] item, 1.1 Select music directory: in here you can choice Music 1-10. 1.2 Choice and Upload the music file (The sound file must be wav (16bit/8000Hz/Single), gsm, w or alaw!! The size is limited in 15MB)
- Page 85 1.3 In music settings, choice the file you want to replace, and press save. 1.4 Please be remind: [Music Reload], is last step to upload the music file to system, even r already press [Upload] in step 1.2 or press Music reload in step 1.3, it still need to press sic Reload] to finished the last step and make music file replace.
-
Page 86: Chapter 8 How To Use Skype Account In Ipx-1980
Chapter 8 How to use Skype account in IPX-1980 Notice: The fee of your business account must be more than €50 when you use the account first time. 1. Sign in with the business account on this page: https://login.skype.com/account/login-form?intcmp=sign-in&return_url=https://secure.skype.co m/account/login... - Page 87 3. Please click the button Features. 4. Please click the Skype connect 5. Create a SIP profile...
- Page 88 Then you can create one sip account, you need pay for € 4.95 for one channel as monthly rent and you need input the register information to our VoIP trunk blank, then you can register to Skype server. And you need assign money for outgoing calls, and then you can call out. Note: Skype Channel belongs to VoIP channel, so any calls from Skype will be directed to the same destination of VoIP.
Need help?
Do you have a question about the IPX-1980 and is the answer not in the manual?
Questions and answers