Table of Contents
Advertisement
Quick Links
Advertisement
Table of Contents

Subscribe to Our Youtube Channel
Related Manuals for Planet IPX-1000


Summary of Contents for Planet IPX-1000
- Page 1 Internet Telephony /PBX System IPX-1000 User’s manual...
- Page 2 Copyright Copyright (C) 2004 PLANET Technology Corp. All rights reserved. The products and programs described in this User’s Manual are licensed products of PLANET Technology, This User’s Manual contains proprietary information protected by copyright, and this User’s Manual and all accompanying hardware, software, and documentation are copyrighted.
-
Page 3: Table Of Contents
WAN IP address configuration via web configuration interface....16 Internet Access Setup................. 17 Chapter 3 Network Service Configurations ........19 Configuring and monitoring your IPX-1000 from web browser ....19 Overview on the web interface of IPX-1000..........19 Manipulation of IPX-1000 via web browser..........19 LAN/WAN Configuration ................ - Page 4 Chapter 5 Voice communications............55 Overview......................55 Default Configuration .................. 55 IPX-1000 to IPX-1000................. 56 IPX-1000 to VIP-FXS.................. 58 IPX-1000 to VIP-FXO ................. 60 VIP-FXO to IPX-1000 ................. 62 Keypad operations in IPX-1000............... 64 Appendix A IPX-1000 Specifications ..........74...
-
Page 5: Chapter 1 Introduction
PBX Functions · IPX-1000 provides 6 analog ports to interface with 2 CO lines and 4 extension lines. Since all ports are analog, no extra hardware is needed to connect analog devices. · IPX-1000 allows the use of regular telephones instead of expensive digital telephones, resulting in even more cost savings. -
Page 6: Package Content
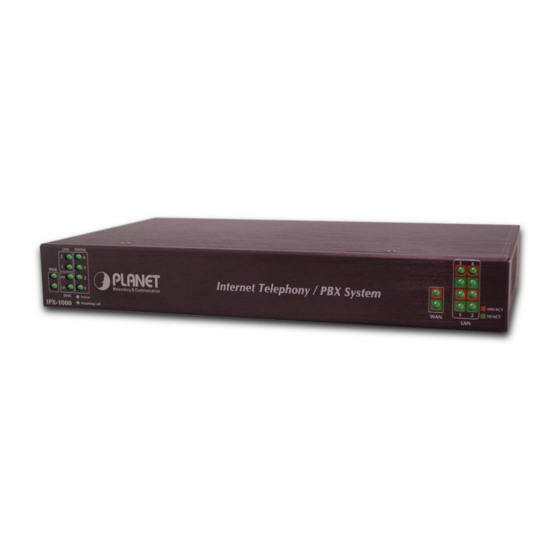
Package Content The contents of your product should contain the following items: IPX-1000 unit Power adapter Quick Installation Guide User’s Manual CD Physical Details Front Panel of IPX-1000 Rear Panel of IPX-1000 LED Display & Button Indicator Color Activity Indication Ÿ... -
Page 7: Physical Interfaces
Physical Interfaces IPX-1000 is equipped with a WAN interface with 10/100 Mbps auto-negotiation capability, 4 LAN Ethernet ports with 10/100 Mbps auto-negotiation, auto-MDI/MDI-X capability. In addition to the LAN/WAN Ethernet interface ports, there is a 9-pin RS-232 interface port, four RJ-11 telephony interface ports on the rear panel. -
Page 8: Chapter 2 Preparations & Installation
Using UTP cables, connect all your LAN devices (PC, NB, HUB, switch…) to the LAN ports on the IPX-1000. The corresponding “LAN” light(s) on the front panel will turn on. Wait a minute or two for all LAN devices to establish links with the IPX-1000. The network related installation is now complete and you should be able to access the Internet. -
Page 9: Administration Interface
6. Connecting to the telephony devices · Connecting to PSTN/CO line Connect CO line(s) to IPX-1000’s line 1 and/or line 2. The “Line 1” and/or “Line 2” light(s) on the front panel will turn on. · Connecting to Telephone Connect telephone(s) to Tel 1 ~ Tel 4 (Extension 1 ~ Extension 4) Connection of incorrect telephony devices to the ports on ë... -
Page 10: Lan/Wan Interface Quick Configurations
IPX-1000 web configuration page. IPX-1000 will prompt for sign in User Name / Password, please enter: admin / 123 to continue machine Web Management. Default WAN interface IP address of IPX-1000 is 172.16.0.1. You may now open your web browser, and insert http://172.16.0.1 in the address bar of your web browser to logon IPX-1000 web configuration... -
Page 11: Checking Tcp/Ip Settings On Windows 95/98
Checking TCP/IP settings on Windows 95/98 If there is no TCP/IP installed on your Windows 95 or Windows 98, you must add the protocol and change the settings on your PC. Step 1 Open the Control Panel, and double-clicking the Network icon. The Network window appears Step 2 If TCP/IP protocol shown in the network window, please continue to the next step. - Page 12 Step 3.2 Change the TCP/IP settings to use DHCP as follows (Fixed IP allocation): If there is no DHCP server in your network, please consult your network administrator the TCP/IP parameters of your PC, and insert the obtained data in IP address tab. To access different IP segment (for example, from LAN to Internet), you will need to assign the gateway and DNS (for Internet access) in your PC.
-
Page 13: Checking Tcp/Ip Settings On Windows Nt
Checking TCP/IP settings on Windows NT Obtain an IP address from a DHCP Server Select Control Panel - Network, and, on the Protocols tab, select the TCP/IP protocol, as shown below. Windows NT4.0 - TCP/IP a) Clicking the Properties button to see a screen like the one below. - Page 14 Windows NT4.0 - IP Address b) Select the network card for your LAN. c) Select the appropriate radio button - Obtain an IP address from a DHCP Server or Specify an IP Address, as explained. Specify an IP Address If your PC is already configured with an IP address, check with your network administrator before making the following changes.
- Page 15 Windows NT4.0 - Add Gateway b) The DNS should be set to the address provided by your ISP, as follows: · Clicking the DNS tab. · On the DNS screen, shown below, clicking the Add button (under DNS Service Search Order), and enter the DNS provided by your ISP.
-
Page 16: Checking Tcp/Ip Settings - Windows 2000
Checking TCP/IP Settings - Windows 2000: Select Control Panel - Network and Dial-up Connection. Right - clicking the Local Area Connection icon and select Properties. You should see a screen like the following: Network Configuration (Win 2000) b) Select the TCP/IP protocol for your network card. Clicking on the Properties button. - Page 17 TCP/IP Properties (Win 2000) Ensure your TCP/IP settings are correct with one of the following description. Using DHCP To use DHCP, select the radio button Obtain an IP Address automatically. This is the default Windows setting. If your networking environment is a DHCP environment, Using this option is recommended. Restart your PC to ensure it obtains an IP Address from DHCP server.
-
Page 18: Checking Tcp/Ip Settings - Windows Xp
Checking TCP/IP Settings - Windows XP Select Control Panel - Network Connection. a) Right - clicking the Local Area Connection icon and select Properties. You should see a screen like the following: Network Configuration (Windows XP) b) Select the TCP/IP protocol for your network card. c) Clicking on the Properties button. - Page 19 TCP/IP Properties (Windows XP) Ensure your TCP/IP settings are correct with one of the following description. Using DHCP To use DHCP, select the radio button Obtain an IP Address automatically. This is the default Windows setting. If your networking environment is a DHCP environment, Using this option is recommended. Restart your PC to ensure it obtains an IP Address from DHCP server.
-
Page 20: Lan Ip Address Configuration Via Web Configuration Interface
Execute your web browser, and insert the IP address (default: 192.168.0.1) of IPX in the adddress bar. After logging on machine with username/password (default: admin / 123), browse to “LAN/WAN Configuration” --> “LAN configuration” menu: The LAN information Parameter Description of IPX-1000 LAN IP address of IPX-1000 Default: 192.168.0.1... -
Page 21: Internet Access Setup
Internet Access Setup · When WAN interface of IPX-1000 is properly configured, with default Windows TCP/IP settings, no changes need to be made on LAN side PC for Internet access. · If using a specified (fixed) IP address on your PC, refer to the user manual for details of the required changes: ·... - Page 22 Hint node/site. If you’re unable to get response from the remote site, please check the following: IPX-1000 is properly installed, LAN connection is OK, and Hint it is powered ON. You can test the connection by using the "ping" command: ping 192.168.0.1...
-
Page 23: Chapter 3 Network Service Configurations
Provides user input data fields, check boxes, and for changing machine configuration settings w Displays machine running configuration To start IPX-1000 web configuration, you must have one of these web browsers installed on computer for management w Netscape Communicator 4.03 or higher w Microsoft Internet Explorer 4.01 or higher with Java support... -
Page 24: Lan/Wan Configuration
IPX-1000 main page LAN/WAN Configuration Please select “LAN/WAN Configuration” on the Network Service configuration menu. After entering “LAN/WAN Configuration” page. and please clicking LAN configuraion button, the configuration screen is shown below. - Page 25 Please clicking WAN configuraion button, the configuration screen is shown below. WAN connection type in IPX-1000 The Internet connection type supported in IPX-1000 are PPPoE, DHCP client and the fixed IP allocation. Please be sure to choose proper connection type for Internet access.
- Page 26 Certain ISP provides a fixed IP address to each of its subscriber. This parameter allows users to setup the fixed IP address assigned by ISP. Your ISP should provide all the information requied for Internet access. The WAN information Parameter Description of IPX-1000 WAN IP address of IPX-1000 Default: 172.16.0.1...
- Page 27 Default: null Password Password for PPPoE connection Default: null DHCP connection Please choose the DHCP client connection if ISP automatically assigns IP address for Internet connecton. Some ISP may require additional information such as Host Name, Domain Name and MAC address.
-
Page 28: Dhcp Server Configuration
ISP service staff for support information. DHCP Server Configuration IPX-1000 has a built-in DHCP server that can automatically assign dynamic IP addresses to client PCs connected to its LAN ports, simplifying the task of IP address management. You can set up two IP address ranges for the DHCP server to use –... -
Page 29: Internet Sharing
Please insert the domain name of the IPX-1000. Please insert the router’s IP address of the IPX-1000. If you want to use IPX-1000’s internal router, please insert the IPX-1000’s LAN Router IP IP address here, or use another router on the LAN then insert its IP address here instead. -
Page 30: Advanced Internet Configuration
Advanced Internet Configuration Advanced Internet configuraton - also called IP masquerade, is a process of translating the source header of IP packets so they will be routable across wide area networks Address mapping This feature allows public IP address to be associated with one computer on your LAN. All outgoing traffic from that PC will be associated with that public IP address. - Page 31 Destination IP address: Please fill the target private IP address which packet be transferred to. Edit:Please select the IP transparented, clicking Edit to modify the public and private IP Address. Remember to save after changing. Delete:Please select the IP transparented,clicking delete to remove the IP you don’t want to transparent.
- Page 32 particular computer on your local network. This computer becomes the DMZ host. A virtual DMZ, however, should be used only in very specific situations. The computer that hosts the virtual DMZ is fully exposed to the Internet, and is thus susceptible to malicious attacks and unauthorized access.
- Page 33 Another important point is the protecting by Firewall. All accessing can be defended and filtered by IPX-1000. But one thing have to be pay attention, the factory setting about allows all service to pass through Firewall. So you need to configure your Firewall before contruct the Virtual DMZ framework.
- Page 34 Internet. The reason is the Virtual DMZ framework will occupy more bandwidth and cause the System loading bigger. See the figure, all traffic will through IPX-1000 when PC in intranet want to access server, but Address Mapping won’t.
-
Page 36: Firewall Configuration
A firewall is designed to prevent unauthorized access to and/or from a private network. It can stop inappropriate communications into and out of the LAN, preventing hacker attacks. IPX-1000’s built-in firewall provides hardware based network security via the following two mechanisms. Pleaae select the... -
Page 37: Qos Configuration
QoS Configuration QoS (Quality of Service) regulates the bandwidth used by each network services. QoS can prevent this from happening and make more efficient use of the available bandwidth. QoS is also needed for certain network services (such as IP phone) where it is essential to guarantee a minimum level of bandwidth in order for the service to be usable. - Page 38 Actual BW > Upload and Download Guaranteed BW Advanced QoS config IPX-1000 provides two standard rules: one for H323 (IP phone) and the other for FTP. Usually you want to guarantee a minimum bandwidth for H323 in order to have an acceptable IP phone quality. And you may want to limit the bandwidth for FTP so the network will not perform poorly when someone is uploading or downloading a large file.
- Page 39 DONE Clicking on the DONE button to apply the changes. Return Go back to the last page. Parameter Description Up to ten user rules can be defined. Note that if “-1” is entered into any BW (bandwidth) field, it means that no QoS is applied to that particular bandwidth. QoS rules For example, if all four BW fields are entered “-1”...
-
Page 40: Ddns
DDNS This device supports many popular Dynamic DNS service providers. Select the company that you want to join then clicks Add button. There are seven DDNS service provides of your choices. Note1: This Device only allows register to one DDNS service provider. Note2: Before using this DDNS service, you should apply an account first. -
Page 41: Vpn Configuration
VPN Configuration The IPX Series VPN Client creates a Virtual Private Network (VPN) connection between one IPX machine and the other corporate IPX machine’s network to maintain the confidentiality of private data. The IPX Series VPN Client provides an easy-to-use solution for secure, encrypted access through the Internet for remote users. - Page 42 Parameter Description IPX Series’ VPN service supports max 4 connections. Tunnel num can be tell VPN tunnel by the other side to which num of the tunnel can be connected. This option has relative to “Remote VPN tunnel number”. Tunnel name Type a human-friendly name for your new connection.
- Page 43 Example: Site A wants to establish VPN connection to site B & C. Site B wants to establish VPN connection to site C. First, site A select tunnel 1 as the channel to site B then site B select tunnel 1 to complete this connection.
-
Page 44: Chapter 4 Telephone Service Configurations
Telephone Service Configurations IPX-1000 Telephony Functions IPX-1000 comes standard with 2 CO ports and 4 extension ports. Basically any analog telephones can be used, but it is better to use telephones with a “Flash” key which generates hook flashes within the range of 100 ~ 700 milliseconds. -
Page 45: Pbx Configuration
Reboot: system reboot PBX Configuration IPX-1000 comes standard with 2 CO lines and 4 extension lines. Basically any analog telephones can be used, but it is better to use telephones with a “Flash” key which generates hook flashes within the range of 100 ~ 700 milliseconds. - Page 46 After being transferred to an extension, if a call is not answered within Transfer Transfer Hold Time Recall Time (measured in seconds), the system will cancel the transfer and try (Transfer Recall Time) to re-transfer the call to either the voicemail box of that extension or the operator, based on the caller’s choice.....
- Page 47 IPX-1000 in order to release line ports after PSTN caller party is hung up. A caller makes a telephone call to IPX-1000 from PBX/PSTN side and calls to other VoIP device through the IPX-1000. If the IP side of other VoIP devices do not answer the call and the caller hang up,...
- Page 48 PBX/PSTN will give IPX-1000 a busy tone automatically. If the other VoIP device of IP side answers and hangs up the phone, the IPX-1000 will release the line port automatically without analyzing busy tone from PBX/PSTN. PBX system advance There are three parameters received from PBX/PSTN.
-
Page 49: Co/Extension Line Configuration
DSP false recognize as busy tone. If so, lower sensitivity will reduce such problem. But in any case, if the line port of IPX-1000 was locked, please use “disconnect” in CO & EXT selection to release the line locked Co/Extension line Configuration CO &... - Page 50 Operator Voicemail Enable operator voicemail if the operator fails to answer the call. IPX-1000 supports the following three caller ID types: FSK, DTMF before ring, DTMF after ring. Please check with your local phone company to find out Caller ID which type is used in your area.
- Page 51 Parameter Description The range is 100~899 and you are free to assign any number in this range to an extension. If two or more extensions are assigned the same number, the Extension No. system will try to transfer the call to the one with the lowest physical port number first.
- Page 52 If this feature is enabled, incoming CO calls can be transferred to this extension by the system (via the auto attendant or the Ring Through function). COTX2EXT (Incoming If this feature is disabled, incoming calls cannot be transferred to this CO Transfer) extension directly.
-
Page 53: Toll Table
Select the prefix from the drop down list and clicking on the DELETE button. H.323 Configuration IPX-1000 supports the “H.323” VoIP phone standard. There are two modes of operation: P2P mode and GK mode. The P2P mode allows for direct communication and is used when both parties have static IP address. - Page 54 GK time to live (min) Gatekeeper searching time. Vocoder Voice compression type.G.723.1 or G.729a. Alignment VoIP gain, default value is –3dB. For example, if IPX-1000 results VoIP gain echo when communicate with another VoIP device, you have to adjust IPX-1000’s VoIP gain till the echo is disappear.
-
Page 55: Calling Party Configuration
This is where you enter the details of all the VoIP servers that you want to communicate with. An IP phone call involves two VoIP servers: your IPX-1000 and the VoIP server at the other end. Both VoIP servers must be in the same mode when communicating with each other. Therefore, in addition to setting up your own system properly, you must also advise the other party to set up their system with the same mode. - Page 56 Parameter Description From the drop down list, please select a type to use when communicating with Type of destination this destination. IP/Domain Please insert the IP address or Domain name Please click the Seq.No or Name link to enter into VoIP Tel data Parameter Description Please insert the username of the remote extension Name...
-
Page 57: Voip & Pstn
VoIP & PSTN Based on the distributed architecture concept, VoIP extensions are off-premises extensions reachable through VoIP calling party. You can call a VoIP extension by dialing a simple extension number as if you are dialing a local extension, although the VoIP extension may be physically located in a remote office thousands of miles away. -
Page 58: Voip User
Incoming IP address, date, time, duration, and called number. VoIP user VoIP user date VoIP user date is users who want to make Off-Net calls through this office. If the Off-Net Security Level is set to high, a non-IPX Off-Net call will be allowed only if the caller is a VoIP User of this office. Up to 50 VoIP Users can be set up here. -
Page 59: Chapter 5 Voice Communications
Chapter 5 Voice communications Overview There are several ways to make calls to desired destination in IPX-1000. In this chapter, we’ll lead you step by step to establish your first voice communication via web browsers operations. Default Configuration Without any configuration, your IPX-1000 is come with following basic information. -
Page 60: Ipx-1000 To Ipx-1000
IPX-1000 to IPX-1000 IPX-A: IPX-B: IPX-A IPX-B WAN IP Address WAN IP Address (210.66.155.80) (210.66.155.90) Ext: 124 Ext: 444 Assume both PBXs used port is port#4 connect to a phone. To call each other. SETP 1: Please select Calling party configuration item on the Telephone Service configuration menu, after enter Calling party config server page, please added the Seq.No. - Page 61 SETP 2: Please full other IPX-B WAN IP Address of your IPX-A "IP" field and after SETP 3: After clicking DONE button, and then the configuration screen appears below. SETP 4: Please select IPX-B item on the Calling party info menu. You will see the configuration screen below, please added the Name / Abbrev code/ PostFix code and select VoIP server on the Add VoIP TEL.
-
Page 62: Ipx-1000 To Vip-Fxs
GW mode on the Add Calling Party, and then the configuration screen appears below. SETP 2: Please full other VIP-series IP Address of your IPX-1000 "IP" field. SETP 3: After clicking DONE button, and then the configuration screen appears below. - Page 63 After these configurations, please refer to following usage steps: VIP-400 Usage: Please pick up the VIP-400 telephone and dial 121 to connect to IPX-1000. IPX-1000 Usage: Case 1: IPX-1000 phone 121 calls to VIP-400 phone 5678 Human operation at IPX...
-
Page 64: Ipx-1000 To Vip-Fxo
Calling party config server page, please added the Seq.No. / Name and select GW mode on the Add Calling Party, and then the configuration screen appears below. SETP 2: Please full other VIP-400 IP Address of your IPX-1000 "IP" field. - Page 65 After these configurations, please refer to following steps: VIP-400 Usage: Please pick up the VIP-400 telephone and dial 121 to connect to IPX-1000. IPX-100 Usage: Case 1: IPX-1000 phone 121 calls to Ext. 801 via VIP-400...
-
Page 66: Vip-Fxo To Ipx-1000
Case 2: IPX-1000 Phone 121 calls to PSTN number (02) 12345678 via VIP-400. Human operation at IPX Equipment operation Human operation at Caller side VIP Receiver Side Pick up phone 121 1.IPX dial tone is heard. 2.the first LED will be at the green color in Phone 1 of front panel. - Page 67 Phone 121 is ringing 1.The second LED is lighting in phone 4 Pick up phone 121 of IPX-1000 front panel. Case 2: Ext. 801 calls to IPX-1000 Ext.121 and transfer to Ext. 124 Human operation at Equipment operation Human operation at...
-
Page 68: Keypad Operations In Ipx-1000
Phone 124 is ringing 1.The second LED is lighting in phone 1 Pick up phone 124 of IPX-1000 front panel. Case 3: Ext. 801 calls to IPX-1000 Ext. 121 via voicemail system Human operation at Equipment operation Human operation at... - Page 69 *2 : the call will be transferred to the voicemail system. Dial Hint Press “1” = leave a message Press “2” = Mailbox Password (default value is “0000”) “1” = hear new messages “2” = hear old messages “3” = change password “4”...
- Page 70 *8:Call pickup Dial Hint You can answer an incoming call that is ringing at another extension from your phone without leaving your desk. The following types can pick up a extension’s call. Dial *8 when the other extension is ringing. Flash(100ms〜700ms)/Recall:Call transfer Dial Hint...
- Page 71 The function is reserved The function is reserved Call Pickup Accept or Drop Timed Reminder(MM.DD.HH.MM,8 digits) The function is reserved The function is reserved The function is reserved Automatic Callback Busy (only for extension) The function is reserved The function is reserved The function is reserved The function is reserved The function is reserved...
- Page 72 incoming call, outside party will hear the personal voice announce you recorded before and will be ask for leaving message. “2” You can set another extension as the forward destination. When extension receive incoming call, outside party will be transfer to the extension appointed to forward. “3”...
- Page 73 System Phone Command List System Phone Command Setting (XXXX is the password of the PCBX system,and the default value is “1234”;You have to dial the password after dialing command) Command Feature Default Pcbx Password Changing The function is reserved The function is reserved Reset to Default Value The function is reserved The function is reserved...
- Page 74 #30:Password Changing(4 digit) Dial Hint You can assign a password for IPX system by dialing “#30XXXX”. The voice will ask you to enter 4-digit number to change the factory value of the system. #33:Reset(S:0=reset the password to ‘0000’;S:1=clear the data and setting of the Dial extension) Hint...
- Page 75 Dial “2”:reserve for master à “2”:listen the voice mail; “3”:change extension’s password; “4”:call forward set; “5”:enter the forwarded number Note (The default password value is “0000”, and when you listen the voice mail, you can use “Recall” or “Flash” to disconnect forced) Dial “###”...
- Page 76 Introduction of the *key * Key Function Method Reserved *1 On your desk à dial “*2” à follow the process system ask Voice mail and *2 At the other desk à dial “*2” à enter your extension number à Master mode follow the process system ask At the outside party à...
- Page 77 GW mode dialing Dial *6 *6 + “No. In the VoIP Server selection” + “the extension of that machine” + “# key” To ring the remote extension speedy through VoIP. Example: you can dial *6 0001 177 # to ring the 177 extension of No.0001 machine in VoIP Server selection.
-
Page 78: Appendix Aipx-1000 Specifications
Appendix A IPX-1000 Specifications Model IPX-1000 Dimensions (mm) 215 (L) x 30 (H) x 132 (W) Operating Temperature Storage Temperature VoIP Standard H.323, Compression G.723/G.729 Echo Cancellation G.165/G.168 25ms Network Protocol: TCP/IP, NAT, DHCP, HTTP, DNS Network Interface: LAN 4 * 10/100 Mbps RJ-45...
Need help?
Do you have a question about the IPX-1000 and is the answer not in the manual?
Questions and answers