Advertisement
Advertisement
Table of Contents

Subscribe to Our Youtube Channel
Related Manuals for Digitus USB 3.0 Dual SATA HDD


Summary of Contents for Digitus USB 3.0 Dual SATA HDD
- Page 1 USB 3.0 DUAL SATA HDD DOCKING STATION User Manual (DA-70547)
-
Page 2: System Requirements
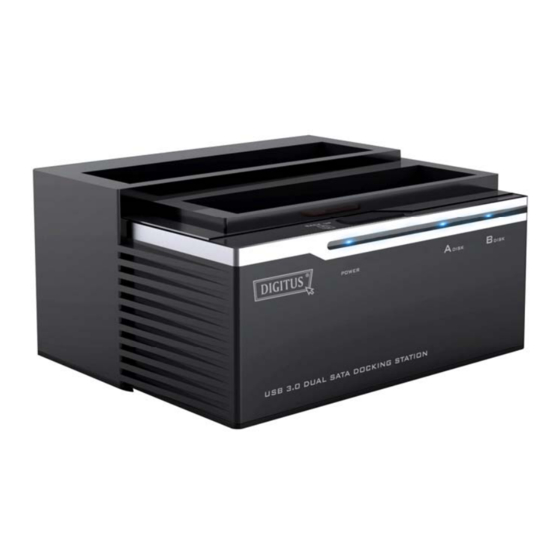
Introduction DA-70547 is a USB3.0 enabled dual-SATA hard drive enclosure. It supports simultaneously use of two 2.5” or 3.5” SATA hard disk for both data read and data write. It also is downward compatible with USB2.0 and USB1.1. The maximum transfer speed of USB3.0 can reach 5Gbps. -
Page 3: Software Installation
Software installation 1. Please put PCClone EX Lite CD into CD ROM drive, the program directly goes on the screen of PCClone Setup Wizard. (In case the screen doesn’t come out, please operate the window box of “setup.exe”) 2. Click “install’. 3. - Page 4 6. The installation is completed, please click “OK” to exit. 7. “PCClone EX”icon will displays in the notification area after setup; users can double-click the icon or press the right key of the mouse to execute PCClone EX Lite.
-
Page 5: Create Partition
Create Partition If your USB HDD has managed already, please skip this part and move on next context. Steps 1. Please plug USB HDD. (Turn on the USB power) 2. Please right click “My computer”, and point “Manage”. (If also can click in succession as “Start”→... - Page 6 3. Please click “Disk Management” as the left window, and then find the disk management as the right window. 4. Please right click the disk of “Unallocated”, and point the “New Partition”. (In order to make sure the disk of “Unallocated” whether the USB disk uses this area or not, users can find out by removing and plugging the port of USB connection) 5.
-
Page 7: Fat32 Format Utility
6. Also, you can format USB hard disk by “FNet FAT32 Utility” and then you can start the backup function (The detail format steps please refer to the section of “FNet FAT32 Utility”) FAT32 Format Utility For the current HDD capacity is getting larger, the Fat32 Format Utility in Windows 2000/XP is not able to support the HDD size exceeding 32GB;... - Page 8 3. Confirm the “USB Device’ and “Drive to Format ” in the FAT32 Format Utility, and then press “Start” 4. Tick “Quick Format” and click “Start” for executing (Attention: All data in USB HDD will be deleted if you use this function)
- Page 9 5. The window shows in progress...
- Page 10 One Button File Backup One Button backup function only supports the external HDD case with button design – It won’t set comprehensive steps for backup anymore, only use the button of the external HDD case. Note: when you click the button of backup, the icon of PCClone EX Lite must be staying at the notification area.
- Page 11 5. When the backup is in progress, PCClone EX Lite diagram will be blinking at the notification area. There is a dialog box will be displayed the progress every single 10 percentages. 6. After the backup is completed, PCClone EX Lite diagram at notification area will appears the “Backup finished”...
-
Page 12: Quick Launch
Quick Launch... - Page 13 Quick File Backup Users can directly execute “File Backup’ from Quick Launch, or use their own “Hot key”, only one step, and the system data will be backed up easily. (For the first time using, please refer to the subject of “FileBackup”, or setup your own hot key in “Setup” 1.
-
Page 14: File Backup
File Backup 1). File backup 2). File Restore 1. Please plug the USB HDD into the computer, and turn on the power 2. Execute PCClone EX Lite 3. Click “File backup” 4. Select folders / drives from the fix device 5. - Page 15 6. Select “Backup” and press “Start” to start. 7. Backup is completed, please press “OK”. 8. The selected folders have been moved from the fixed devise to the USB device successfully.
- Page 16 9. There is a hidden root directory F: FNet in the USB device, all the file backups are kept in there. Be careful, don’t delete it carelessly.
-
Page 17: File Restore
File Restore 1. Please plug the USB HDD, and turn on the power. 2. Execute PCClone EX Lite. 3. Go on the PCClone EX Lite screen. 4. Click “File Backup”. 5. Select folders / files of USB device you would like to restore. 6. - Page 18 Erase File Backup 1. Please plug USB HDD, and turn on the power. 2. Execute PCClone EX Lite. 3. Go on PCClone EX Lite screen. 4. Select the “File backup” of USB device, then, right click the mouse to click “Delete select Files”, all select files in the USB device will be deleted.
-
Page 19: File Manager
File Manager PCClone EX Lite File Manager is the same function as Windows Explorer. Directly cut and paste folders / files between two windows of local and USB HDD. It is convenient for users who can review / manage / move / access their folders / files directly without clicking the “My computer”... - Page 20 Others There are two options: ◆ automatically on Windows startup ◆ Enable USB button Other Connecting PCClone EX Lite spec., please click the icon of “PCClone EX Lite” on the right side of upper corner of the screen, or right click the icon of “PCClone EX Lite” in the notification area.
Need help?
Do you have a question about the USB 3.0 Dual SATA HDD and is the answer not in the manual?
Questions and answers