Table of Contents
Advertisement
Quick Links
Advertisement
Table of Contents

Related Manuals for AEG 35146TG


Summary of Contents for AEG 35146TG
- Page 1 EN User manual 35146TG...
-
Page 2: Table Of Contents
13. INSTALLATION ............22 FOR PERFECT RESULTS Thank you for choosing this AEG product. We have created it to give you impeccable performance for many years, with innovative technologies that help make life simpler –... -
Page 3: Safety Information
ENGLISH 1. SAFETY INFORMATION Before the installation and use of the appliance, careful- ly read the supplied instructions. The manufacturer is not responsible if an incorrect installation and use cau- ses injuries and damages. Always keep the instructions with the appliance for future reference. 1.1 Children and vulnerable people safety WARNING! Risk of suffocation, injury or permanent disability. -
Page 4: Safety Instructions
• Never try to extinguish a fire with water, but switch off the appliance and then cover flame e.g. with a lid or a fire blanket. • Do not store items on the cooking surfaces. • Do not use a steam cleaner to clean the appliance. -
Page 5: Gas Connection
ENGLISH • The bottom of the appliance can get Gas connection hot. We recommend to install a non- • All gas connections should be made combustile separation panel under the by a qualified person. appliance to prevent access to the bottom. - Page 6 • Do not use the appliance as a work – do not keep moist dishes and food surface or as a storage surface. in the appliance after you finish the cooking. • Provide good ventilation in the room where the appliance is installed.
-
Page 7: Internal Light
ENGLISH WARNING! • Do not clean the burners in the dish- Make sure to install a stabilizing washer. means in order to prevent tip- ping of the appliance. Refer to 2.4 Internal light Installation chapter. • The type of light bulb or halogen lamp used for this appliance, is only for 2.3 Care and Cleaning household appliances. -
Page 8: Product Description
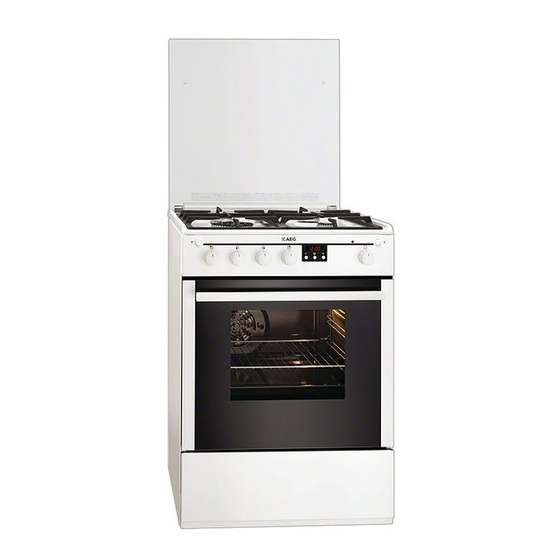
3. PRODUCT DESCRIPTION 3.1 General overview Button for the fan Knobs for the hob Timer - minute minder Grill indicator Button for the oven lamp Knob for the oven functions Heating element Oven lamp Rating plate Shelf positions 3.2 Cooking surface layout... -
Page 9: Before First Use
ENGLISH 4. BEFORE FIRST USE WARNING! Press the + and - buttons at the same Refer to the Safety chapters. time until 0:00 flashes. Then press the + or - button to set the correct time of day. CAUTION! After approximately five seconds, the To open the oven door, always flashing stops and the display shows the hold the handle in the centre. -
Page 10: Hob - Helpful Hints And Tips
10 www.aeg.com WARNING! If the burner does not light after 10 seconds, release the control knob, turn it into off position and try to light the burner again after minimum 1 minute. You can light the burner without electrical device (e.g. when there is no electricity in the kitchen). -
Page 11: Oven - Daily Use
ENGLISH WARNING! water and dry them carefully before Deactivate the appliance and let you put them back. it cool down before you clean it. • Wash stainless steel parts with water, Disconnect the appliance from and then dry them with a soft cloth. the electrical supply before you •... - Page 12 12 www.aeg.com Oven function Application To grill flat food in the middle of the shelf. To make toast. WARNING! Grill We recommend that you do not use the elec- tric grill for cooking at the same time as the gas oven.
-
Page 13: Oven - Using The Accessories
ENGLISH 8.5 Using the electric grill cooking function is selected. It goes off when the oven reaches the correct tem- WARNING! perature. It then cycles on and off to Always cook with the oven door show the temperature adjusts. closed. 8.7 Timer - minute minder WARNING! We recommend that you do not... -
Page 14: Oven - Helpful Hints And Tips
14 www.aeg.com Inserting the oven shelf and deep roasting pan together Put the oven shelf on the deep roasting pan. Push the deep roasting pan be- tween the guide-bars of one of the oven levels. 9.2 Inserting the baking tray Put the tray in the centre of the oven cavity, between the front and rear wall. -
Page 15: Cooking Times
ENGLISH • If you use two baking trays at the same • To prevent too much smoke in the time, keep one level empty between oven during roasting, add some water them. into the dripping pan. To prevent the smoke condensation, add water each time after it dries up. - Page 16 16 www.aeg.com Ther- Preheat- Cooking / Tray type and shelf ing time baking Food stat level (mi- time (mi- posi- nutes) nutes) tion Cheese cake (2600 g) aluminized / enamel- 70 - 90 led tray at level 3 Swiss apple flan (1900...
-
Page 17: Oven - Care And Cleaning
ENGLISH 10.5 Grilling Cooking / Preheating time baking Food Shelf level (minutes) time (mi- nutes) Toast (500 g) oven shelf at level 3 4 - 6 Beef steaks (1000 g) 20 + 20 Chicken, half (1200 g) 30 + 35 Pork roast cutlet (500 g) 30 + 30 1) Put a baking tray under the oven shelf, on shelf level 1 or 2. -
Page 18: Cleaning The Oven Door
18 www.aeg.com To support this self-cleaning process the cleaning easier remove the oven heat the oven without any food door. regularly: WARNING! Open the oven door. The oven door can close if you Remove all accessories from the try to remove the internal panel oven. - Page 19 ENGLISH Lift and turn the levers on the two hinges. Close the oven door to the first opening position (halfway). Then pull forward and remove it from its seat. Place the door on a stable surface protected by a soft cloth. Use a screwdriver to remove 2 screws from bottom edge of door.
- Page 20 20 www.aeg.com Use a spatula made of wood or plastic or equivalent to open the in- ner door. Hold the outer door, and push the inner door against the top edge of the door. Lift the inner door. Clean inner side of the door.
-
Page 21: Oven Lamp
ENGLISH 11.5 Oven lamp • Remove the fuses in the fuse box or deactivate the circuit breaker. WARNING! • Put a cloth on the bottom of the oven. Be careful when you change the This prevents from damage to the oven lamp. -
Page 22: Installation
22 www.aeg.com Problem Possible cause Remedy The oven lamp does The oven lamp is de- Replace the oven lamp. not operate fective Steam and conden- You left the dish in Do not leave the dishes in the sation settle on the... - Page 23 ENGLISH Gas burners Burner Normal Reduced Type of Pres- Injector Usage power power sure diame- mbar Auxiliary 1,00 0,40 Natural 0,82 burner Gas G20 1,00 0,35 Natural 0,70 Gas G20 1,00 0,35 Butane 28 - 0,50 72,71 0,85 0,31 Propane 28 - 0,50 60,70...
- Page 24 24 www.aeg.com Installation: use the pipe holder. Always Gas connection point (only one point engage the gasket. Then continue with is applicable for appliance) the gas connection. The flexible pipe is Gasket prepared for apply when: Adjustable connection – it can not get hot more than room Natural Gas pipe holder temperature, higher than 30 °C;...
- Page 25 ENGLISH • If you change from liquid gas to natu- WARNING! ral gas, undo the by-pass screw ap- Make sure the flame does not go proximately 1/4 of a turn (1/2 of a turn out when you quickly turn the for the Triple Crown burner).
- Page 26 26 www.aeg.com Adjust the by-pass adjustment screw Turn the knob for the oven functions (A) with a thin-bladed screwdriver. to the maximum position and let the oven heat for 10 minutes. Turn the knob for the oven functions from the maximum to the minimum position.
-
Page 27: Electrical Installation
ENGLISH How to install the anti-tilt protection Set the correct height and area for 110-115 the appliance before you attach the anti-tilt protection. 232- 237 Make sure that the surface behind the appliance is smooth. Install the anti-tilt protection 232 - 237 mm down from the top surface of the appliance and 110 - 115 mm from the side of the appliance into... - Page 28 www.aeg.com/shop...
Need help?
Do you have a question about the 35146TG and is the answer not in the manual?
Questions and answers