
Related Manuals for Hommy Soft Ice Cream Machine


Summary of Contents for Hommy Soft Ice Cream Machine
- Page 1 SOFT ICE CREAM MACHINE USER MANUAL House-hold and Commercial Appliances) Model No.: Date: S/N: (Please read this user manual before using the machine!) 1,40...
- Page 2 AGENT Sales agent: Address: Telephone: Service Technician Telephone: Sales date: 2,40...
- Page 3 INDEX Overview Introduction to different models Important user information Technical parameters Operating safety Cleaning your machine Operating instructions Fault-finding Electrical wiring diagram 10. Refrigeration system diagram 11. Service records 3,40...
- Page 4 1. OVERVIEW Hommy has implemented an intensive development programme through consultation with and feedback from its clients throughout the world in order to secure its position as a market leader. The different models catering to diverse needs, attractive appearance, ease of use and operation, control...
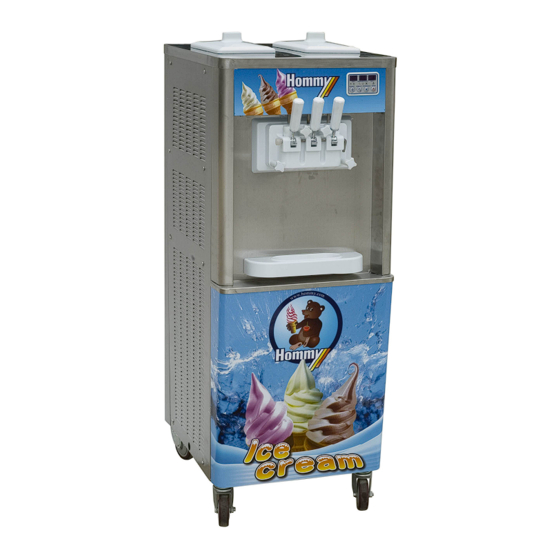
- Page 5 HM316 (PAMC) HM106 (PC) 5,40...
- Page 6 HM836 Power supply:220V/240V 50Hz Net weight:188kg Rated power:3.5kw Machine dimensions:540x780x1490mm Production:60~80L/h Packing dimensions: 705x900x1600mm Condensation medium: air Flavours:2+mixed Refrigerant:R22 or R404 (as per requirement) Optional function: Pre-cooling and keep-fresh functions, servings counter, hopper motor, air pump, cone holder, umbrella, side-tray. 6,40...
- Page 7 HM833 Power supply:220V/240V 50Hz Net weight:160kg Rated power:2.9kw Machine dimensions:540x780x1490mm Production:35~50L/h Packing dimensions: 705x900x1600mm Condensation medium: air Flavours:2+mixed Refrigerant:R22 or R404 (as per requirement) Optional function: Pre-cooling and keep-fresh functions, servings counter, hopper motor, air pump, cone holder, umbrella, side-tray. 7,40...
- Page 8 HM633 Power supply:220V/240V 50Hz Net weight:188kg Rated power:2.6kw Machine dimensions:540x780x1490mm Production:35~50L/h Packing dimensions: 705x900x1600mm Condensation medium: air Flavours:2+mixed Refrigerant:R22 or R404 (as per requirement) Optional function: Pre-cooling and keep-fresh functions, servings counter, hopper motor, air pump, cone holder, umbrella, side-tray 8,40...
- Page 9 HM620 Power supply:220V/240V 50Hz Net weight:160kg Rated power:1.7kw Machine dimensions:540x780x1490mm Production:25~40L/h Packing dimensions: 705x900x1600mm Condensation medium: air Flavours:2+mixed Refrigerant:R22 or R404 (as per requirement) Optional function: Pre-cooling and keep-fresh functions, servings counter, hopper motor, air pump, cone holder, umbrella, side-tray. 9,40...
- Page 10 HM316 Power supply:220V/240V 50Hz Net weight:120kg Rated power:1.7kw Machine dimensions:518x756x860mm Production:25~35L/h Packing dimensions: 665x864x969mm Condensation medium: air Flavours:2+mixed Refrigerant:R22 or R404 (as per requirement) Optional function: ir pump, cone holder. Pre-cooling and keep-fresh functions, servings counter, hopper motor, a 10,40...
- Page 11 HOMMY ENTERPRISE (XINHUI) CO., LTD. HM106 Power supply:220V/240V 50Hz Net weight:68kg Rated power:0.7kw Machine dimensions:440x620x663mm Production:15~20L/h Packing dimensions: 608x699x730mm Condensation medium: air Flavours:2+mixed Refrigerant:R22 or R404 (as per requirement) Optional extras: Pre-cooling and keep-fresh functions, servings counter. 11,40...
- Page 12 HM836 Machine Structure Description Description Description Right side panel Lower front panel Gear box Front panel Condenser Freezing cylinder Decorative cover Ventilator fan Control panel Handle Pre-cooling compressor Top panel Draw valve Main compressor Back panel Horizontal bar Left side panel Hopper lid Throat block nut Pre-cooling condenser...
- Page 13 HM316 Machine Structure Description Description Description Front panel Main ventilator Hopper Throat block Main compressor Rear panel Draw valve Main motor Top panel Throat block nut Pre-cooling condenser Hopper lid Drip tray Pre-cooling compressor Control panel Decorative cover Main compressor Draw switch Freezing cylinder Main compressor capacitors...
- Page 14 Description Description Description Right panel Draw valve O ring Left panel Front panel Throat block O ring Gear box Control panel Throat block nut Rear panel Draw switch Beater stick Level sensor Decorative cover Drip tray Hopper Throat block Freezing cylinder Flywheel Draw handle Main motor...
- Page 15 attention: a. During transportation, it is inevitable that the machine be shaken and vibrated. It must be allowed to stand for 24 hours to allow the refrigerant system to settle. b. The machines are designed to operate below 32ºC. They should be shielded from direct sunlight and placed away from heat sources.
- Page 16 Machine chassis earth connection b. 220v/50Hz machines should be connected to an adequate power supply of 220~240V(single phase) or. The power cable cross-section area should be at least 2.5mm² to ensure adequate current flow during start-up peak. The connection cable should be no longer than 6m. c.
- Page 17 1. MODEL: 2. POWER: 3. CURRENT: 4. N.W: 5. FUNCTION: 6. THE BLOWING GAS: 7. MAIN POWER: 8. PRODUCTION: 9. REFRIGERANT: 10. CLIMATIC: 5. OPERATING SAFETY During machine use, the following must be complied with: 5.1) Prior to operation, this manual and any additional instructions must be observed and machine operated strictly according to these instructions.
- Page 18 5.2) Do not operate the machine if it is not properly earthed. This may lead to electric shock. 5.3) When machine is not in use for continued periods, unplug the power cable. 5.4) Always disconnect the power supply before opening any side panel on machine or before undertaking any repair/maintenance work.
- Page 19 6. Cleaning Procedure 6.1) Pre-production cleaning a. Remove the throat block by unscrewing the four nuts. b. Use household detergent or a chlorine solution to clean the hoppers, freezing cylinders, beater sticks, inlet tube and face block. Dip the throat block in the cleaning solution and pull the draw handles three or four times.
- Page 20 Step 4: remove cross-bar and draw handles Step 5: remove draw valves. Be sure to inspect and replace the rubber washers if worn. Note that “a” and “c” are side-valves and “b” is a centre valve with a different design. Re-assembly with valve “b”...
- Page 21 a:draw valves b:square gaskets Notes: Square gaskets must be inspected and properly installed prior to assembly. Lubricate with edible oil. a: draw handles; b:horizontal bar rubber stopper; c: horizontal bar, d: central draw valve; e: side draw valve; f: throat block; g: square gasket.
- Page 22 Step 7: Clean freezing cylinder with moist cloth. Step 8: To replace beater sticks, push gently into freezing cylinder and rotate slowly until the back of beater stick slots into position and the beater stick no longer protrudes from the cylinder. Step 9: To clean the hopper, use cloth soaked in detergent solution and gently clean all traces of ice cream mixture, taking care not to dislodge level sensor.
- Page 23 a:Inner expansion tube; b:Outer expansion tube; c: washers Expansion tube assembly: insert inner tube (a) into outer tube (b), replace O rings (c) on grooves in outer tube (b) After cleaning hopper and expansion tubes, replace expansion tube. The orifice dimension in expansion tube may be increased or decreased.
-
Page 24: Operating Instructions
c. The wash cycle switches off automatically after 2 minutes. d. After wash cycle, proceed to clean the parts as per pre-production wash procedure. Warning: During the wash cycle, the main motor works without the compressor. Do not wash the mashing whilst it is in the production cycle as this will freeze the water and result in damage to the machine. - Page 25 H. Right hopper temperature indicator. I. Power switch indicator: becomes blue when machine is switched on, default colour is red. J. Power source button/function programming button. K. Pre-cooling function button. This is also used as programming function navigation button (is used to choose between electric current value setting, ice cream hardness setting and pre-cooling temperature setting).
- Page 26 again automatically every 120 minutes while the hopper pre-cooling system is regulated by the pre-set temperature. c. In programming mode, press the pre-cooling button to select the function to be programmed – calibration of the ice cream hardness level [value between 30 and 100] or press again to set the pre-cooling temperature or press again to set the current value).
- Page 27 button will increase the value of the calibration. 7.3.5) Calibrating ice cream hardness setting a. The machine has pre-established factory settings for ice cream hardness. However, these are based on a standard average ice cream mixture. If your mixture differs substantially, it may be necessary to re-adjust this setting.
- Page 28 than 165 V, machine will continue to work but will display a sign of "E-1" in window H to alert the user that the machine is not operating within its normal parameters. When the voltage returns to the normal parameters, the “E-1” sign will disappear. A machine will be damage when working under inadequate voltage supply conditions.
- Page 29 7.3.13) Suggested settings Hardness calibration adjustment: To adjust the setting, while the machine is in standby mode, press window E 30~100 the start button for three seconds. Thereafter adjust the setting using the + (Produce) or – (Wash) button. HM106: 45~65 Default setting: 55 HM836,HM336:...
- Page 30 Low setting – machine may not produce ice cream resulting in over-working motor Normal production setting In this range the machine may not automatically switch off, possibly resulting in key component damage due to very hard ice cream 30,40...
- Page 31 8. TROUBLESHOOTING GUIDE 8.1) Cooling system fault analysis Faults in the cooling system can be caused by the compressor, condenser, ventilator fan, expansion valve, evaporator, tubing or a host of interrelated problems. All cooling components work together in a single complex system, and in the case of a fault, the whole system should be examined by an experienced and qualified technician using an approach of “listen, touch, observe and analyze”.
- Page 32 8.2) Troubleshooting guide Fault Reason Analysis Corrective actions A. The starter or capacitor for the compressor is defective A.B. Change the defective parts. compressor B. The compressor is damaged. C. Increase the cable size or does not run. C. Power voltage is low or cross increase the capacity of power section of the power cable is too source...
-
Page 33: Electrical Diagram
Serial Fault Cause Corrective Action Insufficient refrigerant Cooling slow 1. Re-charge refrigerant Inefficient compression compressor works for 2. Repair or replace compressor 3. Dust-clogged condenser, low excessive time. 3. Clean condenser heat radiation 4. Discharge refrigerant 4. Excess refrigerant 1. After detection and repair of leak, refill refrigerant 1. - Page 34 (HM833PAMC / HM633PAMC) 34,40...
- Page 35 (HM316PAMC / HM620PAMC) 35,40...
- Page 36 (HM106PC) 36,40...
- Page 37 HM836PAMC/HM336PAMC 10. REFRIGERATION DIAGRAM 37,40...
- Page 38 10.1) Main Cooling System Description Description Description Compressor Ventilation fan Evaporator Pressure sensor Dry filter Pin valve Condenser Expansion valve 10.2) Pre-cooling sytem 38,40...
- Page 39 Description Description Description Compressor Filter dryer Needle valve Condenser Capillary tube Ventilation fan Evaporator We reserve the right to modify the system without prior notice. 11. AFTER SALES SERVICE Model:_________________________ 39,40...
- Page 40 Serial number:_____________________ Frame number: Service record: _____________________________________________________________ _____________________________________________________________ _____________________________________________________________ _____________________________________________________________ _____________________________________________________________ _____________________________________________________________ _____________________________________________________________ _____________________________________________________________ _____________________________________________________________ _____________________________________________________________ _____________________________________________________________ _____________________________________________________________ _____________________________________________________________ _____________________________________________________________ _____________________________________________________________ ________________________________ 40,40...
Need help?
Do you have a question about the Soft Ice Cream Machine and is the answer not in the manual?
Questions and answers
ya mujha chaiya ha contect 03260419466
@horab coll is ki price kai ha