Table of Contents
Advertisement
Quick Links
Advertisement
Table of Contents

Related Manuals for AirLive ETHER-GSH8TW+V2


Summary of Contents for AirLive ETHER-GSH8TW+V2
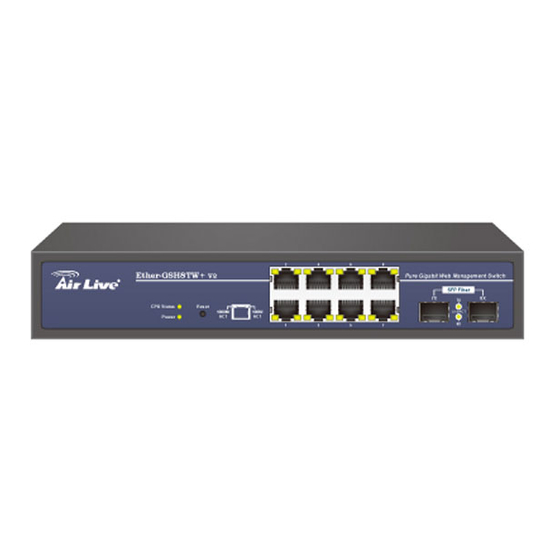
- Page 1 Ether-GSH8TW v2 / 8TW+v2 Pure Gigabit Web Management Switch User’s Manual...
-
Page 2: Declaration Of Conformity
5F., NO.6, Lane 130, Min-Chuan Rd., Hsin-Tien City, Taipei County, Taiwan Declare that the product 8 / 8+2 Ports Pure Gigabit Web Management Switch AirLive Ether-GSH8TW v2/8TW+ v2 is in conformity with In accordance with 2004/108/EC Directive and 1999/5 EC-R & TTE Directive Clause... - Page 3 1999/5/CE. Ar šo OvisLink Corp. deklarē, ka AirLive Hér með lýsir OvisLink Corp yfir því að AirLive Latviski [Latvian] Ether-GSH8TW v2/8TW+ v2 atbilst Direktīvas Íslenska [Icelandic] Ether-GSH8TW v2/8TW+ v2 er í samræmi við...
-
Page 4: Table Of Contents
2.2.3 RSTP Status............................27 2.2.4 IGMP Status ............................28 2.2.5 Ping...............................29 2.3 M ......................30 AINTENANCE 2.3.1 Warm Reboot .............................30 2.3.2 Factory Default ..........................30 2.3.3 Firmware Update ..........................30 2.3.4 Config File............................30 CHAPTER 3 TERMINAL MODE MANAGEMENT .........32 AirLive Ether-GSH8TW v2 / 8TW+v2 User’s Manual... -
Page 5: Chapter 1 Introduction
Rapid STP (RSTP) is supported. To support multicast application IGMP is also supported. Full LED status display eases user’s installation and inspection, a reset button is also provided to allow users to easily go back to default setting. AirLive Ether-GSHTW v2 / 8TW+v2 User’s Manual... -
Page 6: Main Features
Support multicast storm, broadcast storm control as well as flooding control Support port mirroring Support Telnet LED display for each port to show link and activity status Desktop and optional rack-mountable kit Reset to default Field-code-upgrade through web browser AirLive Ether-GSH8TW v2 / 8TW+v2 User’s Manual... -
Page 7: Start To Manage This Switch
Press “?” to find root operation page, then choose command by typing little alphabets After enter command page, Press “?” to find command parameters and format, furthermore, type “command ?” to get explanation. Type “up” or “/” to go back to previous page AirLive Ether-GSHTW v2 / 8TW+v2 User’s Manual... -
Page 8: Led Indicator
Port is not connected Blinking Transmitting/Receiving MiniGBIC slot LEDs Green 7 port is connected 7 port is not connected Blinking Transmitting/Receiving Green 8 port is connected 8 port is not connected Blinking Transmitting/Receiving AirLive Ether-GSH8TW v2 / 8TW+v2 User’s Manual... -
Page 9: Chapter 2 Web Management
Function manuals are divided into three categories: Configuration, Monitoring and Maintenance, and all functions are shown briefly below. AirLive Ether-GSHTW v2 / 8TW+v2 User’s Manual... -
Page 10: Configurations
SNMP communities…etc. Once the user finish the setting, he must press the “ Apply “ button to execute all his setting, and whenever he needs, he may press the “ Refresh “ button to get updated status of system information. AirLive Ether-GSH8TW v2 / 8TW+v2 User’s Manual... - Page 11 (1) Through console port, check configuration of IP if he gets password (2) Press “Reset” button seconds, let system return to default settings, that is, ---- >> IP address = 192.168.1.100; … VID = 1, all settings return to factory default AirLive Ether-GSHTW v2 / 8TW+v2 User’s Manual...
-
Page 12: Ports
Choose and click the ports you want to set. For example, choose port 1, and set port 1 Flow Control enable, then press “Apply”. After execution, diagram will be shown as below. AirLive Ether-GSH8TW v2 / 8TW+v2 User’s Manual... -
Page 13: Port-Based Vlan
Choose and click the ports you want to group. For example, choose port 1, port 2 and set their group ID 2, then press “Apply”. After execution, diagram will be shown as below. AirLive Ether-GSHTW v2 / 8TW+v2 User’s Manual... -
Page 14: Tag-Based Vlan
But, for example, assume user uses port 1 as web management port, then user create VLAN ID = 10 on port 7, 8 and create another VLAN ID = 20 on port 5, 6. Now 3 VLAN groups will be shown on VLAN group table after he presses “Apply” button. AirLive Ether-GSH8TW v2 / 8TW+v2 User’s Manual... - Page 15 ---- >> IP address = 192.168.1.100; … VID = 1, all settings return to factory default After assigning a tag VLAN, there are some attributes parameters that must be assigned for some tag-VLAN application. Here below are explanation when entering the “Port Config”, they are: AirLive Ether-GSHTW v2 / 8TW+v2 User’s Manual...
- Page 16 When Egress Tag is enabled, then, the tag will be added into egress frames and then sent out to the device that supports tagged-VLAN. When this is disabled, tag will not be added into egress frame and then sent to device that does not support tagged-VLAN. AirLive Ether-GSH8TW v2 / 8TW+v2 User’s Manual...
-
Page 17: Port Trunking
A default diagram is shown below, and up to 4 groups are provided. Choose and click the trunk ports you want to group. For example, choose port 1, port 2 into group 1, then press “Apply”. After execution, diagram will be shown as below. AirLive Ether-GSHTW v2 / 8TW+v2 User’s Manual... -
Page 18: Port Mirroring
Choose and click the ports you want to monitor. For example, choose port 2 is mirror port, and the mirror source is port 5, and then press “Apply”. After execution, diagram will be shown as below. AirLive Ether-GSH8TW v2 / 8TW+v2 User’s Manual... -
Page 19: Quality Of Service
Default Priority Table if the device connected to that port is legacy device which does not support Tag. That is, user must set Priority for legacy device at each legacy port. 8 priority levels map into 4 classes also must be done the same as explained in previous paragraph. AirLive Ether-GSHTW v2 / 8TW+v2 User’s Manual... - Page 20 AirLive Ether-GSH8TW v2 / 8TW+v2 User’s Manual...
-
Page 21: Storm Control
Choose and click the type of storm you want to control. For example, choose Broadcast storm with 3,964 frames per second as upper limit, once the Broadcast frame rate is higher than 3,964 frames per second, this port will be disabled. Press “Apply”, after execution, diagram will be shown below. AirLive Ether-GSHTW v2 / 8TW+v2 User’s Manual... -
Page 22: Lacp
Choose and click the trunk ports you want to group. For example, select port 5, 6, 7 and port 8 to group into a LACP group with key value “auto” for all ports, then press “Apply” to activate the setting. The figure is shown below. AirLive Ether-GSH8TW v2 / 8TW+v2 User’s Manual... -
Page 23: Rstp
The Rapid-Spanning-Tree-Protocol (RSTP) is a more advanced protocol than STP according to IEEE 802.1w standard. RSTP can shorten spanning tree convergent time while network topology is changed. A default diagram is shown below. AirLive Ether-GSHTW v2 / 8TW+v2 User’s Manual... - Page 24 Path Cost – A value on a port that switch uses to determine which port are the forwarding ports. The lowest number is forwarding ports. The value can be set from 1 to 200000000 or “auto” to be automatically generated. AirLive Ether-GSH8TW v2 / 8TW+v2 User’s Manual...
-
Page 25: Igmp
Ethernet section, there is only one Querier, and Querier is usually in router device. For example, video traffic comes from port 8 which is connected to a router, and port 3,4,5 are connected to IGMP member, then the configuration may be set as below. AirLive Ether-GSHTW v2 / 8TW+v2 User’s Manual... - Page 26 AirLive Ether-GSH8TW v2 / 8TW+v2 User’s Manual...
-
Page 27: 802.1X
Re-authenticate: authorized again on that port Force Reinitialize: force that port initialize Parameters: Define time schedule on Re-authentication mode The default diagram as shown below: AirLive Ether-GSHTW v2 / 8TW+v2 User’s Manual... -
Page 28: Monitoring
2.2 Monitoring 2.2.1. Port Statistics Choose and click command manual, after execution, diagram will be shown as below; user can clear counter or refresh at will. AirLive Ether-GSH8TW v2 / 8TW+v2 User’s Manual... -
Page 29: Lacp Status
2.2.2 LACP Status Choose and click command manual, after execution, diagram will shown like below, user can refresh at will. AirLive Ether-GSHTW v2 / 8TW+v2 User’s Manual... -
Page 30: Rstp Status
2.2.3 RSTP Status Choose and click command manual, after execution, diagram will be shown like below, user can refresh at will. AirLive Ether-GSH8TW v2 / 8TW+v2 User’s Manual... -
Page 31: Igmp Status
IGMP V2, but it will handle some IGMP V3 frames. If this switch is Querier, it will show Querier state and Query frames it transmitted. If it is not Querier, it only shows how many Querier frames it receives. Only one Querier in a network section, usually Querier is in router. AirLive Ether-GSHTW v2 / 8TW+v2 User’s Manual... -
Page 32: Ping
Fill up the IP address you want to ping, set Time Out time and Counts. For example, IP = 192.168.1.141, count = 5, time out = 5 secs, then press “Apply”, then press “Refresh” after execution, diagram will shown below: AirLive Ether-GSH8TW v2 / 8TW+v2 User’s Manual... -
Page 33: Maintenance
2.3.4 Config File Choose and click command manual, diagram will be shown, and then direct the location of the file that is to be backup, give a name, then press “Backup”. AirLive Ether-GSHTW v2 / 8TW+v2 User’s Manual... -
Page 34: Configuration File Backup
Choose and click command manual, diagram will be shown, and then direct the location of the file that to be restored, then press “Restore”. It will show transfer completed if it went successful. Configuration File Restore Restore AirLive Ether-GSH8TW v2 / 8TW+v2 User’s Manual... -
Page 35: Chapter 3 Terminal Mode Management
Once terminal is connected, enter the password, the basic operation are shown, and then when press “?” commands at top level will be shown as below. Key in “Command” and then key in “?”, second level will be shown, for example: AirLive Ether-GSHTW v2 / 8TW+v2 User’s Manual... - Page 36 If user wants to check the IP related information, one may do as below: All other function can be operated likewise. Type “up” or “/” go back to previous page. The end AirLive Ether-GSH8TW v2 / 8TW+v2 User’s Manual...
Need help?
Do you have a question about the ETHER-GSH8TW+V2 and is the answer not in the manual?
Questions and answers