Table of Contents
Advertisement
Advertisement
Chapters
Table of Contents

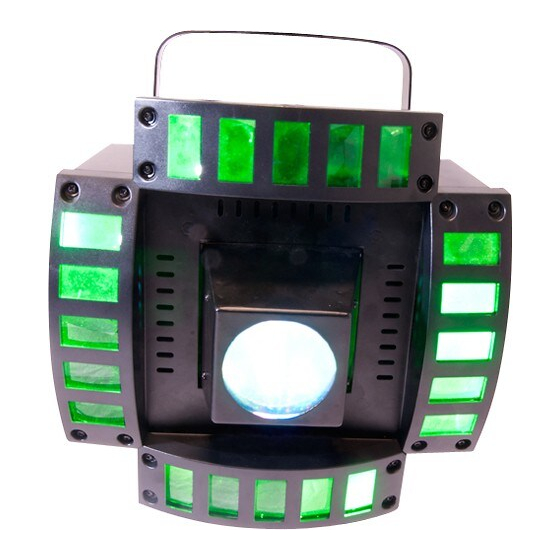
Summary of Contents for Chauvet Cubix
- Page 1 User Manual...
-
Page 2: Table Of Contents
Contact Information ................. 14 DMX Primer .................... 15 Starting Address ....................15 Fixture Linking (Daisy Chain) ................15 DMX Cabling ....................16 DIP Switch Reference Guide ................17 6. Technical Specifications .............. 18 Cubix™ User Manual (Rev. 01a) Page 2 of 18... -
Page 3: Before You Begin
Document Information The information and specifications contained in this document are subject to change without notice. CHAUVET® assumes no responsibility or liability for any errors or omissions that may appear in this manual. © Copyright 2011 CHAUVET®. All rights reserved Printed in P.R.C. -
Page 4: Safety Notes
Never carry a fixture from the power cord or any moving part. Always use the hanging/mounting bracket or the handles. Always avoid direct eye exposure to the light source when this fixture is on. Cubix™ User Manual (Rev. 01a) Page 4 of 18... -
Page 5: Introduction
2. I NTRODUCTION DMX in Side Panel DMX out DIP switches Microphone adjustment Microphone Side Panel Safety Fuseholder Power in Power out Cubix™ User Manual (Rev. 01a) Page 5 of 18... -
Page 6: Setup
Power Linking Diagram Other fixtures You can power link up to 26 Cubix™ units on 120 VAC or up to 45 Cubix™ units on 230 VAC. The power linking diagram shown above corresponds to the North American version of this product ONLY! If using this product in other markets, you must consult with the local CHAUVET®... -
Page 7: Mounting
Mounting Orientation The Cubix™ may be mounted in any position, provided there is adequate room for ventilation around it. Rigging Be sure that the structure onto which you are mounting this product can support its weight. Please see the “Technical Specifications” section of this manual for weight information. -
Page 8: Operation
DMX mode uses. If you choose a starting address that is too high, you could restrict the access to some of the fixture’s channels. The Cubix™ uses one DMX channel in DMX mode, which defines the highest configurable address to 507. -
Page 9: Configuration (Standalone Modes)
See the chart below for details on manual DIP switch operation. Some DIP switches may be combined. DIP switches Function Green Blue RGB Strobe (fast) Center effect Center strobe (fast) Motor rotation Cubix™ User Manual (Rev. 01a) Page 9 of 18... -
Page 10: Master/Slave Mode
Master/Slave Mode This mode allows a single Cubix™ unit (the “master”) to control the actions of one or more Cubix™ units (the “slaves”) without the need of a DMX controller. The master unit will be set to operate in either Automatic or Sound Active mode, while the slave units will be set to operate in Slave Mode. -
Page 11: Dmx Channel Assignments And Values
Effect 39 249 255 Effect 40 000 015 Stop Center effect speed 016 255 Speed (slow~fast) 000 015 No function Center strobe 016 255 Strobe (slow~fast) Cubix™ User Manual (Rev. 01a) Page 11 of 18... -
Page 12: Technical Information
Softly drag any dirt or grime to the outside of the external glass surface. Gently polish the external glass surfaces until they are free of haze and lint. Always dry the external glass surfaces carefully after cleaning them. Cubix™ User Manual (Rev. 01a) Page 12 of 18... -
Page 13: General Troubleshooting
#32 Terminator not connected Install a terminator, as indicated in the “DMX Primer” section. If you still experience problems after trying the above solutions, contact CHAUVET® Technical Support. Cubix™ User Manual (Rev. 01a) Page 13 of 18... -
Page 14: Returns Procedure
Be sure to pack the fixture properly. Any shipping damage resulting from inadequate packaging will be the customer’s responsibility. As a suggestion, proper UPS packing or double-boxing is always a safe method to use. CHAUVET® reserves the right to use its own discretion to repair or replace returned product(s). Claims The carrier is responsible for any damage incurred during shipping to this product or any part that shipped with it. -
Page 15: Dmx Primer
The maximum recommended number of fixtures on the same daisy chain is 32. Connecting more than 32 fixtures on one daisy chain without the use of a DMX optically-isolated splitter may result in deterioration of the digital DMX signal. Cubix™ User Manual (Rev. 01a) Page 15 of 18... -
Page 16: Dmx Cabling
You can purchase CHAUVET® certified DMX cables directly from a dealer/distributor or make your own DMX cable. If you choose to make your own DMX cable, you must use a data-grade cable such... -
Page 17: Dip Switch Reference Guide
93 125 157 189 221 253 285 317 349 381 413 445 477 509 94 126 158 190 222 254 286 318 350 382 414 446 478 510 95 127 159 191 223 255 287 319 351 383 415 447 479 511 Cubix™ User Manual (Rev. 01a) Page 17 of 18... -
Page 18: Technical Specifications
111º Thermal Maximum External Temp. Cooling System 104° F (40° C) Convection I/O Connectors Connector Type Channel Range 3-pin XLR Sockets Ordering Item Name Item Number Item Code Cubix™ CUBIX 07050334 Cubix™ User Manual (Rev. 01a) Page 18 of 18...


Need help?
Do you have a question about the Cubix and is the answer not in the manual?
Questions and answers