Table of Contents
Advertisement
Advertisement
Table of Contents

Subscribe to Our Youtube Channel
Related Manuals for Topcom Butler E700


Summary of Contents for Topcom Butler E700
- Page 1 ® USER GUIDE V 1.0 - 4/11...
- Page 2 This product is in compliance with the essential requirements and other relevant provisions of the R&TTE directive 1999/5/EC. The Declaration of conformity can be found on: http://www.topcom.net/support/cedeclarations.php UK The CE symbol indicates that the unit complies with the essential requirements of the R&TTE directive.
-
Page 3: Installing The Handset
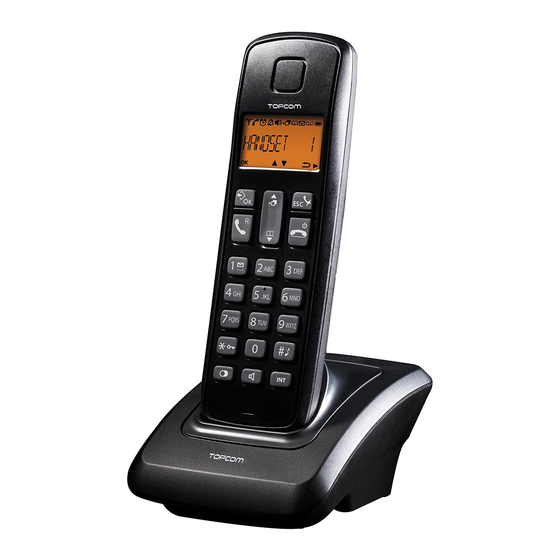
Getting started 1 Getting started Installing the base For installation, do the following: 1 Plug one end of the adaptor into the outlet and the other end into the adaptor jack on the back of the base. 2 Connect one end of the telephone cord with the wall phone jack and the other end to the bottom of the base. - Page 4 Getting started Installing the charger (Only for Butler E700 Twin/Triple/Quattro) Plug one end of the adaptor in the power outlet and the other end into the adaptor jack at the bottom of the charger. - 1C Charger - A. Adaptor with power cable Keys / LED’s...
-
Page 5: Icons Descriptions
Text that appears on the display of the phone is shown in the right column Key to press. between quotation marks. Navigating the menu The Butler E700 has a menu system which is easy to use. Each menu leads to a list of options. -
Page 6: Using The Telephone
Using the telephone The function of the 2 keys below the display (Menu-and Esc key) change depending on the 3 15 operation mode: To enter the menu or to confirm the current selection, press this key. To rotate through the menu options To go back in the menu selection or backdelete during number or name entry. - Page 7 Using the telephone Call from the redial list You can redial the last 5 numbers called. 1 Press the redial key to access the redial list. 2 Select the desired redial number. 3 Press the off-hook key to dial out the selected number. 4 Press the on-hook key to hang up or put the handset back on the base.
-
Page 8: Delete A Redial Number Or All Redial Numbers From The Redial List
Redial list To select a letter, press the corresponding key as many times as necessary. For example, to select an ‘A’, press ‘2’ once. To select a ‘B’, press ‘2’ twice and so on. To select ‘A’ and then ‘B’ consecutively, press ‘2’... - Page 9 Phonebook 6 Edit the name and confirm. 7 Edit the number and confirm. 8 Select a ring melody (1-10) and confirm. To dial an entry from the phonebook 1 Press the phonebook key. 2 Select a name or enter the first letter of the name. (The list scrolls in alphabetical order.) 3 Press the off-hook key to start the call.
-
Page 10: Caller Identification
Caller Identification 5 Caller Identification This service only works when you have a caller ID/Clip subscription. Please contact your telephone company. When you receive an external call, the telephone number of the caller appears on the handset display. The telephone can receive calls in both FSK and DTMF. You can also see his or her name if it is transmitted by the network. -
Page 11: Personalize The Handset
Personalize the handset 6 Personalize the handset Every programmation is confirmed at the end by a double or single long beep. A double beep confirms the validation of your choice. Adjusting the ring volume Handset ring volume internal/external calls The handset ring volume for internal or external calls cannot be set separately. You can choose from 1 to 5 and off. -
Page 12: Alarm Settings
Personalize the handset Locking the keypad 1 Press and hold the keypad lock key for 3 seconds. The keypad will be locked. Unlock the keypad 1 Press and hold the keypad lock key for 3 seconds. 2 “KEYS LOCKED” will disappear from the screen. Set the date, time and date/time format 1 Enter the menu by pressing the menu key. -
Page 13: Voice Message Notification
Personalize the handset Turn alarm on/off 1 Enter the menu by pressing the menu key. 2 Select “CLOCK&ALARM” and confirm. 3 Select “ALARM” and confirm. 4 Select “ONCE”, “DAILY” or “OFF” and confirm. Set the alarm time 1 Enter the menu by pressing the menu key. 2 Select “CLOCK&ALARM”... -
Page 14: Base Settings
Base settings To access your voice mail : 1 Press and hold the ‘1’key in standby. 6.13 Paging You can locate a missing handset by pressing the page key on the base station. All the handsets registered to the base will produce the paging tone and “PAGING” is displayed. You can stop the paging by pressing any key on the handset or by pressing the page-key again on the base. -
Page 15: Managing Multiple Handsets
Managing multiple handsets 2 Select “ADVANCED SET” and confirm. 3 Select “DIAL MODE” and confirm. 4 Select “PULSE” or “TONE” and confirm. 8 Managing multiple handsets Adding a new handset Only needed when you have deregistered a handset or when you bought a new one. You can register new handsets on the base if these handsets support the DECT GAP protocol. -
Page 16: Technical Specifications
100, 250 or 600 ms 12 Topcom Warranty 12.1 Warranty period The Topcom units have a 24-month warranty period. The warranty period starts on the day the new unit is purchased. There is no warranty on standard or rechargeable batteries (AA/AAA type). -
Page 17: Warranty Handling
12.2 Warranty handling A faulty unit needs to be returned to a Topcom service centre including a valid purchase note and a filled in service card. If the unit develops a fault during the warranty period, Topcom or its officially appointed service center will repair any defects caused by material or manufacturing faults free of charge, by either repairing or exchanging the faulty units or parts of the faulty units. - Page 19 BUTLER E700 visit our website www.topcom.net MDxxxxxxx...
Need help?
Do you have a question about the Butler E700 and is the answer not in the manual?
Questions and answers